Gearbox Teardown & Refurbish - 6HP28A61

5.0 V10 50v biturbo - 571 bhp
Post Reply
ATinOf
3rd Gear
Posts: 432
Joined: Fri Jul 06, 2018 7:32 pm
Location: Cheshire

Re: Gearbox Teardown & Refurbish - 6HP28A61

Post by ATinOf » Mon Sep 03, 2018 4:27 pm

Finally back to Clutch C once the steels had arrived, clean the retaining ring etc and fit the spring onto the already fitted piston C
Image
Image

Fit the dished retaining ring
Image

And with the press depress the retaining ring just enough to get the circlip fitted
Image
Image

Fit the wave washer, steel, friction, steel, friction etc (5 of each), followed by the final top steel
Image

Then fit the selective circlip
Image
Last edited by ATinOf on Thu Sep 13, 2018 9:41 pm, edited 4 times in total.

ATinOf
3rd Gear
Posts: 432
Joined: Fri Jul 06, 2018 7:32 pm
Location: Cheshire

Re: Gearbox Teardown & Refurbish - 6HP28A61

Post by ATinOf » Mon Sep 03, 2018 4:27 pm

Invert Clutch C/D and NOTe that the outer seal for clutch D is a profiled seal and will need to be ordered over and above the 6HP26A61 overhaul kit; ZF part number; 501.322.211. Discard (or sell on) the round sealing O-Ring from the 6HP26A61 overhaul kit.
Image

Fit the inner O-Ring seal from the overhaul kit to piston D and Lightly vaseline the outer working faces of the seals and fit the piston D
Fit the new O-ring seal to the inner shaft of clutch D (the second groove from the top) from the overhaul kit
Fit the new O-ring seal from the overhaul kit to the outer rim of the retaining plate, lightly vaseline the outer working faces of the seals and fit the retaining plate
Note the cast lug of the retaining plate must be adjacent to the recess on the cylinder
With the press fit the split ring with the upward pointing lugs fitted into the recess on the clutch D (sorry I didnt snap more images for these steps)
Image
Last edited by ATinOf on Thu Sep 13, 2018 10:11 pm, edited 4 times in total.

ATinOf
3rd Gear
Posts: 432
Joined: Fri Jul 06, 2018 7:32 pm
Location: Cheshire

Re: Gearbox Teardown & Refurbish - 6HP28A61

Post by ATinOf » Mon Sep 03, 2018 4:30 pm

Now ensure your bench is clean and lets start the vacuum test of the lower half of the valve body which is already spotlessly clean, but we will be oiling and greasing it up during this test after which we will be cleaning it again. Now you can refit the valve spools, ensure you lightly oil them first (only recommended oil remember). You can do this as I did one at a time; or you can fit them all and test them all. The objective is to test all of the spool bores that you can, at their various positions, including ensuring the end stops do not leak.
Image

For this you will need a vacuum pump and an orifice of some from to restrict the flow; ideally you want to measure with a vacuum gauge set to read 5 inches vacuum at open end (no seal) and 25 inches vacuum with the end sealed with your thumb. I thought a single stage vacuum pump would achieve this with the relevant orifice (my end test piece has a minute hole). Your pass criteria is a minimum of 18 inches vacuum at the end stops and valve spool to bore interfaces.
Image

To close off the pathways you will need some form of plate, a clear persepx plate is ideal, I put a tapped hole in it off set to one end with an NPT fitting for the vacuum pipe. To aid with sealing it on the flat faces I used a poly glove smeared on the contact face with vaseline (golden rule - only 2 media to come into contact with your auto box is the recommended oil and vaseline, nothing else). You can probably get this perspex sealed without a glove but I found it helped. Clearly the perspex has to be big enough to close off the longest pathway you expect to test, but ensuring the adjacent pathway the other side of the bore being tested is open to atmosphere (so not too big)
Image
Image

Now the bad news was the single stage vacuum pump even though its meant to pull in excess of 20 inches, only managed 18inches, so not man enough for the job.
Image
Last edited by ATinOf on Mon Sep 10, 2018 11:46 pm, edited 8 times in total.

ATinOf
3rd Gear
Posts: 432
Joined: Fri Jul 06, 2018 7:32 pm
Location: Cheshire

Re: Gearbox Teardown & Refurbish - 6HP28A61

Post by ATinOf » Mon Sep 03, 2018 4:31 pm

So i sold the single stage on fleabay and got a two stage pump. at the same time I invested in a couple of fittings and 2 needle valves.
One needle valve (right on top image in pump suction line) set to restrict the vacuum open ended to 5 inches so you can tell the difference between a valid test and a pump problem
Image

The other needle valve (left on top image open to air) to set the bleed so that the pump pulled no more than 25 inches closed ended
Image

These test sheets, courtesy of the Sonnax refurb kit I bought, act as a guide to point you in the direction of the test spools of importance but personally I tested every spool interface I could. These are only a guide as they are not the 6HP28A61 pathways shown, but include the typical common pathways (its a 6HP21 example)
ImageImage

After doing the lower valve body, do the top valve body the same
Image

My test results were all very good, 3 low values were still better than the pass criteria of 18 inches. So no problems with the valve spools, but I feel better for knowing, have learned a lot to get to this point, and the valve body will benefit from a new gasket plate, a good clean, and new solenoid O-Rings (the only part from the Sonnax kit I will end up using!, apart from the test nut and spool piece provided in the kit to shift the spools to the operated position)
Image
Last edited by ATinOf on Tue Sep 11, 2018 12:14 am, edited 5 times in total.

ATinOf
3rd Gear
Posts: 432
Joined: Fri Jul 06, 2018 7:32 pm
Location: Cheshire

Re: Gearbox Teardown & Refurbish - 6HP28A61

Post by ATinOf » Mon Sep 03, 2018 4:33 pm

Clutch C (and D underside) is ready to install, the circlip for Clutch C has been replaced with the newly sized selective circlip
Note that the frictions have all been centred and the tabs aligned vertically; you can use a small screwdriver or a pick or the depth gauge rod for doing this (I dont abuse my gauges in that manner but some do)
Image

Clutch E is ready to install, the circlip for Clutch E has been replaced with the newly sized selective circlip, frictions aligned
Image

Clutch A is ready to install frictions aligned
Image

The output shaft and planetary gear set is ready for install; trial fit the planetary into the annulus and ensure smooth movement
Image
Image
Image
Image
Last edited by ATinOf on Thu Sep 13, 2018 10:25 pm, edited 7 times in total.

ATinOf
3rd Gear
Posts: 432
Joined: Fri Jul 06, 2018 7:32 pm
Location: Cheshire

Re: Gearbox Teardown & Refurbish - 6HP28A61

Post by ATinOf » Mon Sep 03, 2018 4:35 pm

Body II assembly; Take clutch E and insert onto clutch A
Image
Image

Insert Inner Plate carrier E into clutch E ensuring all frictions engaged; lift and drop carrier slightly, a metallic sound confirms fully seated, a muffled sound its not fully seated
Repeat with inner plate carrier A into clutch A
Image

Fit Inner plate carrier B onto Clutch A
Image
Image

And fit retaining circlip
Image
Image
Last edited by ATinOf on Thu Sep 13, 2018 10:52 pm, edited 5 times in total.

ATinOf
3rd Gear
Posts: 432
Joined: Fri Jul 06, 2018 7:32 pm
Location: Cheshire

Re: Gearbox Teardown & Refurbish - 6HP28A61

Post by ATinOf » Mon Sep 03, 2018 4:36 pm

Fit the flanged thrust washer to the top sun gear of the output planetary gear set
Image
Image

Fit the output shaft and annulus first into the gearbox, followed by the output planetary gear set
Image

Install selective thick steel for clutch D, followed by friction, steel, friction, steel (7 off each) followed by wave washer
Image
Image
Last edited by ATinOf on Thu Sep 13, 2018 10:43 pm, edited 3 times in total.

ATinOf
3rd Gear
Posts: 432
Joined: Fri Jul 06, 2018 7:32 pm
Location: Cheshire

Re: Gearbox Teardown & Refurbish - 6HP28A61

Post by ATinOf » Mon Sep 03, 2018 4:38 pm

Clip the needle bearing to the bottom side (Clutch D side) of clutch C/D and lightly oil it
Image
Image

Fit the parallel keys centrally in the 2 notches of clutch C/D
Image
Image
Image

Install clutch C/D ensuring the counterbored ports are facing the valve body area
Image
Last edited by ATinOf on Thu Sep 13, 2018 10:46 pm, edited 4 times in total.

ATinOf
3rd Gear
Posts: 432
Joined: Fri Jul 06, 2018 7:32 pm
Location: Cheshire

Re: Gearbox Teardown & Refurbish - 6HP28A61

Post by ATinOf » Mon Sep 03, 2018 4:39 pm

If you havent already fit the 2 rectangular seals to the rear shaft of Clutch B, vaseline on the seals will aid the shaft install in the box
Clip the needle bearing to the underside
Image

Clip the needle bearing to the top side
Image
Image

And install Clutch B into Clutch C ensuring all frictions engaged; lift and drop Clutch B slightly, a metallic sound confirms fully seated, a muffled sound its not fully seated
Image
Last edited by ATinOf on Thu Sep 13, 2018 10:57 pm, edited 7 times in total.

ATinOf
3rd Gear
Posts: 432
Joined: Fri Jul 06, 2018 7:32 pm
Location: Cheshire

Re: Gearbox Teardown & Refurbish - 6HP28A61

Post by ATinOf » Mon Sep 03, 2018 4:41 pm

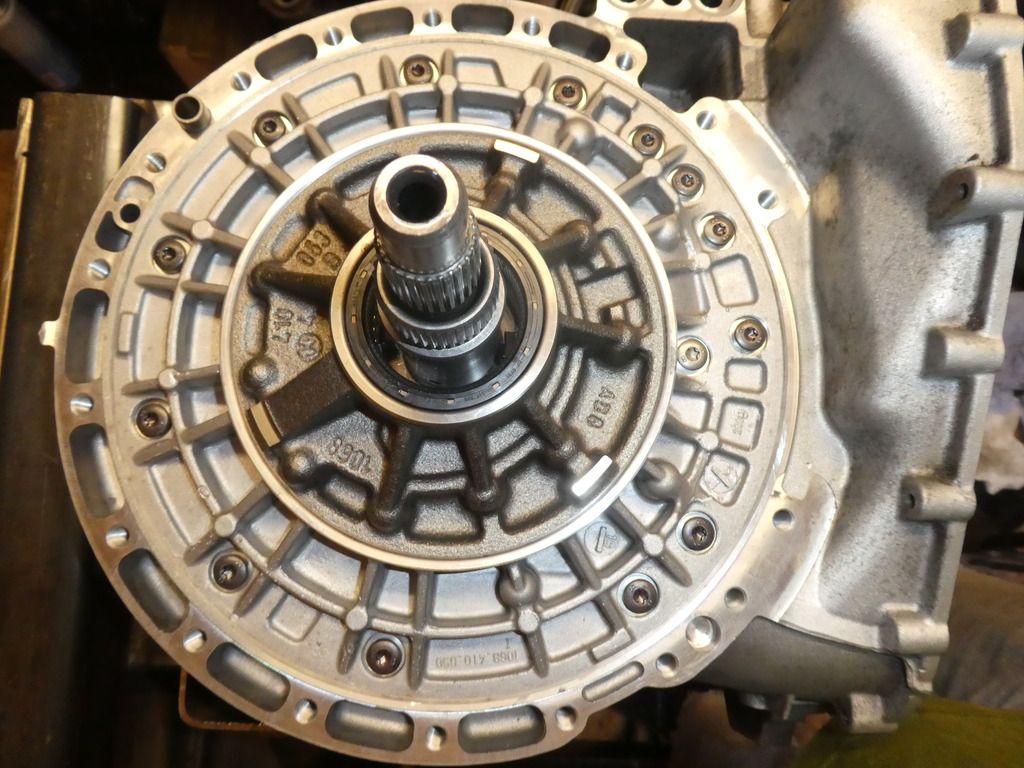
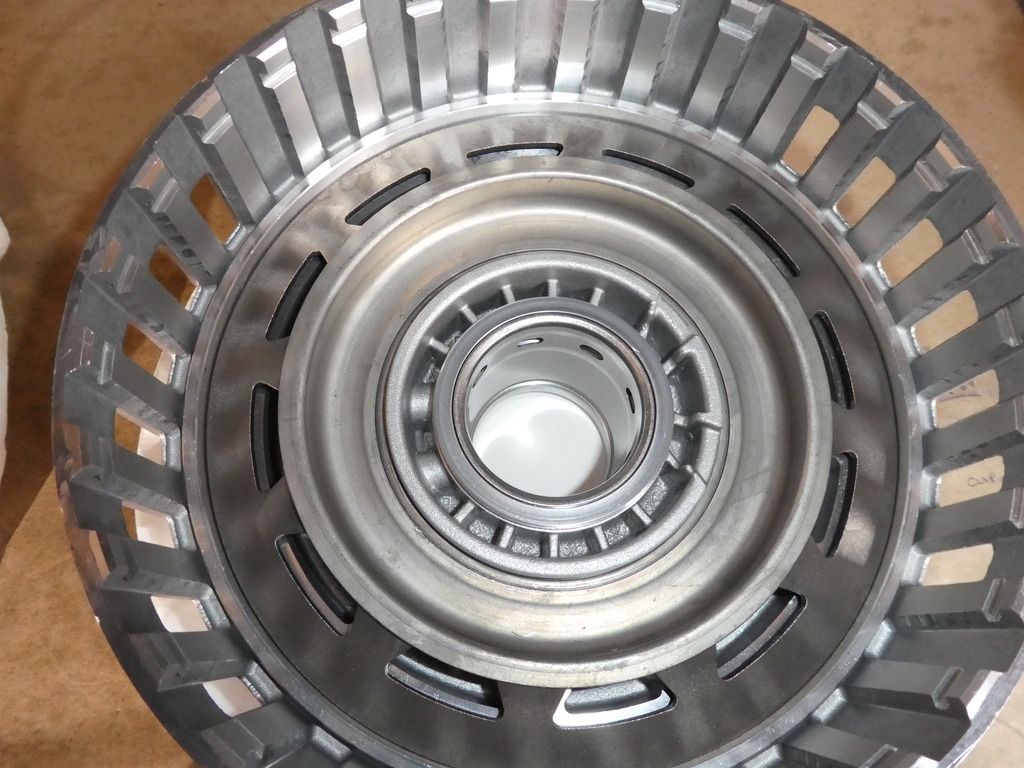
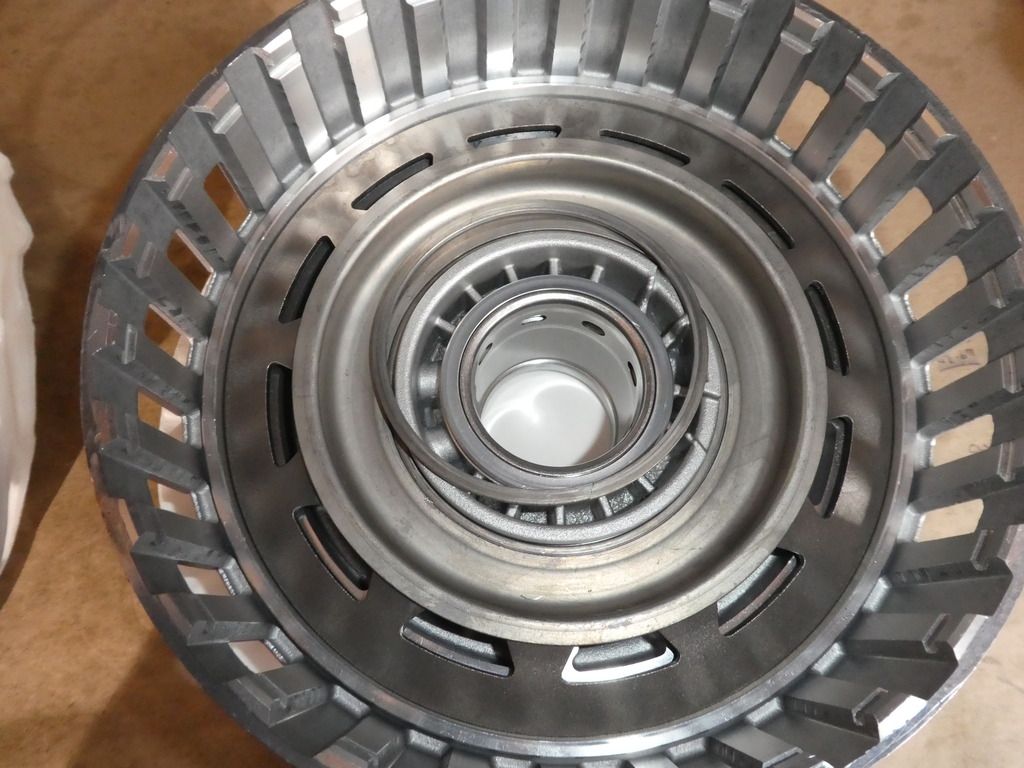
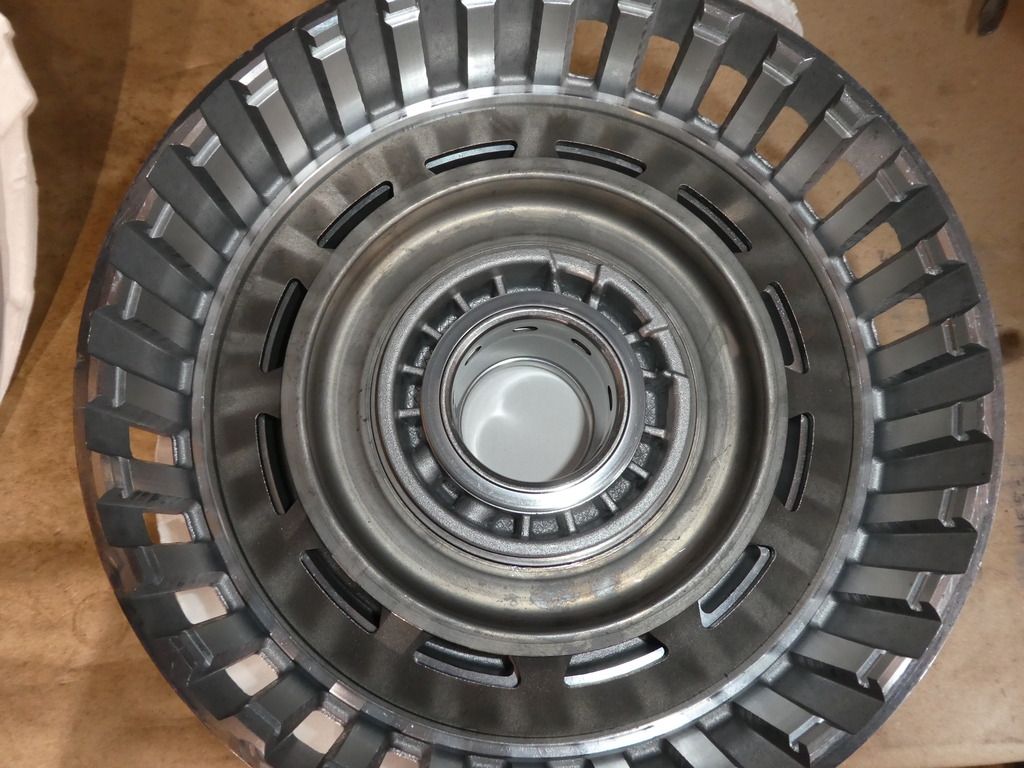
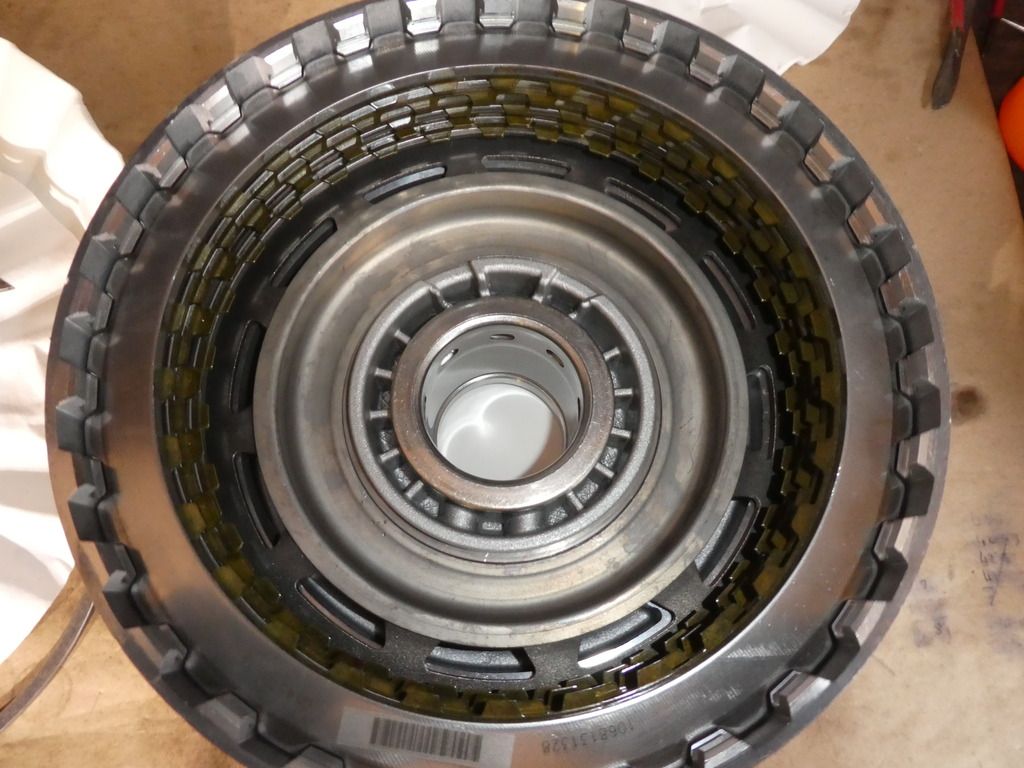
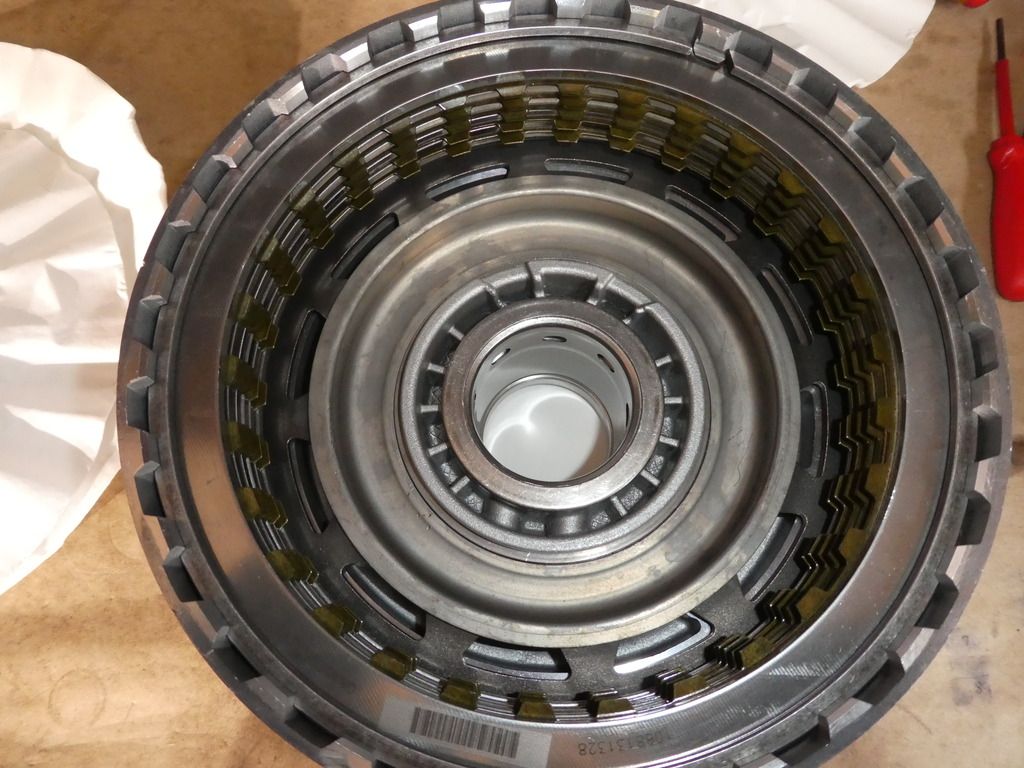
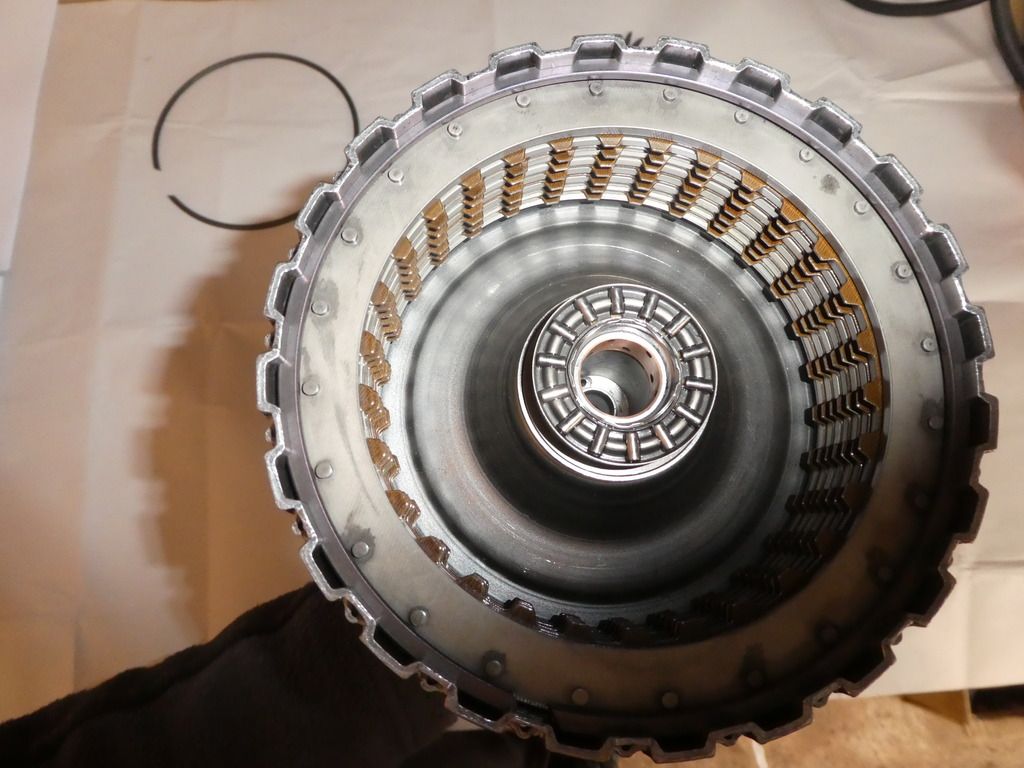
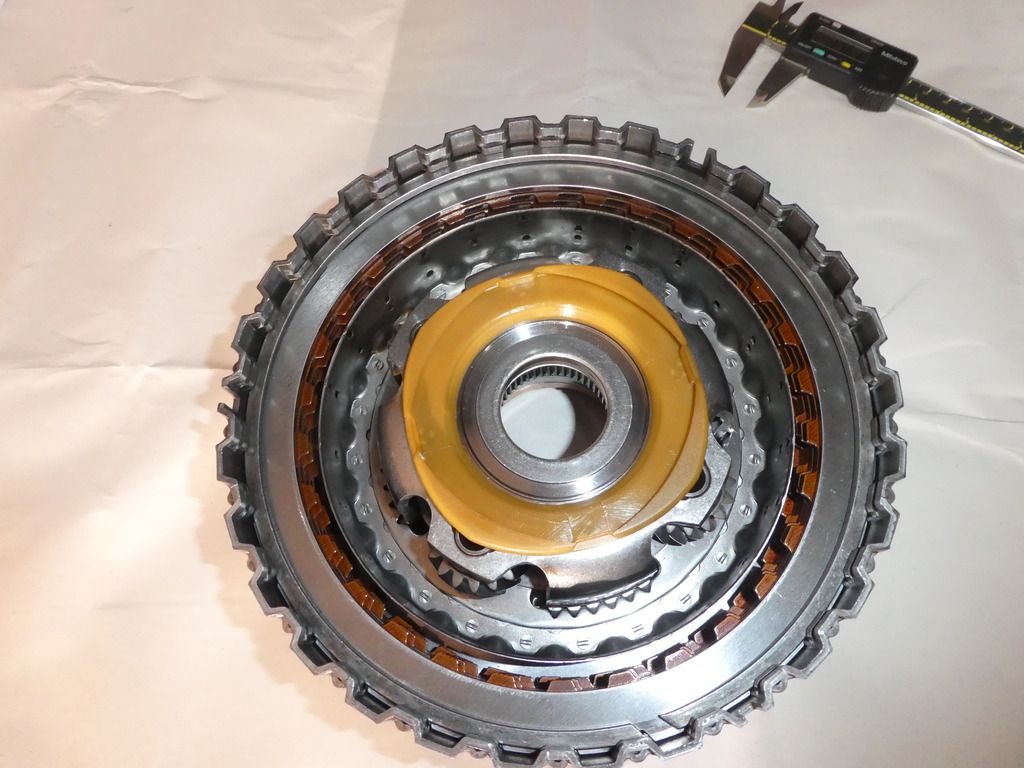
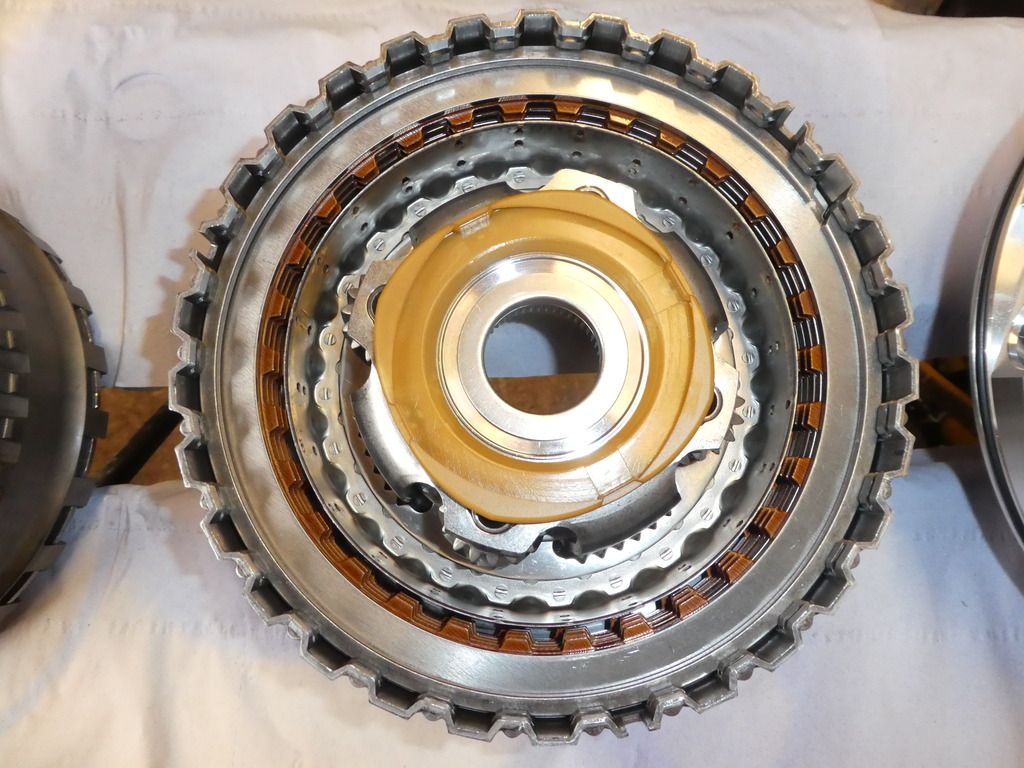
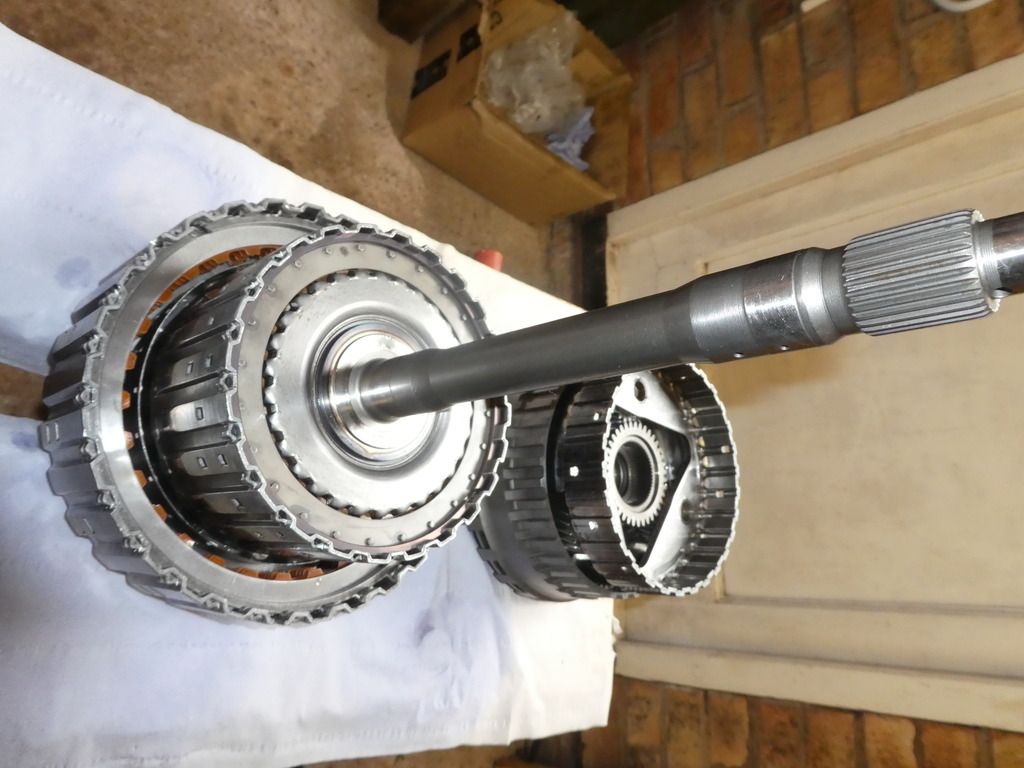
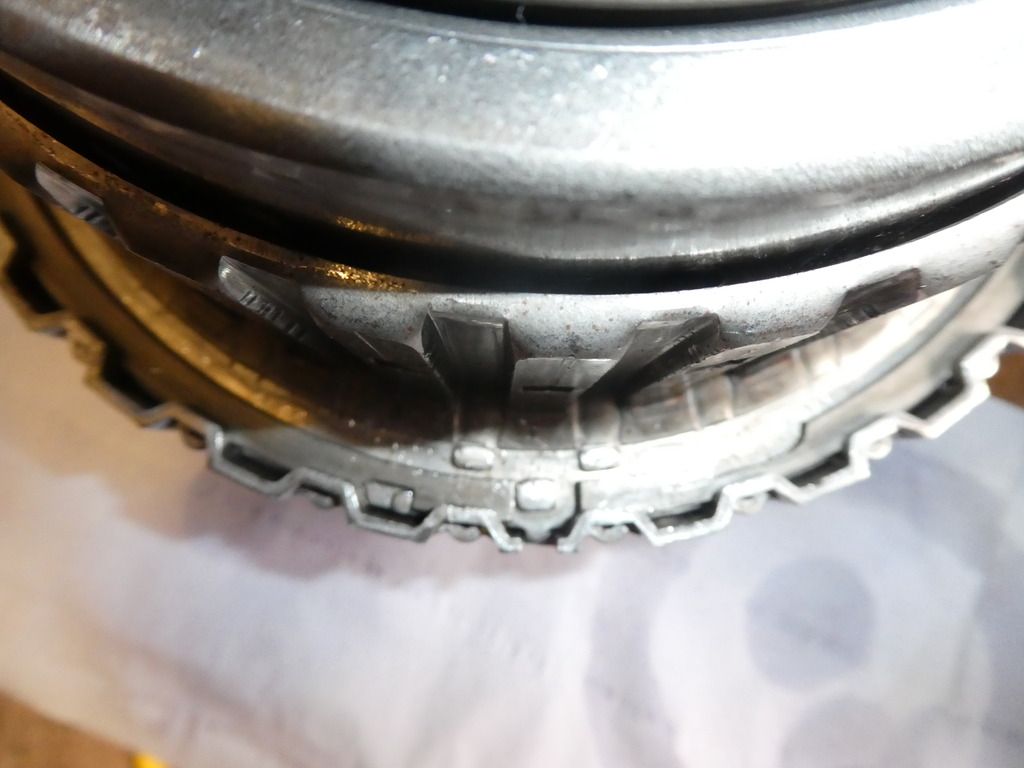
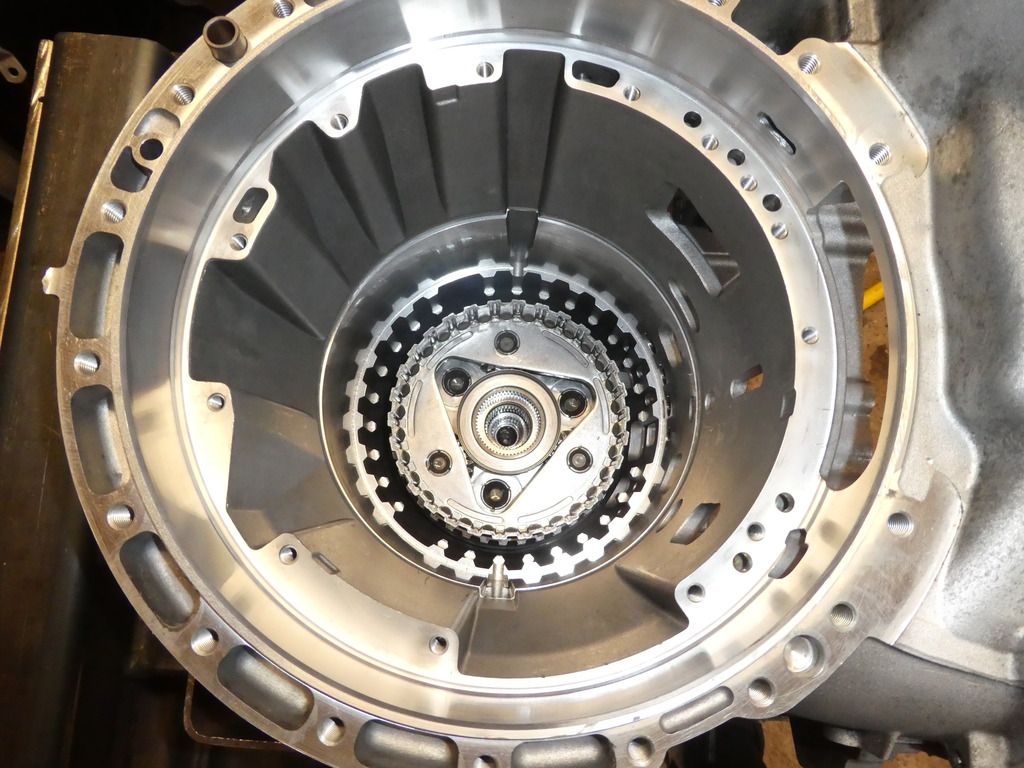
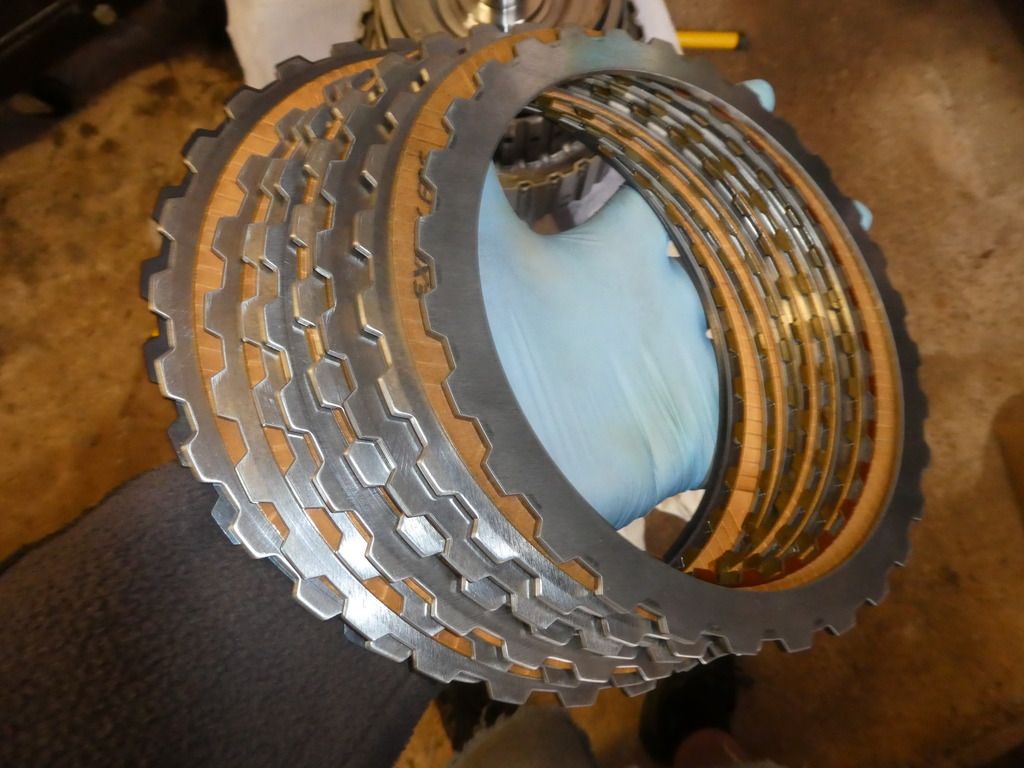
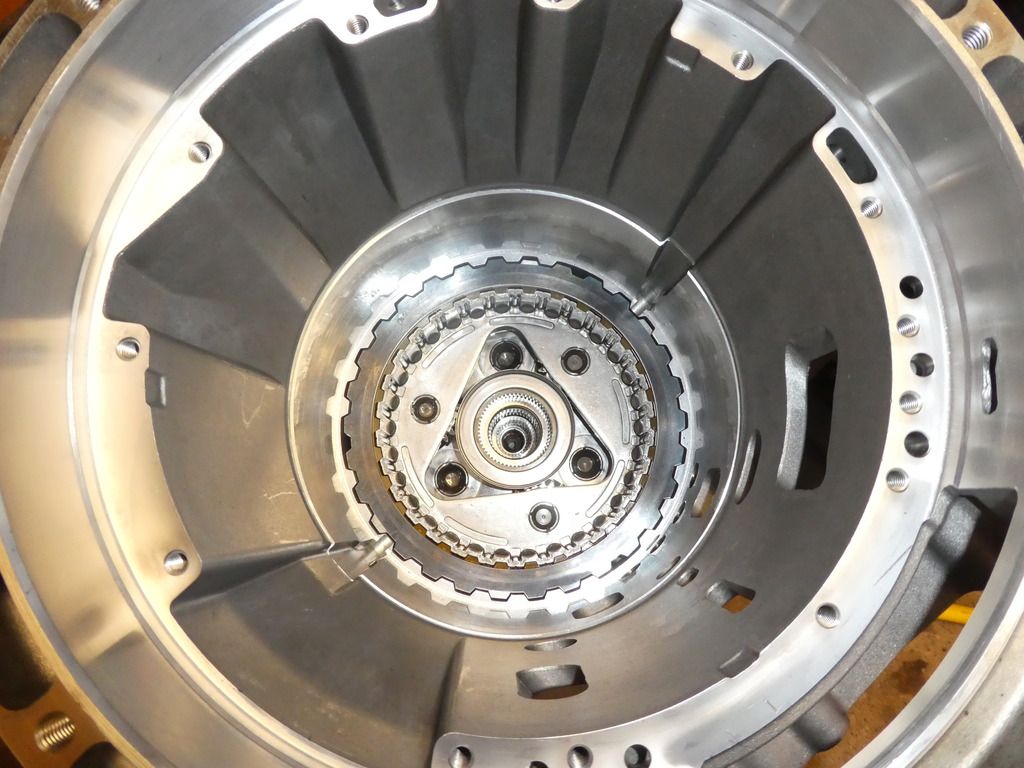
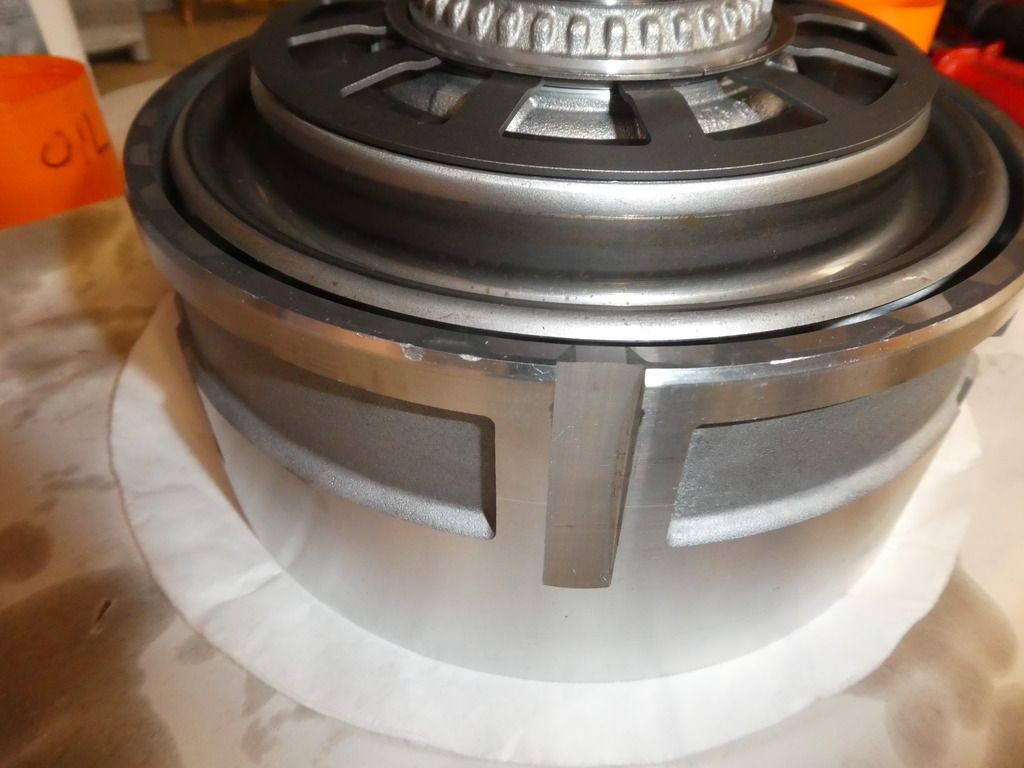
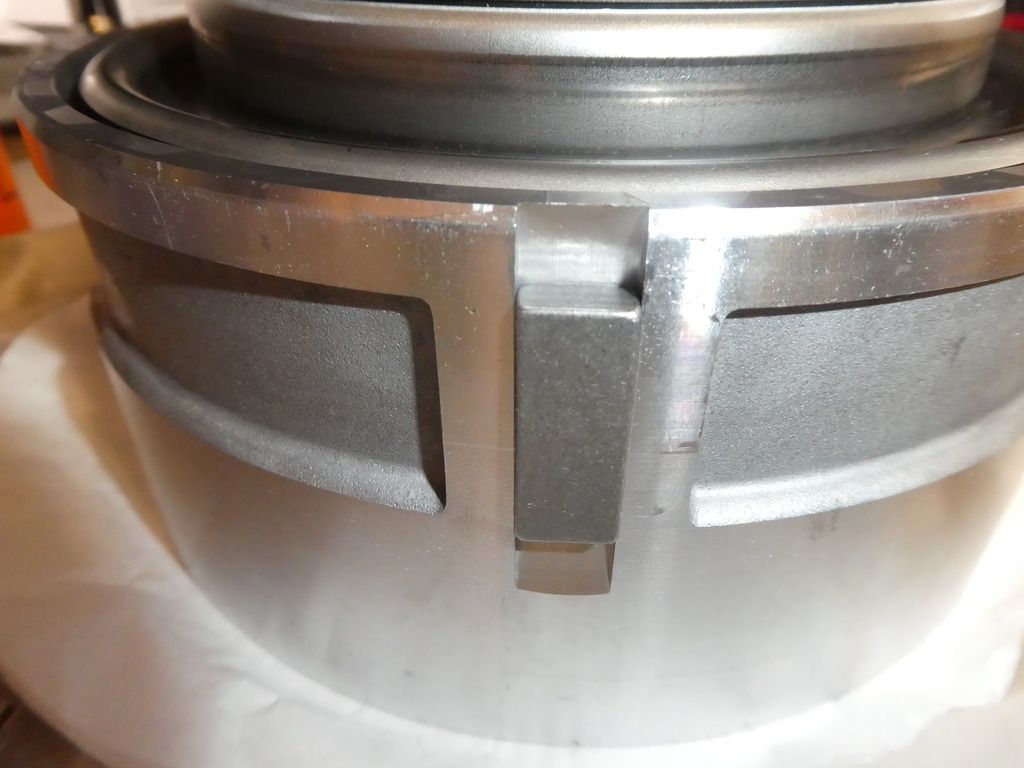
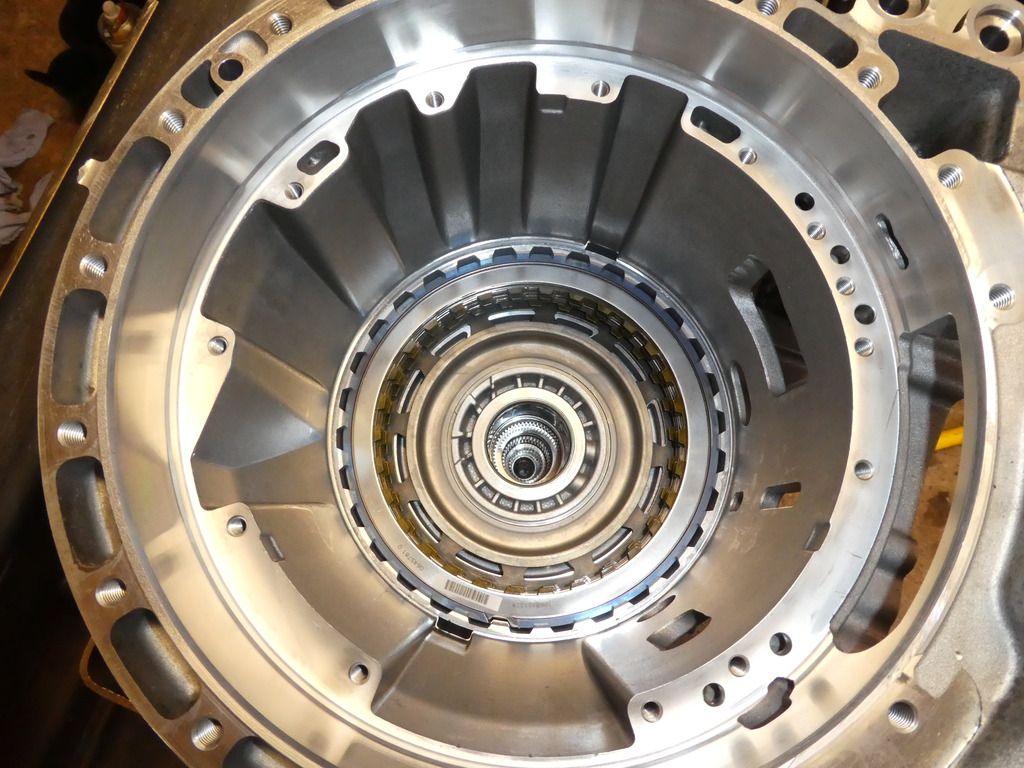
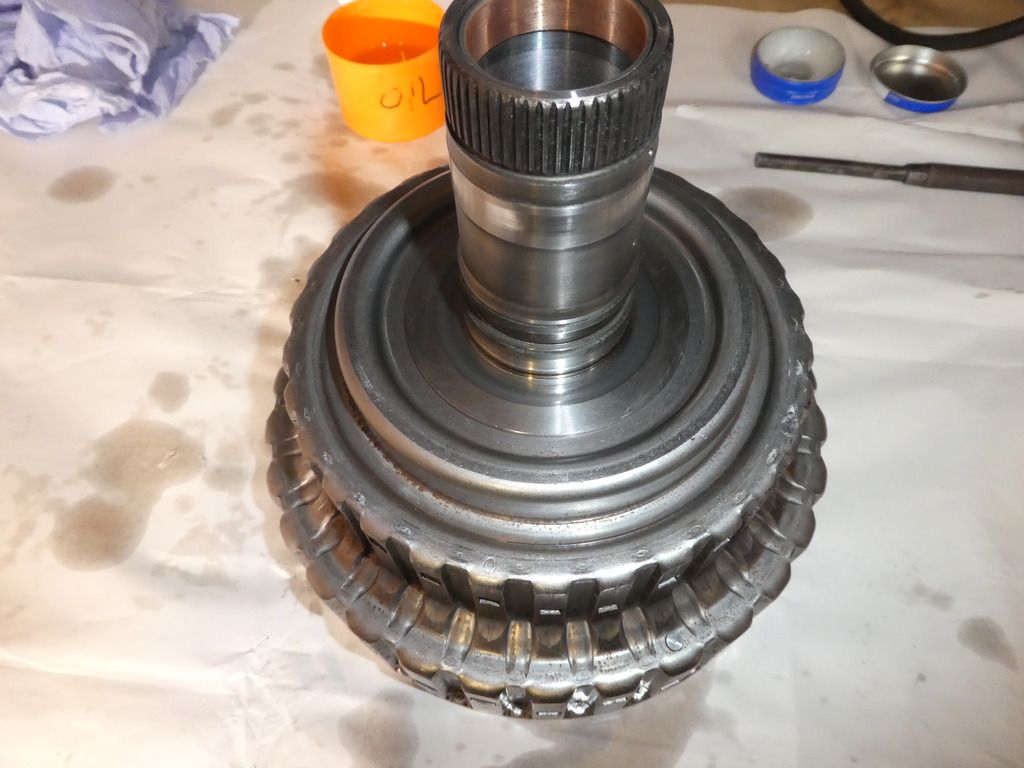
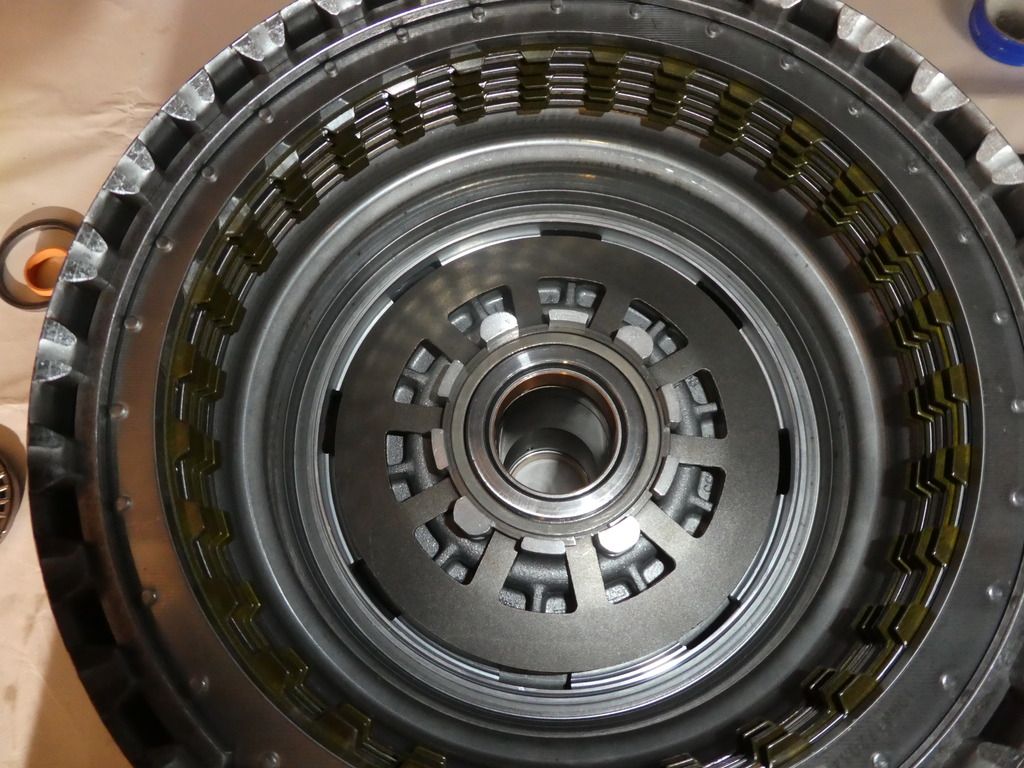
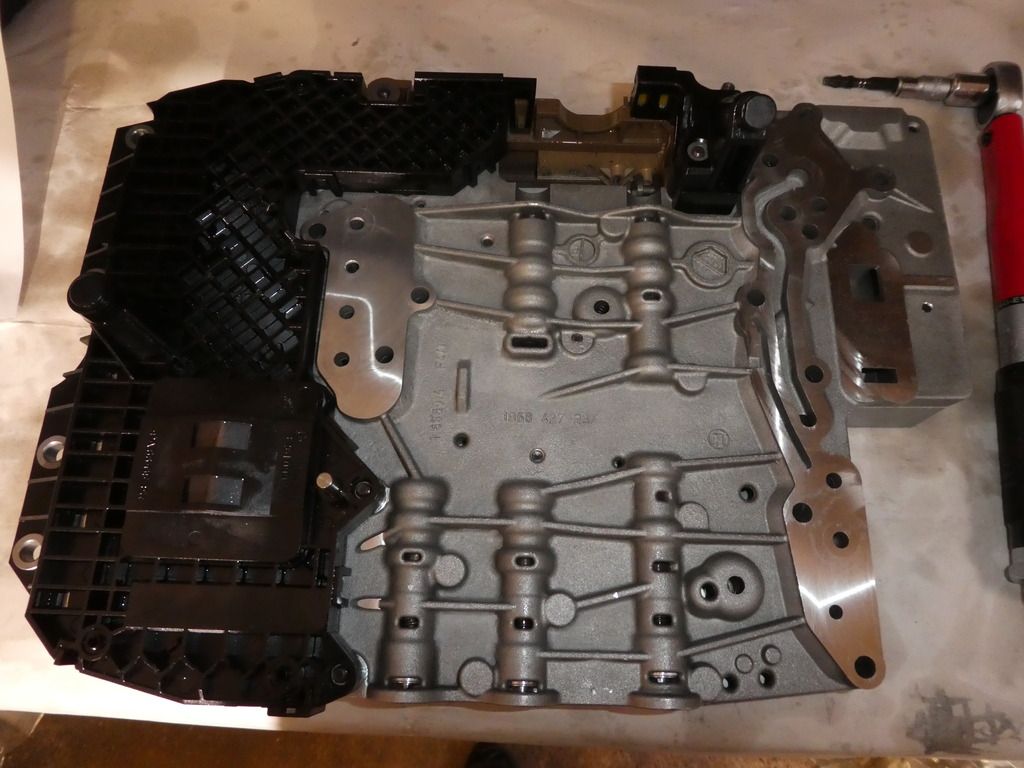
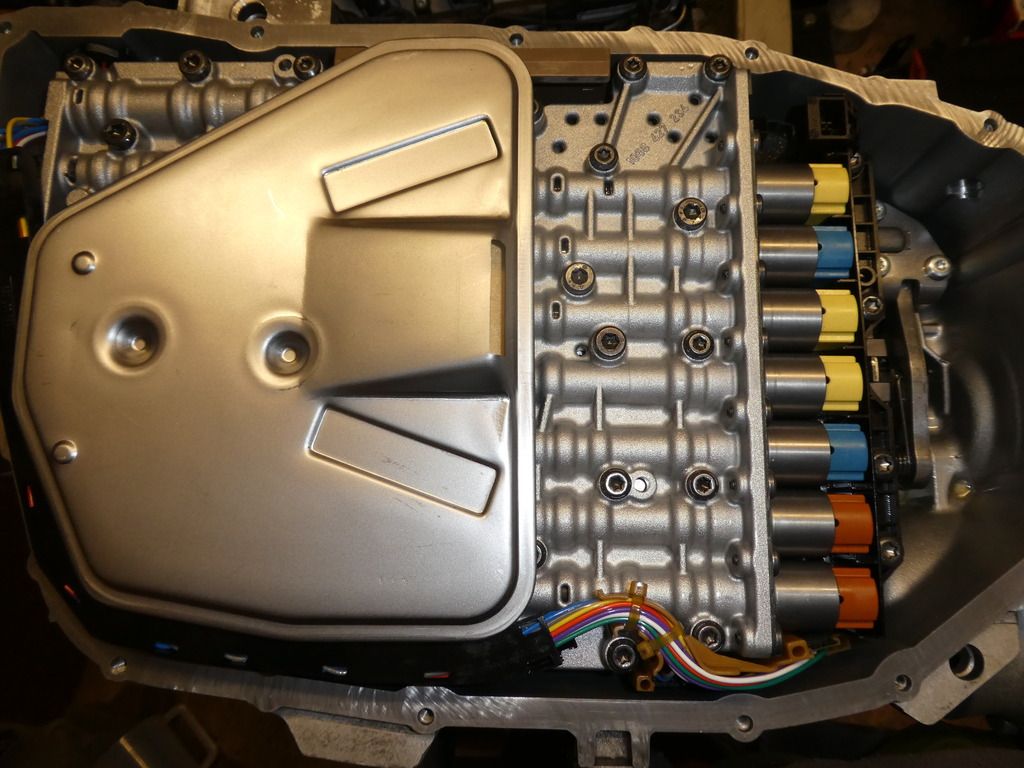
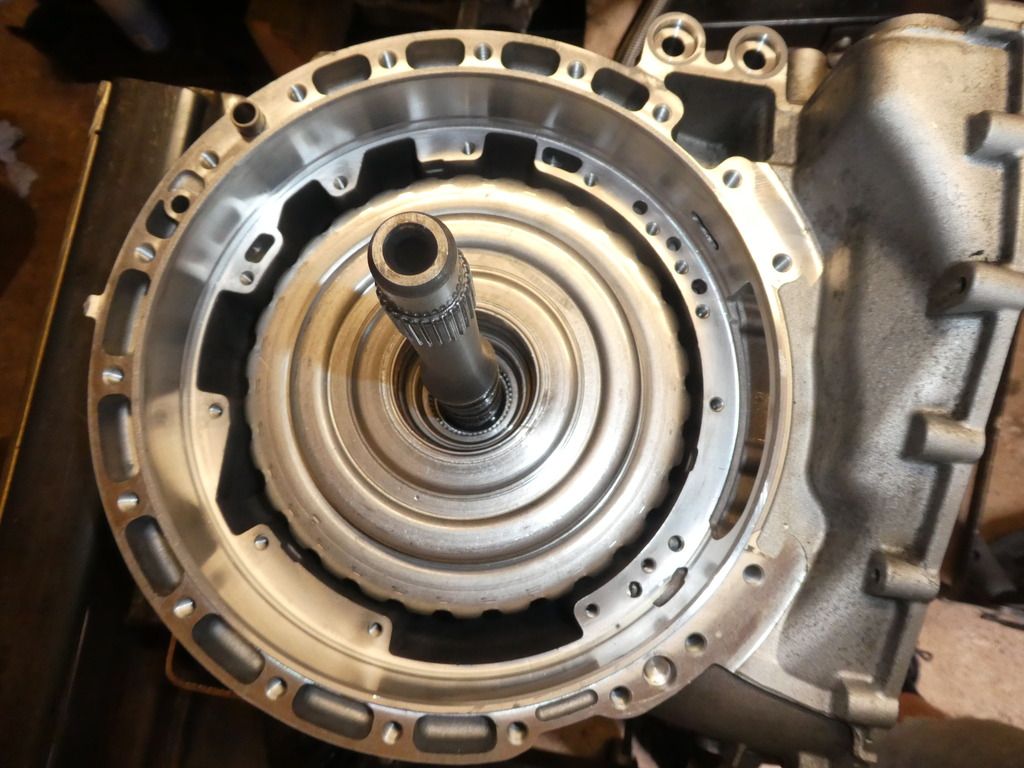
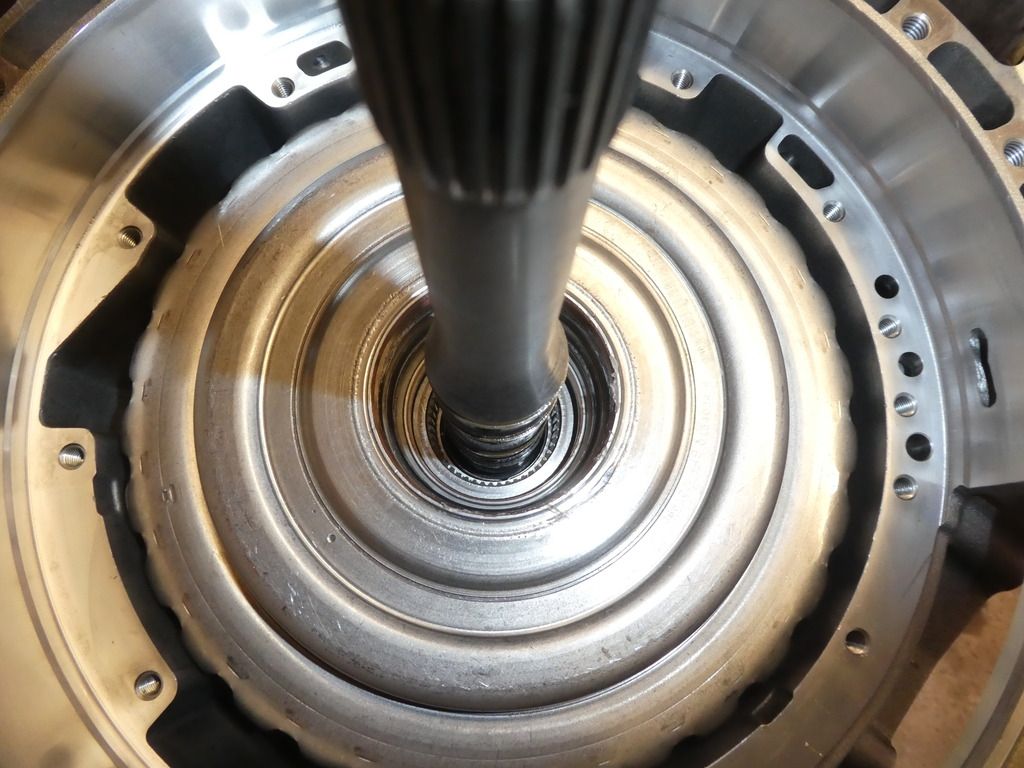
If you havent already clip the flange washer onto body II, Re-align Clutch B frictions and install body II assembly into Clutch B ensuring all frictions engaged; lift and drop Body II slightly, a metallic sound confirms fully seated, a muffled sound its not fully seated. This took some patience to get seated corrrectly
Image

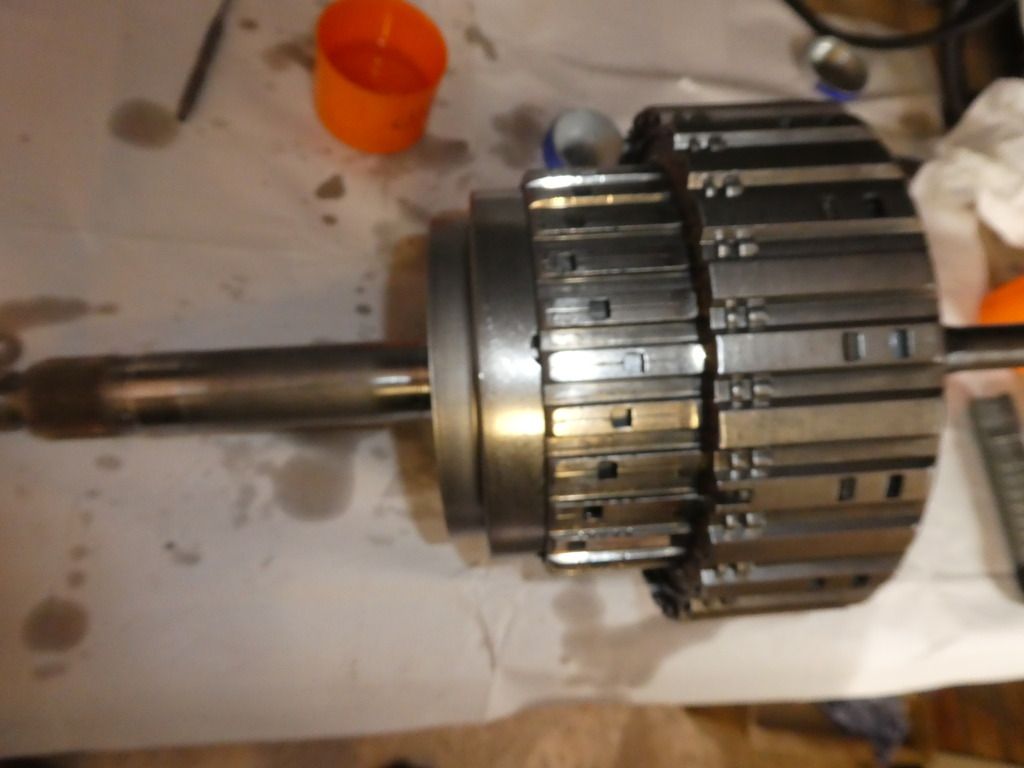
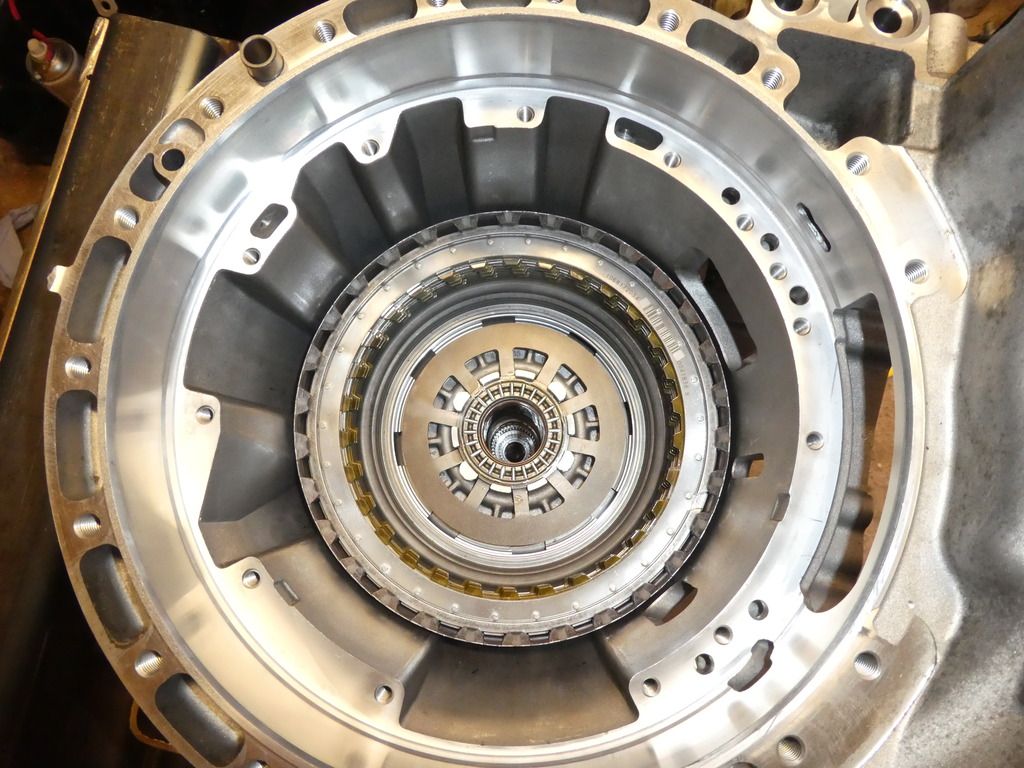
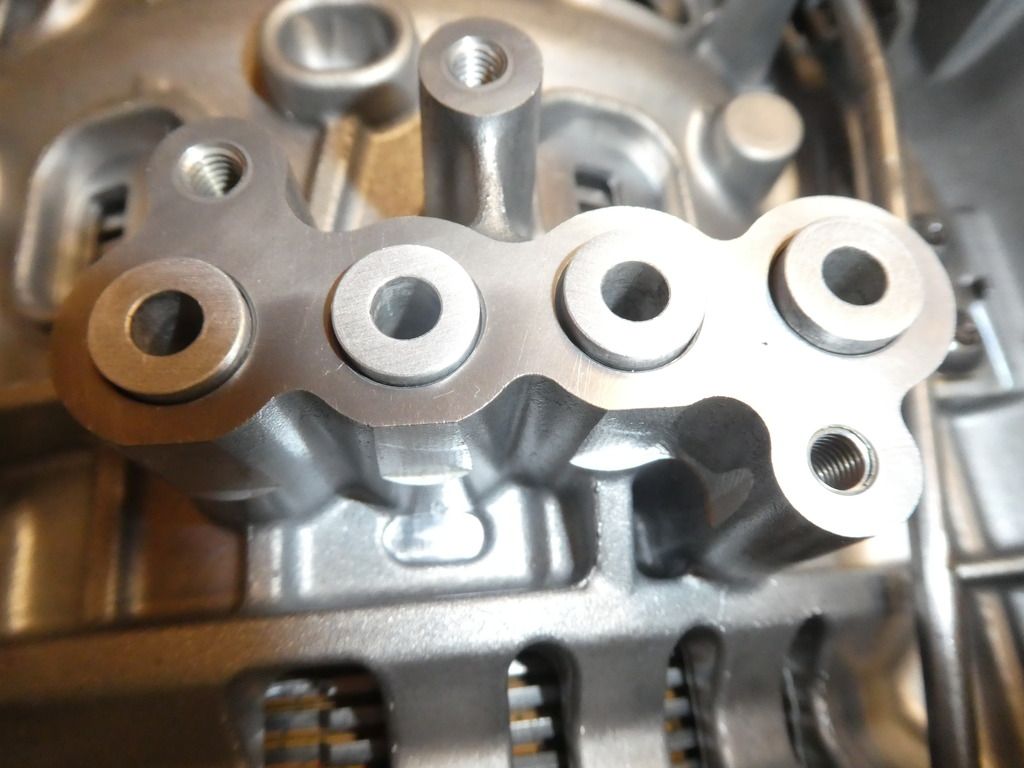
To verify its seated correctly check the dimension from the top face of body II to the ATF pump ledge in the gearbox, it should be approx 12mm. If its much less its not seated correctly.
If you cant get it to seat correctly (it wont go down) and you are sure its not being held on a friction, and you have changed the bushes; then check the installed depth of the new bushes is correct, ie one of the shafts is not bottoming onto a bush.
Image

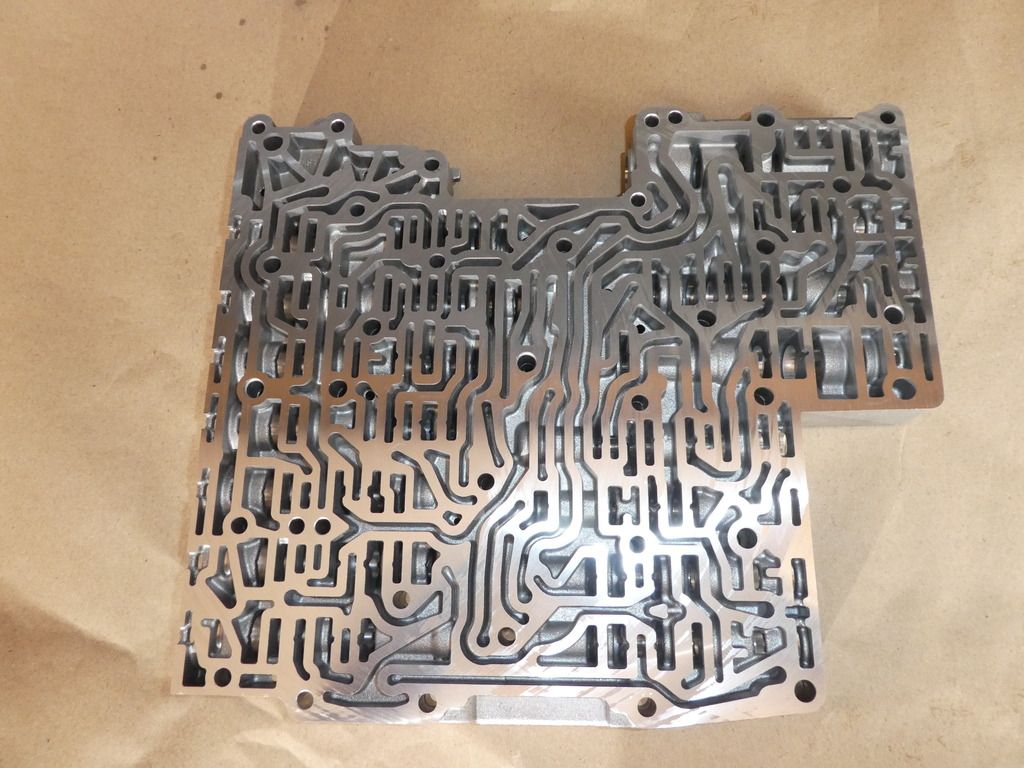
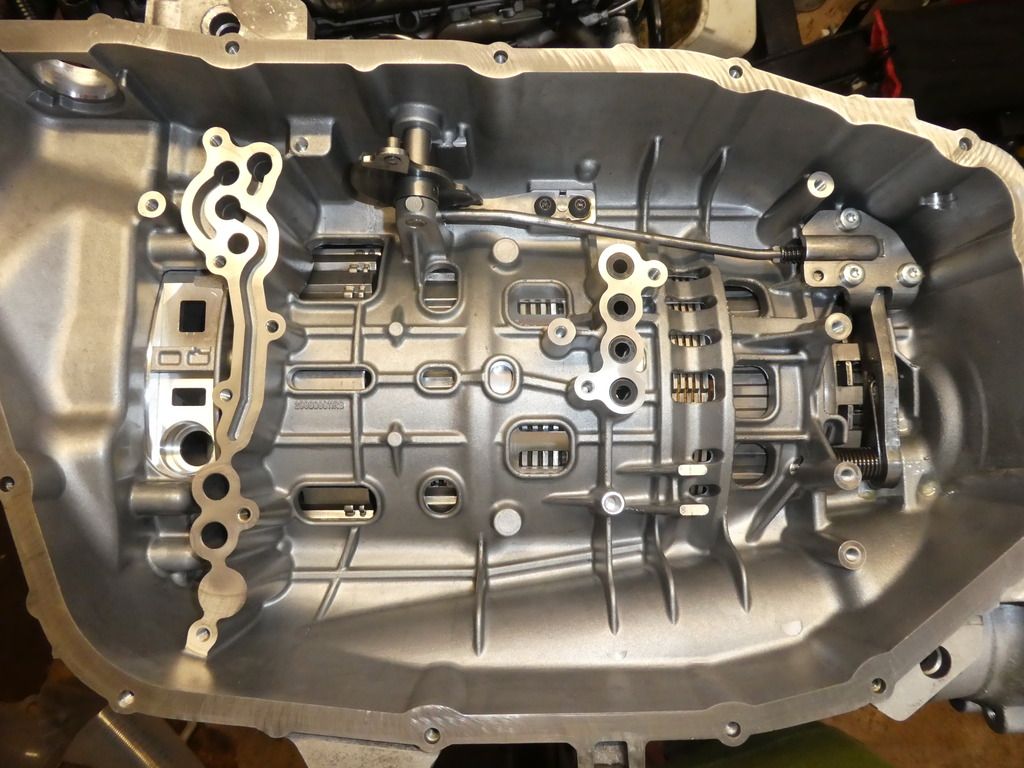
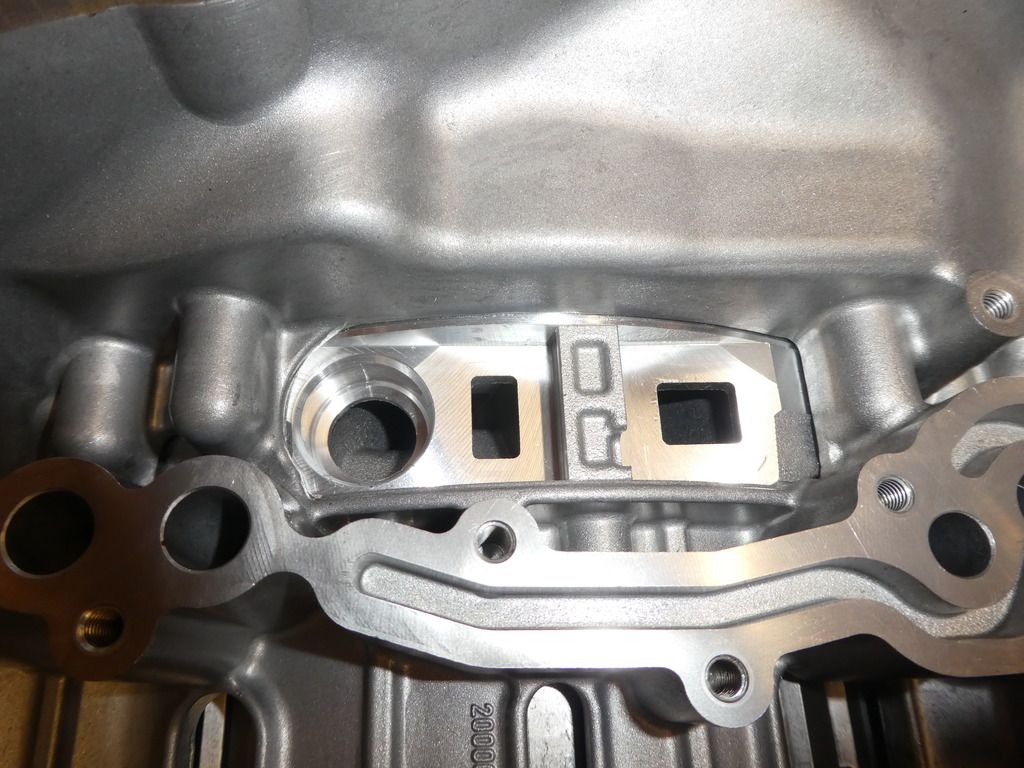
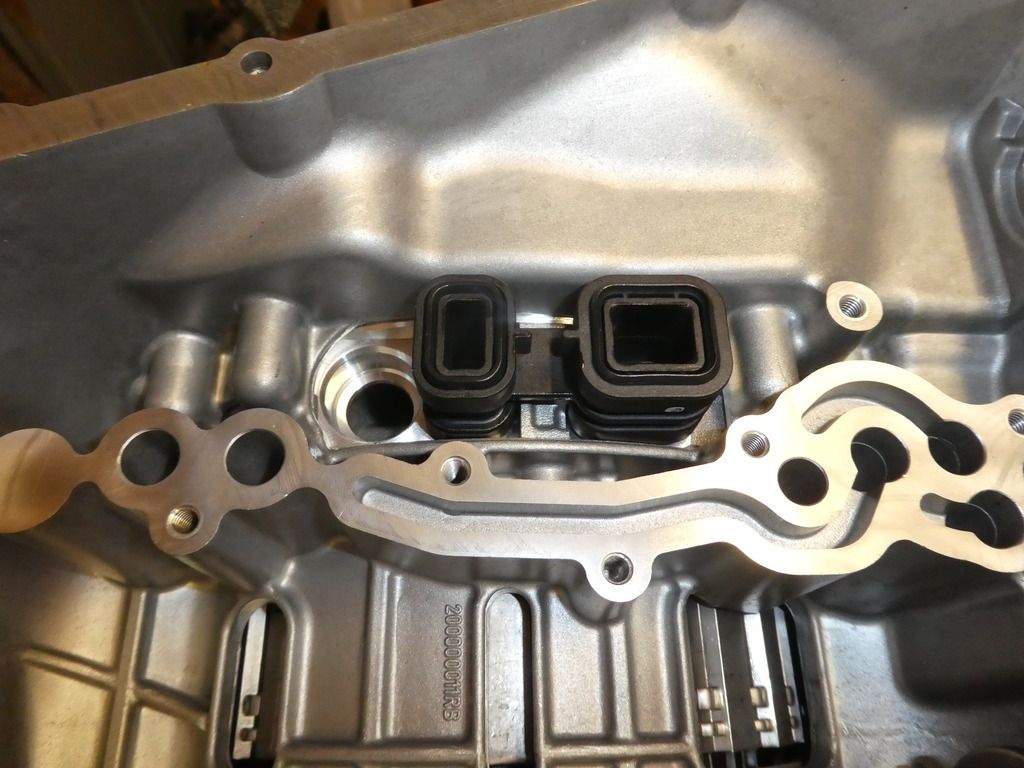
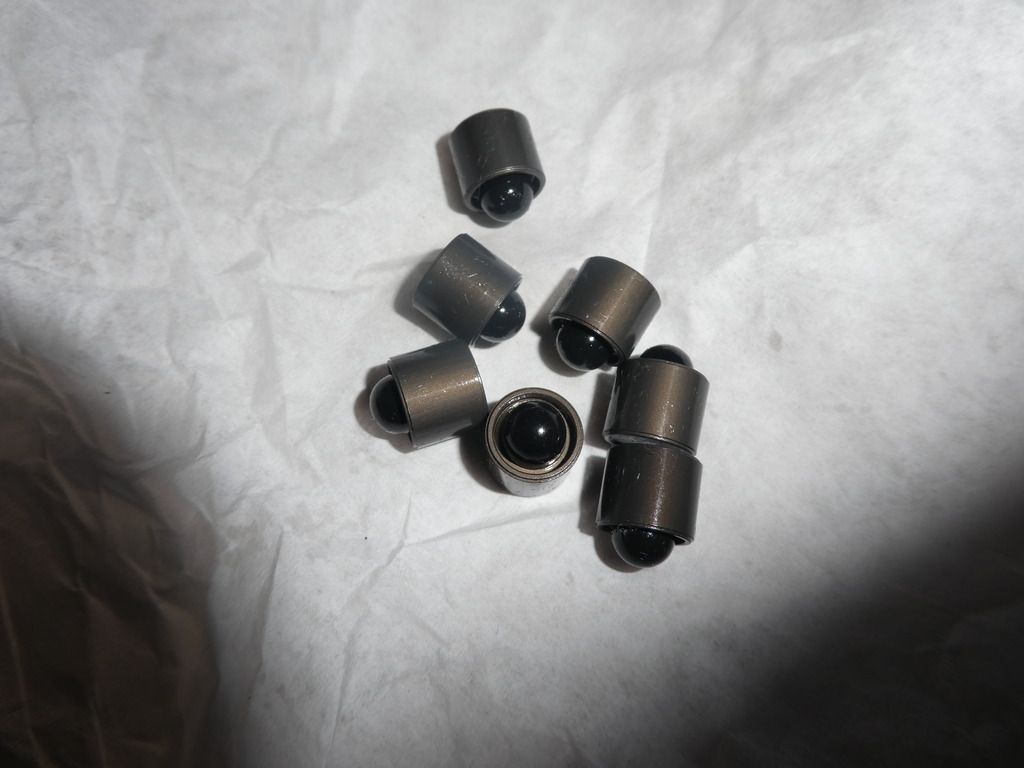
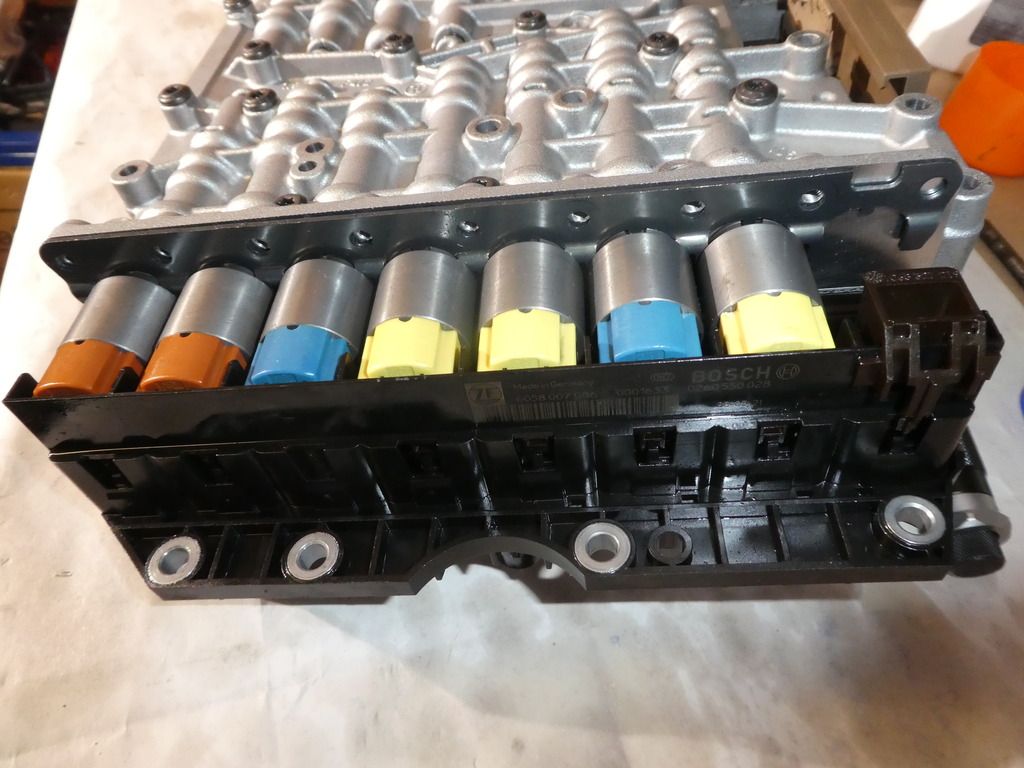
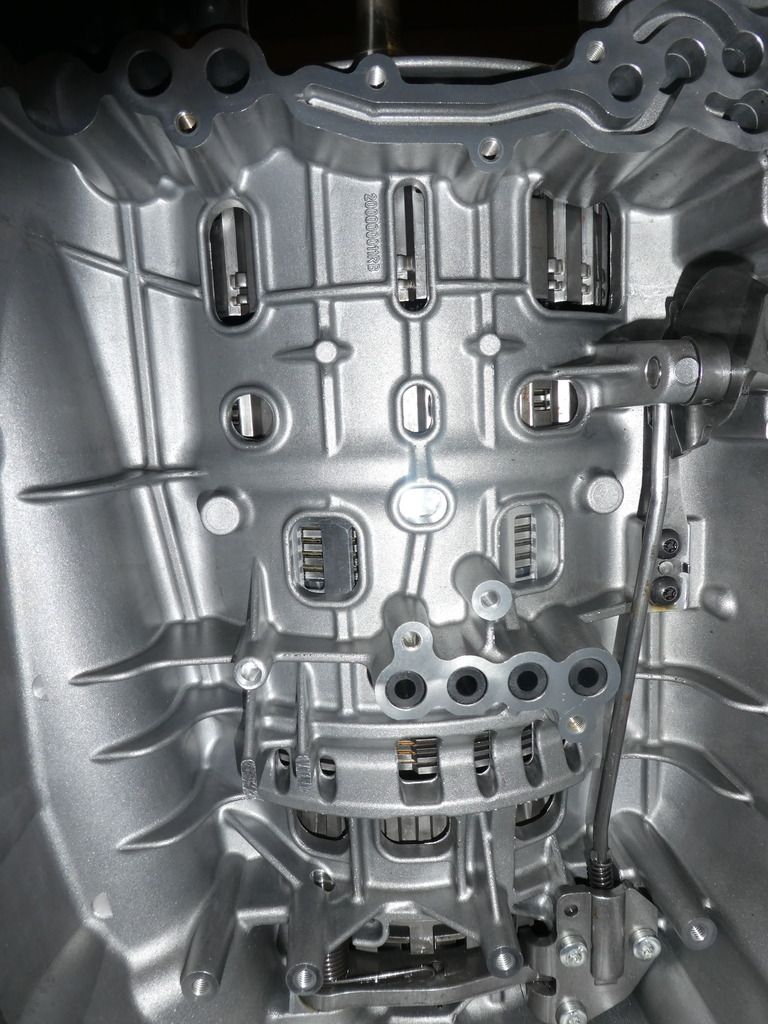
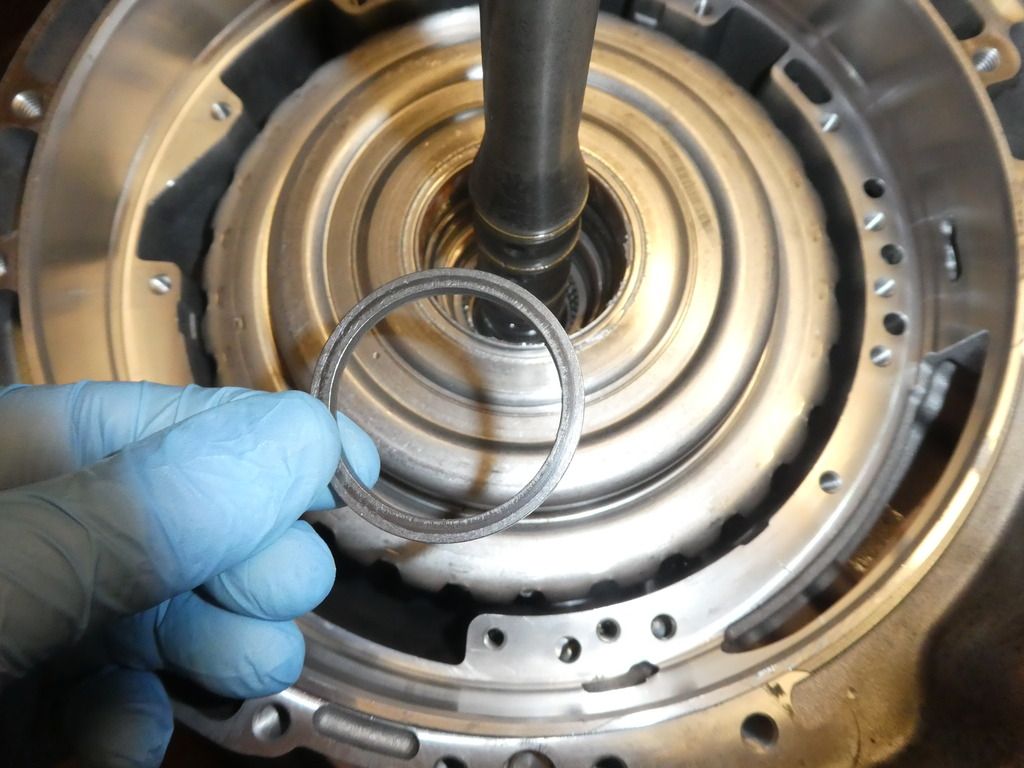
Install the 4 new rubber Tubes into the ports interfacing Clutch C/D to the valve body; I measured these for comparison to the old ones, which we review at the end
Image

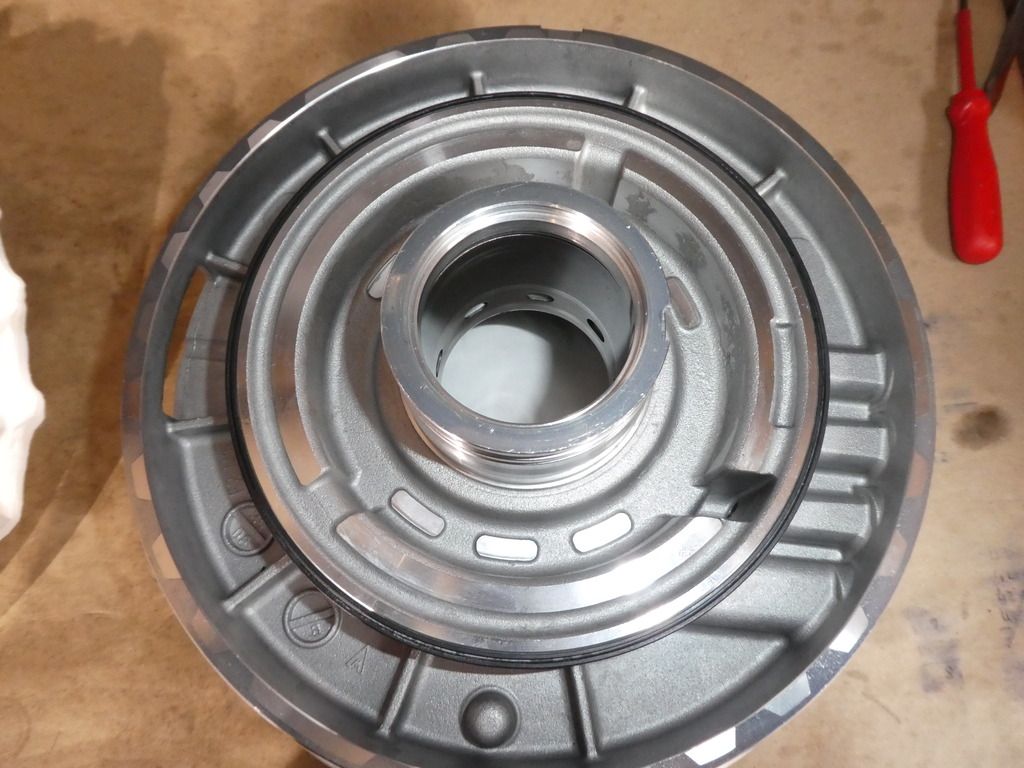
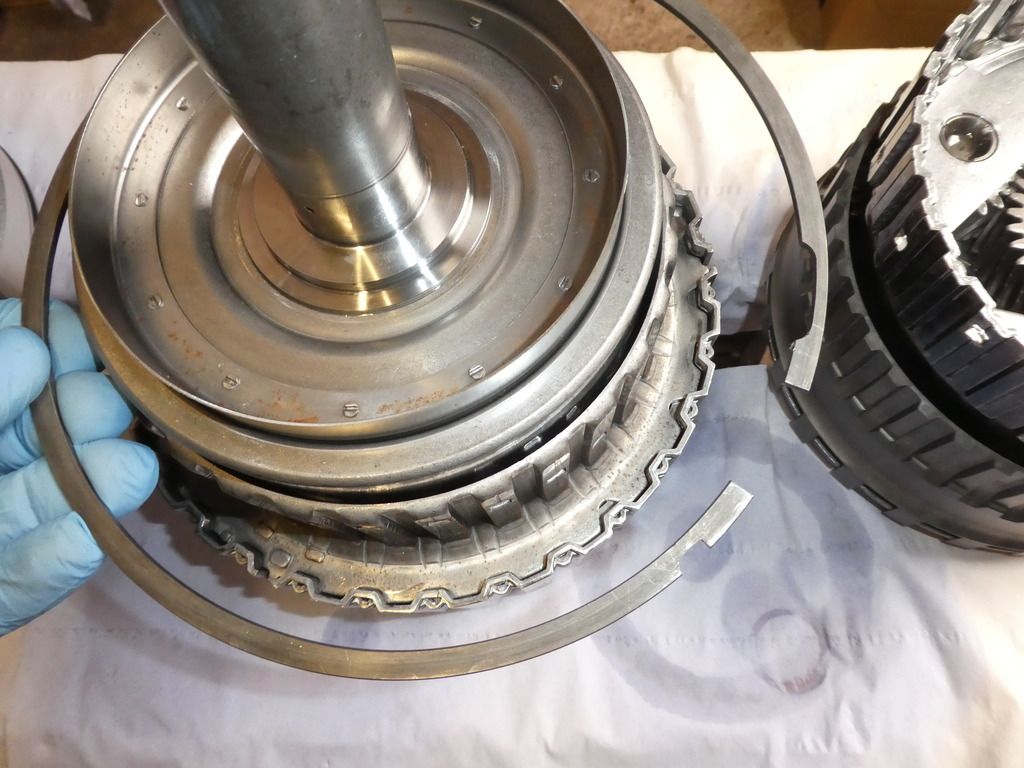
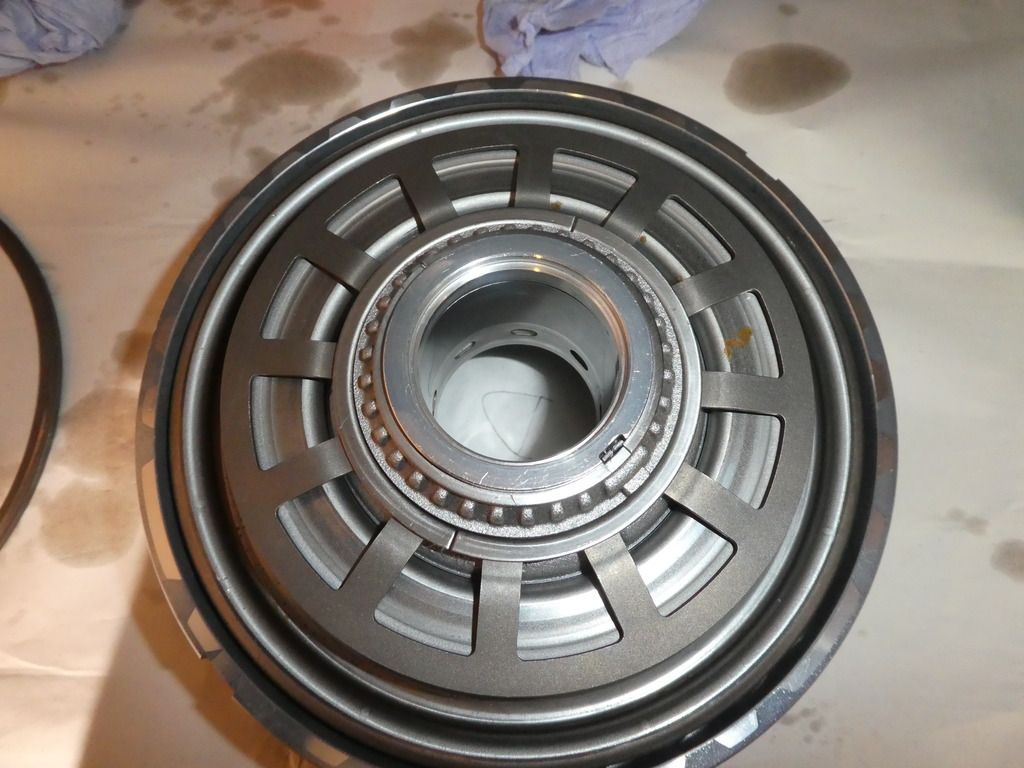
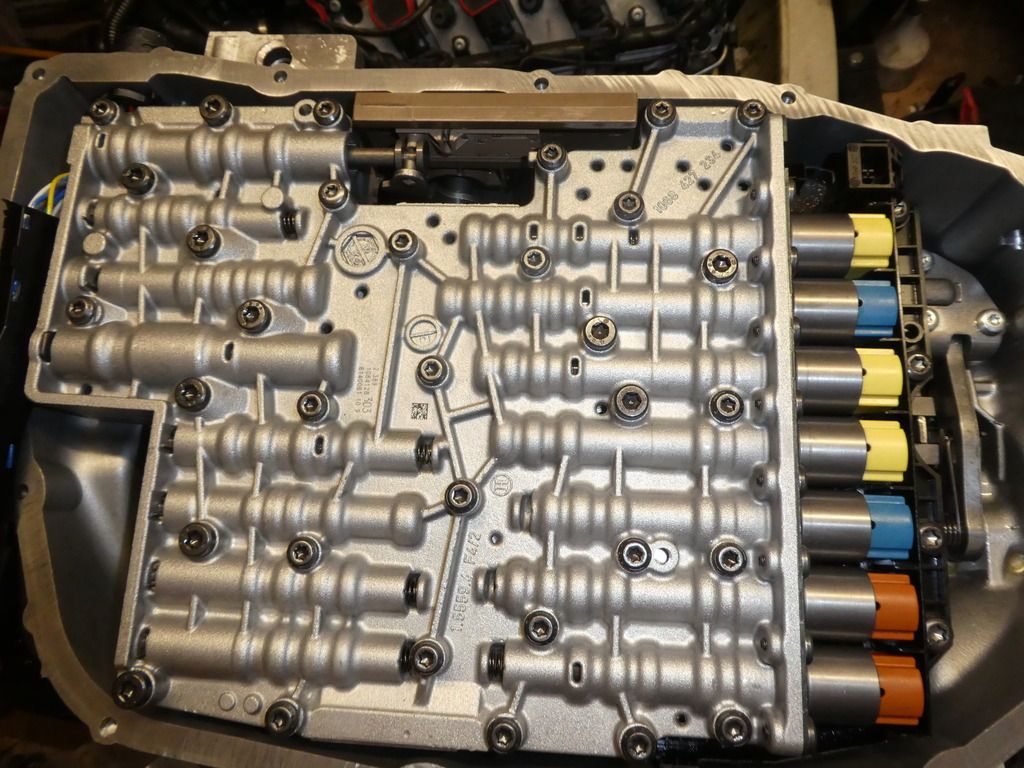
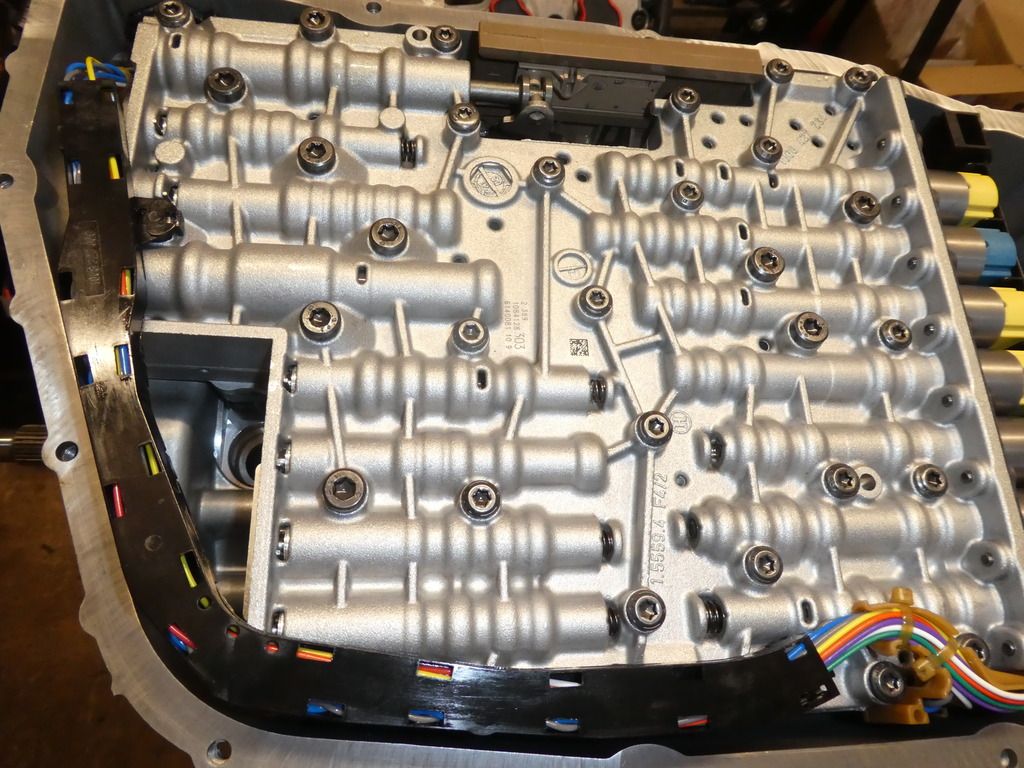
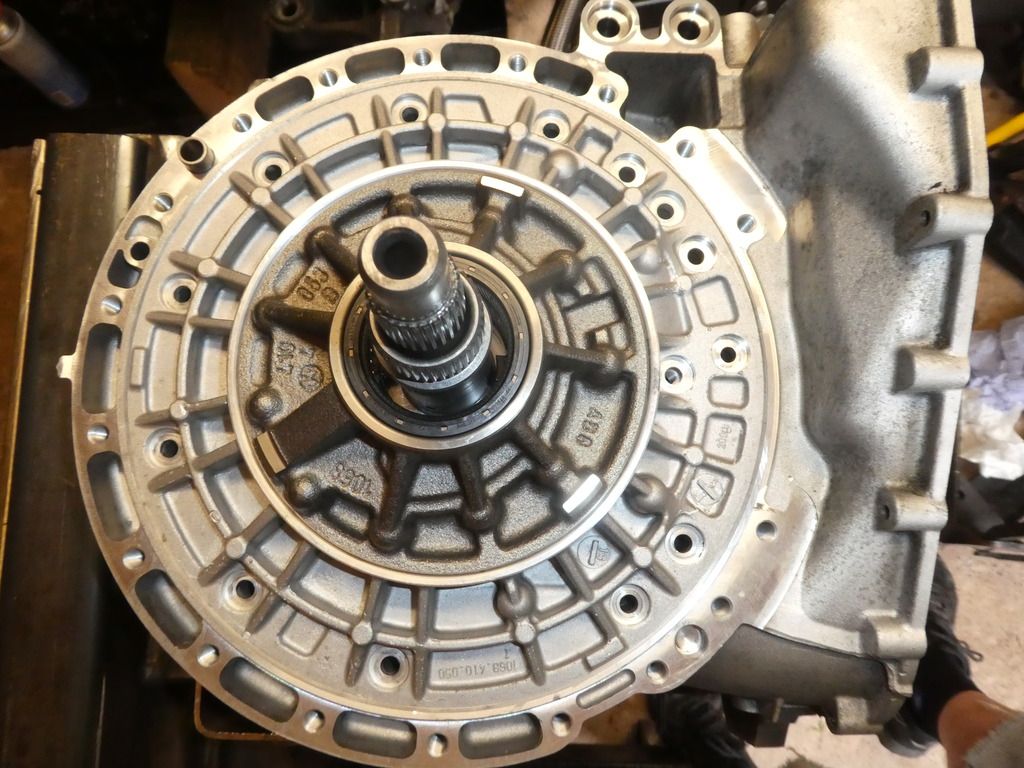
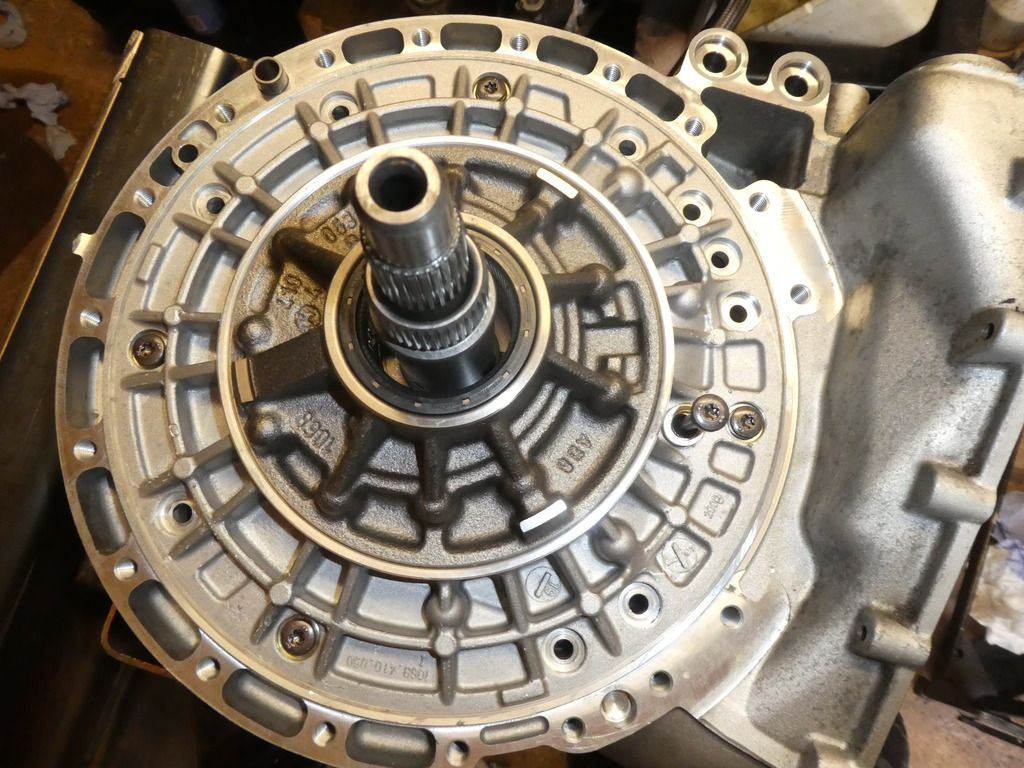
Without fitting the last selective shim washer (that sets the input shaft axial play) I did a trial fit of the pump housing and assembly to make sure it went down ok just fitting 4 screws spaced out 90 degrees each using the old U-Sit washers. I then took a DTI measurement of the axial play at this stage to determine how much play the box has with no shim washer
Image

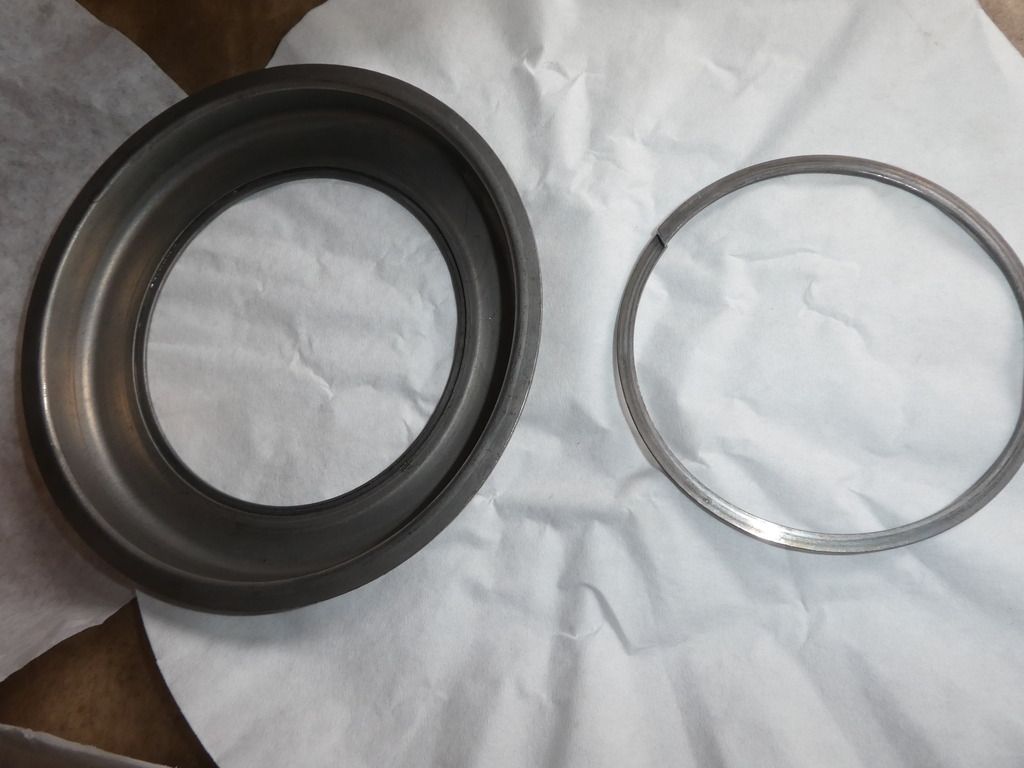
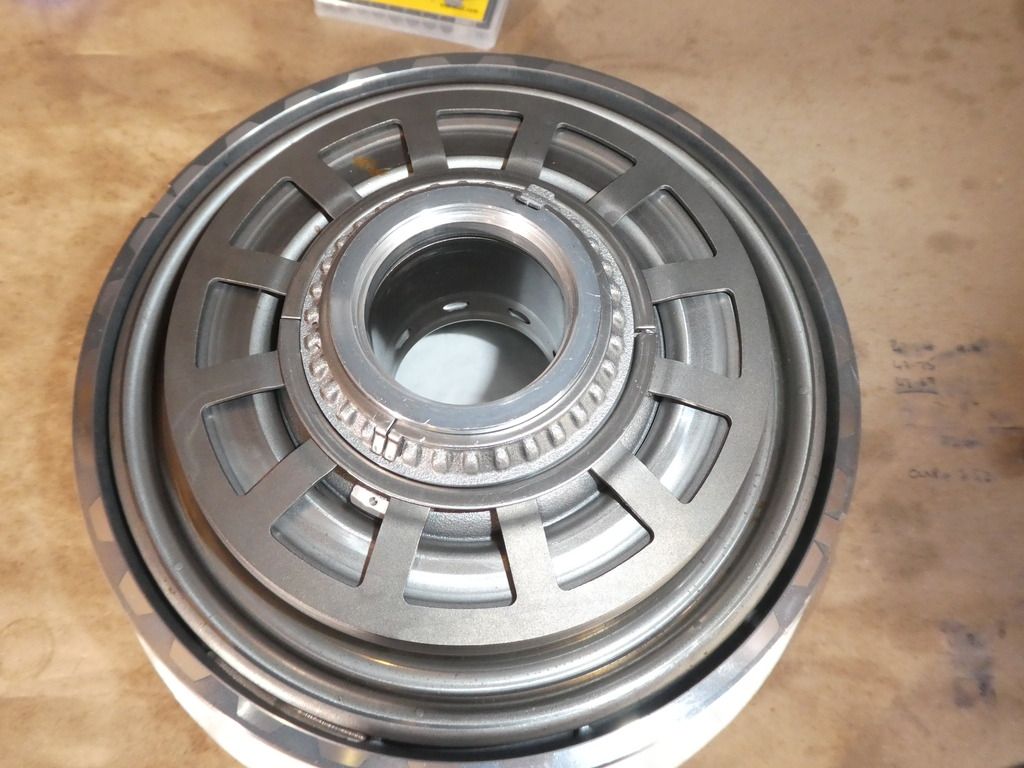
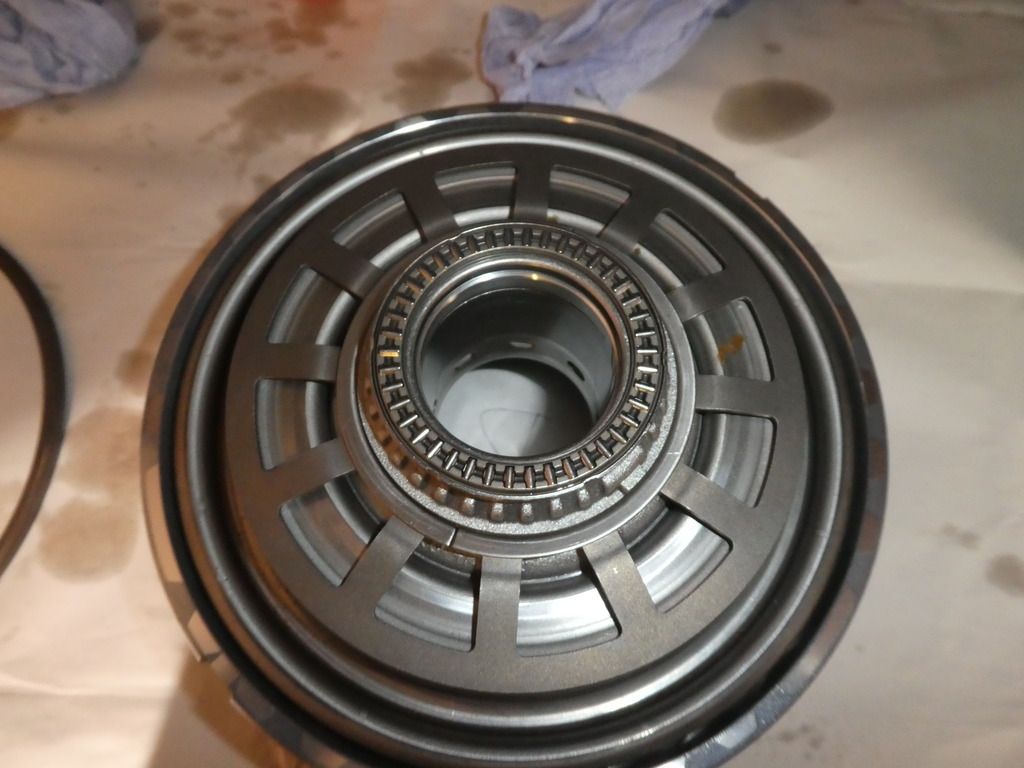
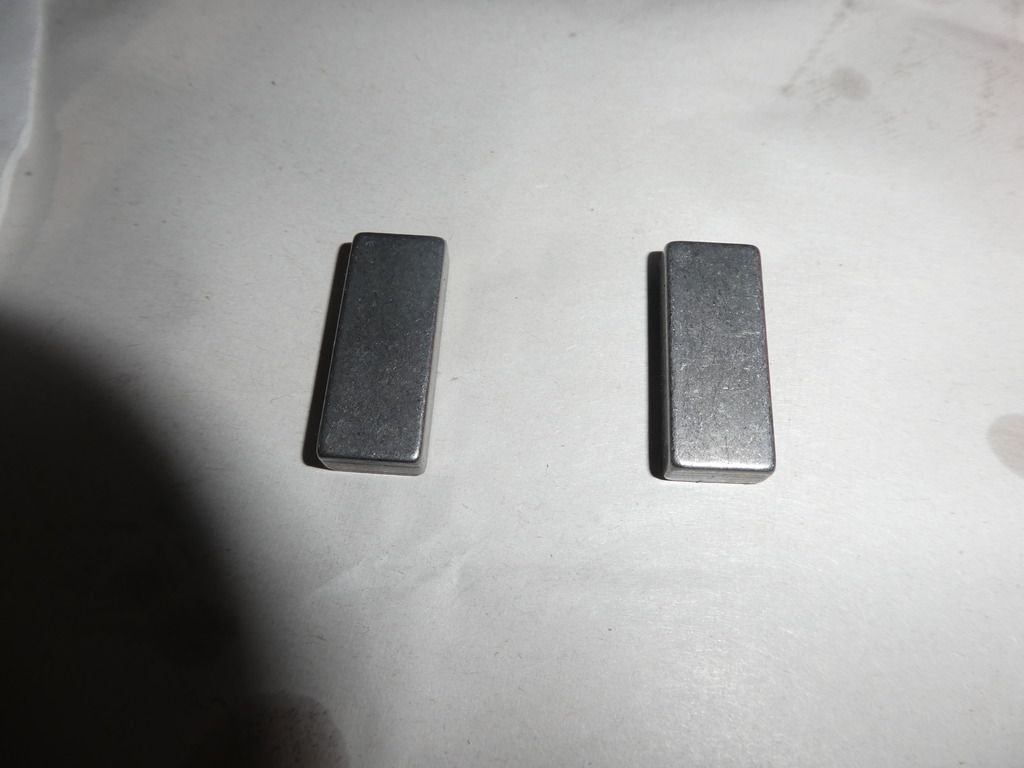
Then I removed the oil pump housing again and fit the selective shim washer I had, which I measured as 3.2mm
Image
Image

Then I refit those 4 screws with the old U-Sit sealing washers again 90degrees apart and took another DTI measurement of the input shaft axial play
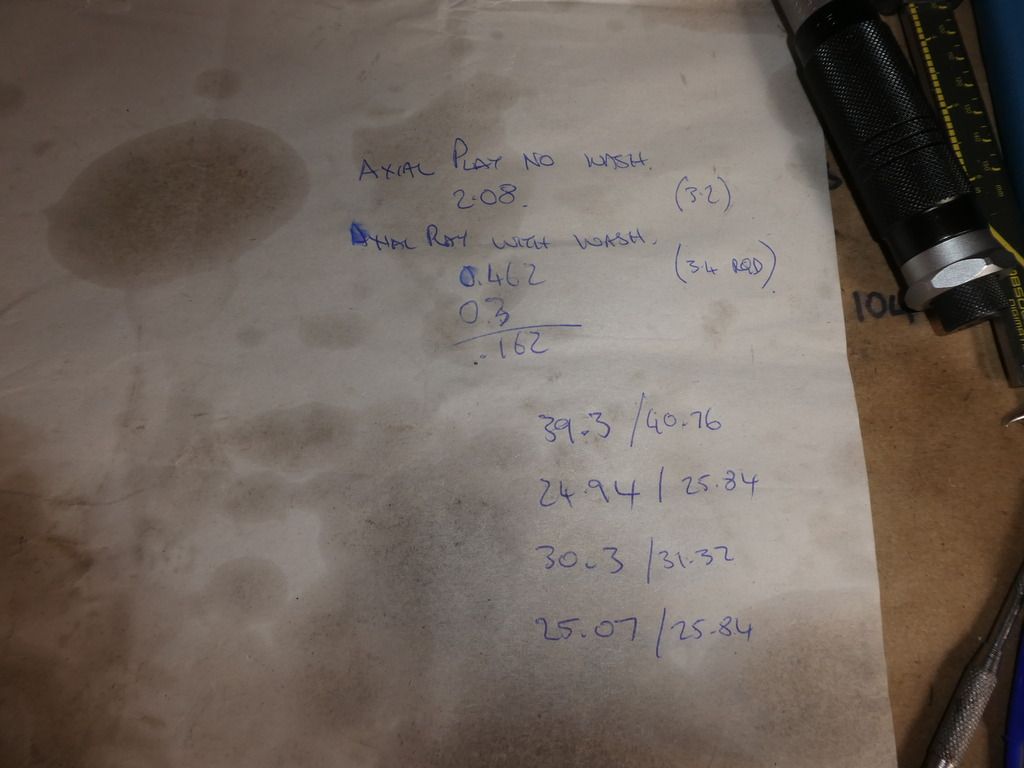
My measurement with no washer fitted was 2.08mm
My measurement with my 3.2mm selective shim washer was 0.462mm;
Clearly the washer is partially recessed and not fully accounting for the clearance from body II to the oil pump housing
Also since the specified allowable tolerance on the axial play is 0.2-0.4 (no more no less) -strictly speaking I need to order a 3.4mm shim washer.
Its about now Im thinking ok so its only 0.062mm...... and Ive been without my RS6 for a number of weeks.... So I went with it and accepted the slightly large tolerance. I wouldnt have accepted much more than this, and I wouldnt have accepted anything less than the 0.2 the other way.
Image

So whip out the 4 old screws with their old U-Sit sealing washers and use the set that came in the overhaul kit
I should have mentioned all of this trial fitting and final fitting of the pump housing is with a NEW sealing O-Ring from the overhaul kit fitted and vaselined
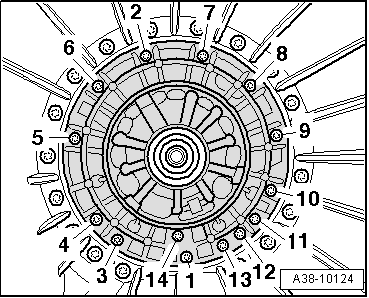
Remember the tightening sequence 1 through 14, and torque these to 10Nm ( I do them in increments 2Nm, 5Nm, 10Nm)
ImageImage
Last edited by ATinOf on Sat Sep 15, 2018 10:05 pm, edited 11 times in total.

ATinOf
3rd Gear
Posts: 432
Joined: Fri Jul 06, 2018 7:32 pm
Location: Cheshire

Re: Gearbox Teardown & Refurbish - 6HP28A61

Post by ATinOf » Mon Sep 03, 2018 4:44 pm

Spin the gearbox on your mount so we can work on the valve body area
Now take an air line against those ports and test the piston movement of each of the clutches,no great pressure required, you will need to fit the aluminium end plugs on the 4 central ports
The annotated image isnt quite the 6HP28 but the port layout is the same; D1 is the reaction piston of D; D2 is the apply piston of D
ImageImage

Remember how these were marked from dirty passing oil? ; top tip to clean the faces off if they wont come clean with only isolpropyl alcohol and elbow grease, - put a sheet of your finest grade emery cloth (2400 minimum) on a flat plate (piece of plate glass if you havent got a flat plate in your DIY machine Shop, but its VERY important its FLAT so if you have neither go get one) wet the cloth with your recommended oil and very carefully with a flat single straight sweep draw the end of the plug across the cloth, no more than twice should be enough you dont want to reduce their length, then clean them off with isopropyl and blast them with air
Image

Now fit your new bridge seal, or your old one with the new rubber seals from the overhaul kit.It should have nibs on one end so that you can only fit it the correct way. There are 2 versions of these too;if you get the right one for the 6HP26, 6HP28, 6HP32 it will be 15.4mm tall; the wrong one is for the 6HP19, 6HP21 and is only 14.4mm tall.
Image
Image

Clean up the cable loom (I use contact cleaner spray for this), and fit the two new connector seals from the overhaul kit
Image
Image

Apply a little vaseline to the seals to aid insertion and fit into place with the clip seated
The observant ones will note I have fitted the clip 90 degrees out compared to how it came off. This becomes apparent when you come to fit the sump pan, I corrected it later :oops:
Image
Image
Last edited by ATinOf on Sat Sep 15, 2018 10:26 pm, edited 15 times in total.

ATinOf
3rd Gear
Posts: 432
Joined: Fri Jul 06, 2018 7:32 pm
Location: Cheshire

Re: Gearbox Teardown & Refurbish - 6HP28A61

Post by ATinOf » Mon Sep 03, 2018 4:46 pm

Now its onto the valve body; if you havent cleaned it up since the vacuum test do so now, this is the lower half, and fit the valve spools in their bores, always lightly oil them with recommended oil ONLY, never fit them dry
Image

But we start assembly with the top half, clean the accumulators, check valves, check balls and filter if you havent already
Image
Image

Fit these components in the upper half of the valve body in the correct positions. Note you have more potential check ball positions than you do check balls; get them in the right places
And fit the valve spools in their bores
Image

Let my fingers do the pointing for the check balls, if you recall my positions were centre dotted
Image
Image
Image
Image

If you want to check against the master sheet I obtained this from Sonnax, very helpful guys
ImageImage
Last edited by ATinOf on Sun Sep 16, 2018 12:40 am, edited 6 times in total.

ATinOf
3rd Gear
Posts: 432
Joined: Fri Jul 06, 2018 7:32 pm
Location: Cheshire

Re: Gearbox Teardown & Refurbish - 6HP28A61

Post by ATinOf » Mon Sep 03, 2018 4:48 pm

Fit the new gasket plate, this only fits one way round, aligned in position. This gasket is not in the overhaul kit
Image

And overlay the lower valve body aligned in position
Image

Make sure you have cleaned up the control module and the fixing screws and bracket
And be cautious of static around the control module connector
Image
Image

Fit the screws not used to secure control module by hand and nip the middle two screws (1 and 2 on the sequence diagram) to 2Nm
Image

Remove the O-rings from the solenoids and replace them; these will not come in the gearbox overhaul kit - but if you get the Sonnax Gen2 zip kit they will be in there. If you dont need the full zip kit, as that costs around 95.00, they can be sourced individually from Sonnax, but ZF dont list them separately; or you can source them independently if you know the size
Image
Image
Image
Image
Last edited by ATinOf on Sat Sep 15, 2018 11:09 pm, edited 6 times in total.

ATinOf
3rd Gear
Posts: 432
Joined: Fri Jul 06, 2018 7:32 pm
Location: Cheshire

Re: Gearbox Teardown & Refurbish - 6HP28A61

Post by ATinOf » Mon Sep 03, 2018 4:49 pm

Fit the solenoid retaining bar and the control module into place and you can finish fitting the screws and torque them up in sequence 1 thro 23 red starred digits; Torque value is 8Nm
ImageImage

Fit the valve body into position and its retaining screws 1 and 2 initially and torque to 2Nm to ensure its seated, then the remaining 12 screws 3 thro 14 in sequence, black numbers, and again Torque value is 8Nm, and dont forget to torque those 1 and 2s up to 8Nm
Image
Image

Clip the cable loom onto its seats, fit the connector and engage the locking tabs, being cautious of static
Image

And always fit a new filter (you wont get a filter in the overhaul kit, I know, wtf!)
Image
Image

Now clean the pan, including the magnets and inspect those fines on that magnet.
Image

And fit the gasket from the overhaul kit (the overhaul kit includes both the 13 bolt and 24 bolt versions) and fit the pan and new sump drain plug with integral washer, again from the overhaul kit. Bolts in sequence 1 through 13 and Torque to 8Nm, sump drain plug 9Nm. Remove the fill plug and replace its O-ring with the one from the overhaul kit. Finger tighten it back in place we will be filling the box when its back on the car
Image
Last edited by ATinOf on Sat Sep 15, 2018 11:16 pm, edited 9 times in total.

ATinOf
3rd Gear
Posts: 432
Joined: Fri Jul 06, 2018 7:32 pm
Location: Cheshire

Re: Gearbox Teardown & Refurbish - 6HP28A61

Post by ATinOf » Mon Sep 03, 2018 4:50 pm

These are my measurements of axial play of the input shaft
Also the measurement comparison of those 4 rubber tubes that seal the 4 pressure ports to clutch C/D. Clearly the old ones have aged and lost their excess length; its likely we had poor pressure at one or more of those couplings
Image
Last edited by ATinOf on Sat Sep 15, 2018 11:20 pm, edited 1 time in total.

Post Reply

Return to “RS6 / RS6 Plus (C6 Typ 4F) 2008-2010”

Who is online

Users browsing this forum: Limited100 and 78 guests