Gearbox Teardown & Refurbish - 6HP28A61

5.0 V10 50v biturbo - 571 bhp
ATinOf
3rd Gear
Posts: 444
Joined: Fri Jul 06, 2018 7:32 pm
Location: Cheshire

Re: Gearbox Teardown & Refurbish - 6HP28A61

Post by ATinOf » Mon Sep 03, 2018 1:46 pm

Next up is the oil pump; so i think its time to refresh the bench and get it clean, fresh brown paper down
Image

If you havent already done so remove the seal from the ATF strainer inlet, careful not to score the inner face doing so (I did slightly :oops: )
Image

Remove the upper and lower rectangular section seals
Image
Image

And remove the outer spiral of Torx screws using the impact driver, in my case I had 2 particularly stubborn ones where the heads started to go, so added these to the shopping list - ZF code 0736.401.074, M6 x 46 T30.
When you remove the screws take them all out apart from 2 mid spiral diagonally opposite; just remove these partially and with the pump housing suspended tap them with a plastic mallet to separate the stub
Image

And remove the oil pump from the housing
Image
Image

Image
Last edited by ATinOf on Wed Sep 05, 2018 3:45 pm, edited 6 times in total.

ATinOf
3rd Gear
Posts: 444
Joined: Fri Jul 06, 2018 7:32 pm
Location: Cheshire

Re: Gearbox Teardown & Refurbish - 6HP28A61

Post by ATinOf » Mon Sep 03, 2018 1:48 pm

This seal needs replacing, with it removed inspect the torque converter needle bearing behind it; if its sound leave it be; if you need to replace it there is a circlip retaining it in position
Image

Take note the gears have two dots on them indicating the correct way up (facing you)
remove the gears and check for scoring
Image
Image

You can expect a visible line on them where they travel over the casting edges, anything more than this you should replace the gears, any imperfections on the bevel teeth replace the gears
Image
Image
Last edited by ATinOf on Mon Sep 10, 2018 9:36 pm, edited 5 times in total.

ATinOf
3rd Gear
Posts: 444
Joined: Fri Jul 06, 2018 7:32 pm
Location: Cheshire

Re: Gearbox Teardown & Refurbish - 6HP28A61

Post by ATinOf » Mon Sep 03, 2018 1:49 pm

Now here is actually where the ZF tool comes in useful, but I havent got it, to remove the side shaft (again you only need do this if you are OCD on cleanliness or suspect a side shaft bearing). So to improvise you ought to have some 27mm hexagon bar, hollow of course as there is also a 17mm bolt in the centre; or if you havent even got that carefully, and I do mean carefullly, jam the teeth of the gear against the housing with a pry bar and undo the 17mm bolt, which works just as well. These pics dont really reflect the issue; but the reassembly ones will later
Image
Image
Image
Last edited by ATinOf on Sun Sep 09, 2018 6:37 pm, edited 3 times in total.

ATinOf
3rd Gear
Posts: 444
Joined: Fri Jul 06, 2018 7:32 pm
Location: Cheshire

Re: Gearbox Teardown & Refurbish - 6HP28A61

Post by ATinOf » Mon Sep 03, 2018 1:50 pm

Now I thought this screw was retaining the side shaft protective tube; but as I found out later it doesnt (I think it retains the side shaft main bearing) so taking this out at this point is pointless
Image

In our case the side shaft acts as an oil pathway for linking the front and rear differentials; thus ensuring the front differential oil is cooled by the rear differential oil cooler. So in spite of the documentation there are NO seals internally in our side shafts; only the 2 outer O-ring seals on the side shaft protective cover itself. Now I stress this for a reason as you will see later!

Now remove the screws securing the bell housing; NOTE there is a sequence to these bolts, and you are likely to need the impact driver (18 thro 1)
ImageImage

And lift the bell housing free
Image

I stress again; look no seal in here....
Image

Image
Last edited by ATinOf on Tue Sep 11, 2018 9:52 pm, edited 6 times in total.

ATinOf
3rd Gear
Posts: 444
Joined: Fri Jul 06, 2018 7:32 pm
Location: Cheshire

Re: Gearbox Teardown & Refurbish - 6HP28A61

Post by ATinOf » Mon Sep 03, 2018 1:53 pm

These two seals in the gearbox body need removing for replacement
Image

Now the bell housing is off the near side drive shaft seal can be removed for replacement
Remove the rear bearing race if it didnt come out before; and note the selective shim washer, dont lose it
The shaft you see there is actually my seal driver, the seal is driven from the bell housing side into the front diff, to get my mallet onto the driver I used it in reverse, shaft sticking out the front diff, and tapped on the seal driver itself in the bell housing
Image

Image
Image
Last edited by ATinOf on Wed Sep 05, 2018 4:11 pm, edited 4 times in total.

ATinOf
3rd Gear
Posts: 444
Joined: Fri Jul 06, 2018 7:32 pm
Location: Cheshire

Re: Gearbox Teardown & Refurbish - 6HP28A61

Post by ATinOf » Mon Sep 03, 2018 1:54 pm

Now clean the gearbox housing thoroughly, blow out the oilways and when you have it spick and span; get out the Isopropyl alcohol and the coffee filters and clean it again - as you can see, just when you think its clean you find its not that spick and span after all. Keep going till the coffee filters stay white. I like to use coffee filters as they are white so you can see the <beep> easily, and they have much less of a tendency to leave bits behind. Its a trick I learned doing engines.
Image

Image
Image
Image
Image
Image
Last edited by ATinOf on Wed Sep 05, 2018 4:14 pm, edited 1 time in total.

ATinOf
3rd Gear
Posts: 444
Joined: Fri Jul 06, 2018 7:32 pm
Location: Cheshire

Re: Gearbox Teardown & Refurbish - 6HP28A61

Post by ATinOf » Mon Sep 03, 2018 1:55 pm

Now everything is clean lets have another look at that double seal
Image

Its hard to tell whether the seal has been compromised both sides, it deffinitely has on the one; way to go Mr bodger, I wonder how long its been like that?
Image

Now cleanliness was important before; its really important now - refresh the bench again
Image
Last edited by ATinOf on Wed Sep 05, 2018 4:19 pm, edited 3 times in total.

ATinOf
3rd Gear
Posts: 444
Joined: Fri Jul 06, 2018 7:32 pm
Location: Cheshire

Re: Gearbox Teardown & Refurbish - 6HP28A61

Post by ATinOf » Mon Sep 03, 2018 1:58 pm

Its time to strip down the valve body, you wont find this procedure in the book!
Image
Image
Image

Considering its not been cleaned yet externally it looks surprisingly good already, a good sign
Image

Unclip the electrical connector by lifting up the 2 black locking tabs and pulling gently on the connector, NOT the wires, and be cautious of static on those connector pins
Image

Remove the loom out of the way
Image

Remove the screws securing the solenoid clamp plate
Image
Last edited by ATinOf on Sun Sep 09, 2018 6:41 pm, edited 6 times in total.

ATinOf
3rd Gear
Posts: 444
Joined: Fri Jul 06, 2018 7:32 pm
Location: Cheshire

Re: Gearbox Teardown & Refurbish - 6HP28A61

Post by ATinOf » Mon Sep 03, 2018 2:01 pm

Remove the Torx screws holding the valve body halves together, ** NOTE there is a sequence for these bolts that is important so that no warping is introduced**. I could not find the official sequence so I drew up my own; loosen in sequence 23 thro 1 (red starred numbers)
ImageImage

I actually removed them all at once after I had them undone, but in hindsight if you just removed the ones holding the controller to the bottom half first its less likely to fall apart when you invert it to remove this controller body, still I managed to keep it together whilst I removed the controller
Image
Image

Top Tip dont do what I did and remove the bottom from the top; flip it over and remove the top from the bottom; that way you wont have the accumulator pistons, check valve springs and balls falling out and rolling around; particularly important if you dont know where they came from (fortunately for me I had the data for the 6HP28)
Image
Image
Image

Dont lose any of the the 6mm balls!
Image
Last edited by ATinOf on Tue Sep 11, 2018 10:04 pm, edited 11 times in total.

ATinOf
3rd Gear
Posts: 444
Joined: Fri Jul 06, 2018 7:32 pm
Location: Cheshire

Re: Gearbox Teardown & Refurbish - 6HP28A61

Post by ATinOf » Mon Sep 03, 2018 2:03 pm

Image

Inspect the seal on the plate; you can expect some degradation of the face on separating the plate but it can also be an indicator of a poor seal
Image

This face looks particlularly rough in places, almost as if its been reused once (which is NOT recommended at all)
Image
Image

If you havent already remove the solenoid retaining bar
Image
Image

And remove the solenoids, noting the colour coded order
From the left of the image these are EDS1, EDS2, EDS3, EDS5, EDS4, EDS7, EDS6
If you are testing the coil resistance they should all read 5.05ohms
The control module learns the flow rates of the solenoids valves so you should avoid mixing the positions; keep them in sequence
Image
Last edited by ATinOf on Wed Sep 05, 2018 5:31 pm, edited 6 times in total.

ATinOf
3rd Gear
Posts: 444
Joined: Fri Jul 06, 2018 7:32 pm
Location: Cheshire

Re: Gearbox Teardown & Refurbish - 6HP28A61

Post by ATinOf » Mon Sep 03, 2018 2:04 pm

Inspect the position of all balls, springs, and condition of the filter. Ensure the accumulator pistons all return to their flush position after being pressed in
Image

On close inspection you can see someone has dotted the check ball positions, I dont believe this is factory standard, I believe this has been done By ANOther
Image
Last edited by ATinOf on Wed Sep 05, 2018 5:27 pm, edited 3 times in total.

ATinOf
3rd Gear
Posts: 444
Joined: Fri Jul 06, 2018 7:32 pm
Location: Cheshire

Re: Gearbox Teardown & Refurbish - 6HP28A61

Post by ATinOf » Mon Sep 03, 2018 2:07 pm

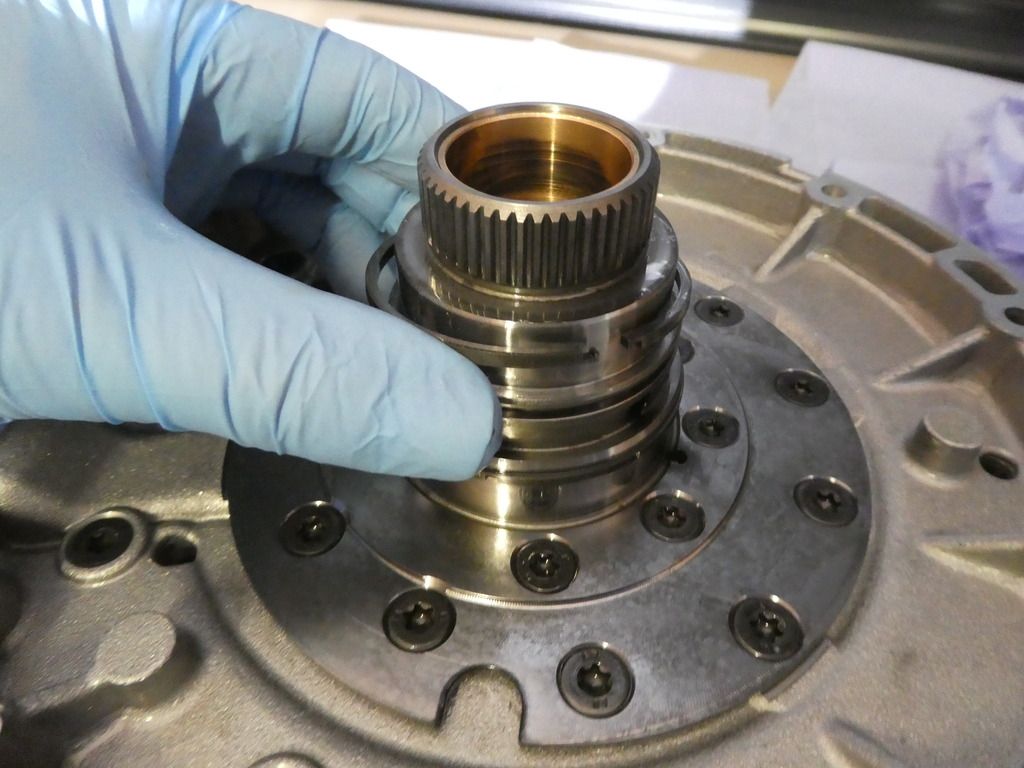
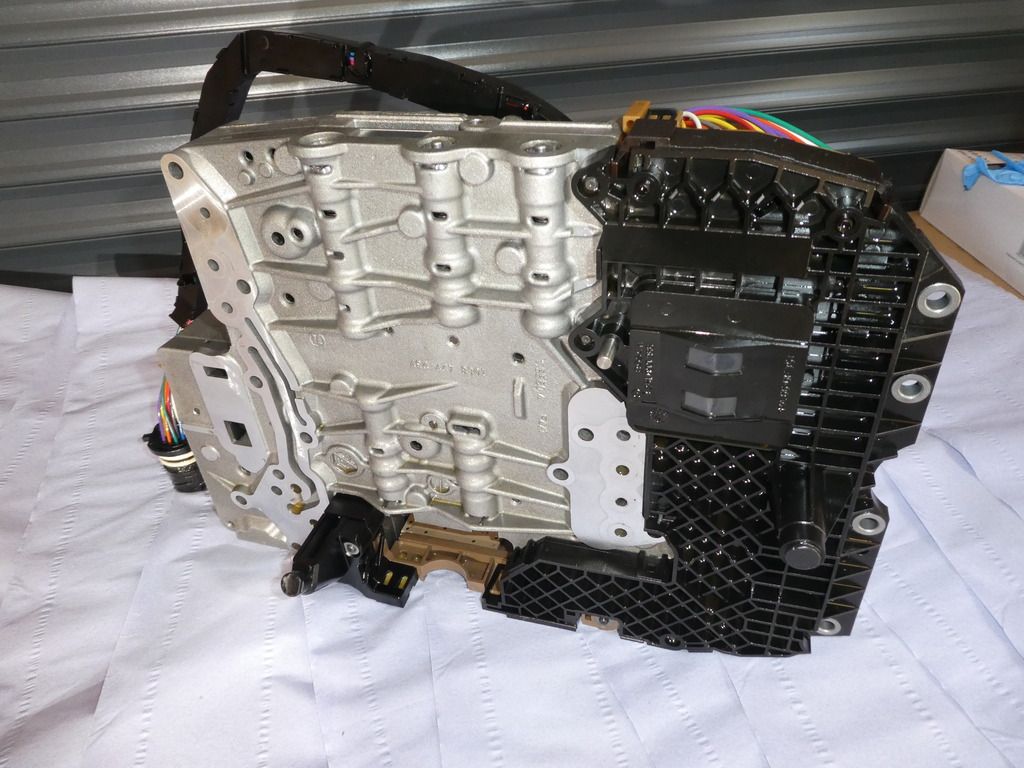
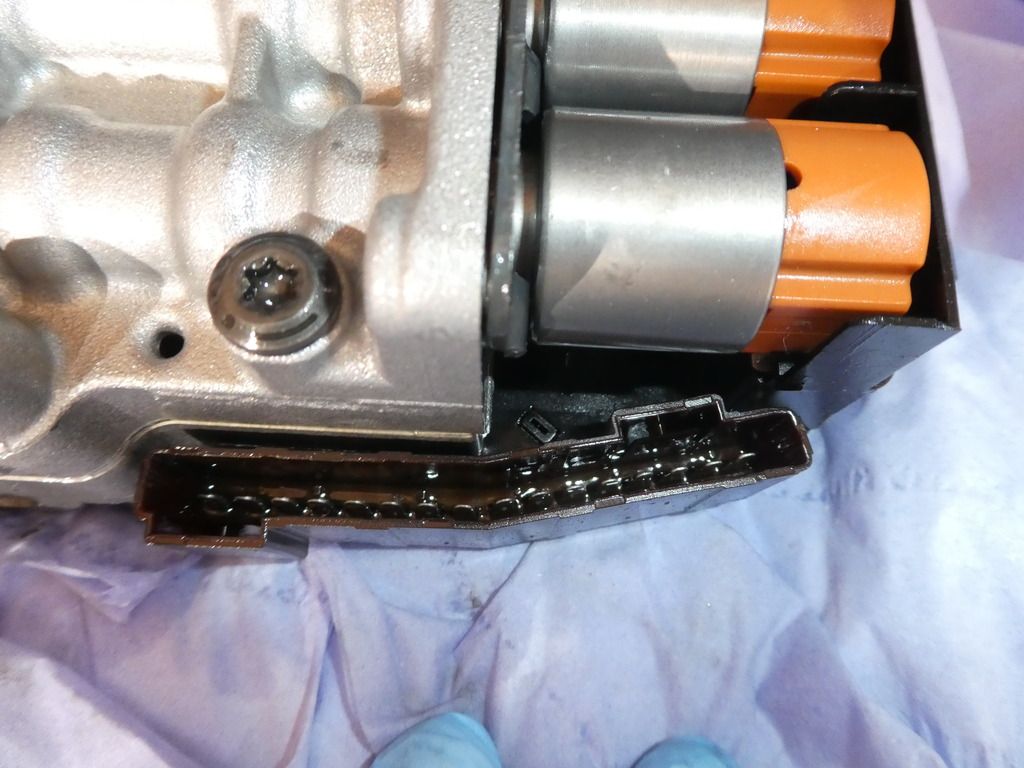
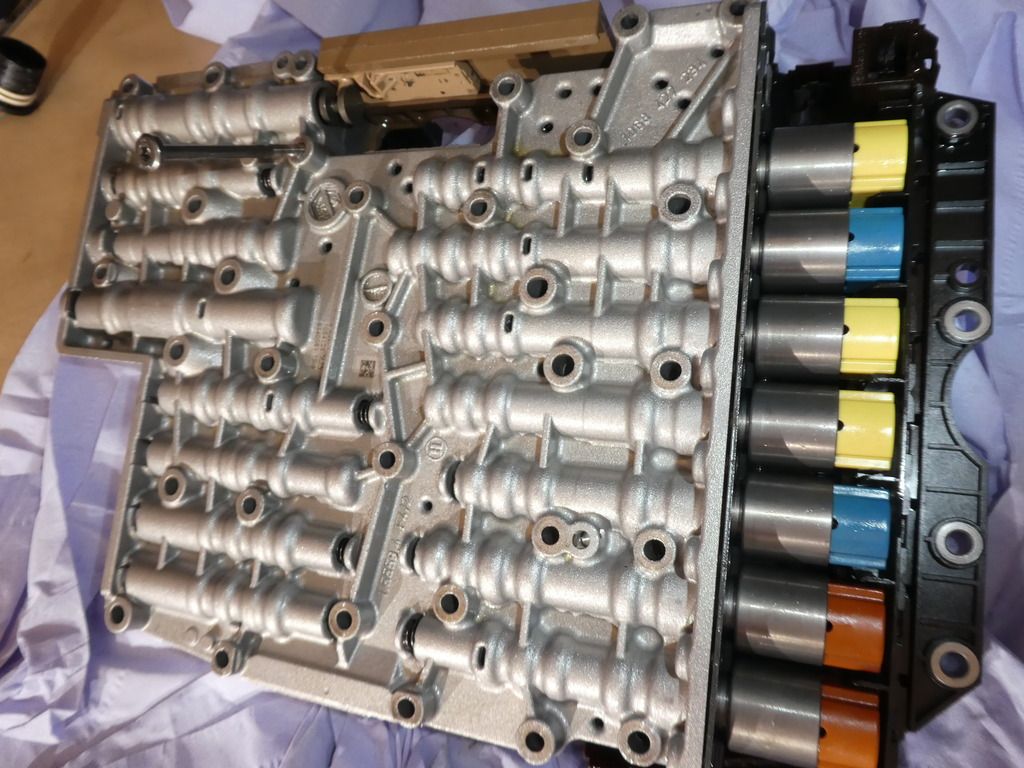
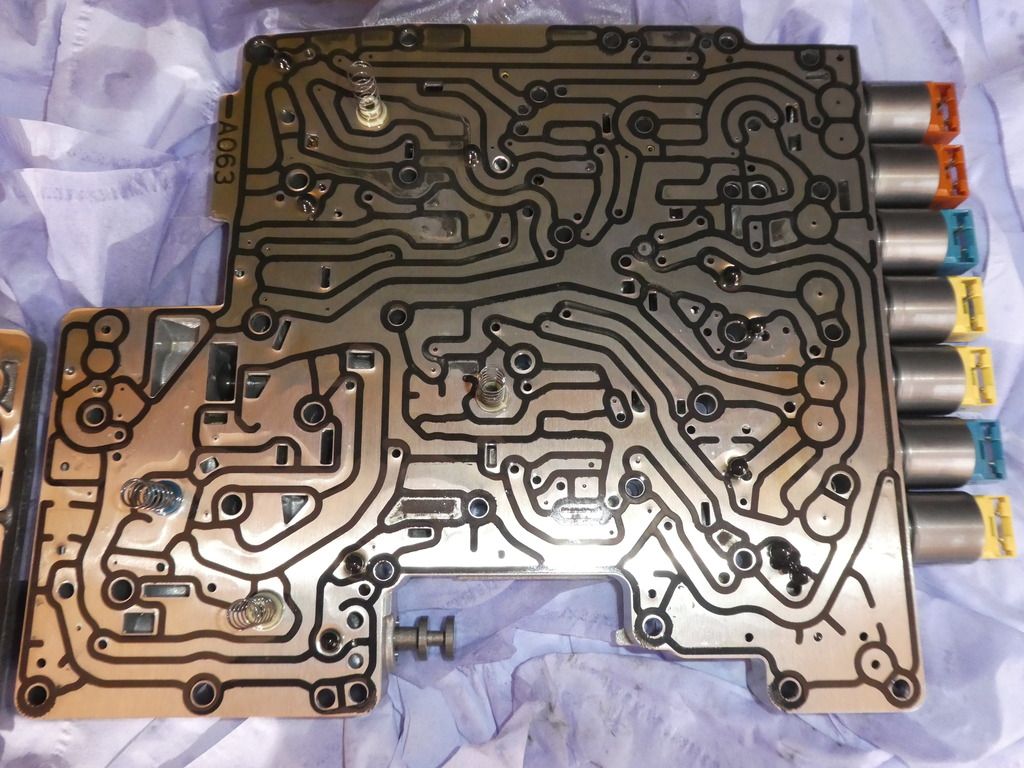
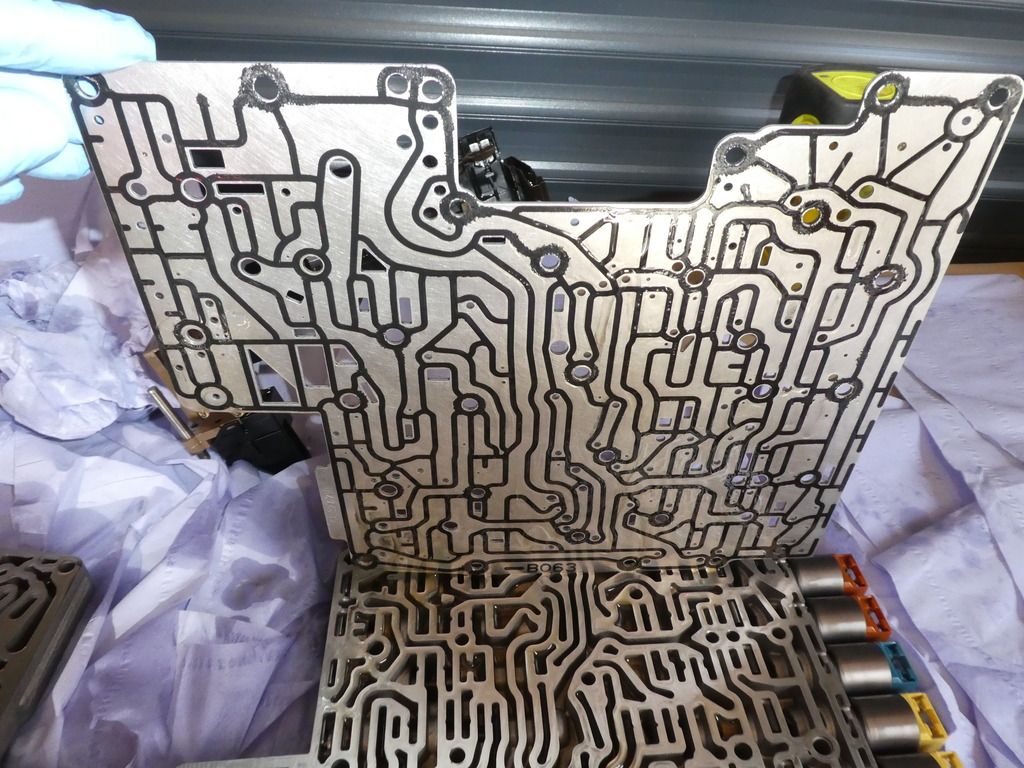
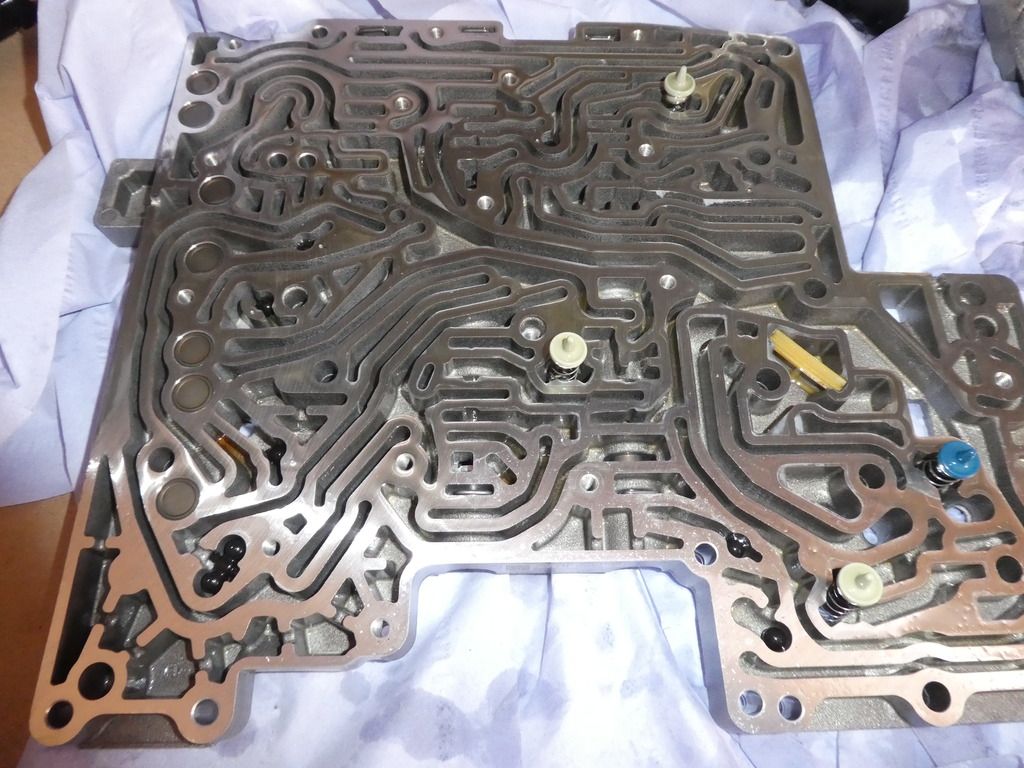
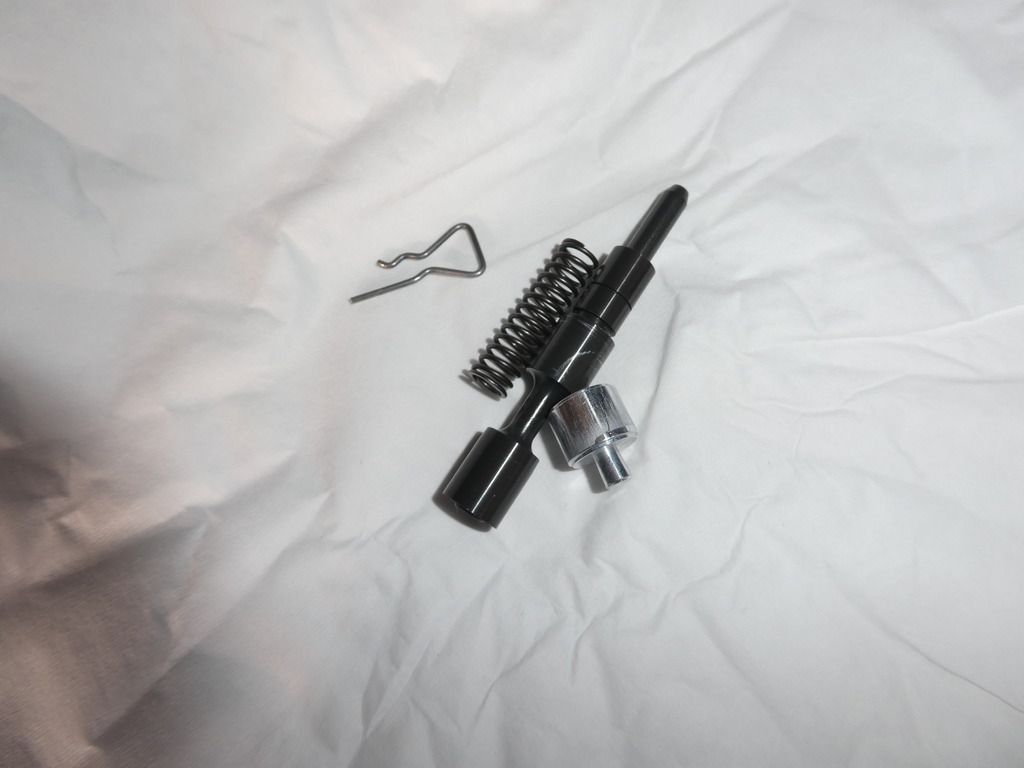
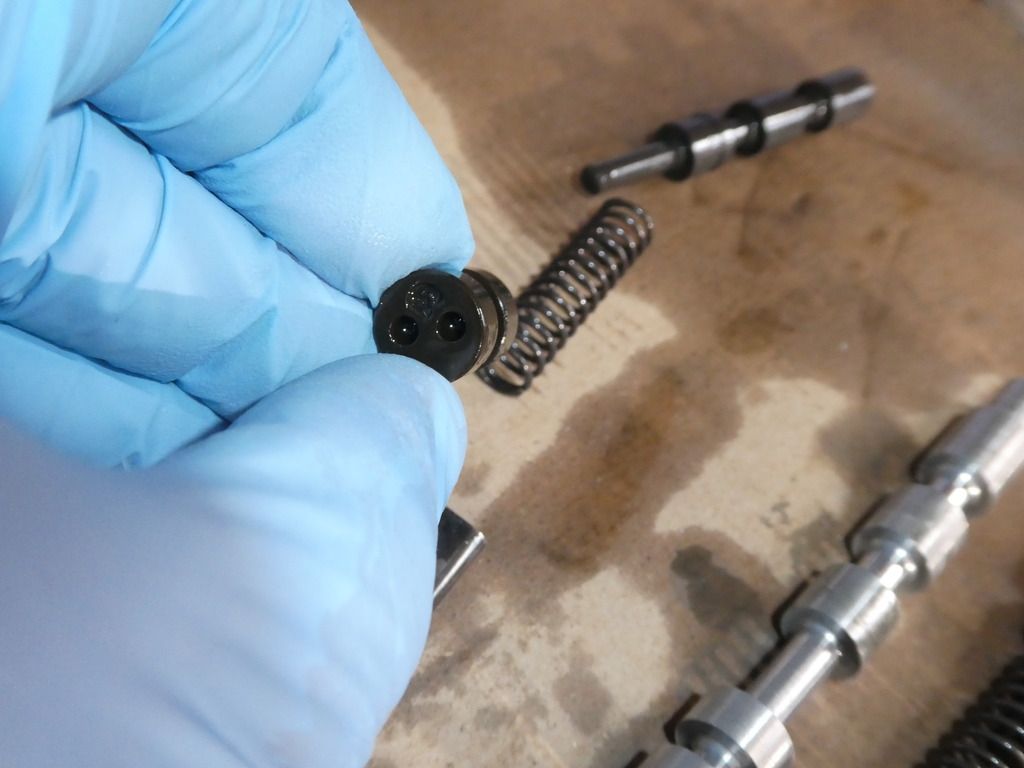
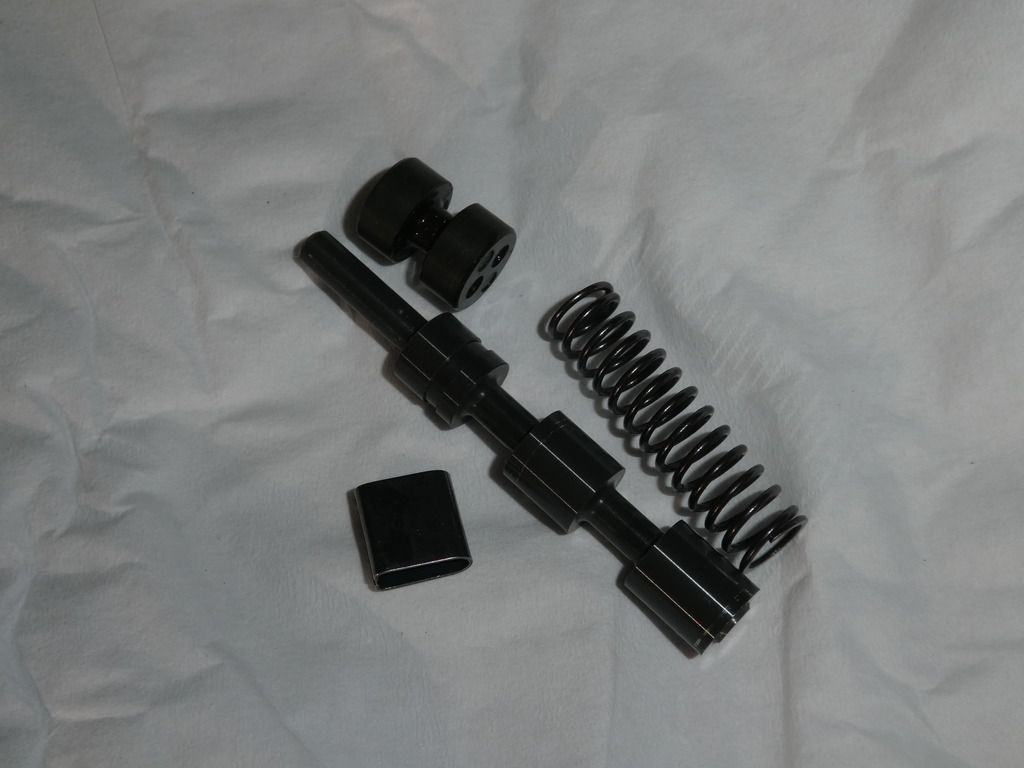
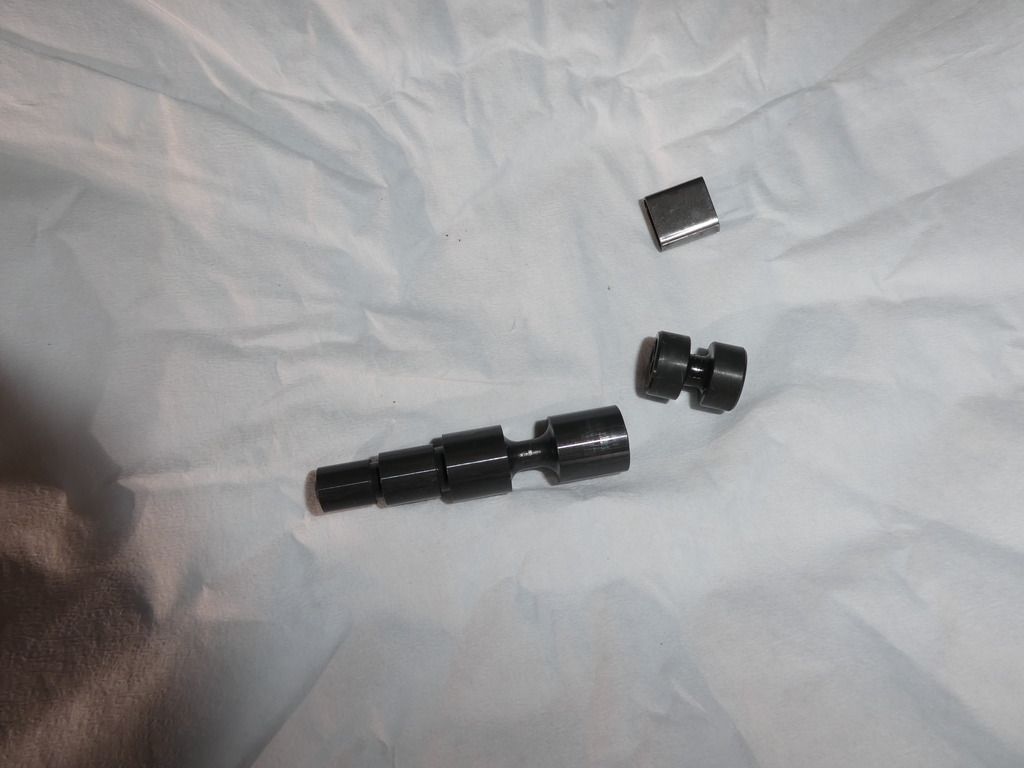
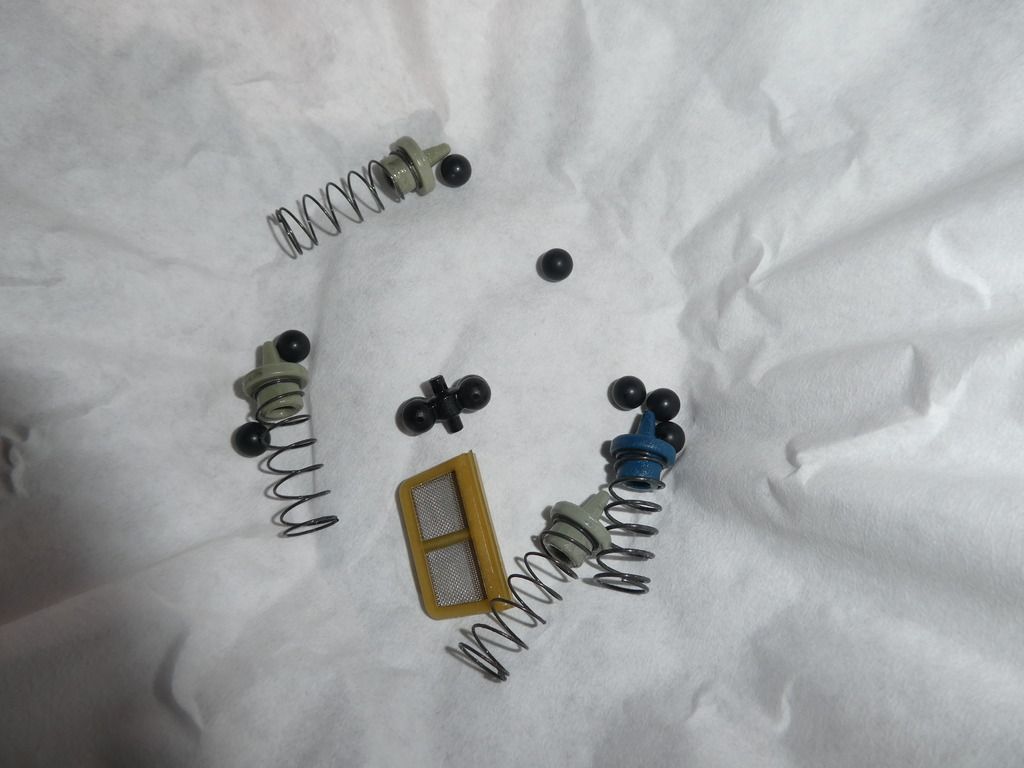
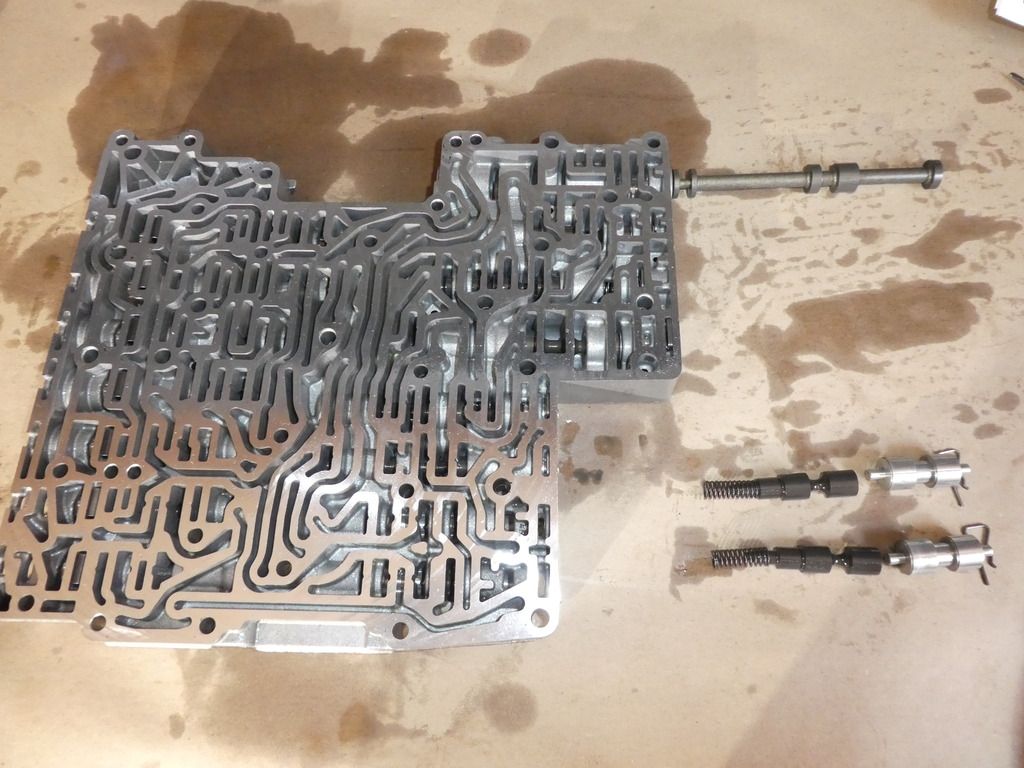
Time to get the valve spools out so that we can inspect the spool faces and condition of the bores
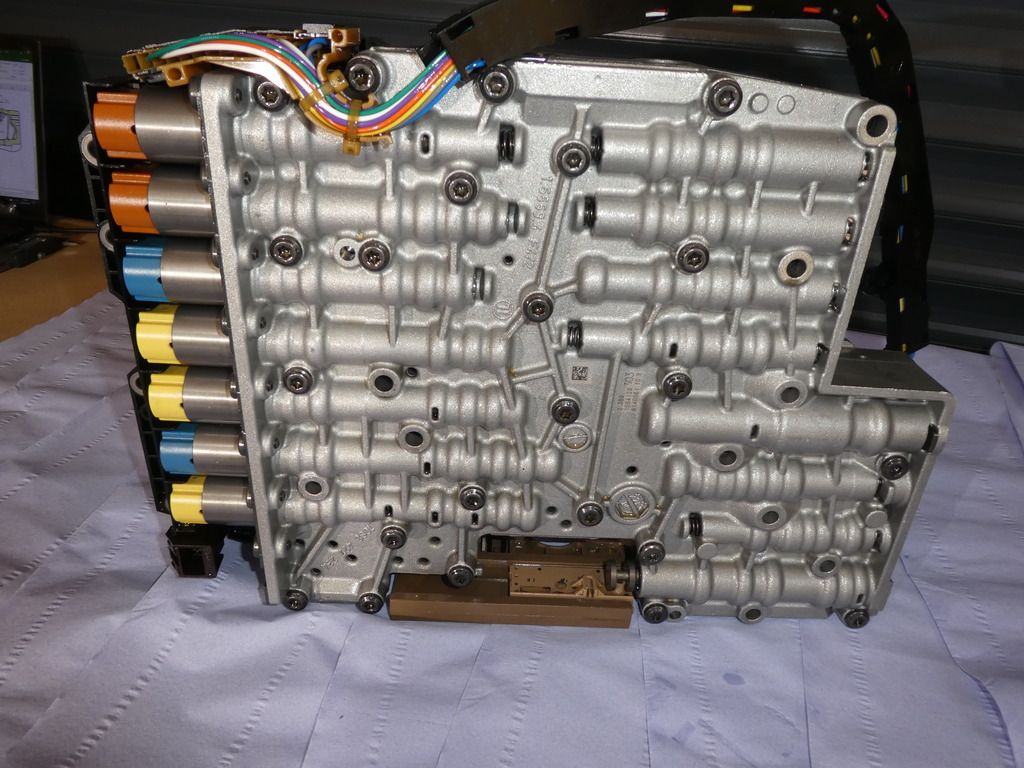
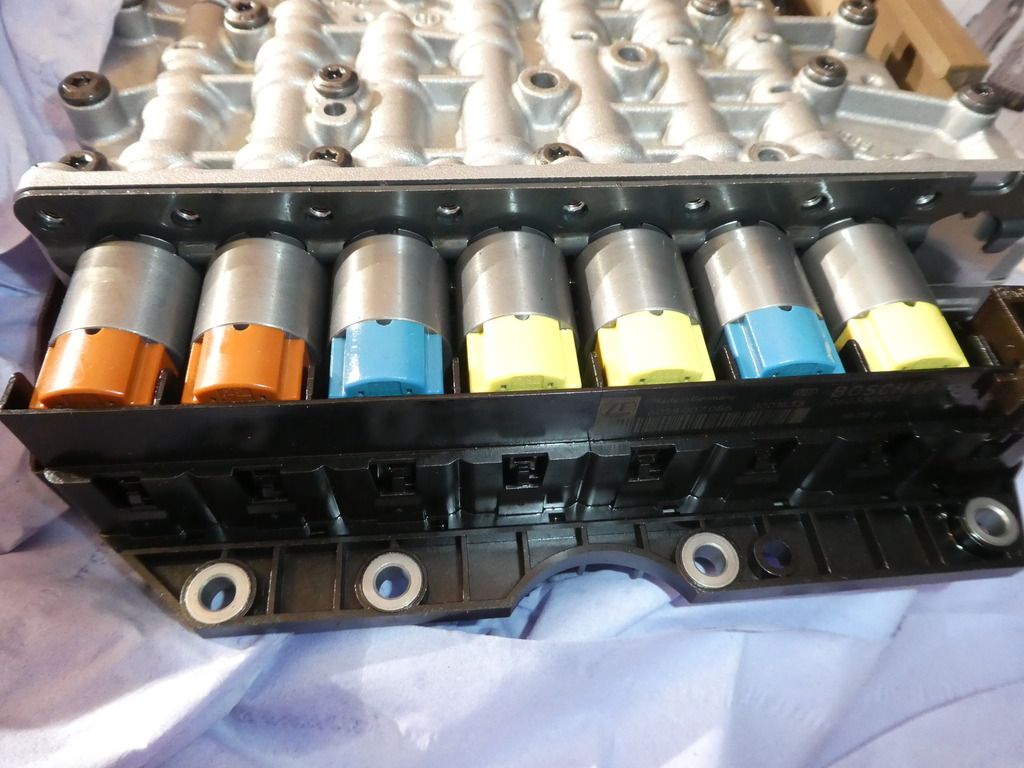
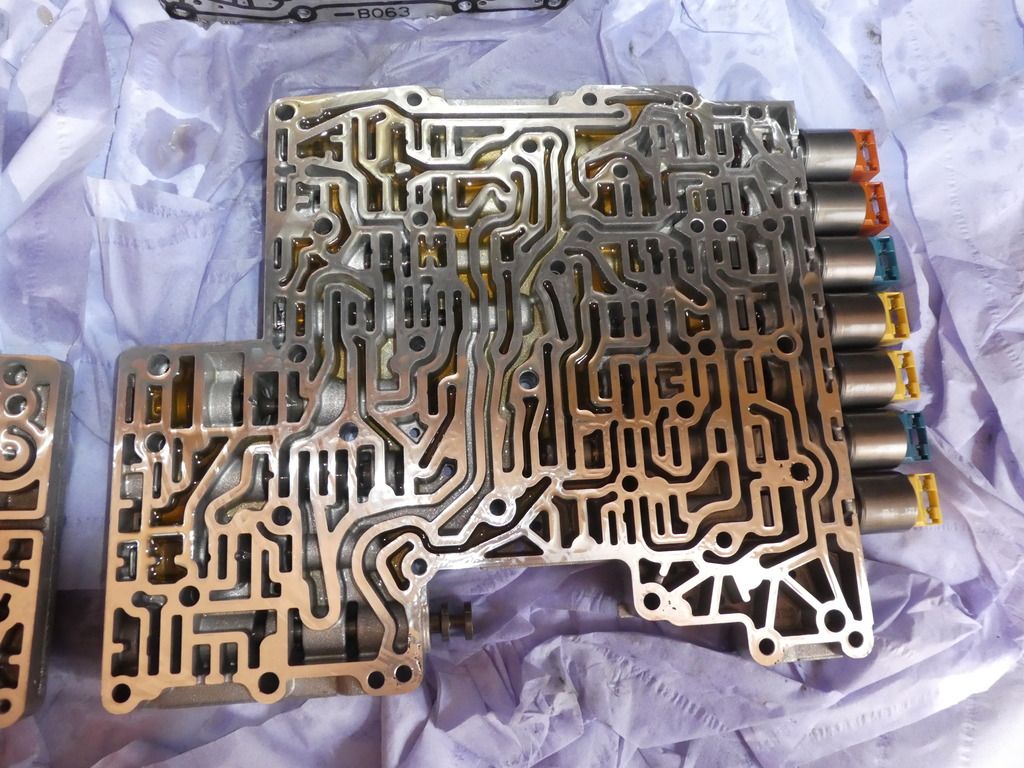
Starting with the loose Manual select valve
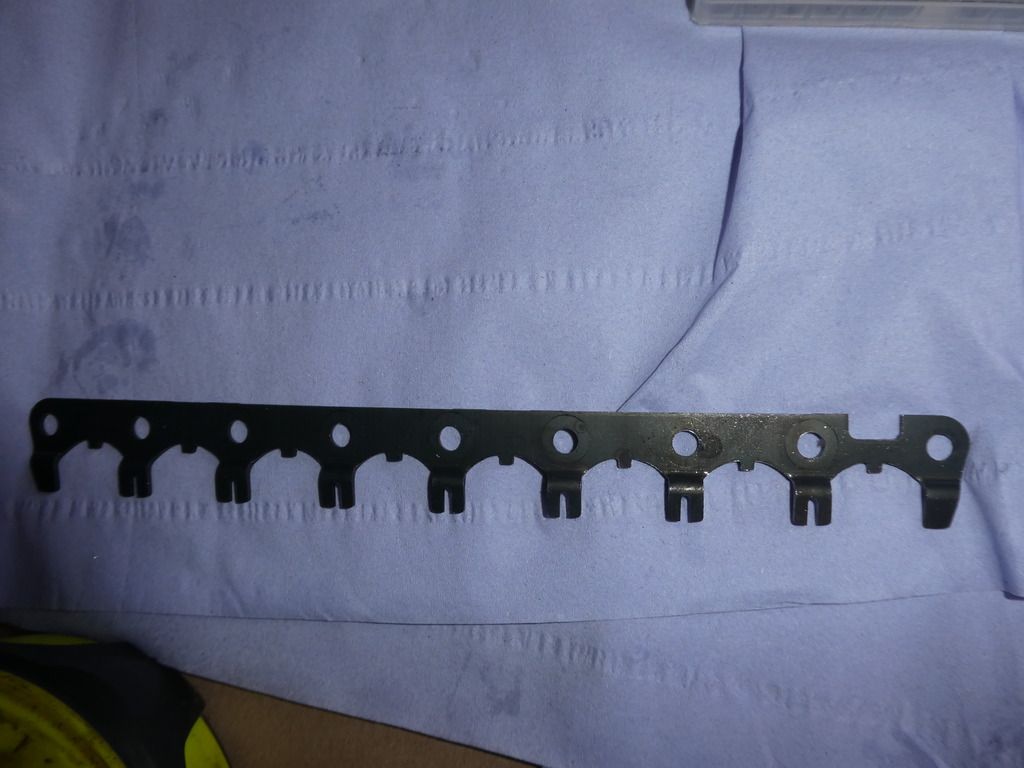
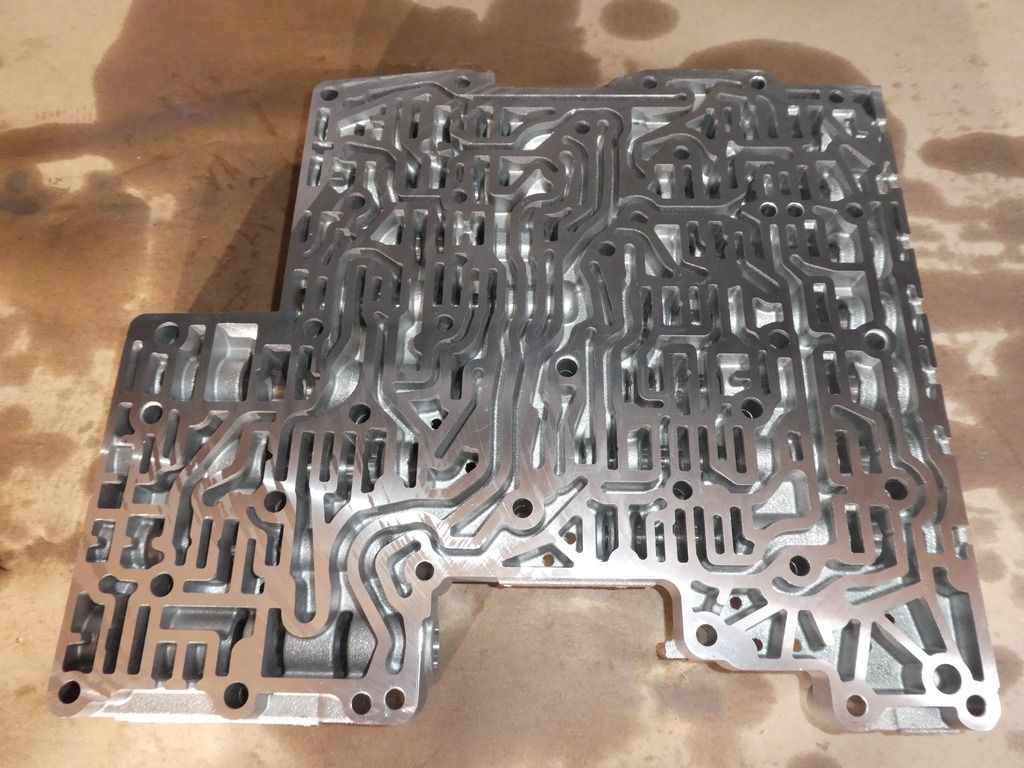
The remaining valves all have a retainer for the springs to act against
Image

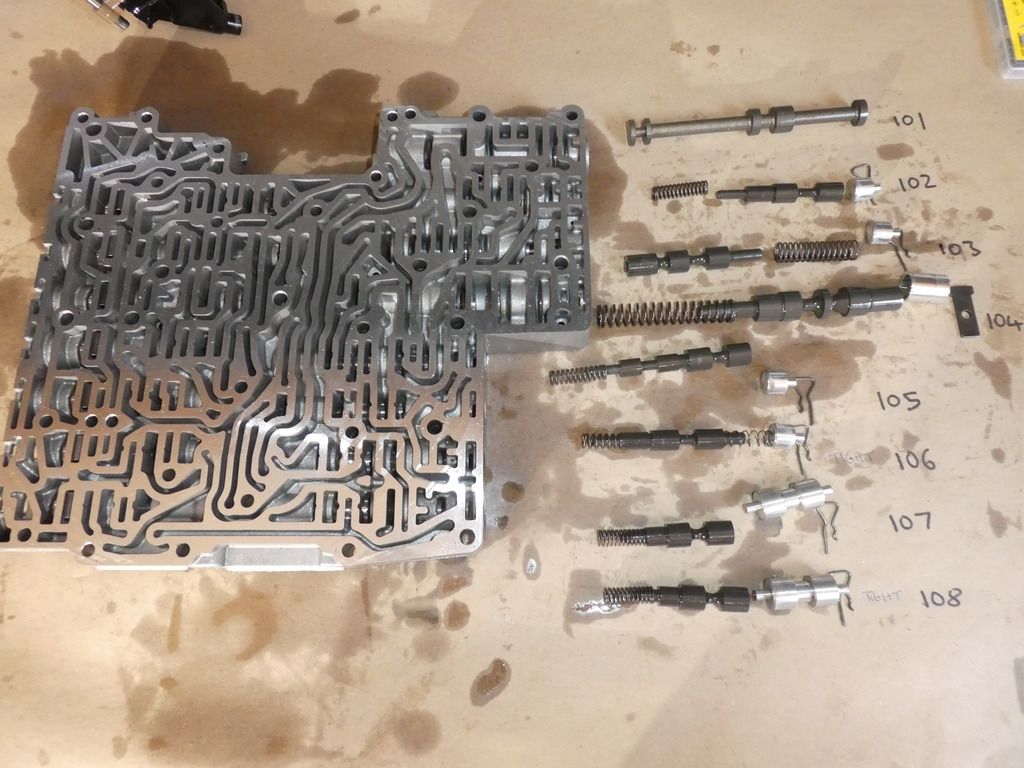
Obviously its critical you do not mix the spool components amongst these or their insertion sequence
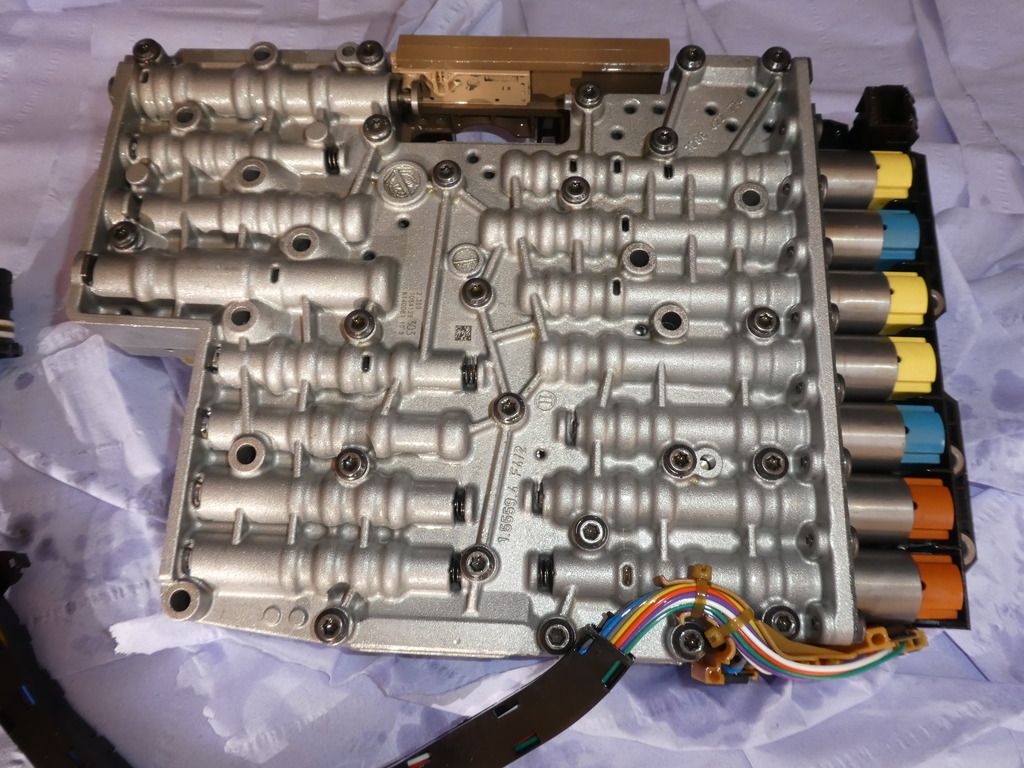
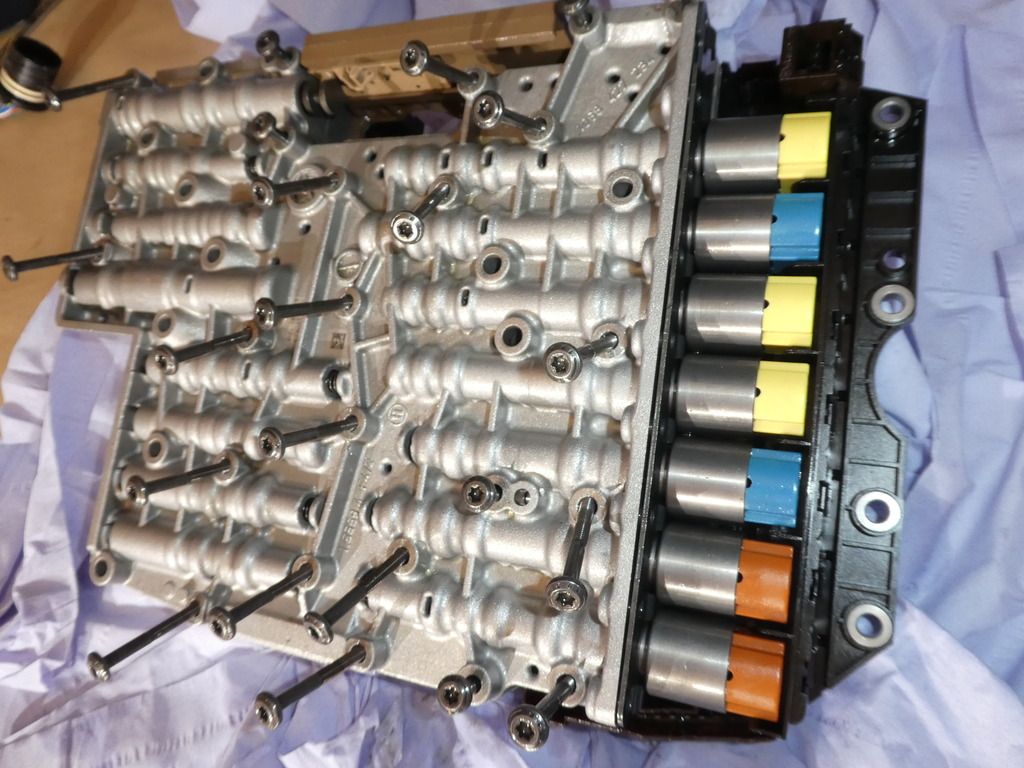
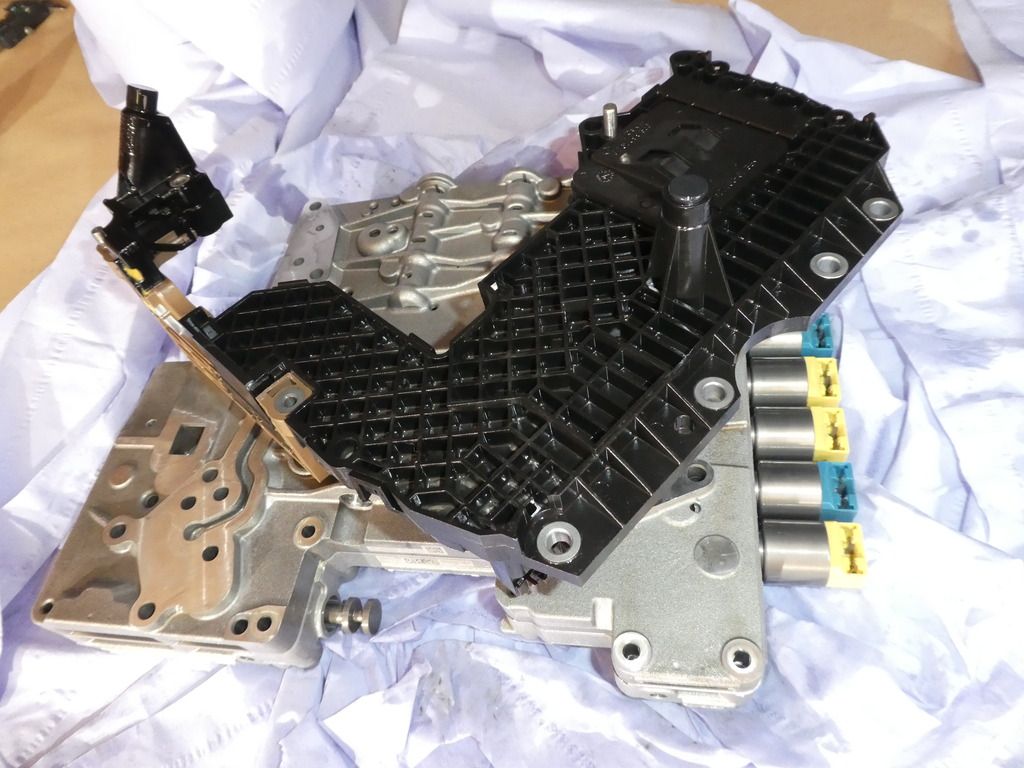
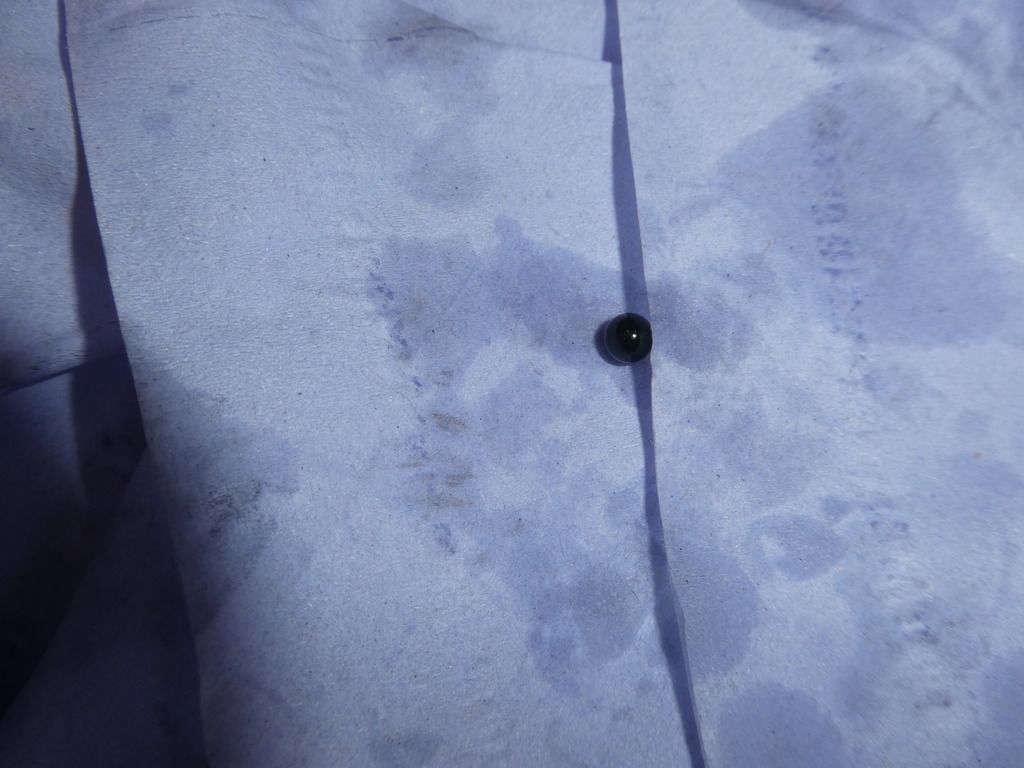
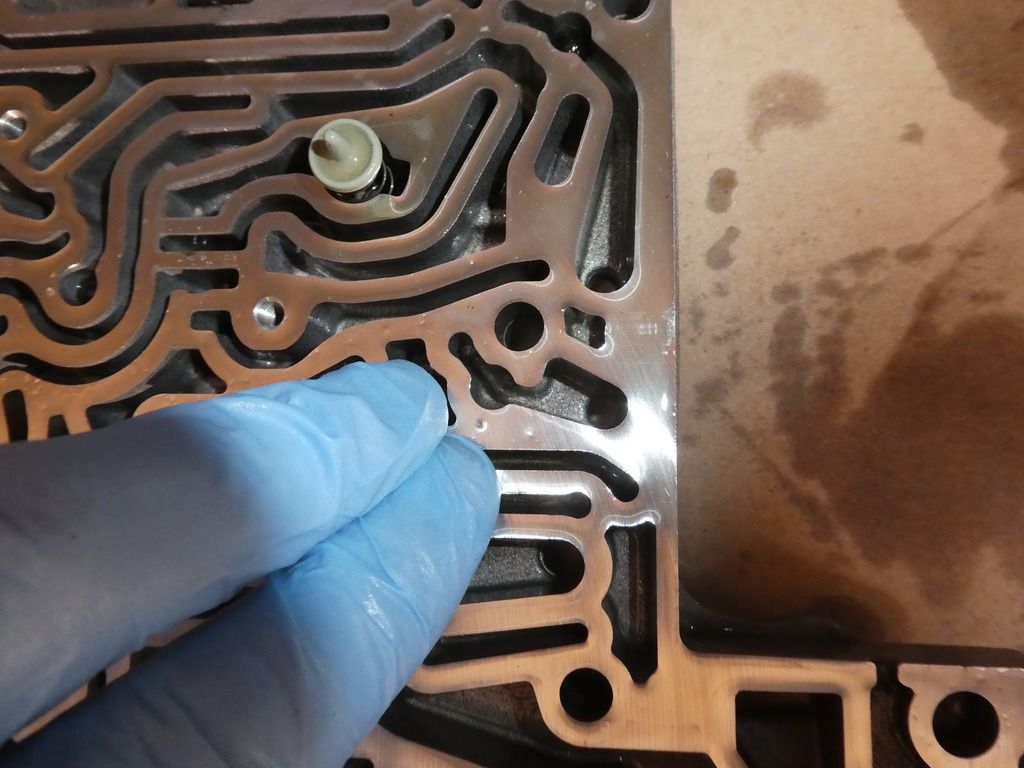
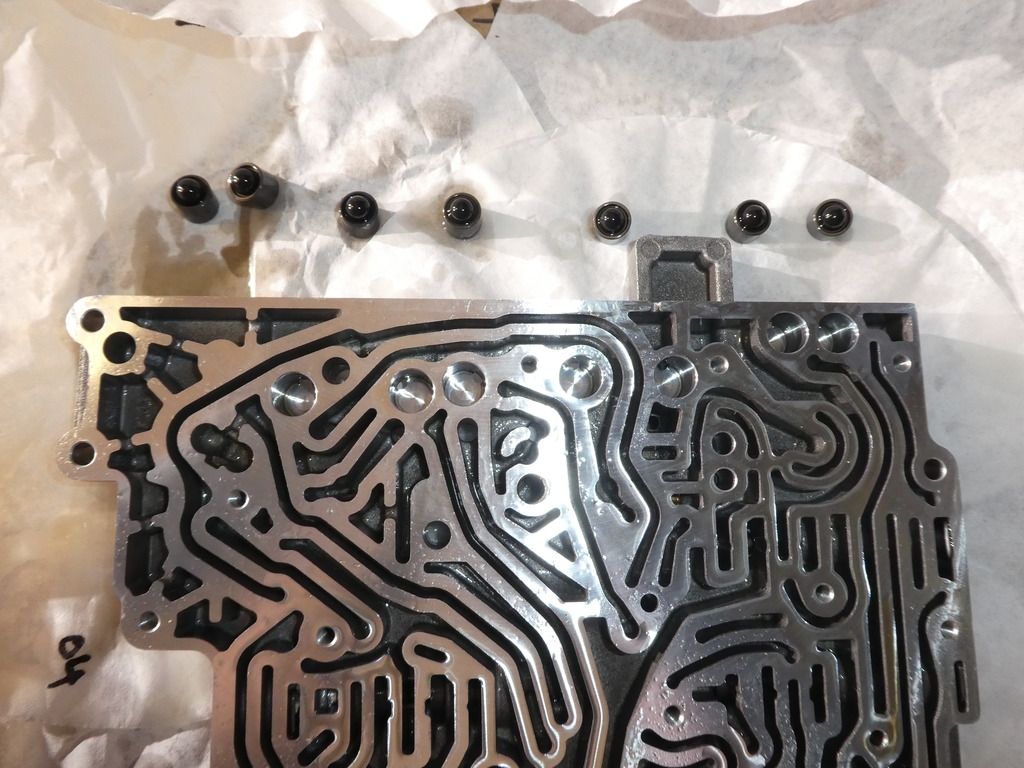
In general the spools are a close tolerance fit and will not fall out, even with a persuasive tap on the body; I used a fine pick to help them out when doing this be careful not to scratch the spool faces, use the pick on the inner diameters of the spools
Image

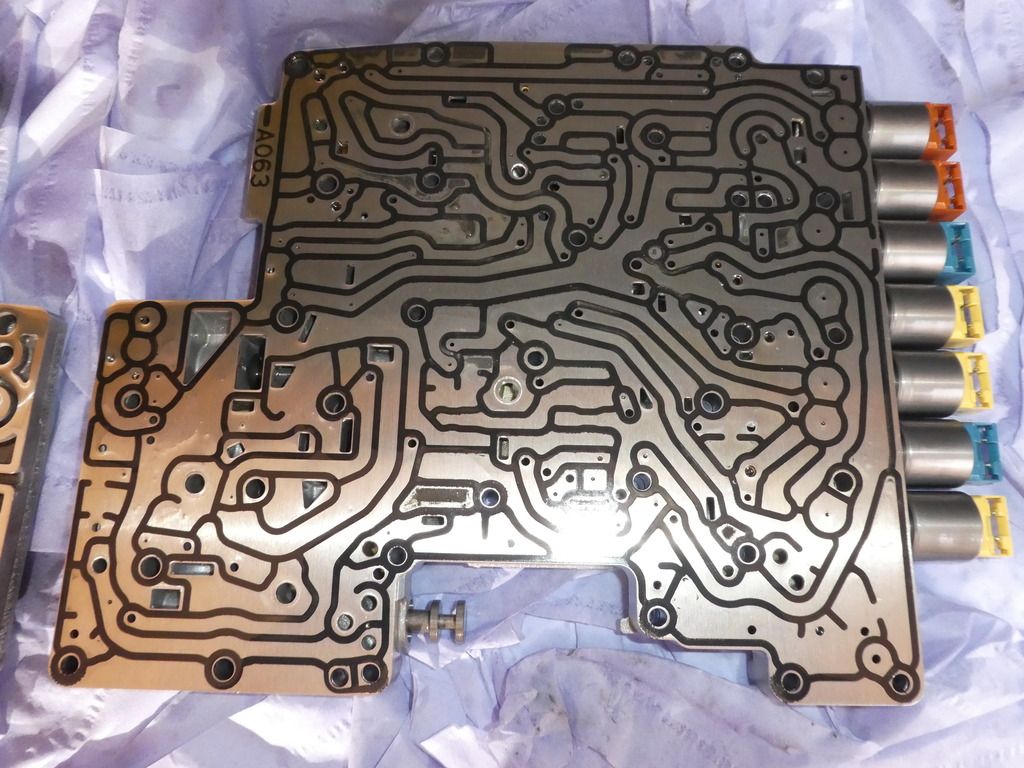
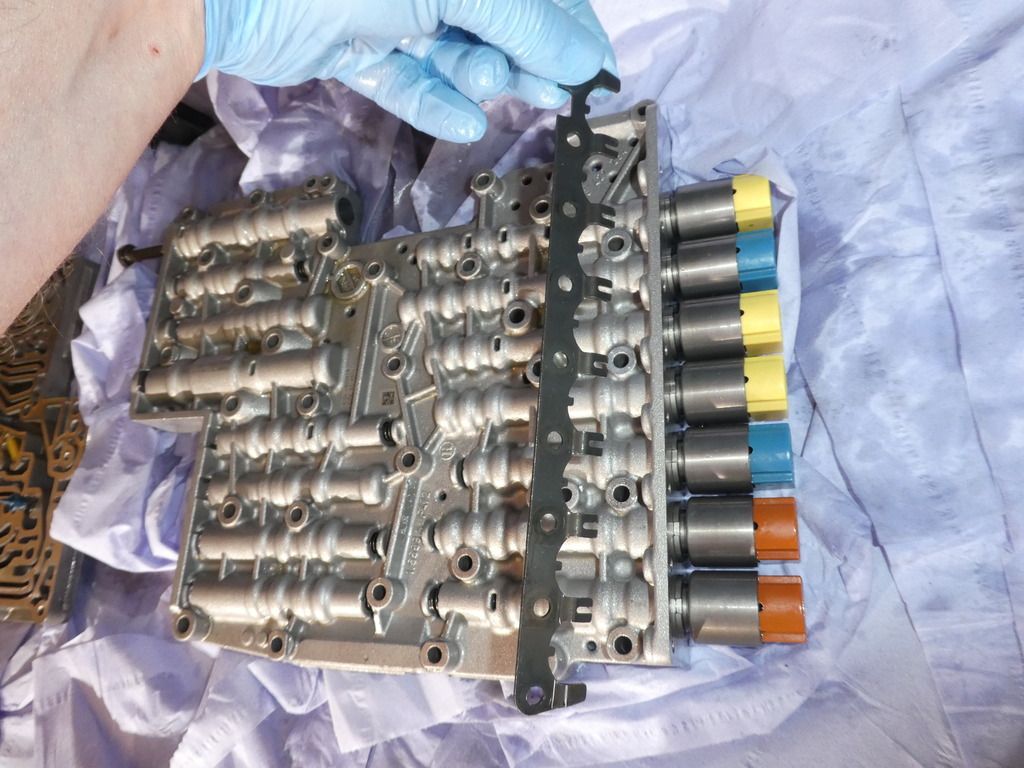
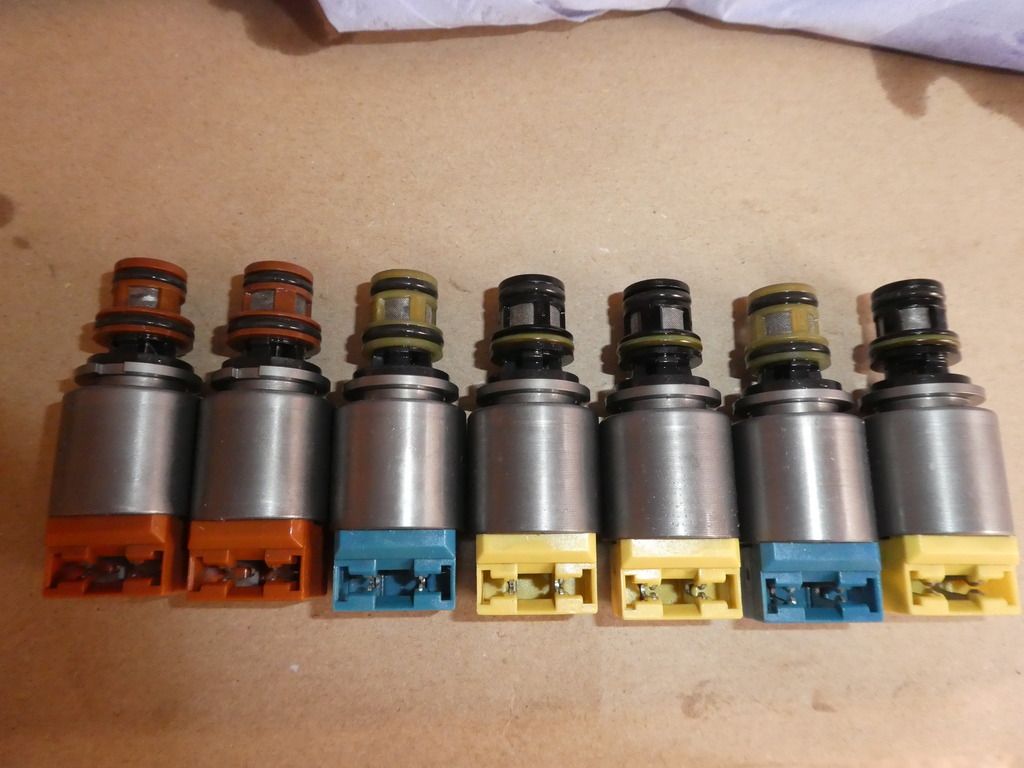
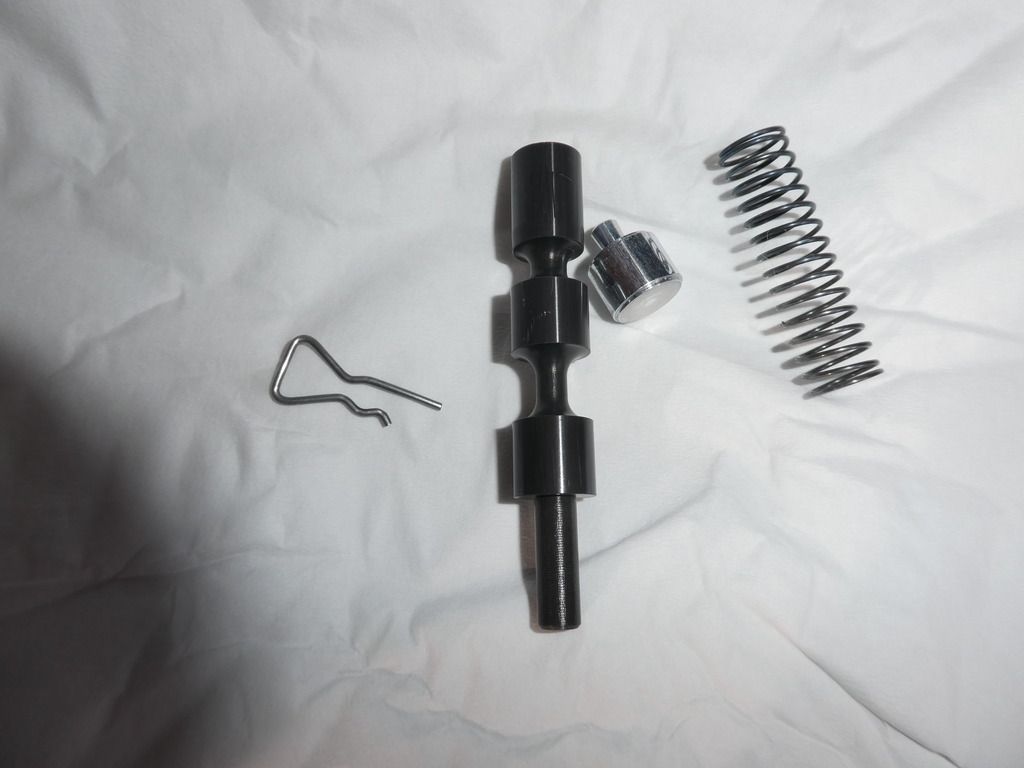
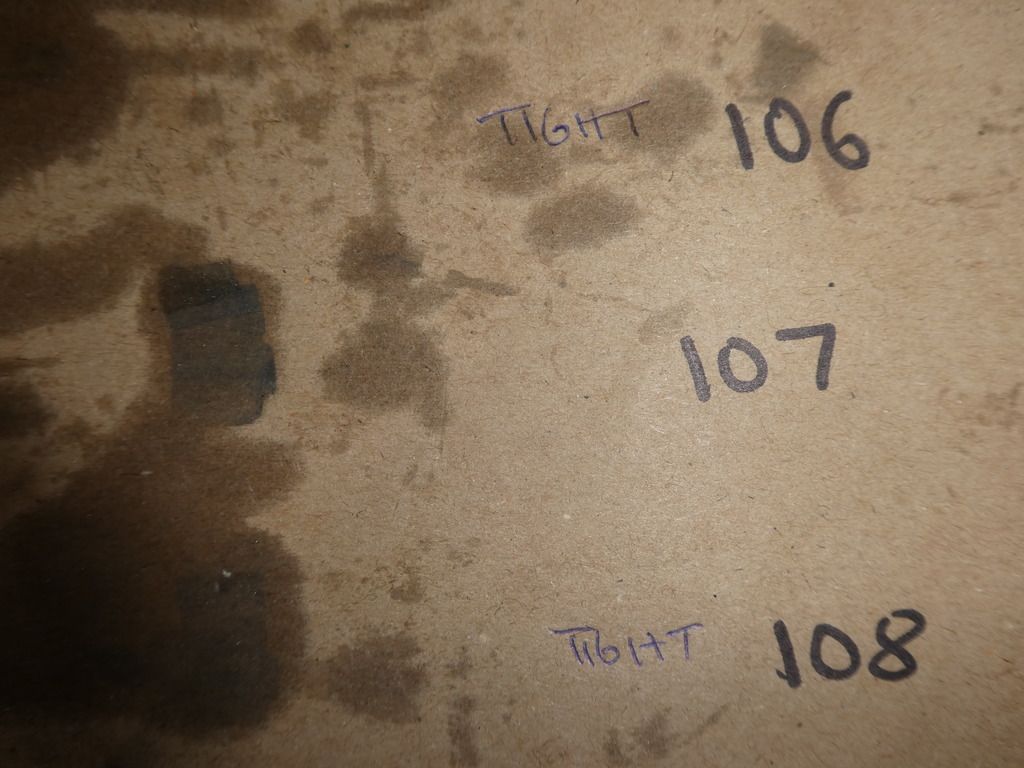
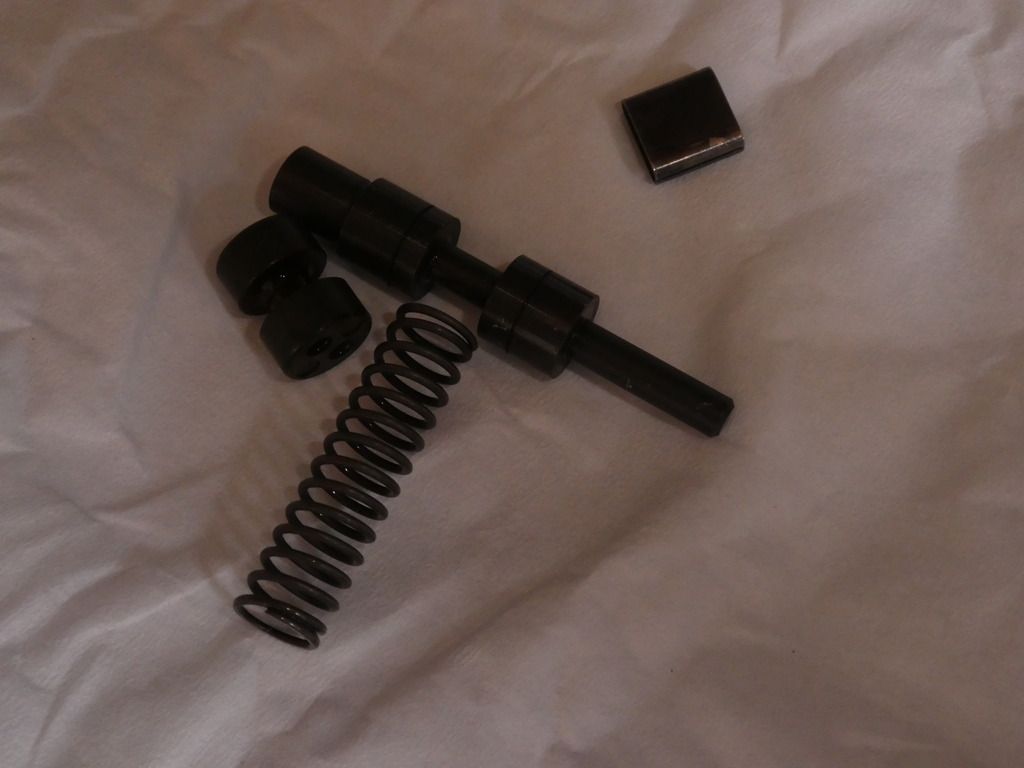
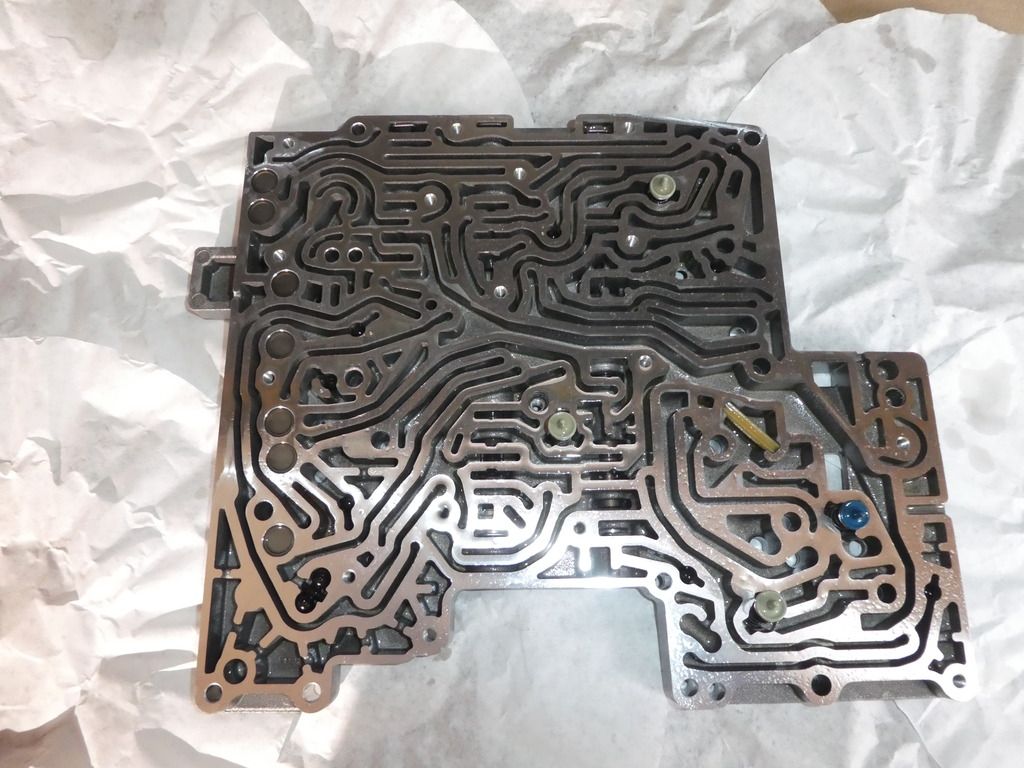
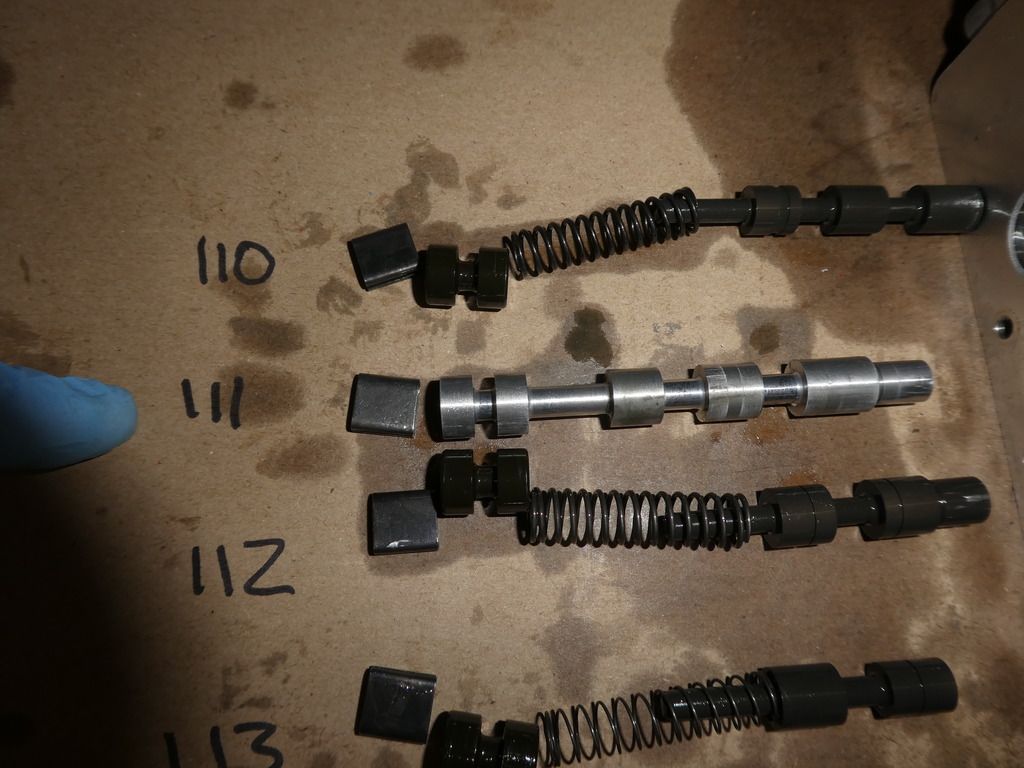
I numbered them as I withdrew them in the same coded manner as the Sonnax numbering system that I had the refurb kit from (in case any parts failed the vac test to follow)
Image

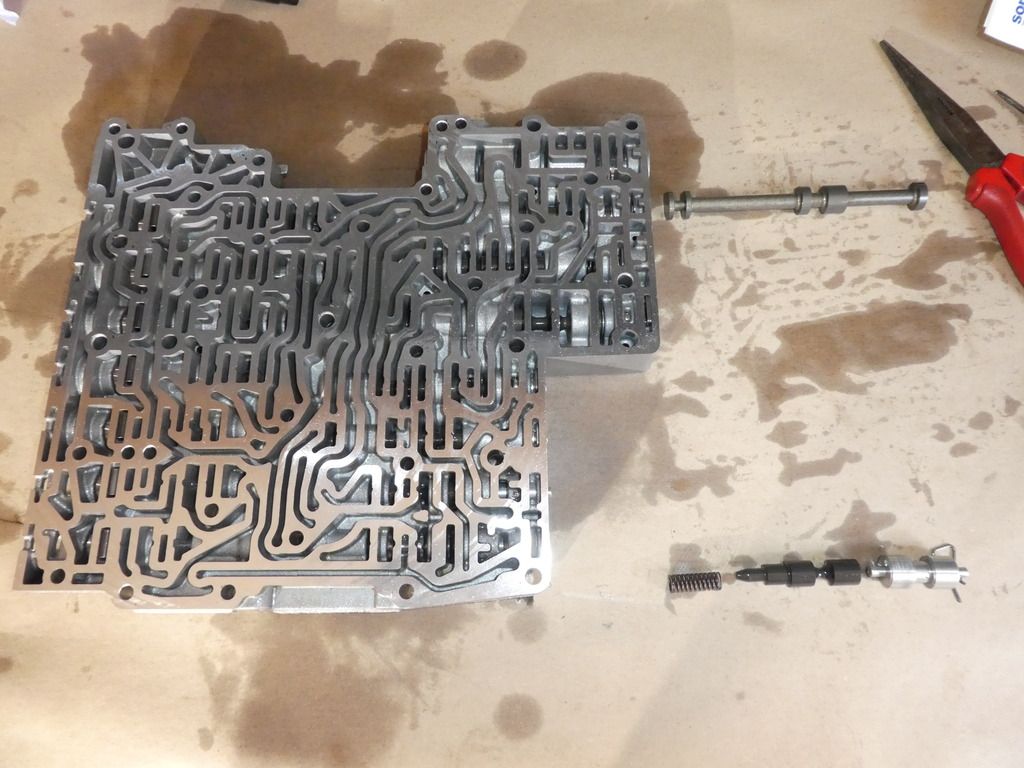
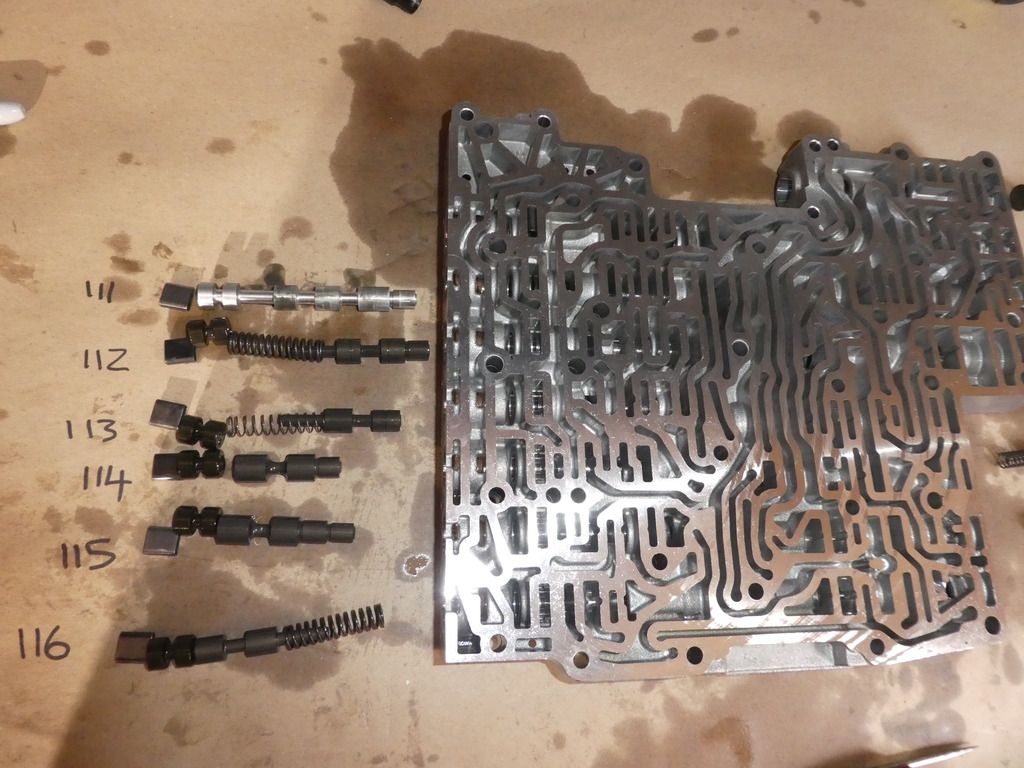
Ditto for the left side spools
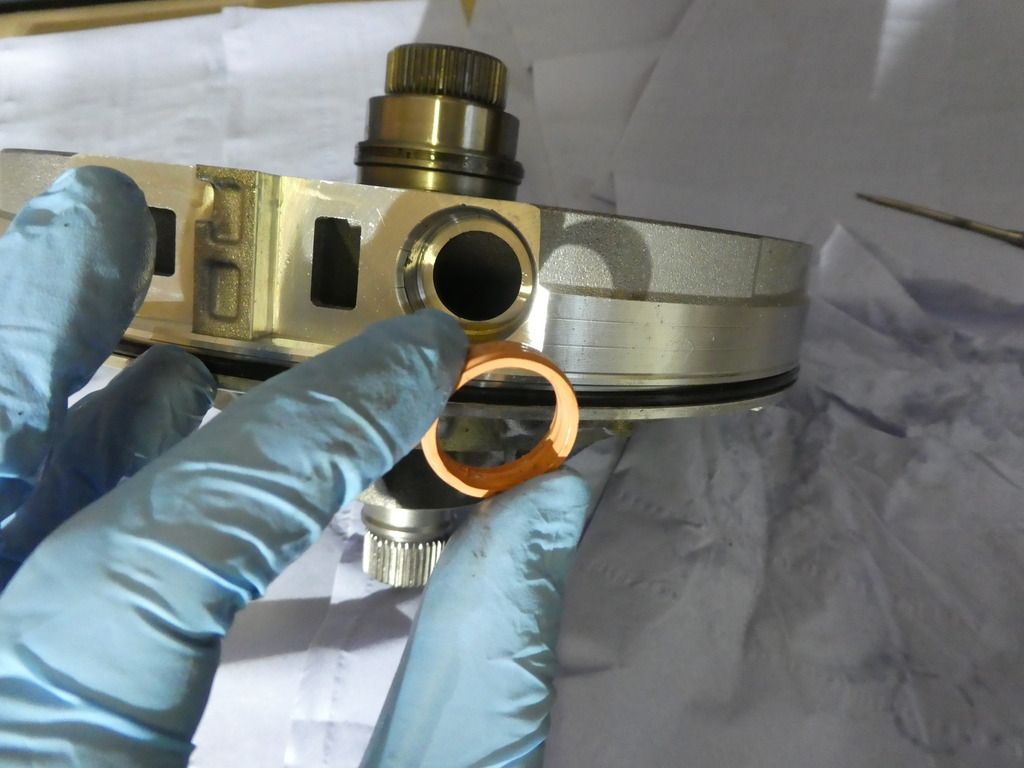
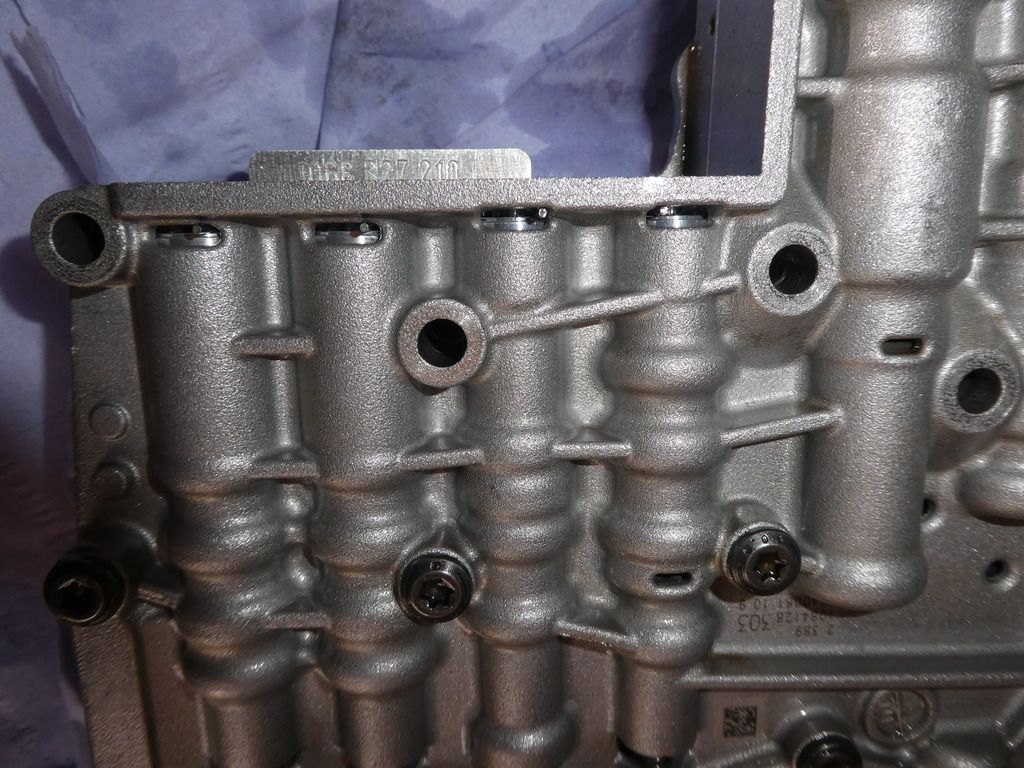
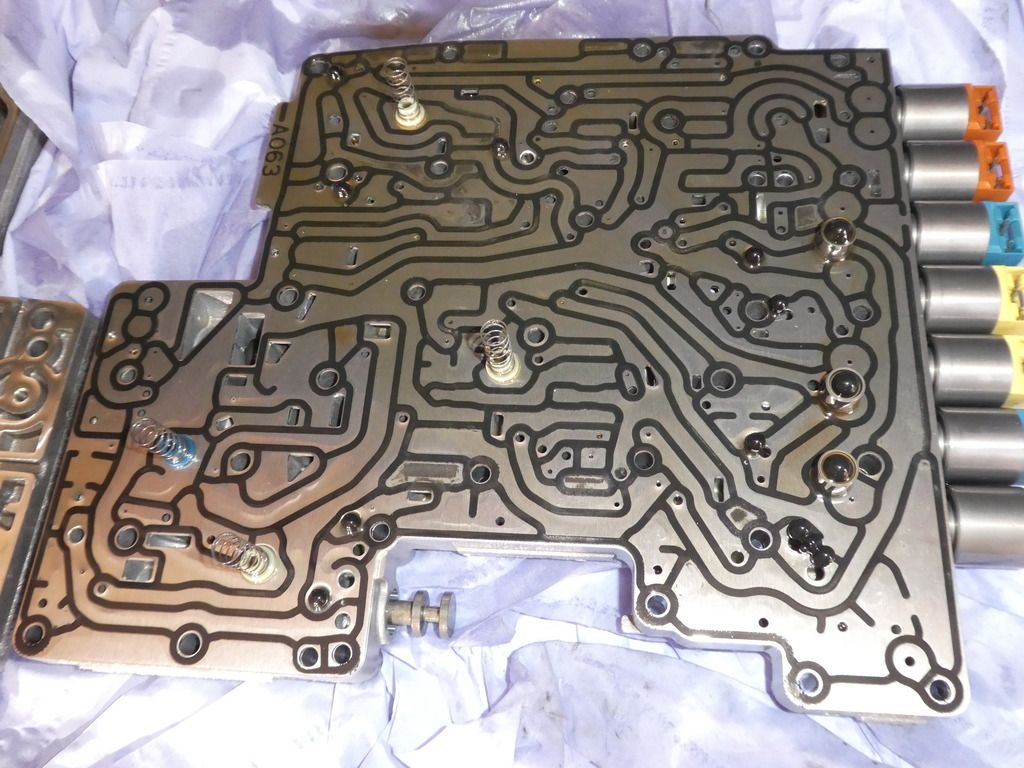
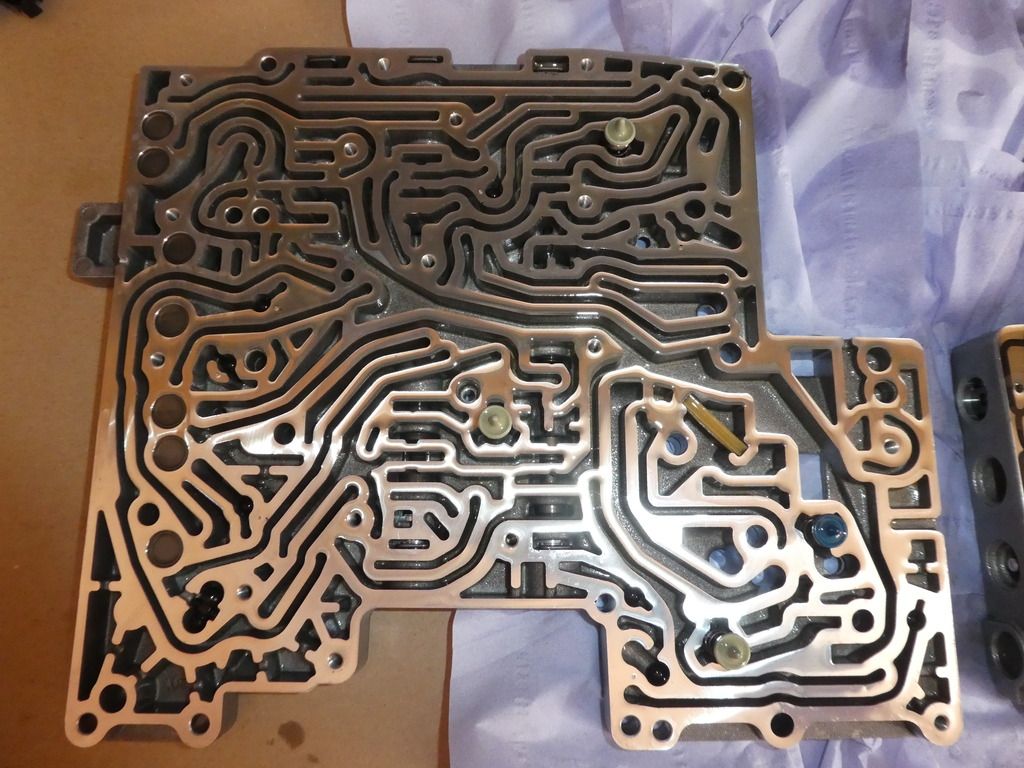
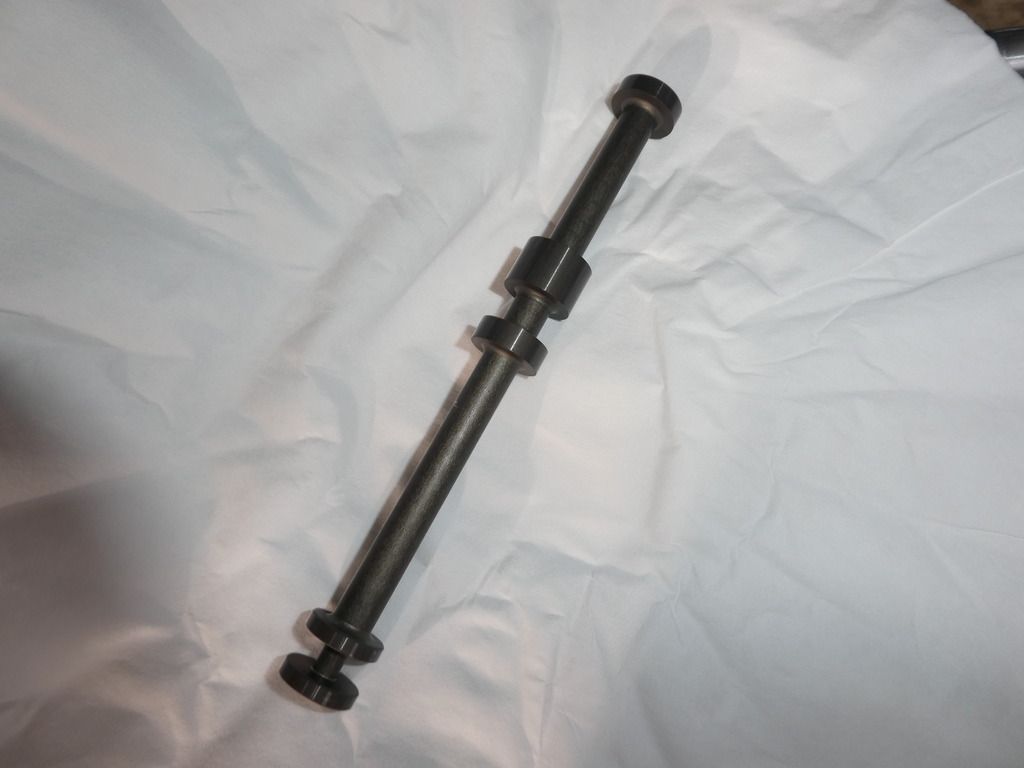
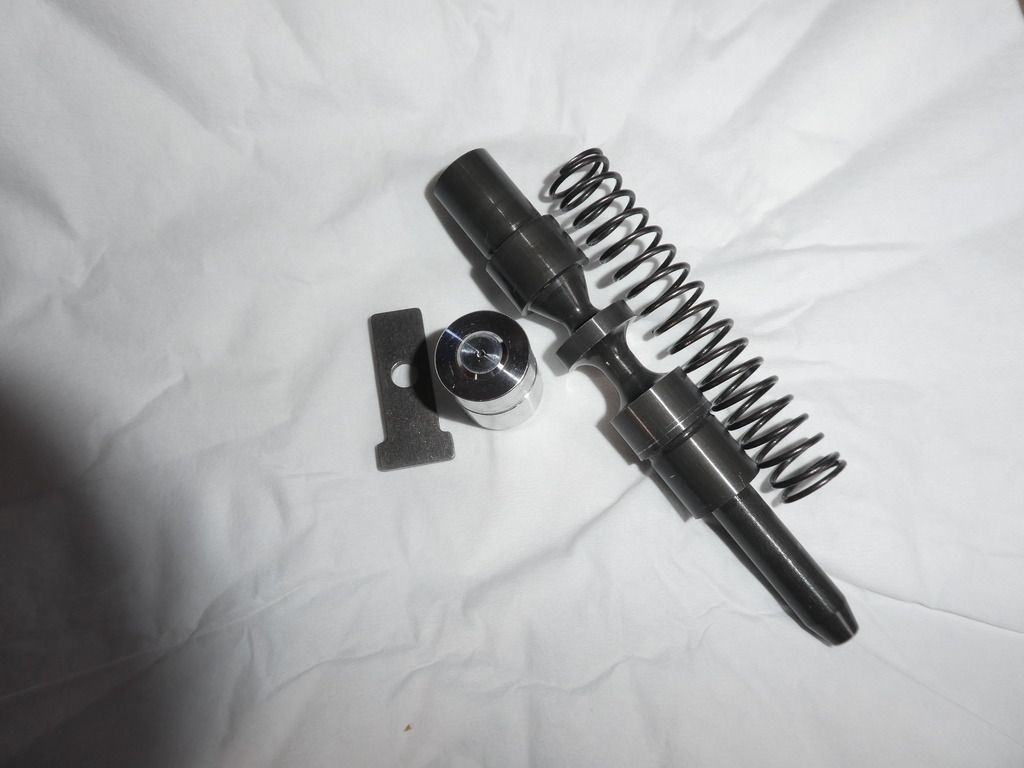
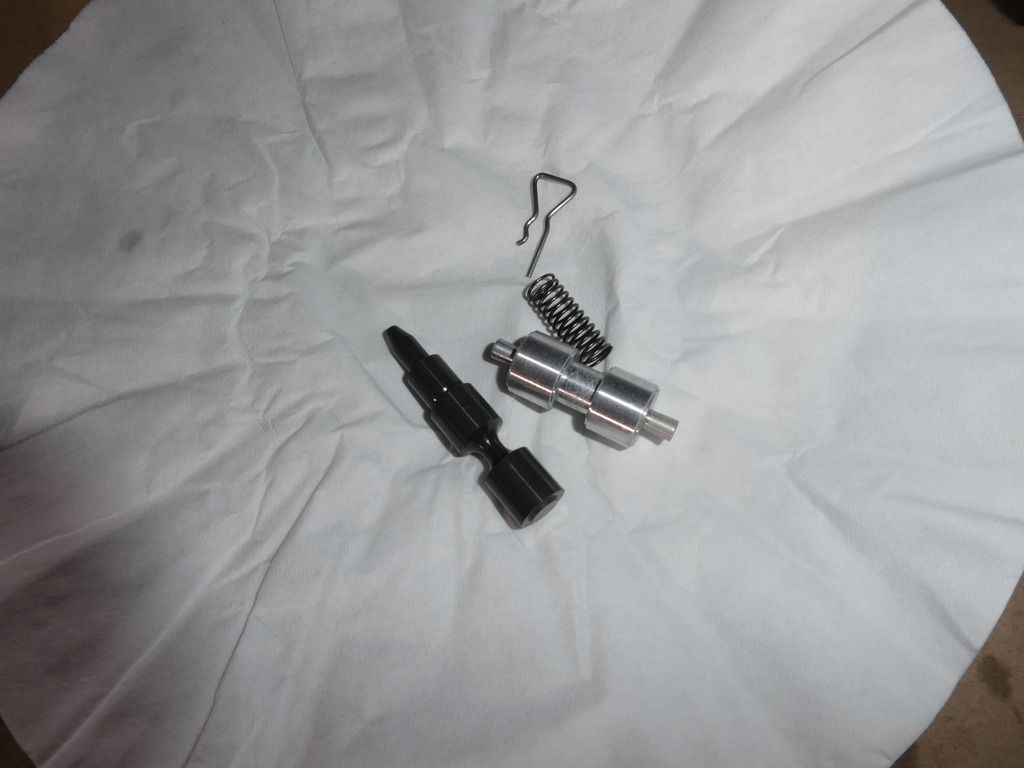
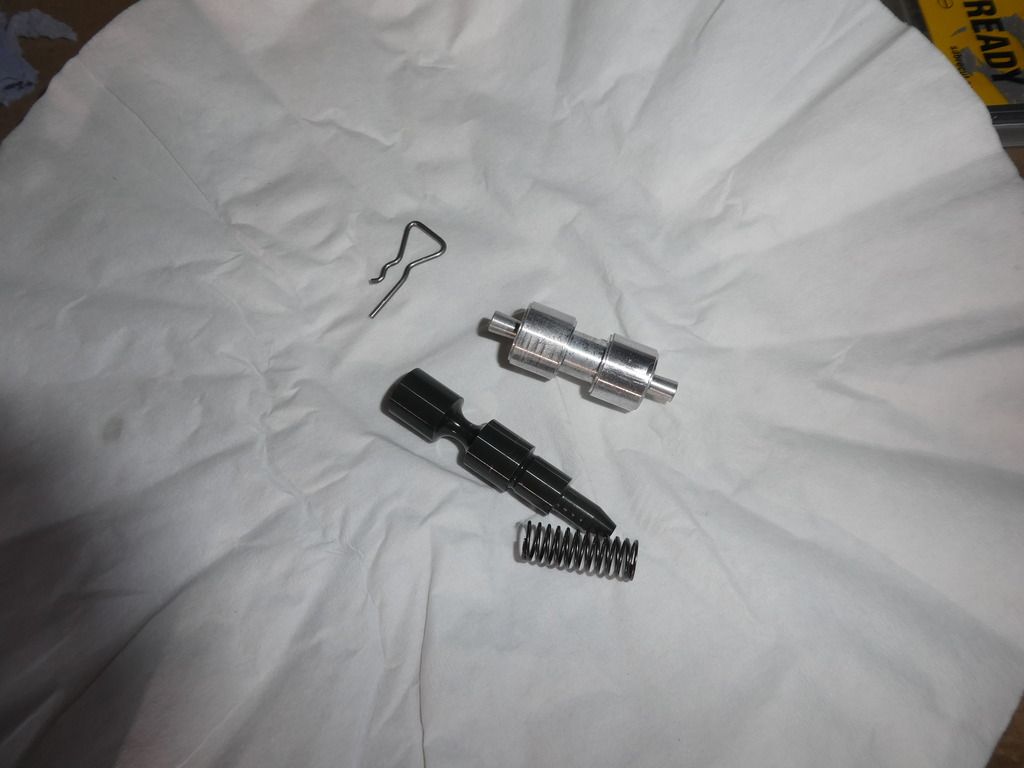
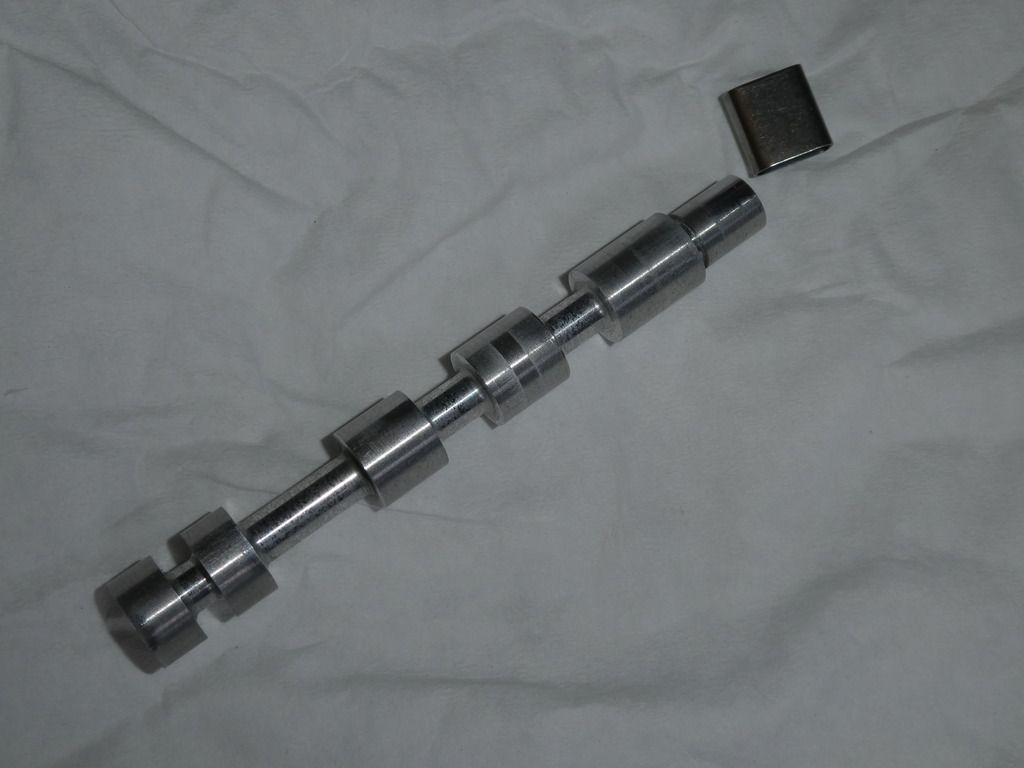
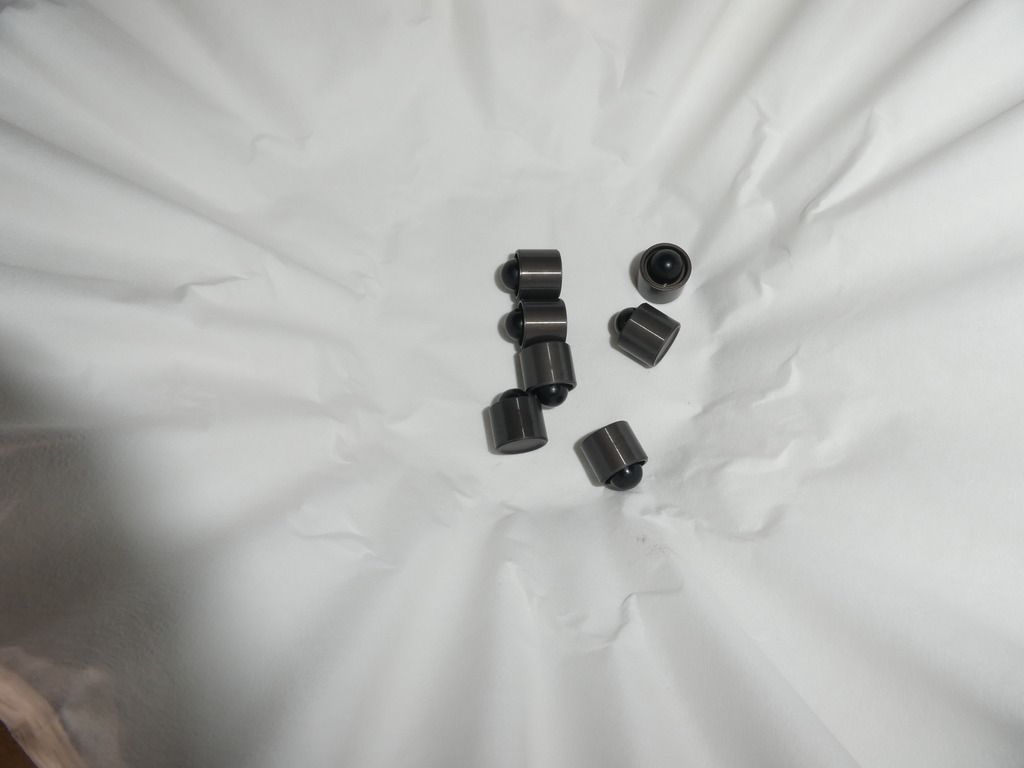
Note the alloy one piece assembly of 111; I have nothing to compare this to but given the material difference its suggestive this is an aftermarket part? Maybe someone who has split their valve body up can advise what they had for comparison...
(The function of spool 111 is 'Shift Valve 1' and the Sonnax data suggests it had a spring, I did enquire with Sonnax technical but they do not offer any aftermarket part for Shift Valve 1; and I find ZF technical support to be non-existent for us DIYers, they just never come back to any of my enquiries)
Image

Image
Image

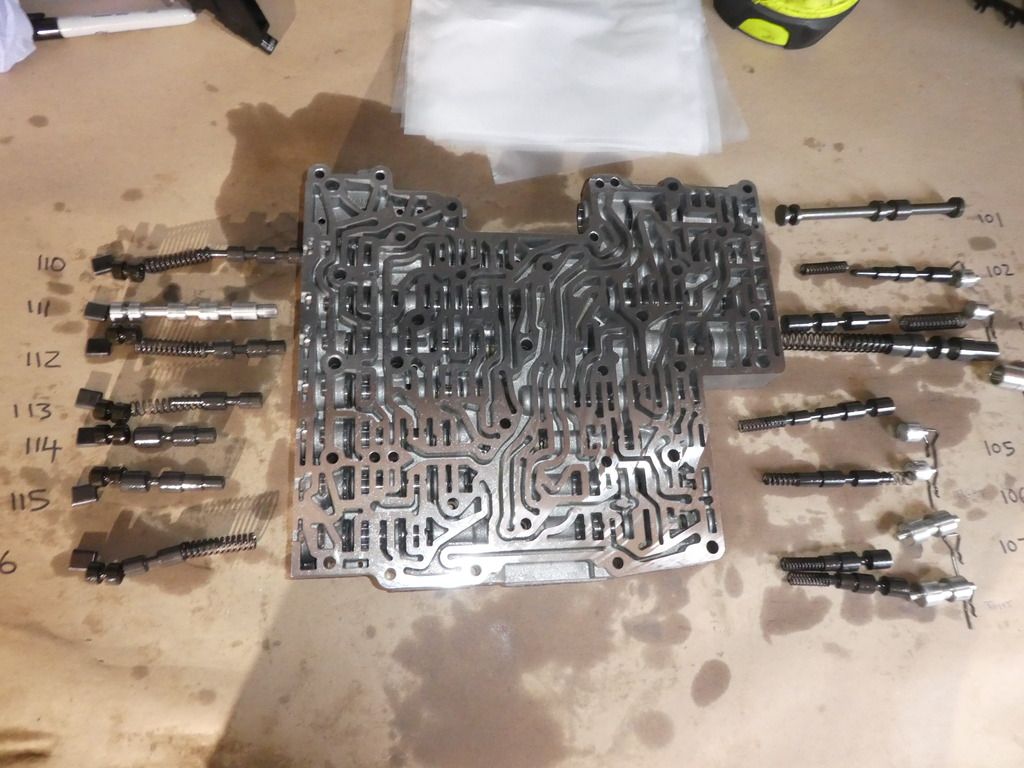
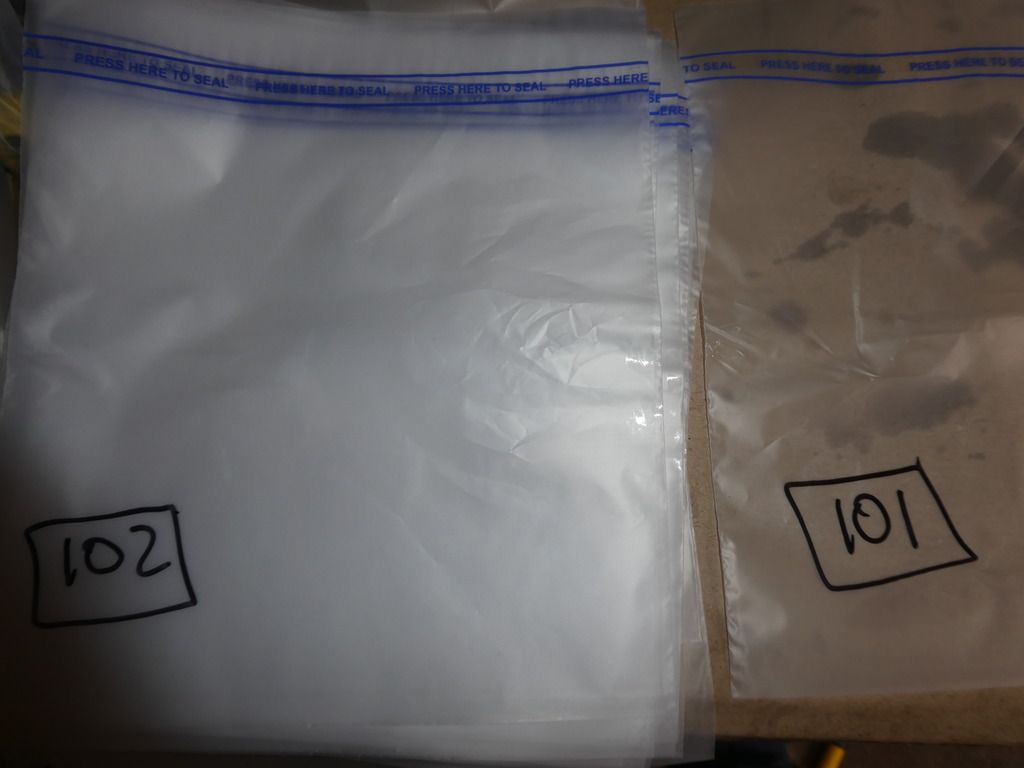
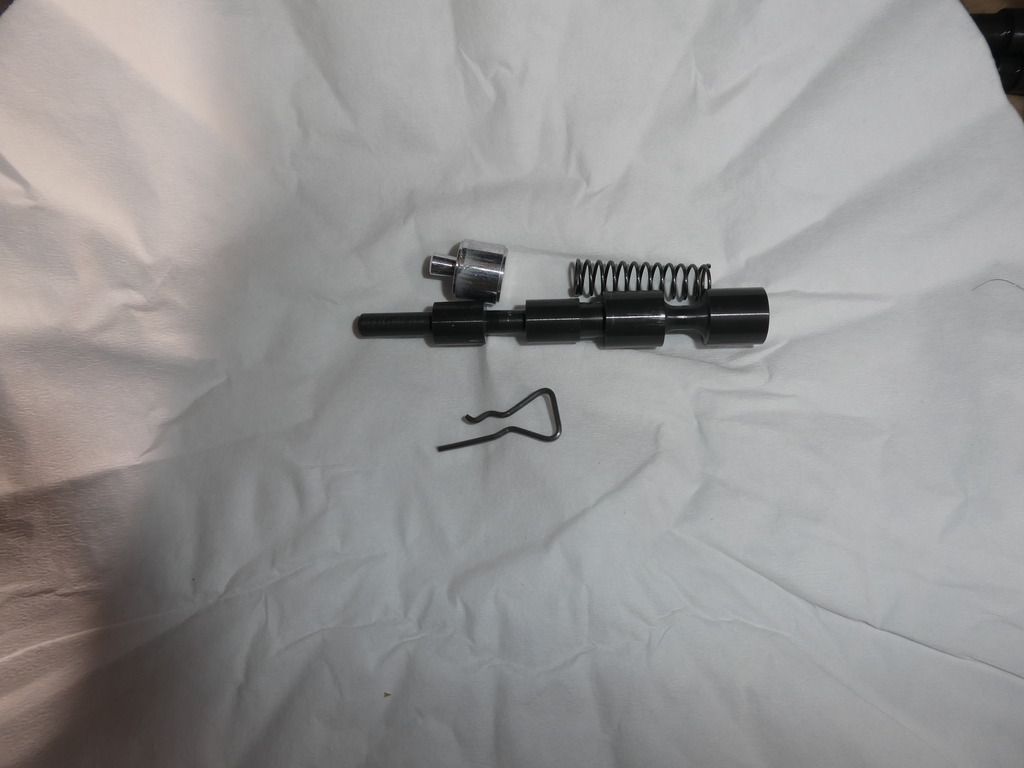
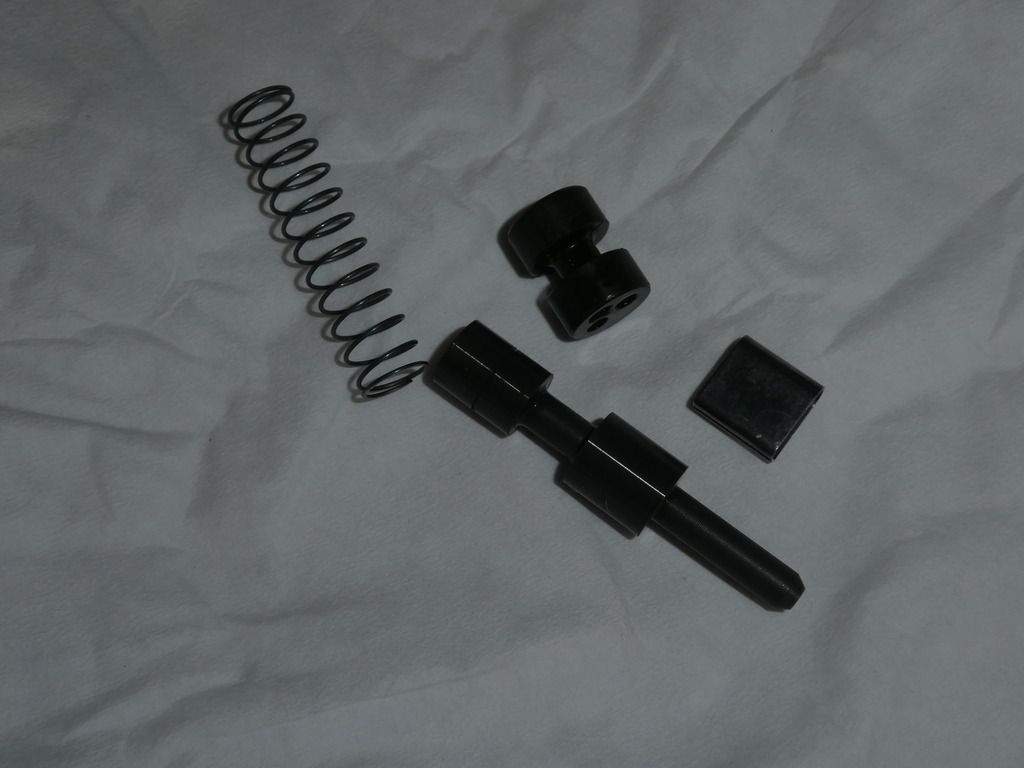
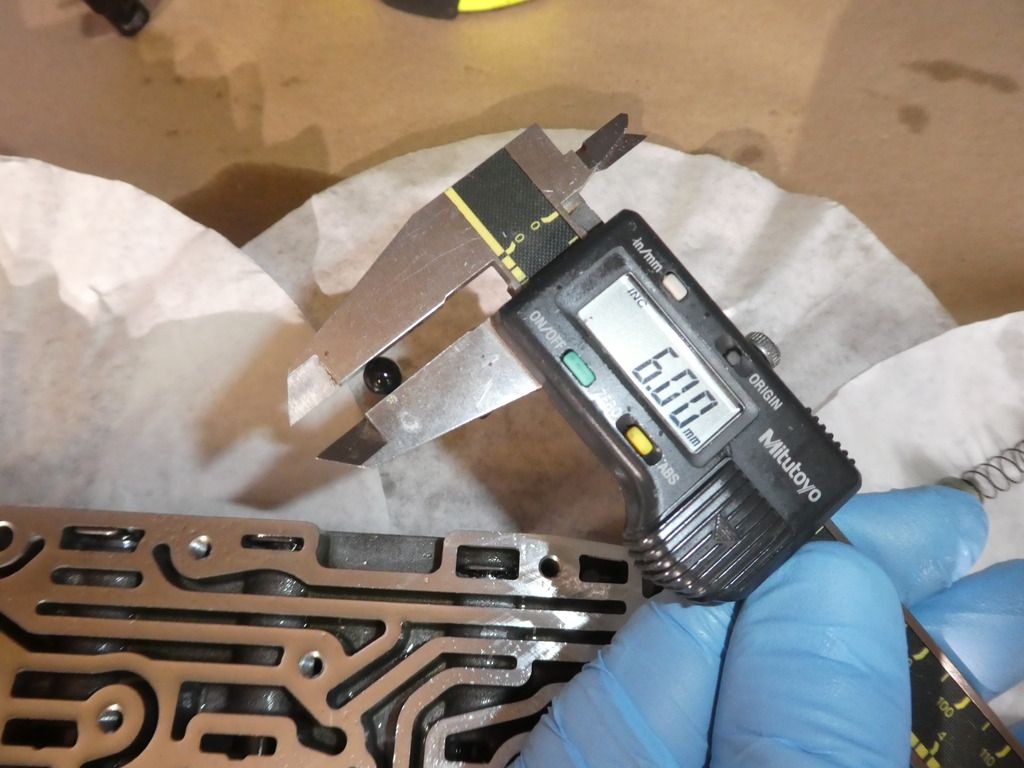
Now to aid in keeping these sequenced I numbered the food bags accordingly and kept them separate, ingeniously simple
Image
Last edited by ATinOf on Mon Sep 10, 2018 9:43 pm, edited 12 times in total.

ATinOf
3rd Gear
Posts: 444
Joined: Fri Jul 06, 2018 7:32 pm
Location: Cheshire

Re: Gearbox Teardown & Refurbish - 6HP28A61

Post by ATinOf » Mon Sep 03, 2018 2:10 pm

Now to individually clean the spools; which seems pointless if we are just going to oil them up and refit them for the vacuum test, but we dont want any dirt or dirty oil for that test; so we clean them anyway
Image

These end pugs are also a different alloy material; stock parts or aftermarket parts fitted to fix a passing pressure issue; I dont know? (I do know it looks like Sonnax do their end plugs in this same alloy material)
Image
Image
Image
Image
Image
Image
Last edited by ATinOf on Wed Sep 05, 2018 6:06 pm, edited 2 times in total.

ATinOf
3rd Gear
Posts: 444
Joined: Fri Jul 06, 2018 7:32 pm
Location: Cheshire

Re: Gearbox Teardown & Refurbish - 6HP28A61

Post by ATinOf » Mon Sep 03, 2018 2:11 pm

As padantic as I am I also made a note where the spools were so tight it was difficult to get them out. If they turn out to be easy going in I know there was dirt interfering in the bore
Image

These end plugs seem stock; they have indents in the outer face; note for orientation
Image

Image
Image
Image
Image
Image

Lastly give the valve body a serious clean; for stubborn dirt you can use cotton buds, but I just use a good spray cleaner and blow it out with air; but dont use an agressive solvent
Its about this point where I got my USB endescope camera on the smart phone out and ran it down the bores looking for scoring on the machined faces; A little laborious but informative for your diagnosis, I found nothing of significance
Image
Last edited by ATinOf on Wed Sep 05, 2018 6:11 pm, edited 4 times in total.

ATinOf
3rd Gear
Posts: 444
Joined: Fri Jul 06, 2018 7:32 pm
Location: Cheshire

Re: Gearbox Teardown & Refurbish - 6HP28A61

Post by ATinOf » Mon Sep 03, 2018 2:14 pm

Its pretty much the same process for the other half
Image

The check balls should all be 6.0mm
Image
Image
Image

Check there is no delamination of the accumulator piston rubber inserts
Image
Last edited by ATinOf on Wed Sep 05, 2018 6:14 pm, edited 3 times in total.

Post Reply

Return to “RS6 / RS6 Plus (C6 Typ 4F) 2008-2010”

Who is online

Users browsing this forum: No registered users and 29 guests