Gearbox Teardown & Refurbish - 6HP28A61

5.0 V10 50v biturbo - 571 bhp
ATinOf
3rd Gear
Posts: 444
Joined: Fri Jul 06, 2018 7:32 pm
Location: Cheshire

Re: Gearbox Teardown & Refurbish - 6HP28A61

Post by ATinOf » Mon Sep 03, 2018 1:13 pm

Invert the planetary gear and remove the lower needle bearing and inspect, again all good
Image
Image
Last edited by ATinOf on Tue Sep 04, 2018 3:43 pm, edited 1 time in total.

ATinOf
3rd Gear
Posts: 444
Joined: Fri Jul 06, 2018 7:32 pm
Location: Cheshire

Re: Gearbox Teardown & Refurbish - 6HP28A61

Post by ATinOf » Mon Sep 03, 2018 1:18 pm

It looks like we are making progress but really we have only scratched the surface so far...
Image

Remove the flat bearing washer from within the planetary annulus
Image
Image

Invert the annulus and remove the large circlip holding the output shaft to the annulus gear, you need only do this if you are a little OCD on cleanliness like me; they can be left together
Image
Image

Image
Last edited by ATinOf on Tue Sep 04, 2018 3:47 pm, edited 3 times in total.

ATinOf
3rd Gear
Posts: 444
Joined: Fri Jul 06, 2018 7:32 pm
Location: Cheshire

Re: Gearbox Teardown & Refurbish - 6HP28A61

Post by ATinOf » Mon Sep 03, 2018 1:20 pm

Now lets go back to clutch B and strip down the clutch pack itself
Image

Starting with the circlip holding the clutch pack in place
Image
Image

Keep it together for later inspection
Image

Now we need the use of the press for removal of the clutch piston retained by a stiff spring and circlip. ZF have some good tooling for use with the press, but as usual I dont believe in buying something we can be inventive with. Had I not run out of shield gas I would have made the 3 press tools (you will find lots of google images on these and they are easy to make with some flat bar and a welder) Given I dont expect to have do this job twice I didnt think it was worth it anyway. So I rooted through my scrap steel and came up with some odds and ends to do the same job - to press against the piston and spring so the circlip can be removed without any tension on it. In this case an old double bearing race from a 406 Peugeot fits nicely...

Oh and ZF recommend an arbour not a hydraulic press (presumably so you can control the force and not stress the components), but the hydraulic press works fine if you are careful
Image

Just compress the spring sufficient to remove the clip, no more than necessary
Image
Last edited by ATinOf on Tue Sep 04, 2018 3:59 pm, edited 6 times in total.

ATinOf
3rd Gear
Posts: 444
Joined: Fri Jul 06, 2018 7:32 pm
Location: Cheshire

Re: Gearbox Teardown & Refurbish - 6HP28A61

Post by ATinOf » Mon Sep 03, 2018 1:23 pm

Now remove the circlip
Image

And the retaining washer
Image
Image

And the spring of course
Image

That leaves us with the piston itself and the retaining plate
Image

Remove the circlip against the retaining plate
Image

And pull, in my case the piston came first, with the retaining plate; depending what you pull on you may get a different result, but the bottom line is you need to pull out the piston and release the retaining plate from the piston to get to all 3 of the O-ring seals
Image

2 of the seals sit in the piston
Image
Last edited by ATinOf on Wed Sep 05, 2018 12:58 pm, edited 4 times in total.

ATinOf
3rd Gear
Posts: 444
Joined: Fri Jul 06, 2018 7:32 pm
Location: Cheshire

Re: Gearbox Teardown & Refurbish - 6HP28A61

Post by ATinOf » Mon Sep 03, 2018 1:26 pm

Image

And the third O-ring seal is on the retaining plate
Image
Image
Last edited by ATinOf on Wed Sep 05, 2018 12:59 pm, edited 1 time in total.

ATinOf
3rd Gear
Posts: 444
Joined: Fri Jul 06, 2018 7:32 pm
Location: Cheshire

Re: Gearbox Teardown & Refurbish - 6HP28A61

Post by ATinOf » Mon Sep 03, 2018 1:27 pm

Back to 'body II' (Clutches A and E) which is still sitting upside down in the workbench with the input shaft pointing downwards, remove the circlip retaining the rear inner plate carrier
Image

And remove the rear inner plate carrier
Image

On the bench withdraw the inner plate carrier B
Image

Image
Image
Last edited by ATinOf on Wed Sep 05, 2018 1:06 pm, edited 3 times in total.

ATinOf
3rd Gear
Posts: 444
Joined: Fri Jul 06, 2018 7:32 pm
Location: Cheshire

Re: Gearbox Teardown & Refurbish - 6HP28A61

Post by ATinOf » Mon Sep 03, 2018 1:29 pm

Leaving us with the inner plate carrier A
Image

Turn this over and remove the needle bearing and inspect it, all good
Image
Image

Image
Last edited by ATinOf on Wed Sep 05, 2018 1:07 pm, edited 1 time in total.

ATinOf
3rd Gear
Posts: 444
Joined: Fri Jul 06, 2018 7:32 pm
Location: Cheshire

Re: Gearbox Teardown & Refurbish - 6HP28A61

Post by ATinOf » Mon Sep 03, 2018 1:30 pm

Back to the 'body II' assembly and withdraw the inner plate carrier E with its intermediate shaft
Image
Image

Inspect the bearing and seal faces visually and with your nail, no problems here
Image
Image
Image
Last edited by ATinOf on Wed Sep 05, 2018 1:10 pm, edited 3 times in total.

ATinOf
3rd Gear
Posts: 444
Joined: Fri Jul 06, 2018 7:32 pm
Location: Cheshire

Re: Gearbox Teardown & Refurbish - 6HP28A61

Post by ATinOf » Mon Sep 03, 2018 1:32 pm

Now we can actually get to the clutch E pack
Image

Unclip the needle bearing and inspect, no surprises here either
Image
Image

Withdraw clutch E from clutch A
Image
Image

And invert it on the bench
Image

Remove and Inspect the needle bearing, in my case this was particularly stubborn and would not unclip; given it passed the inspection I decided not to mawl it off (and damage it in the process) and to leave it in situ
Image
Last edited by ATinOf on Wed Sep 05, 2018 1:16 pm, edited 5 times in total.

ATinOf
3rd Gear
Posts: 444
Joined: Fri Jul 06, 2018 7:32 pm
Location: Cheshire

Re: Gearbox Teardown & Refurbish - 6HP28A61

Post by ATinOf » Mon Sep 03, 2018 1:35 pm

Remove the 3 Rectangular section seals
Image
Image
Image

Flip over clutch E and remove the circlip
Image

Remove the frictions and steels
Image
Image
Image
Last edited by ATinOf on Wed Sep 05, 2018 1:52 pm, edited 2 times in total.

ATinOf
3rd Gear
Posts: 444
Joined: Fri Jul 06, 2018 7:32 pm
Location: Cheshire

Re: Gearbox Teardown & Refurbish - 6HP28A61

Post by ATinOf » Mon Sep 03, 2018 1:36 pm

Another visit to the press and the same old bearing race fits nicelyagainst the piston, albeit a bit snug for getting the circlip off
Image

Remove the circlip
Image

Remove the retaining washer
Image

and remove the retaining plate and spring
Image
Image
Last edited by ATinOf on Wed Sep 05, 2018 1:57 pm, edited 3 times in total.

ATinOf
3rd Gear
Posts: 444
Joined: Fri Jul 06, 2018 7:32 pm
Location: Cheshire

Re: Gearbox Teardown & Refurbish - 6HP28A61

Post by ATinOf » Mon Sep 03, 2018 1:37 pm

A gentle tap upside down on the bench and the piston will fall out, or you may have to persuade it a little
If it simply wont play ball you can apply air pressure to one of the oil bores on the shaft whilst covering the others to blow it out
Image
Image
Last edited by ATinOf on Wed Sep 05, 2018 3:43 pm, edited 2 times in total.

ATinOf
3rd Gear
Posts: 444
Joined: Fri Jul 06, 2018 7:32 pm
Location: Cheshire

Re: Gearbox Teardown & Refurbish - 6HP28A61

Post by ATinOf » Mon Sep 03, 2018 1:39 pm

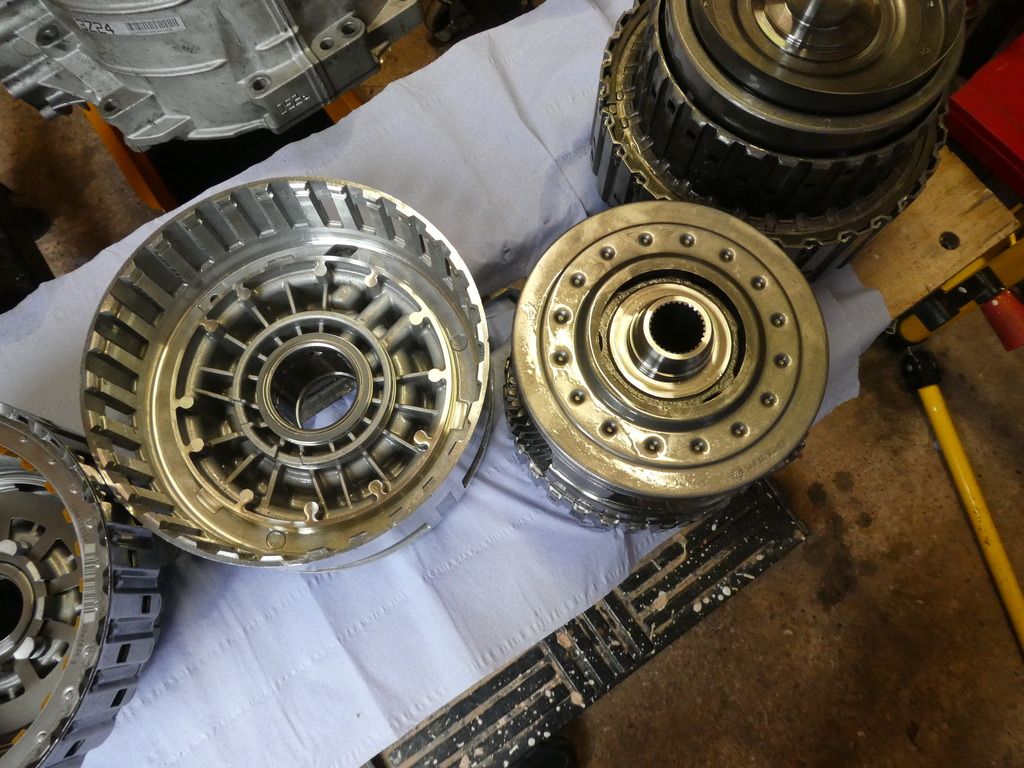
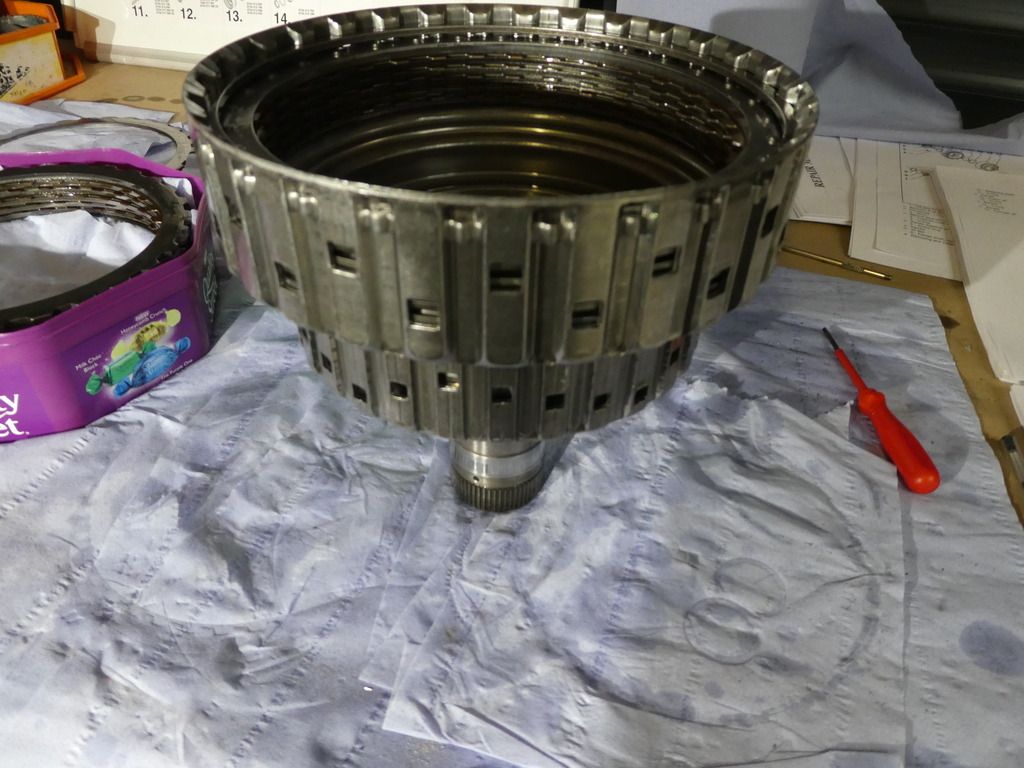
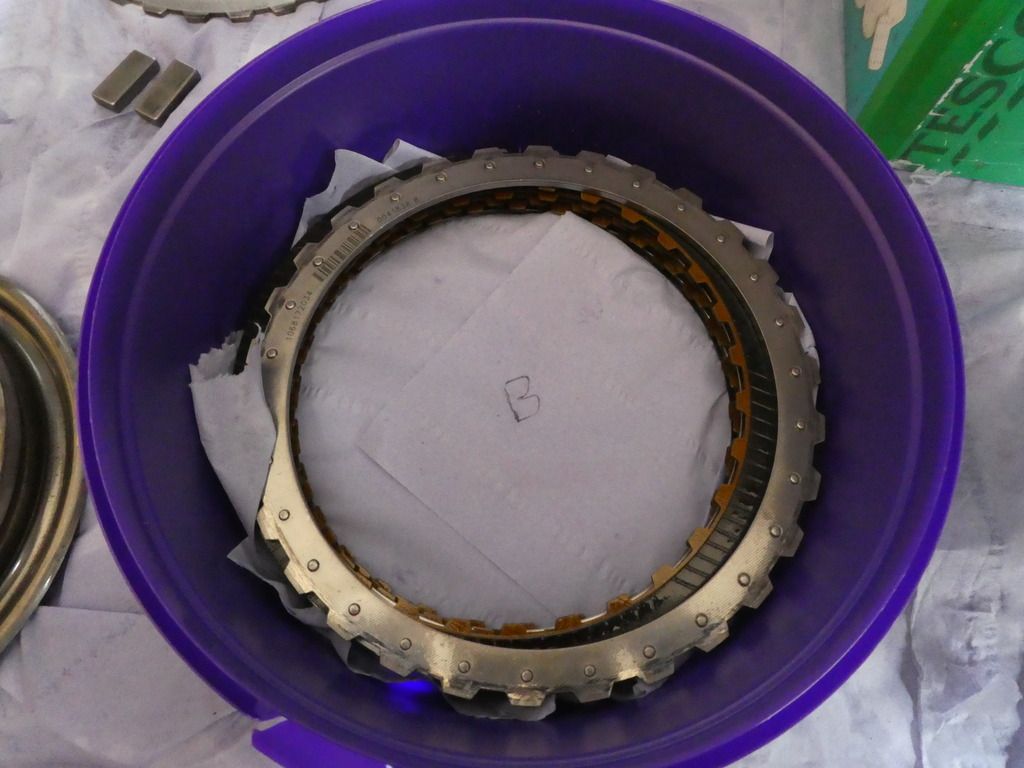
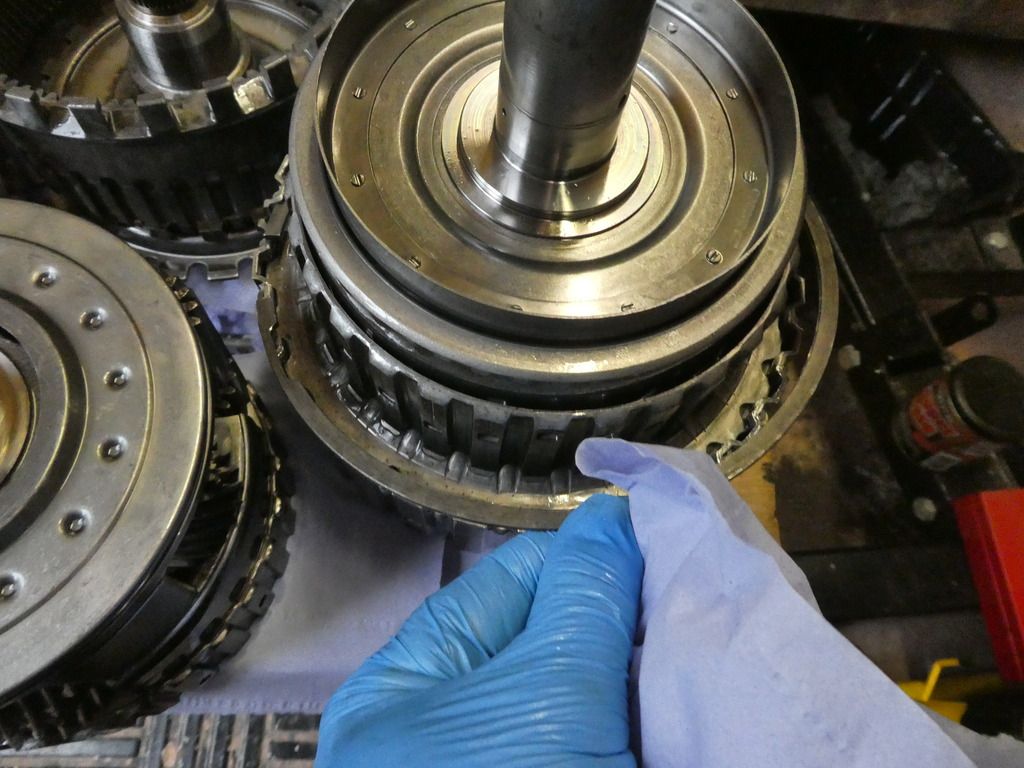
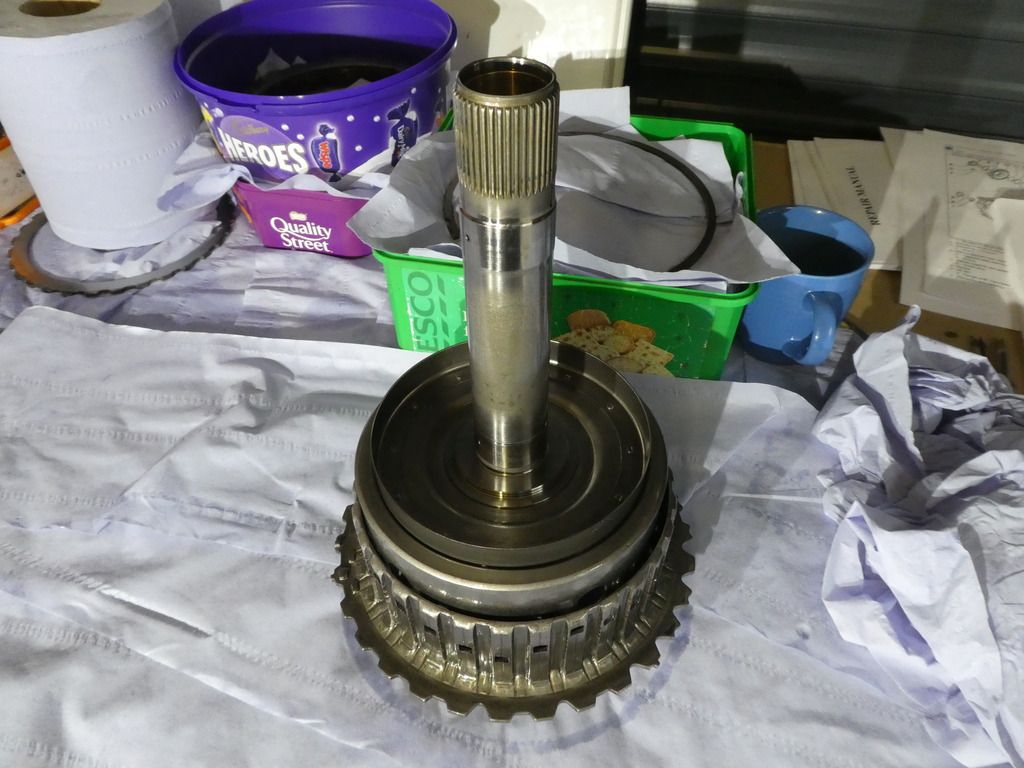
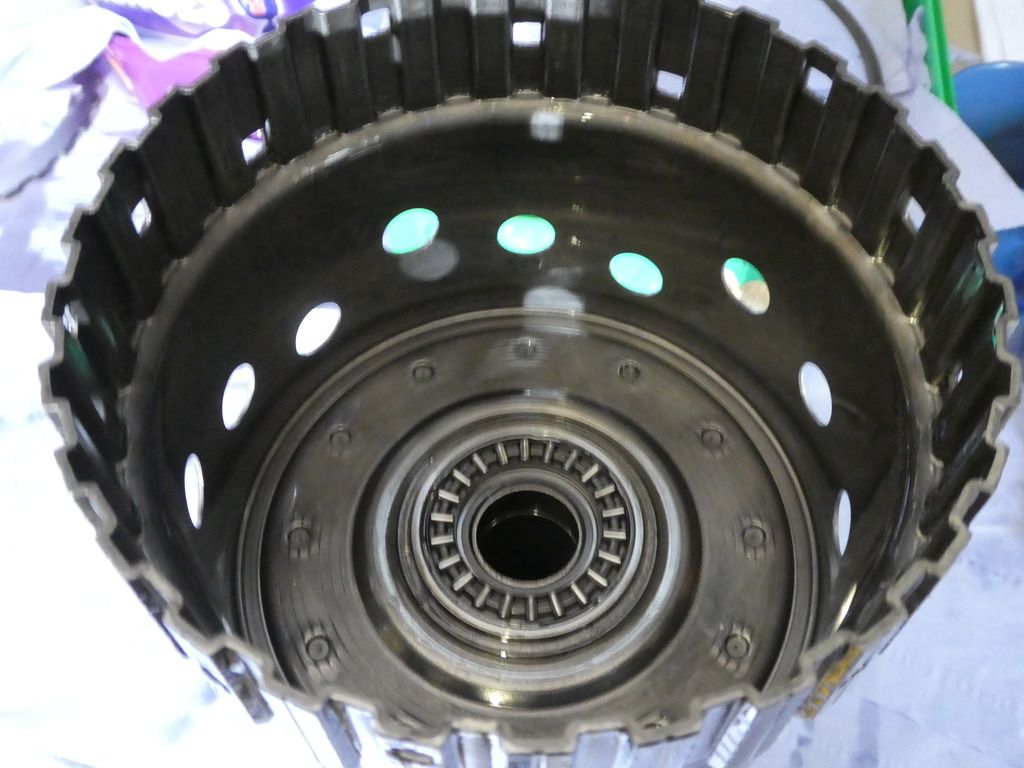
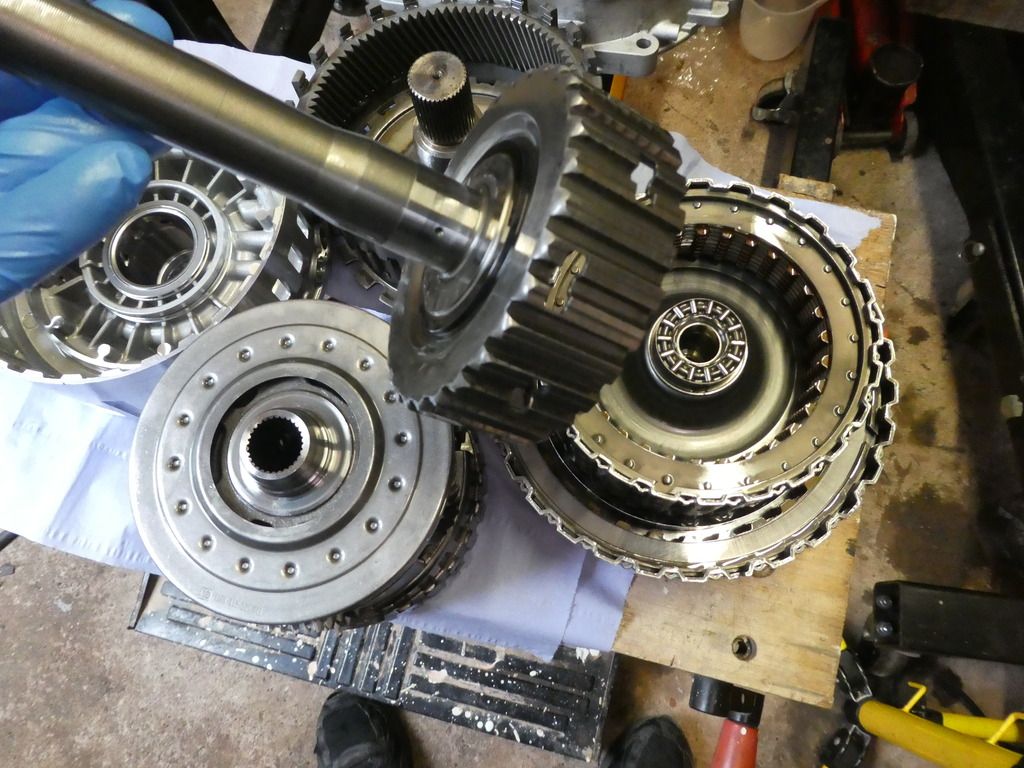
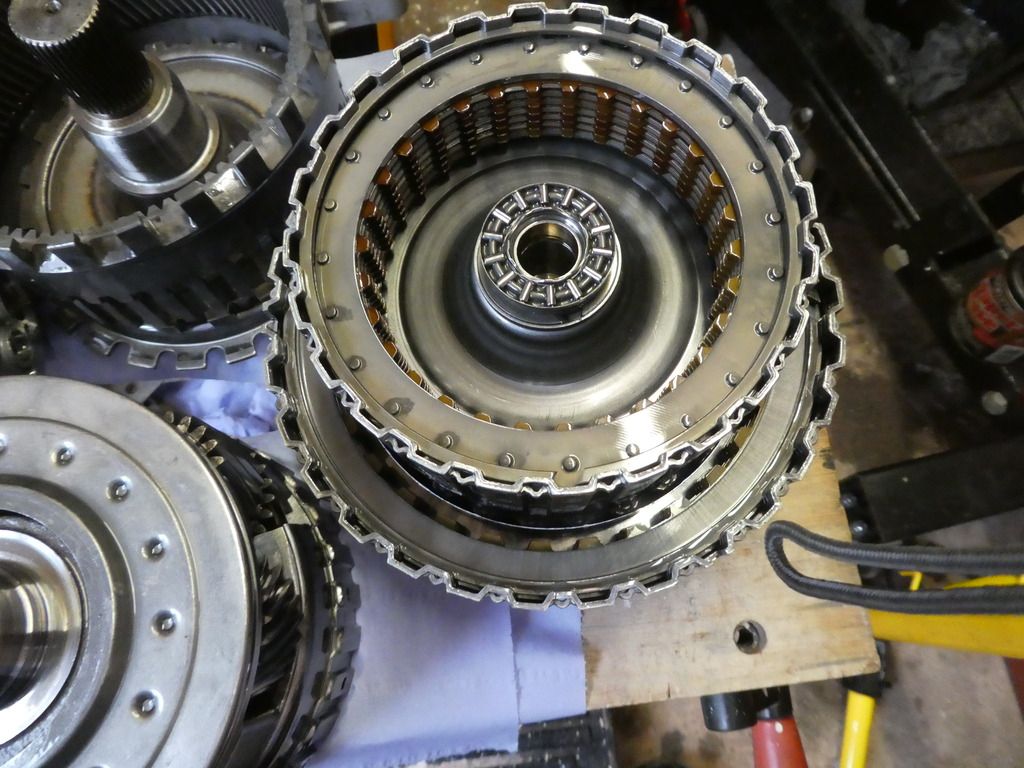
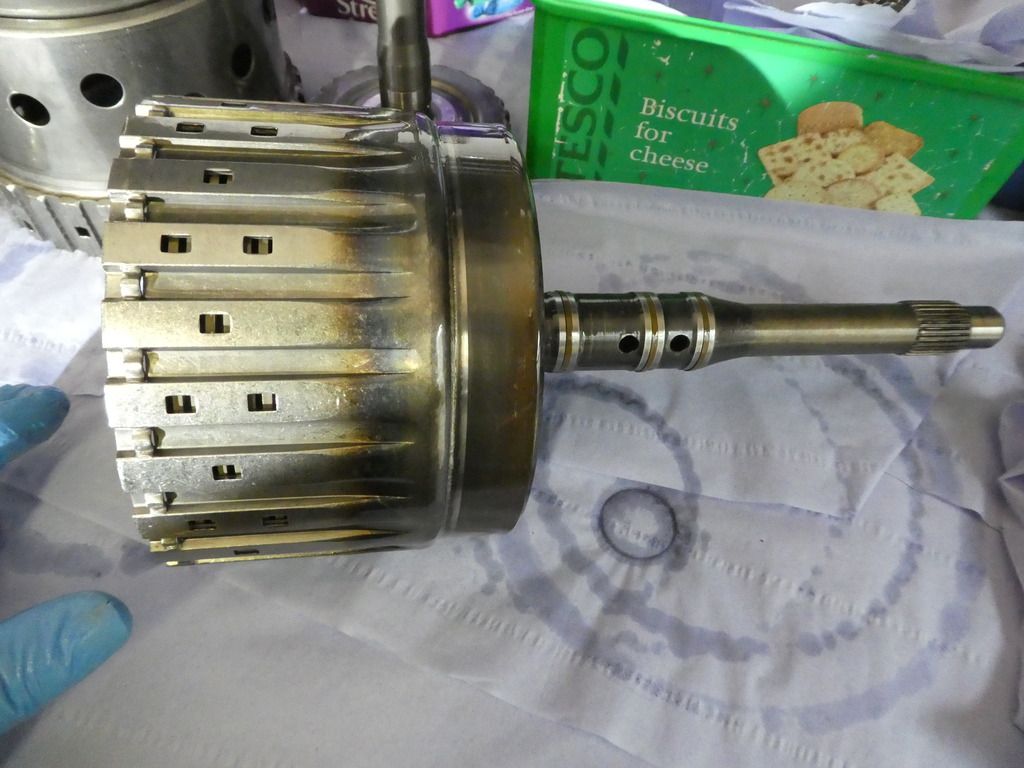
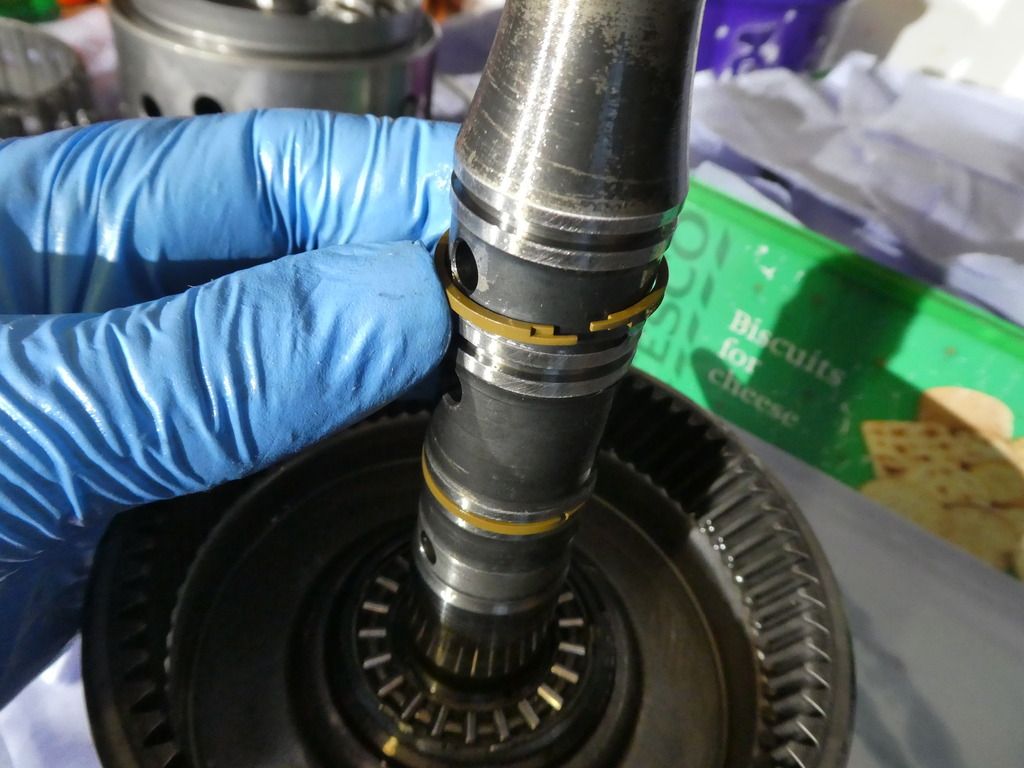
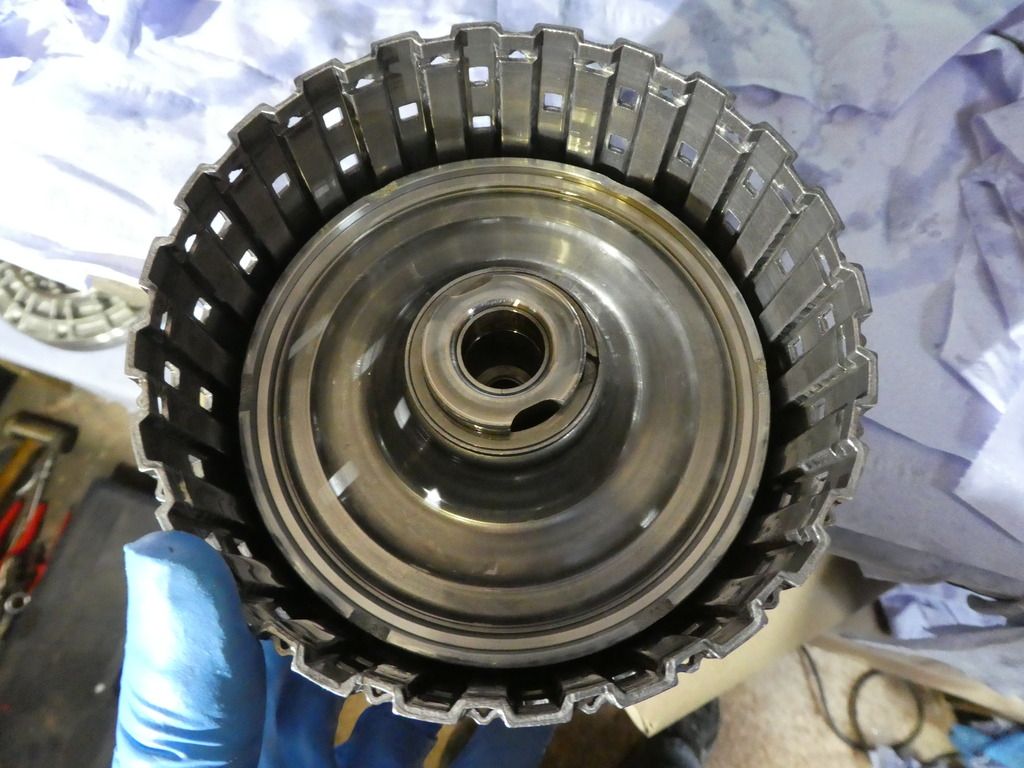
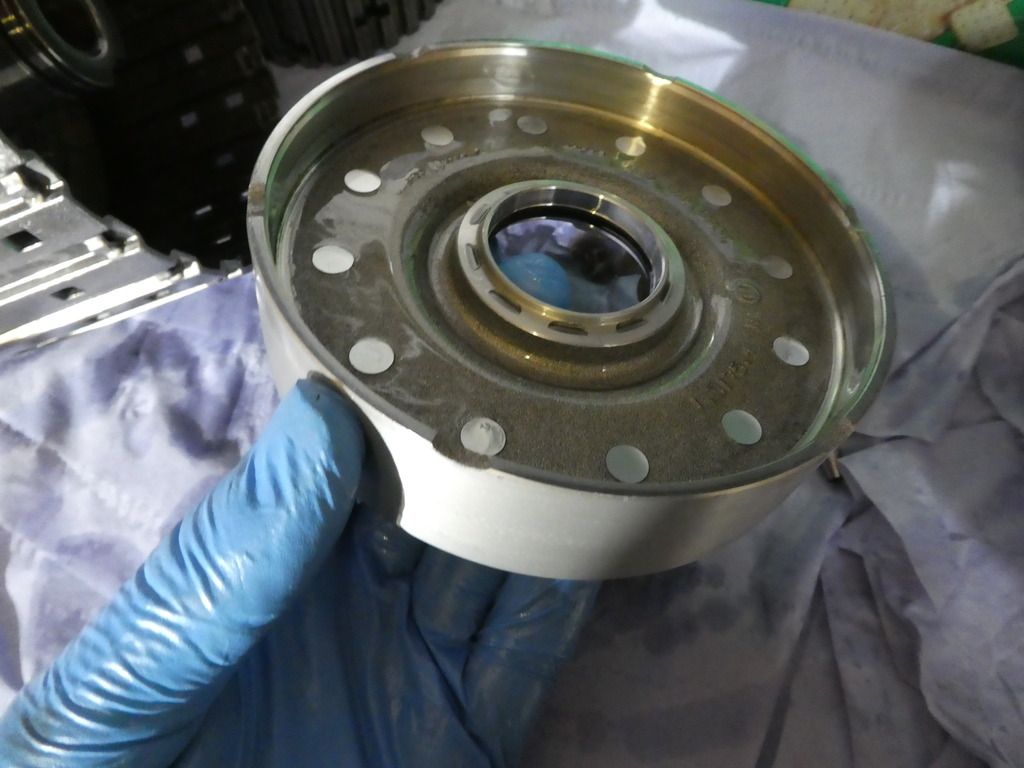
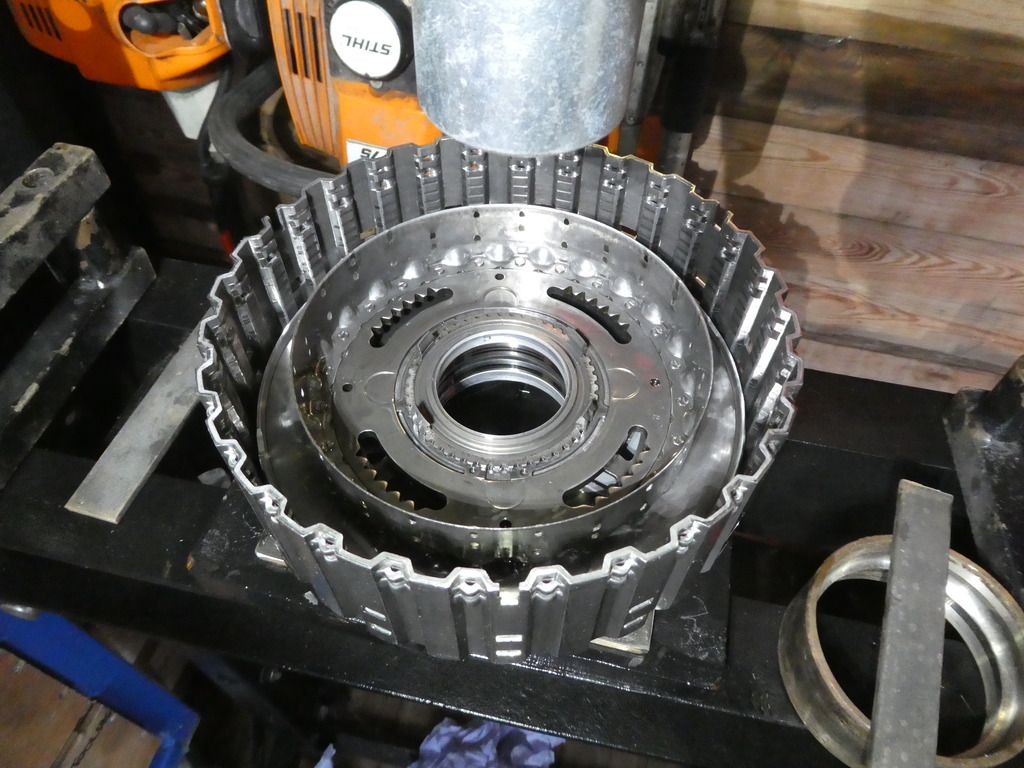
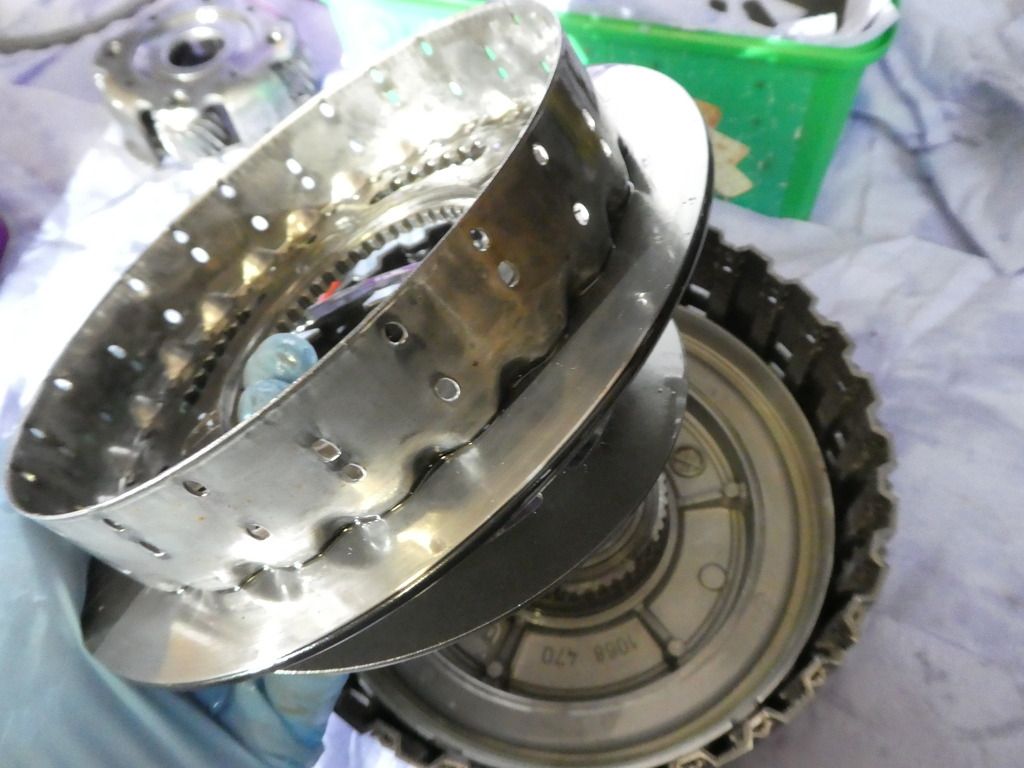
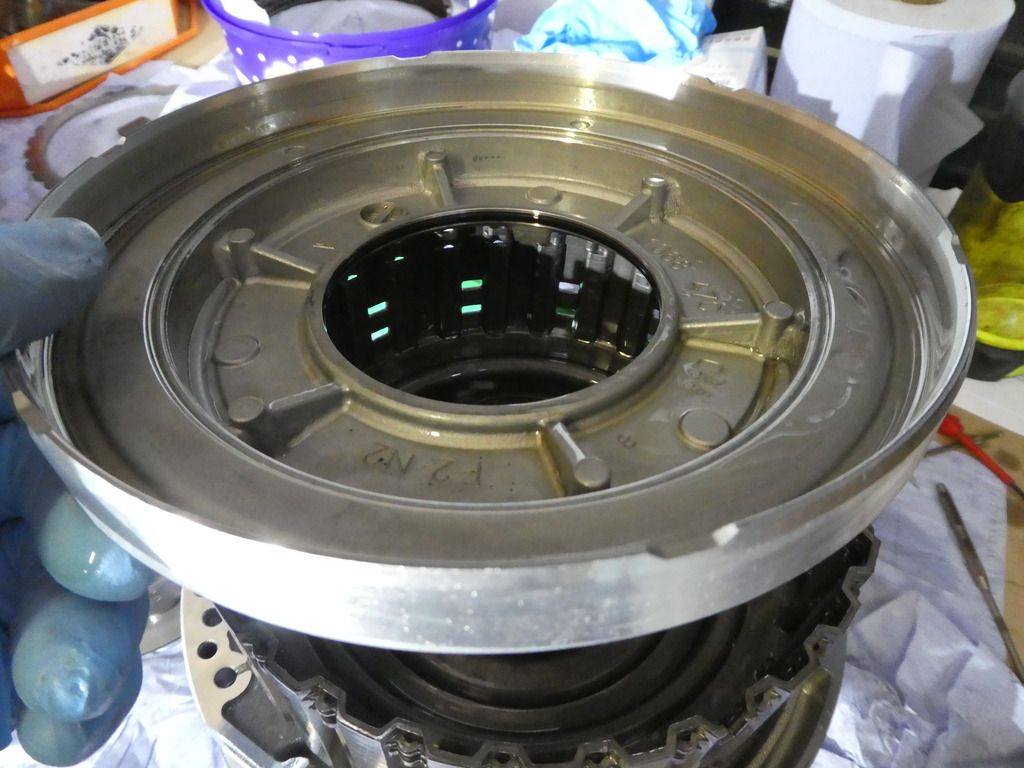
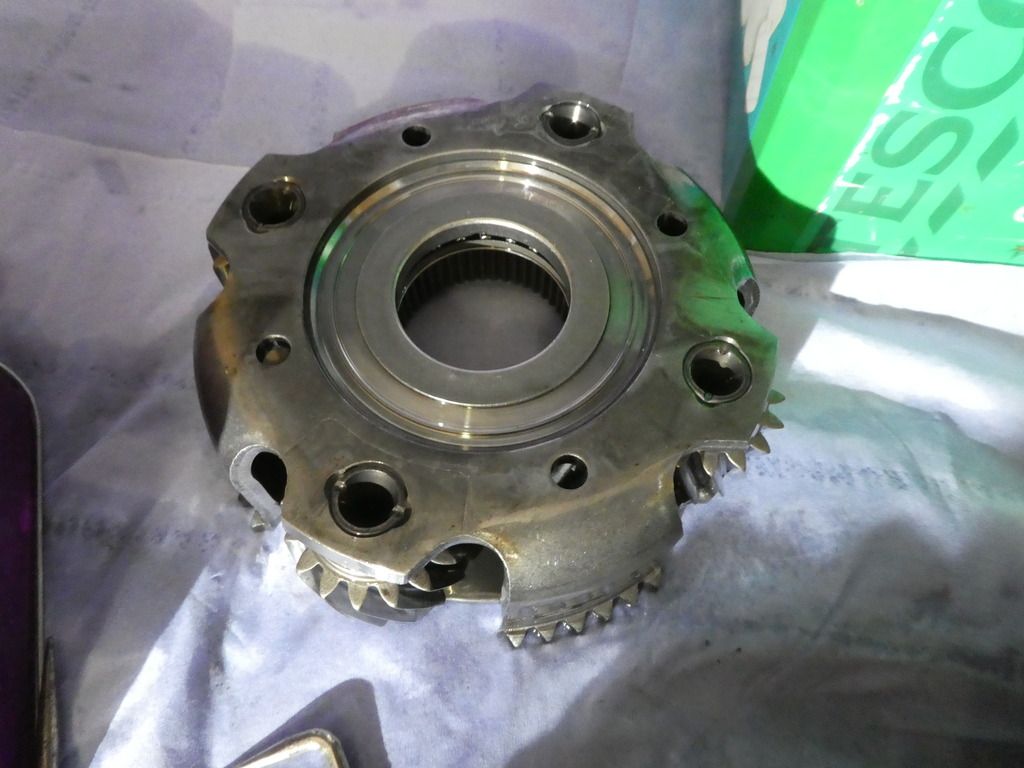
Now onto the last part of 'body II', Clutch A
Image

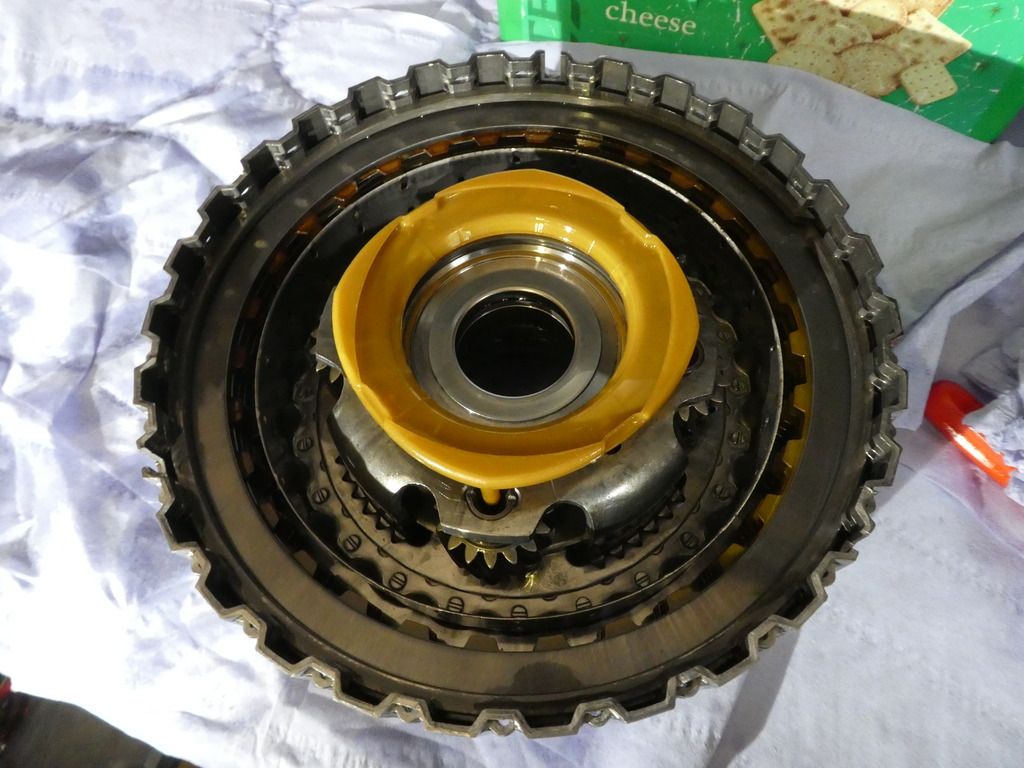
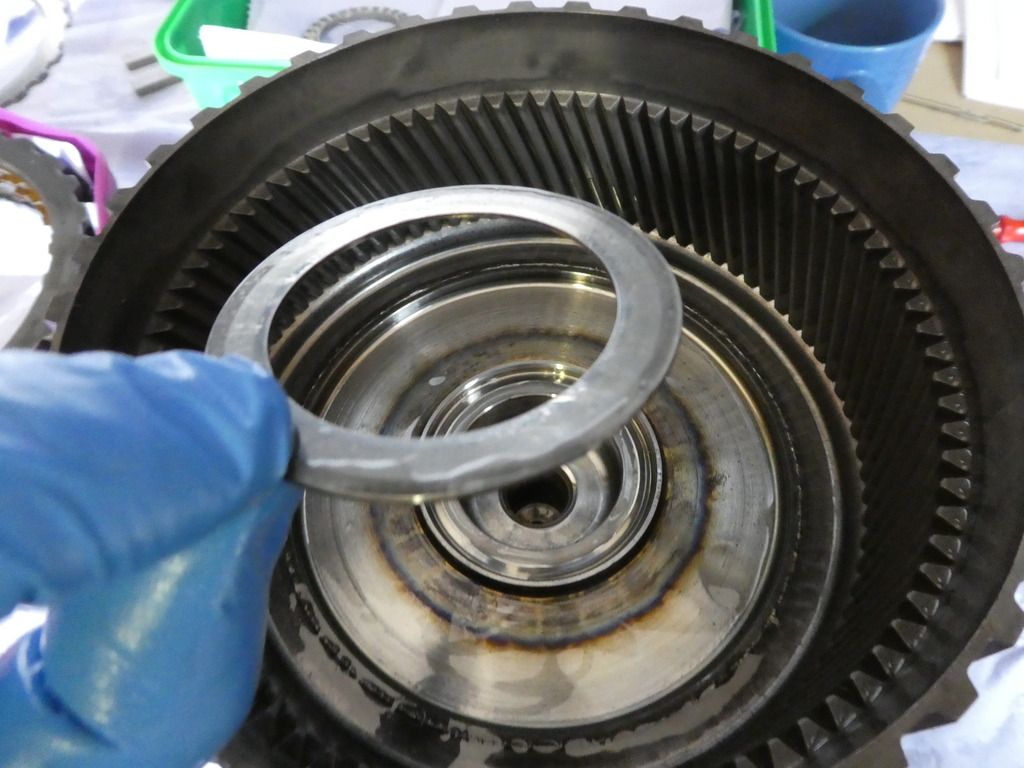
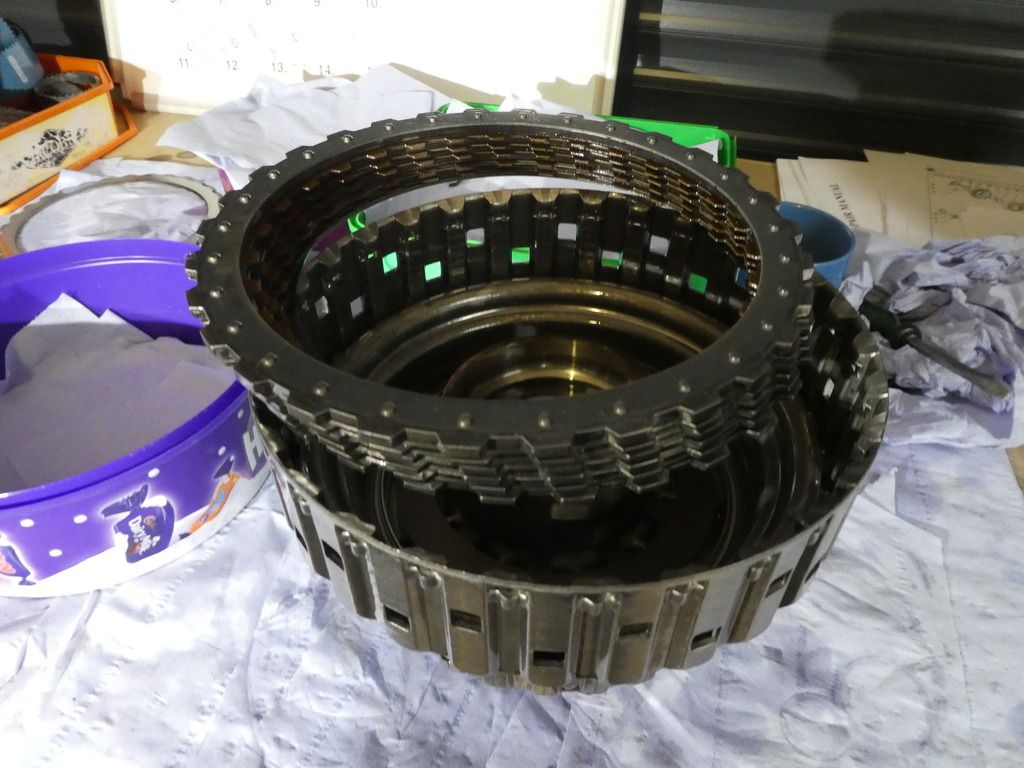
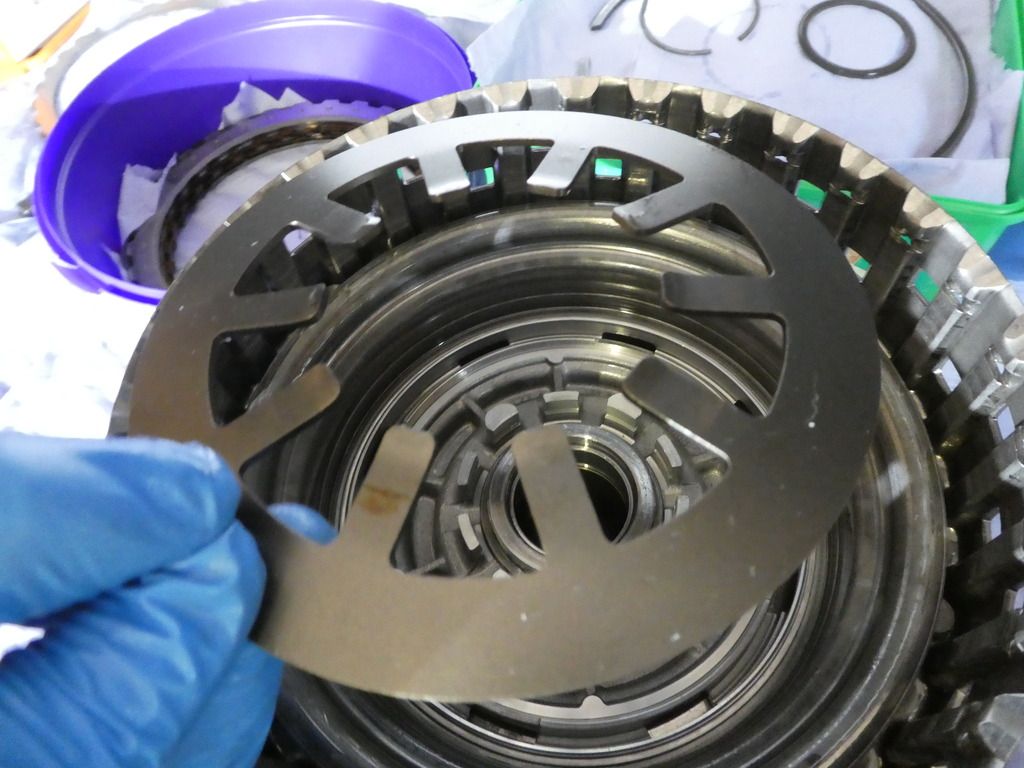
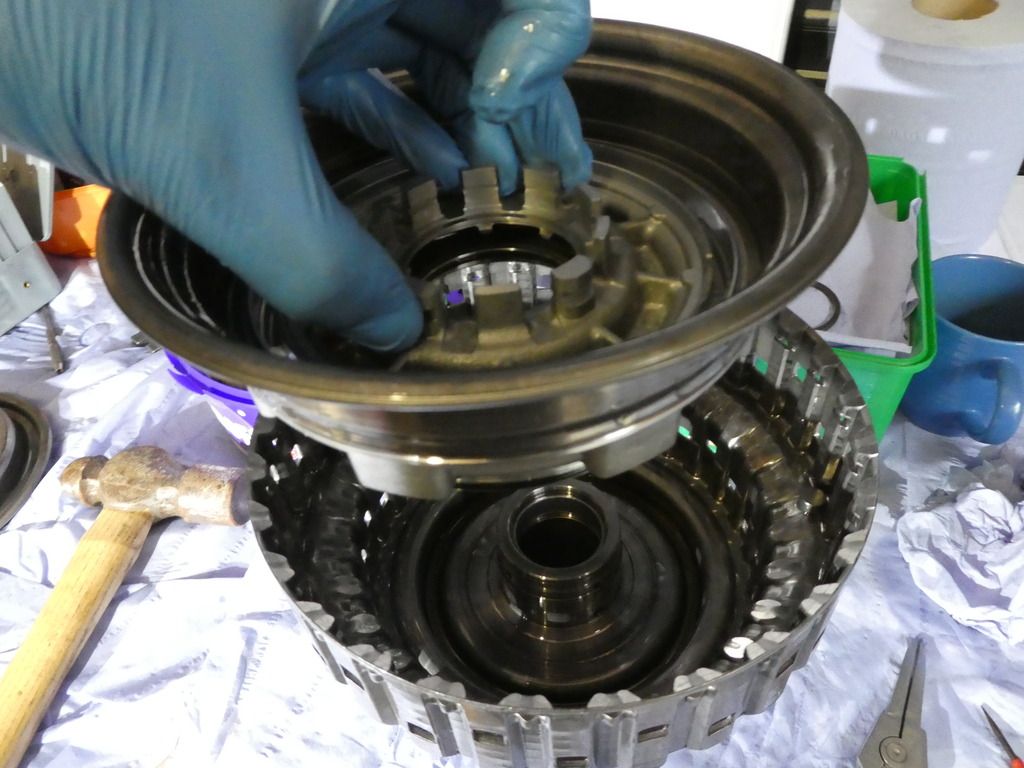
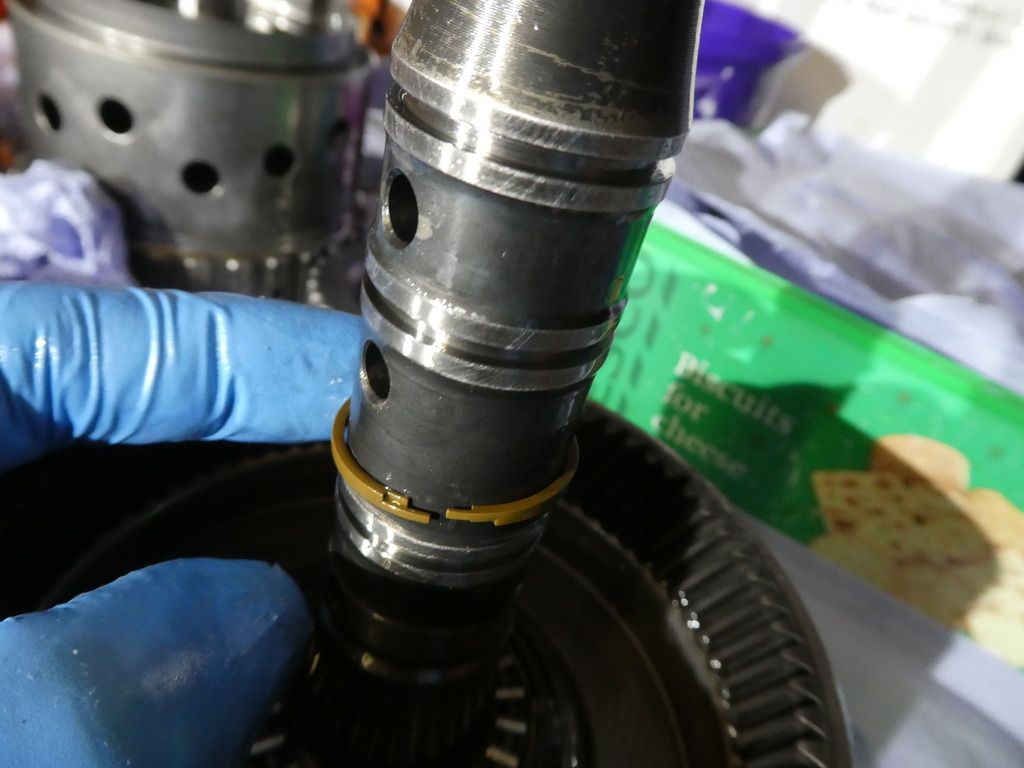
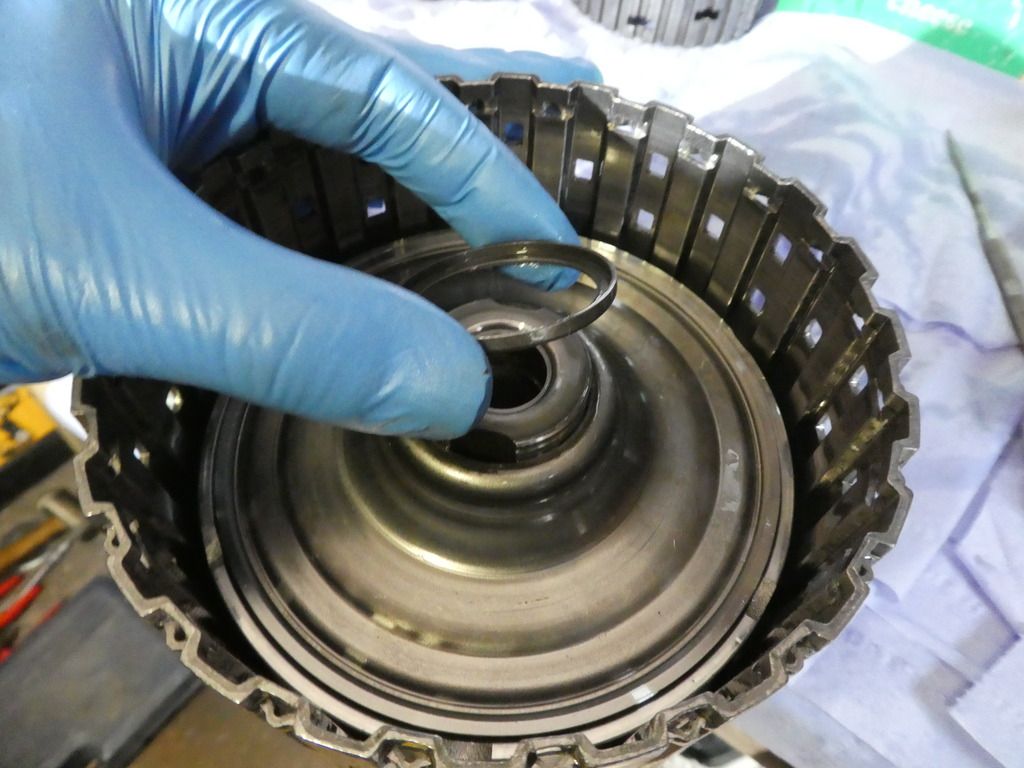
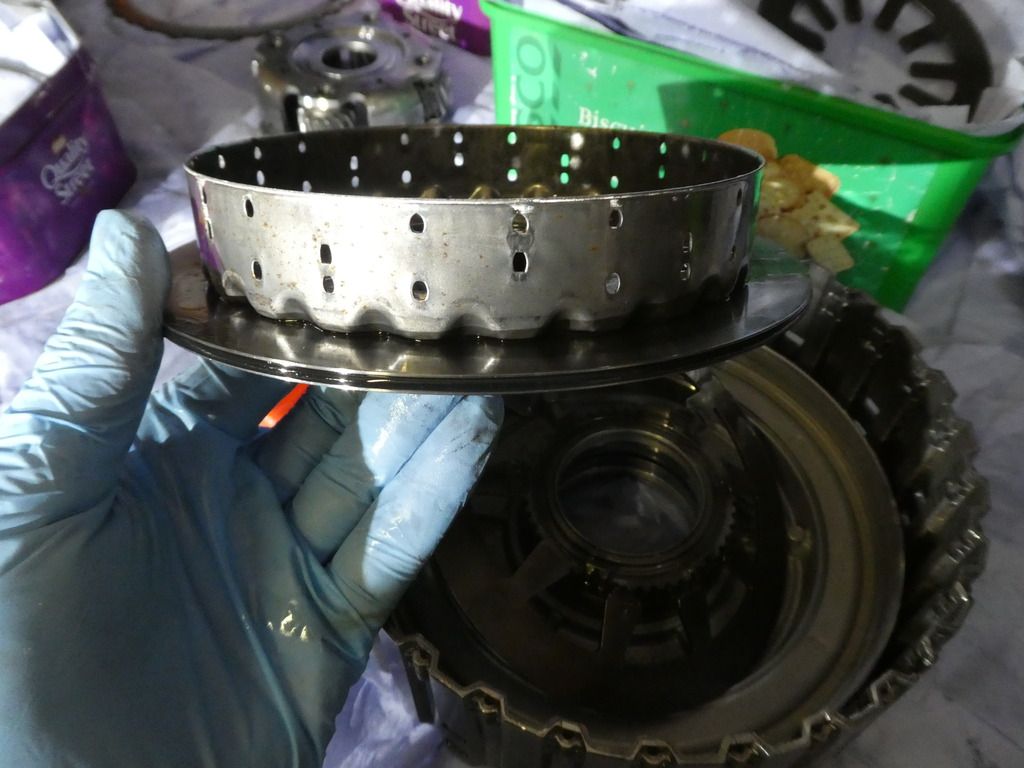
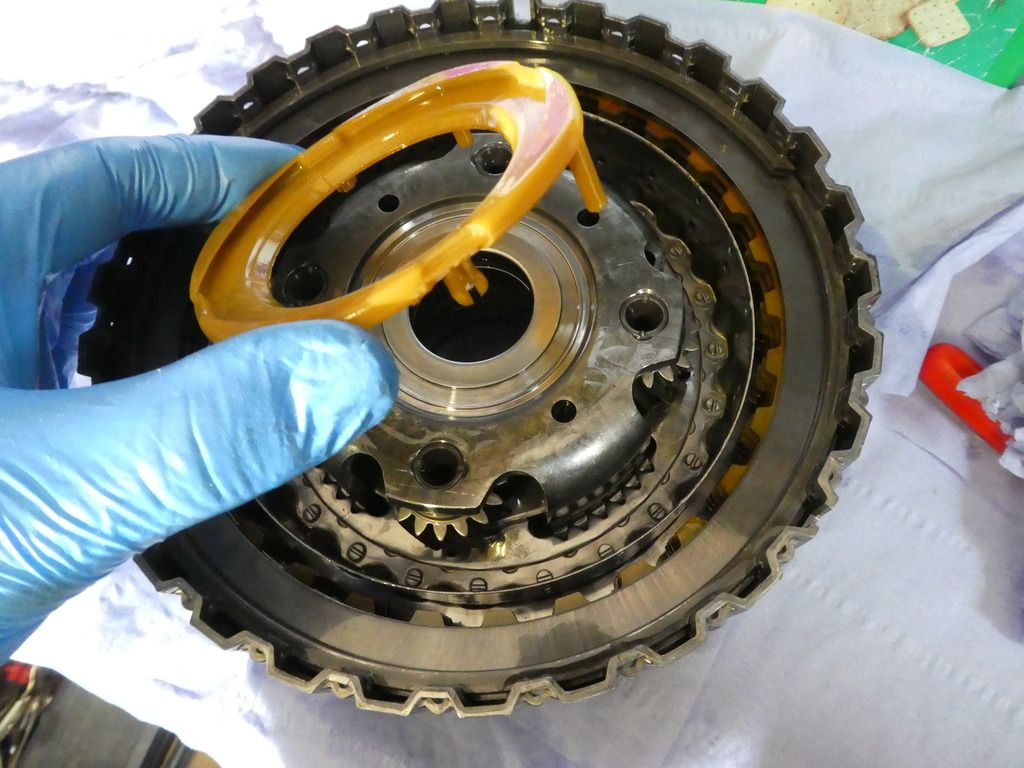
Unclip the oil collector
Image

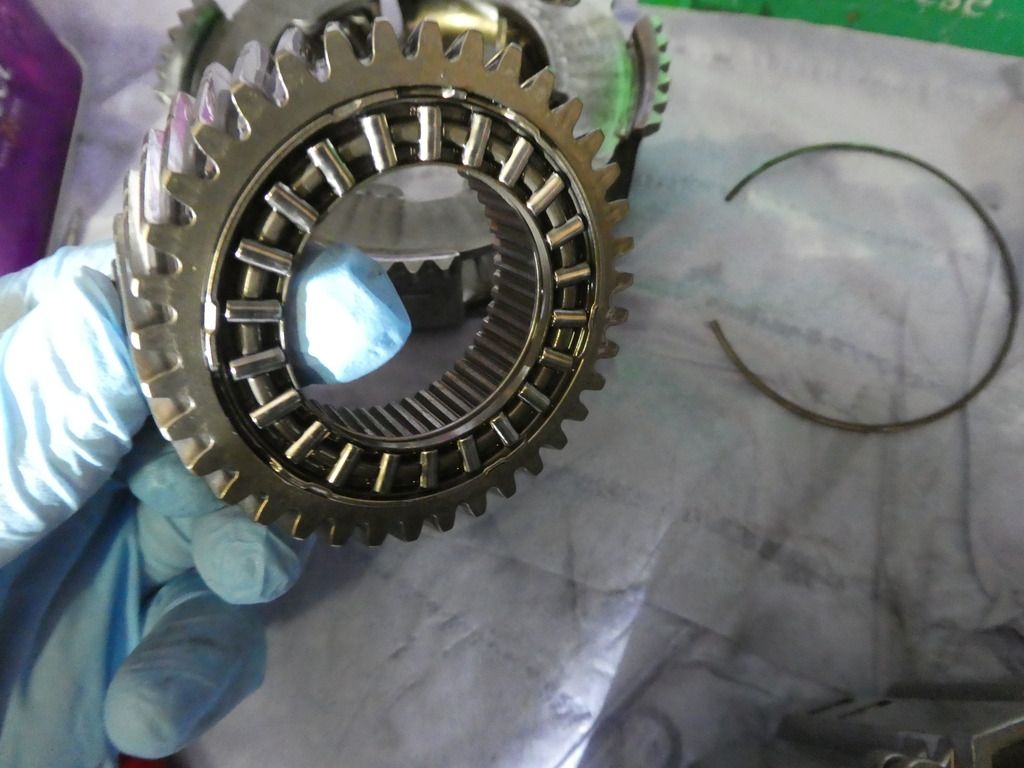
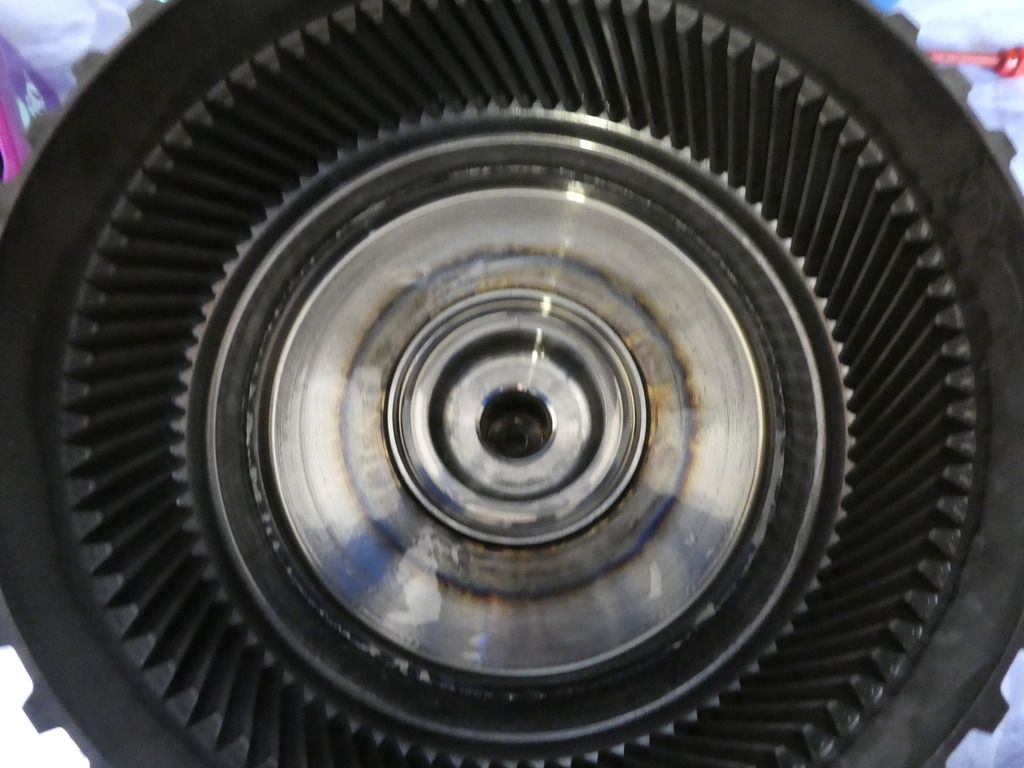
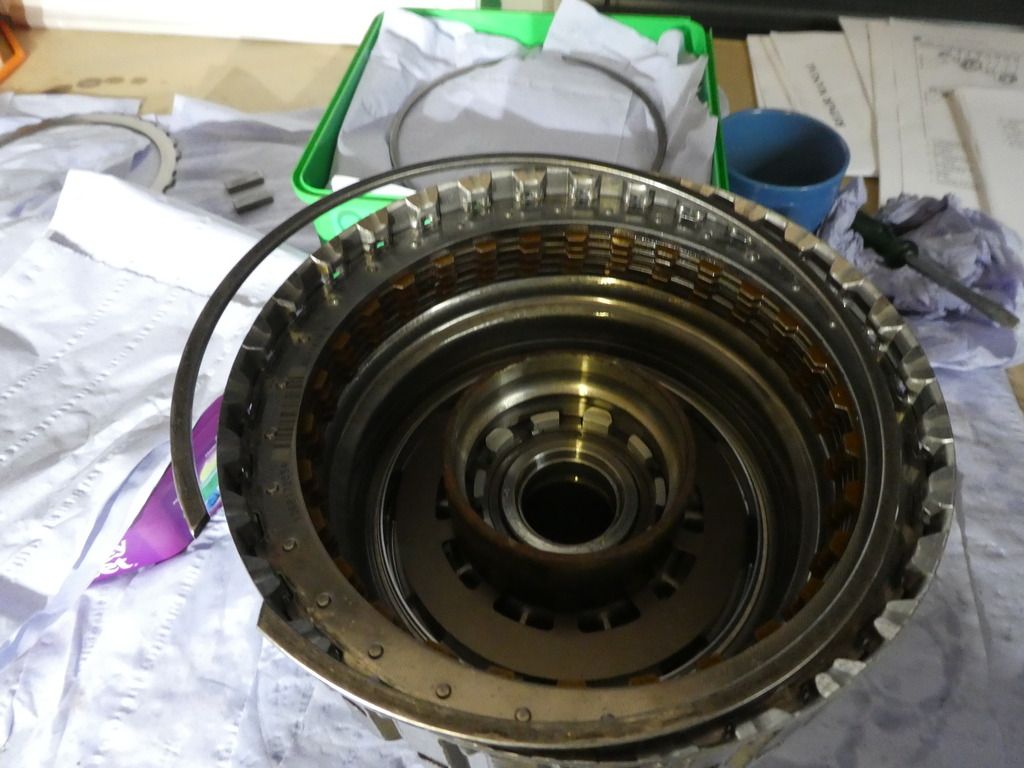
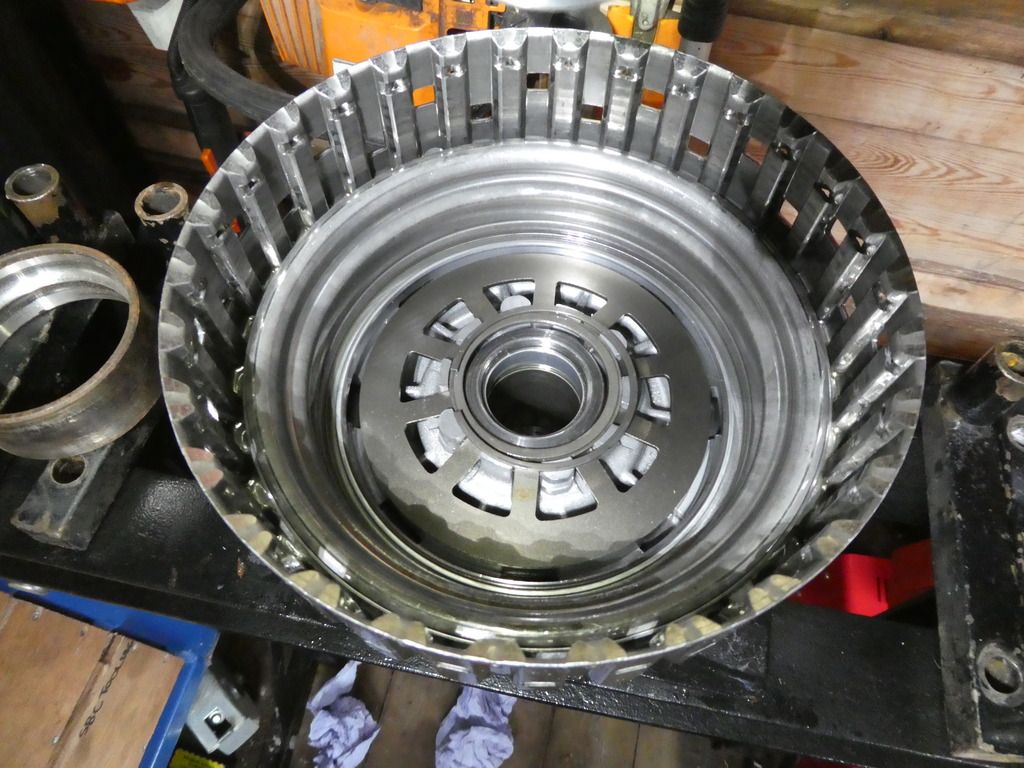
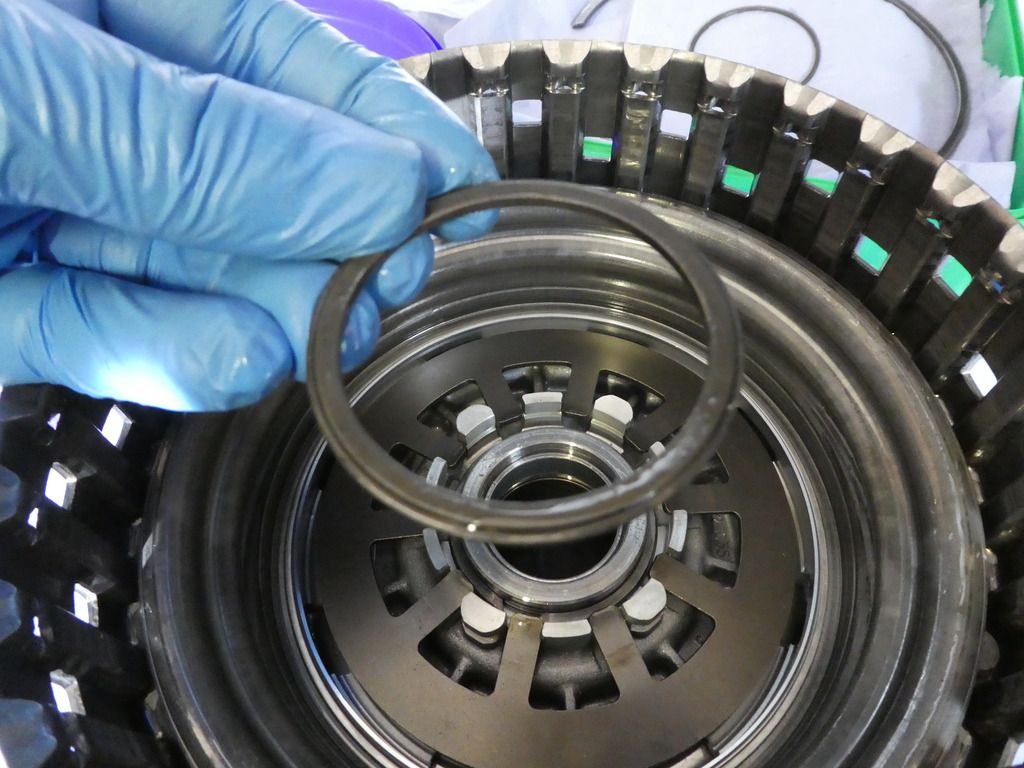
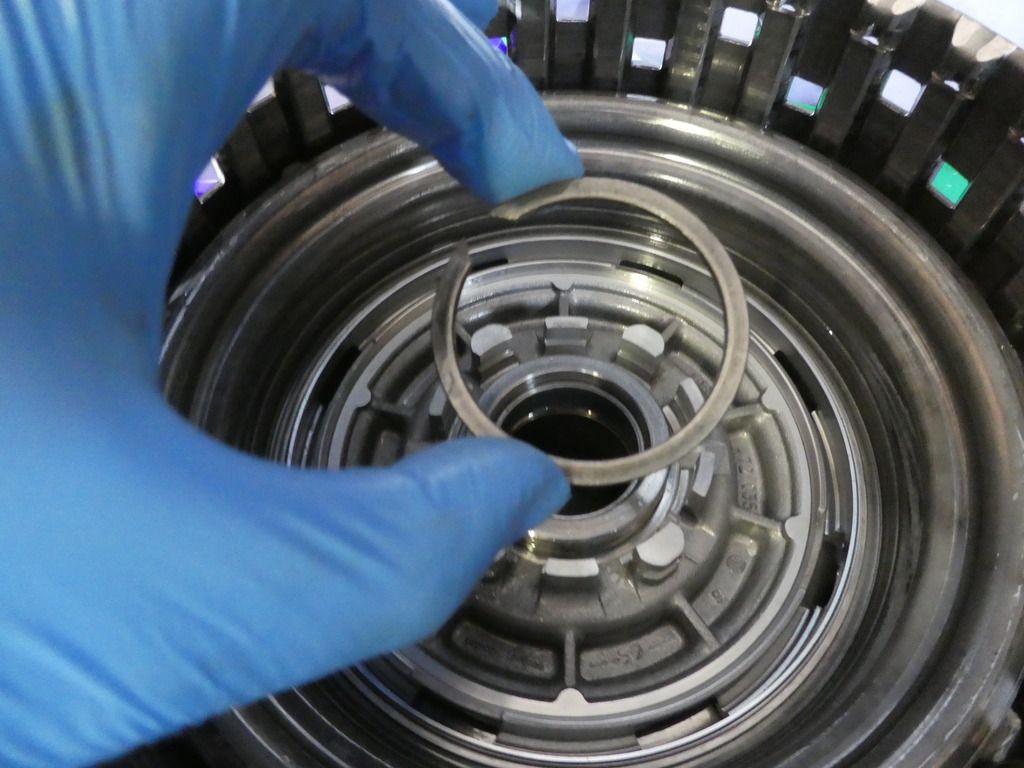
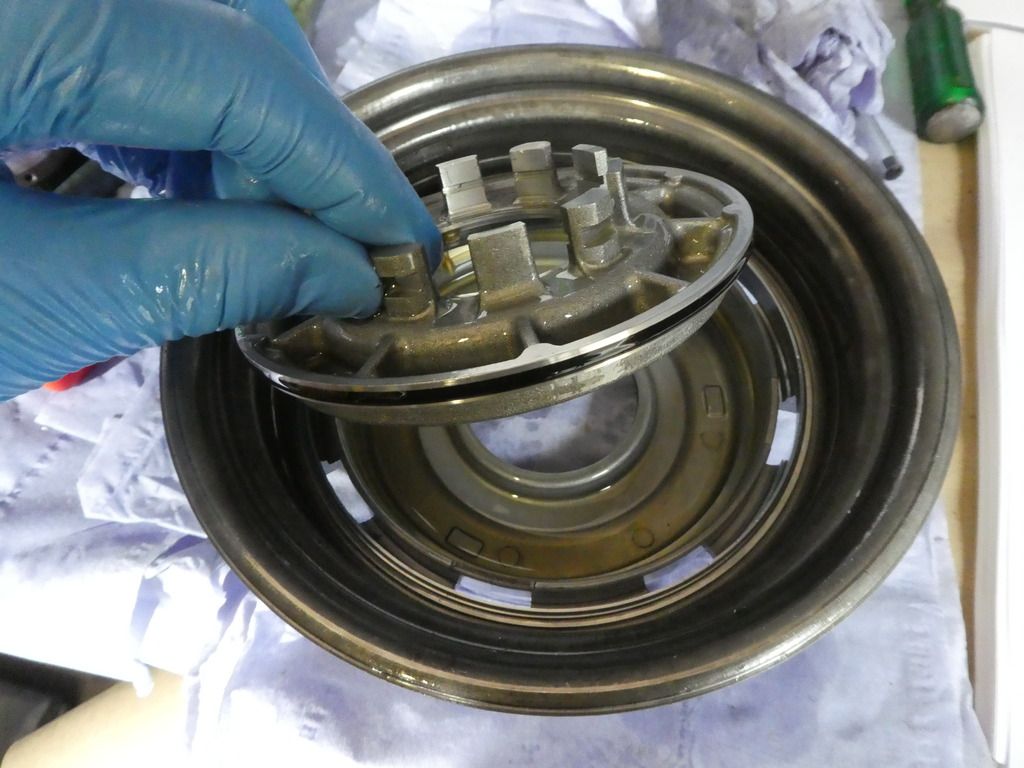
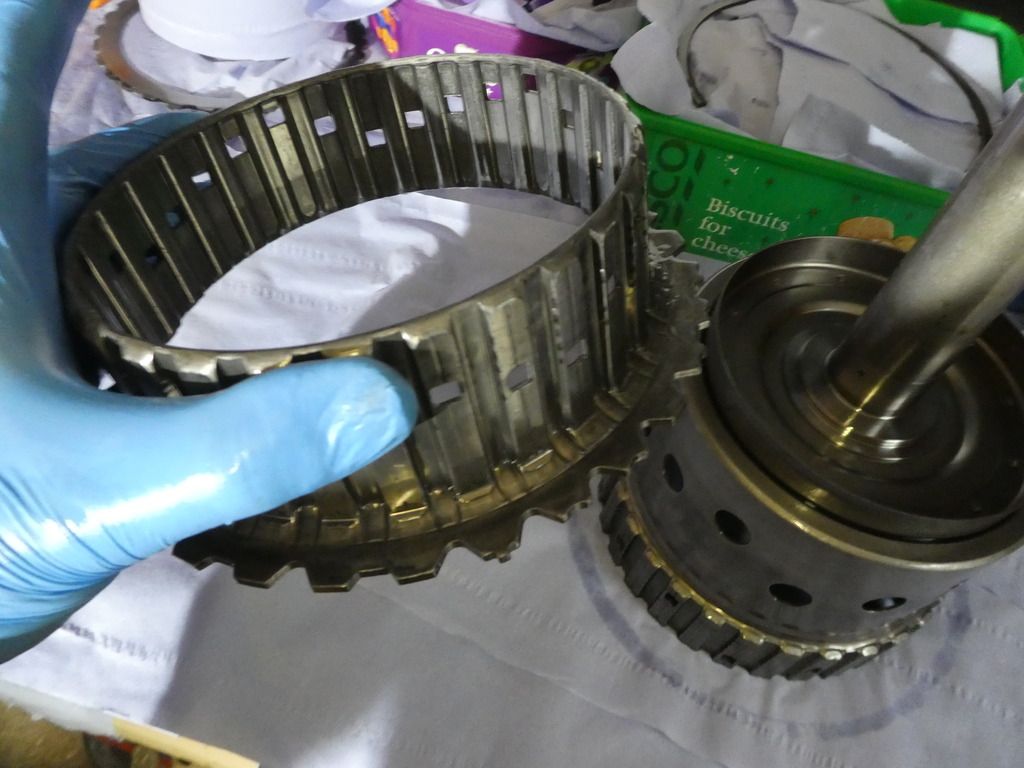
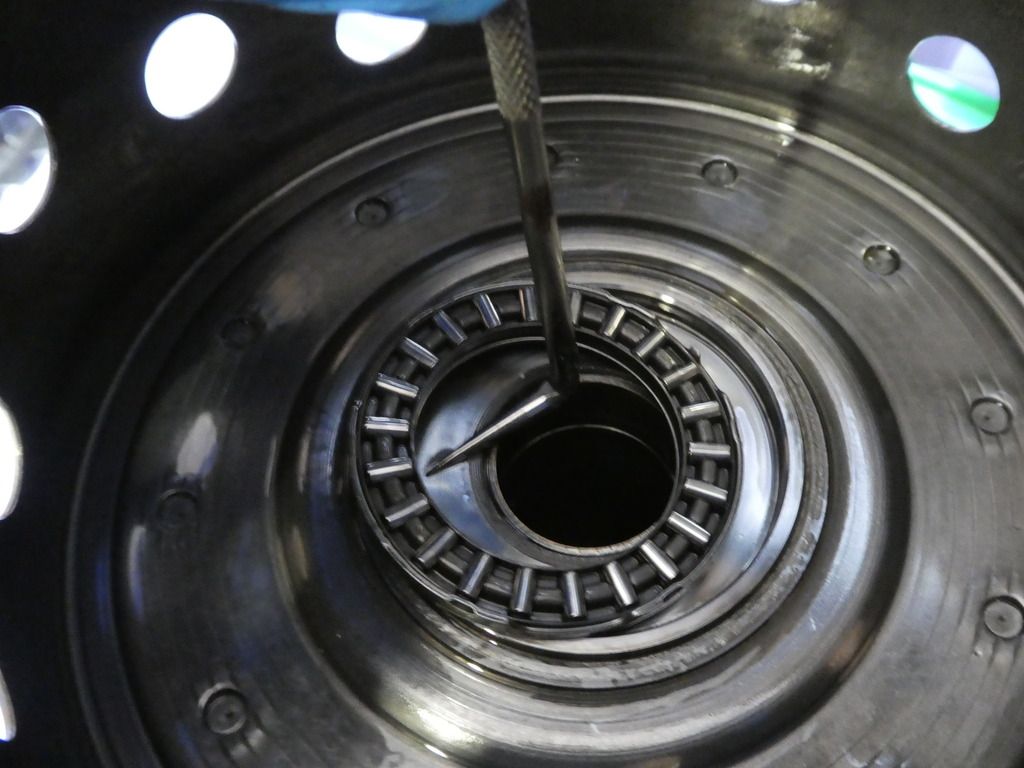
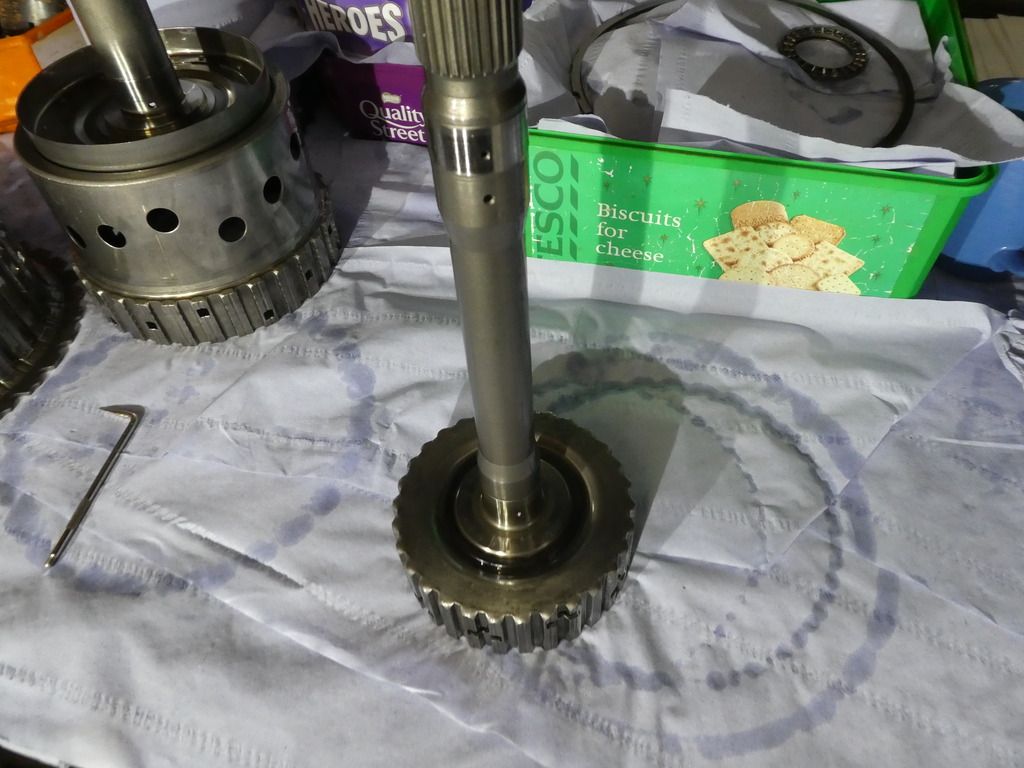
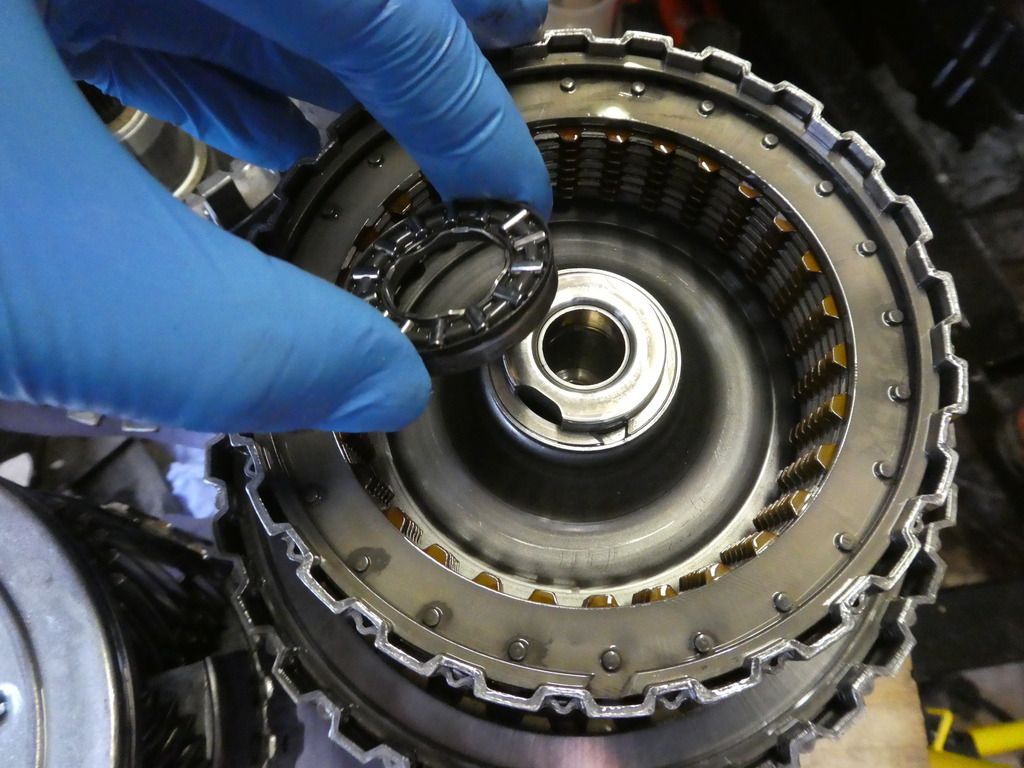
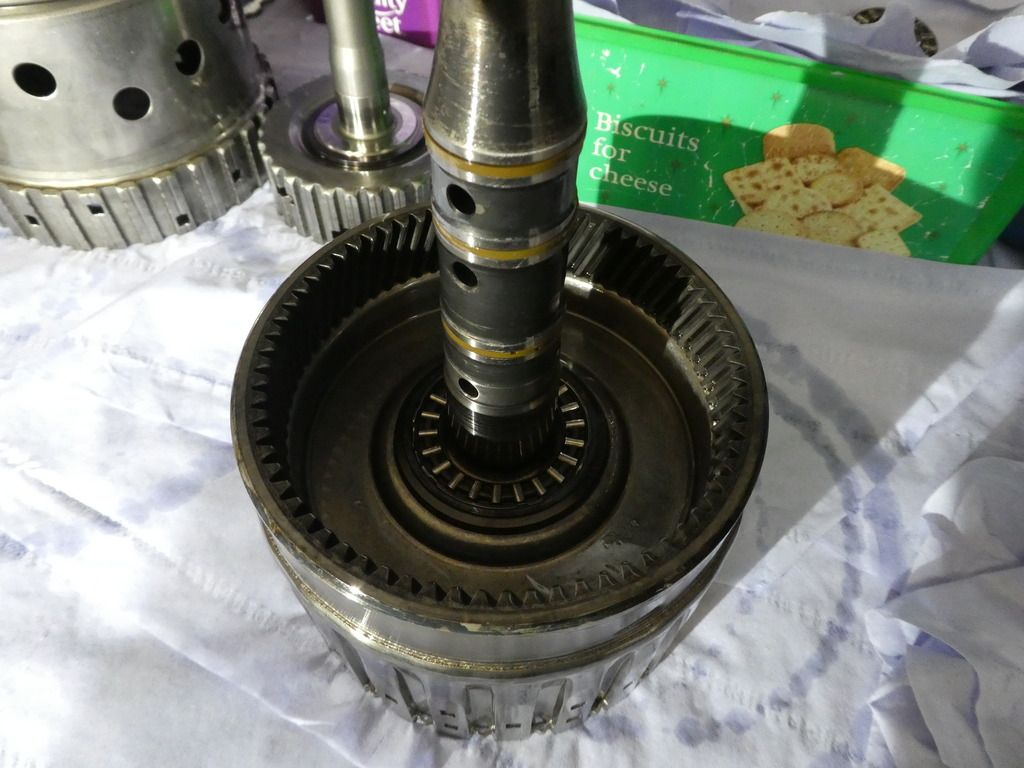
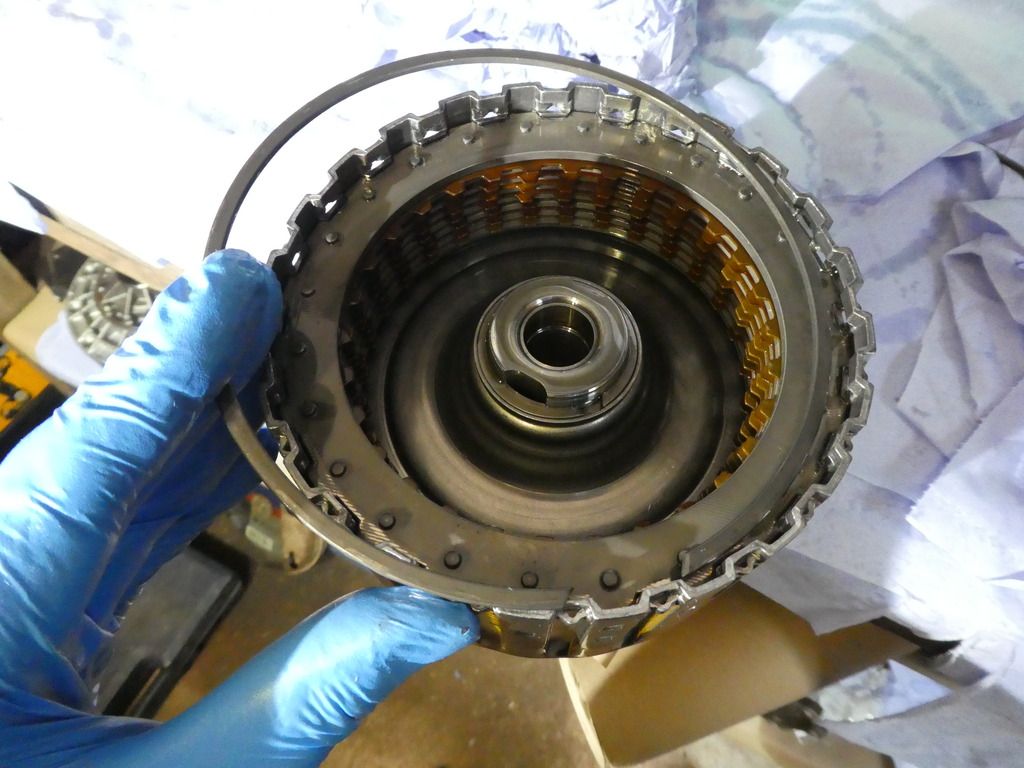
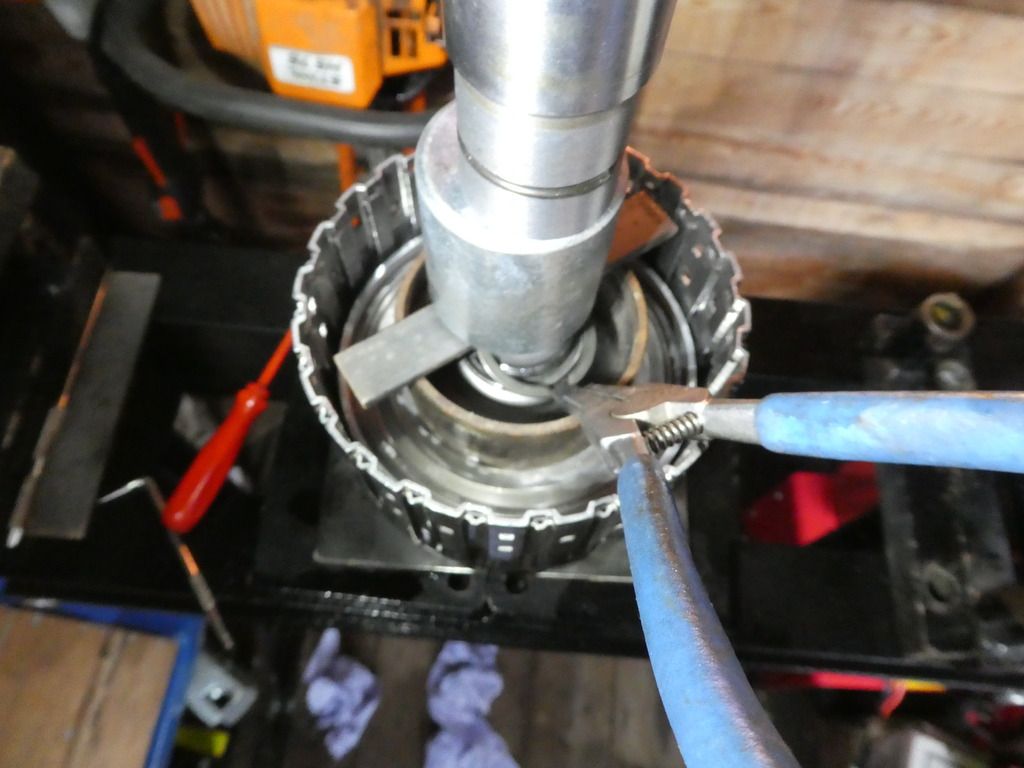
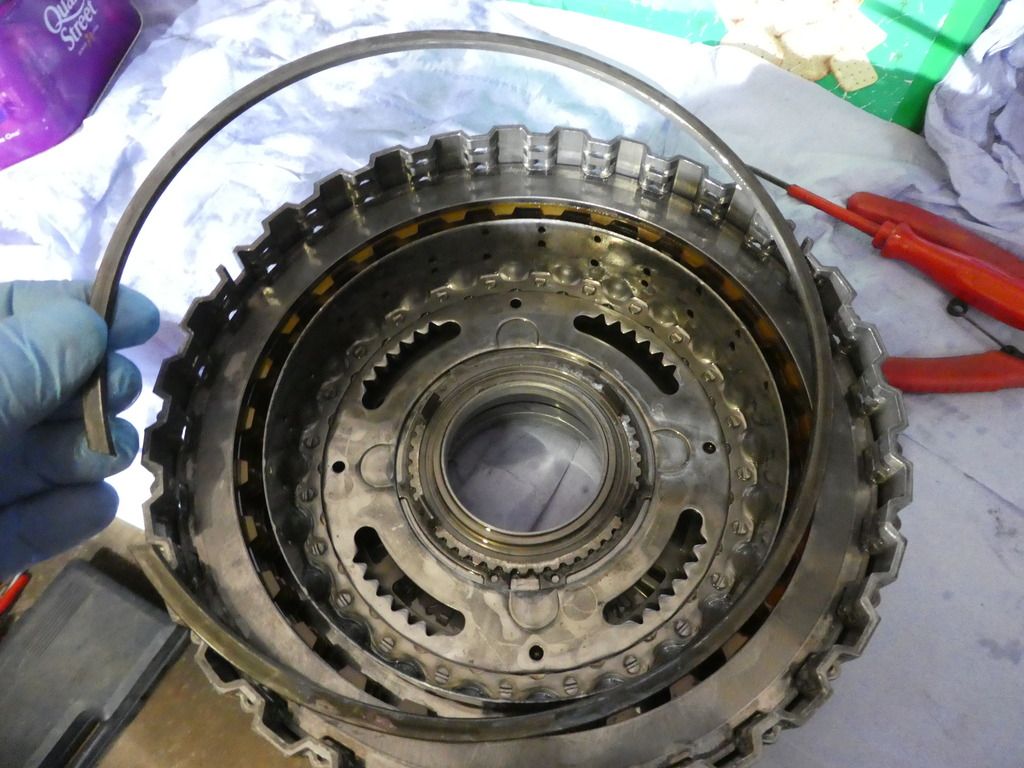
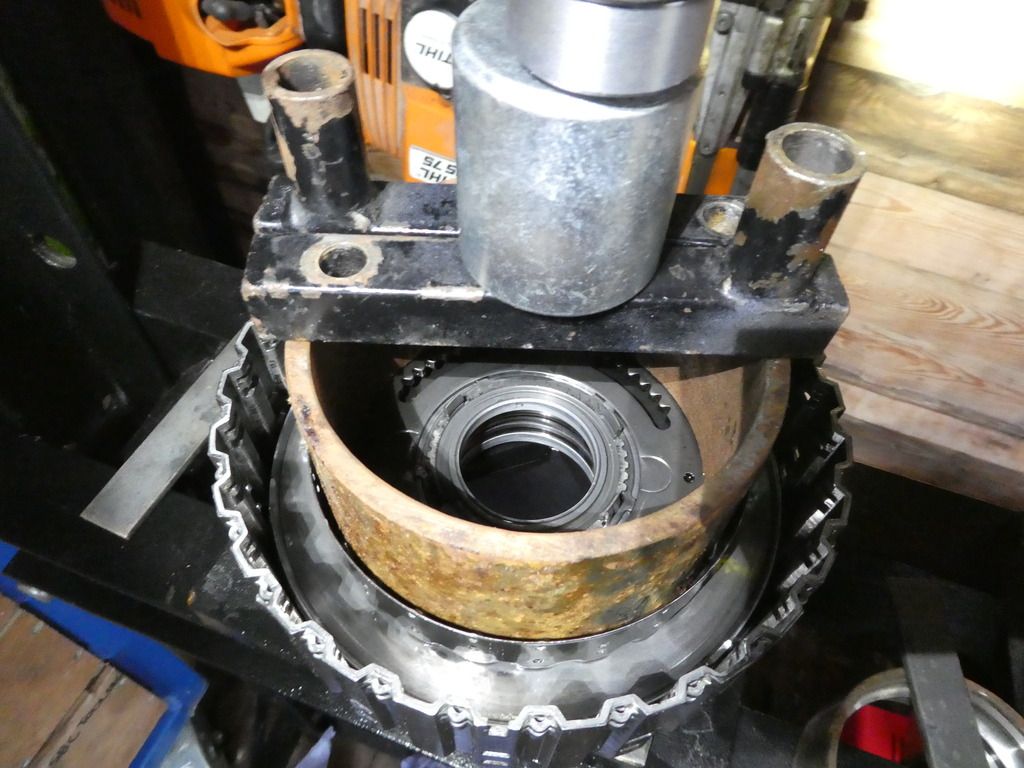
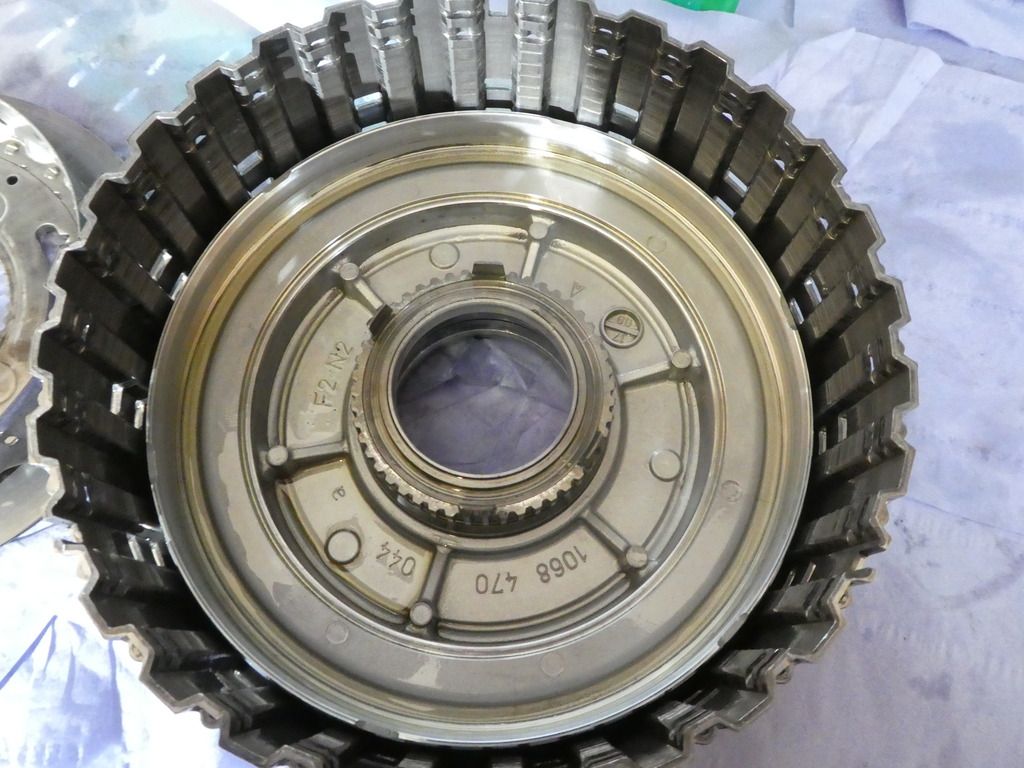
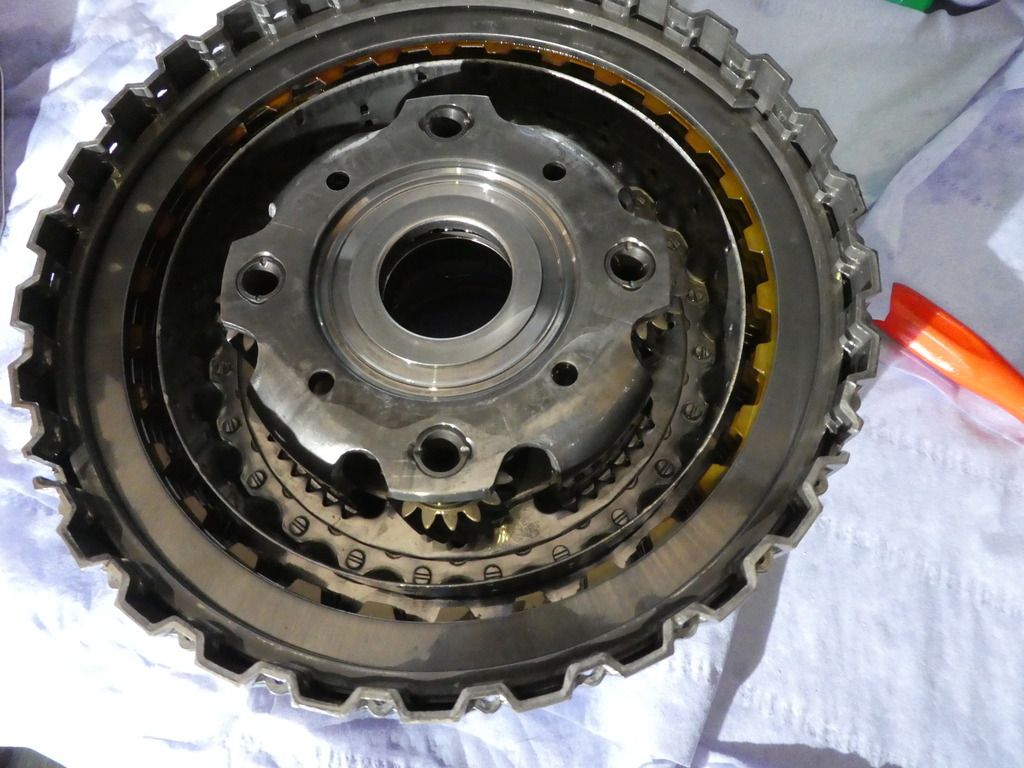
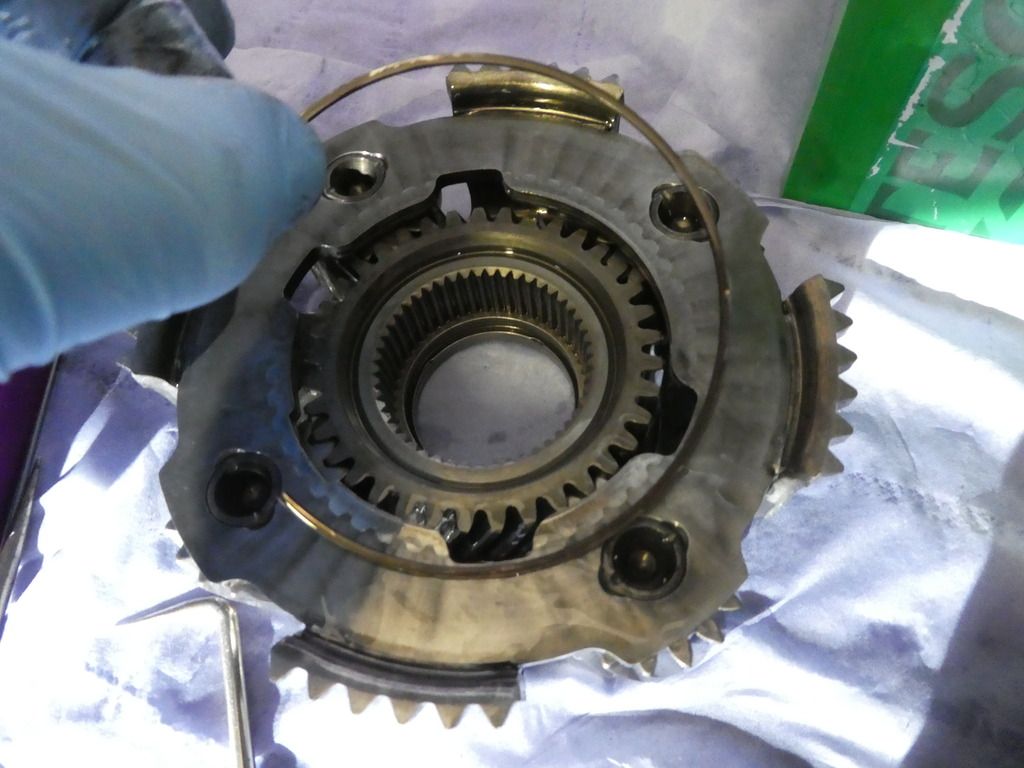
Next up is real tricky sod, you need to place a small screwdriver up in between those outer notches and the planetary gears - there is a circlip on the inner edge holding the planetary gear assembly in place, you need to lever this clip out of its seat in the four points around the gears. You will need a torch to see it and a lot of patience
Image
Image
Image

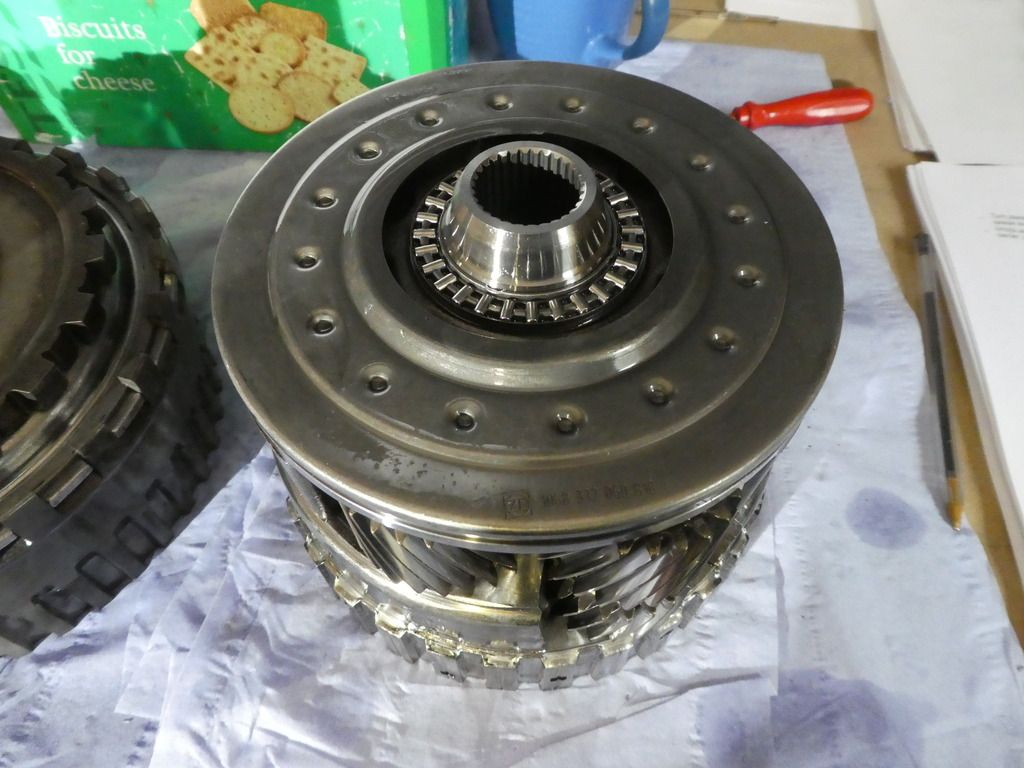
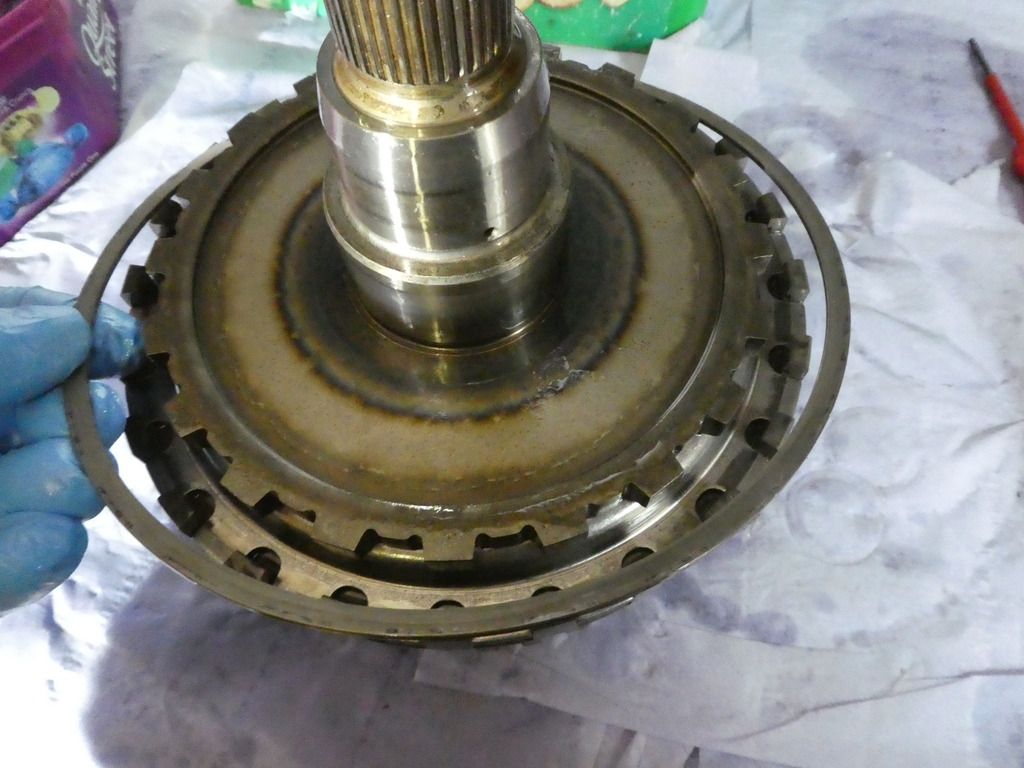
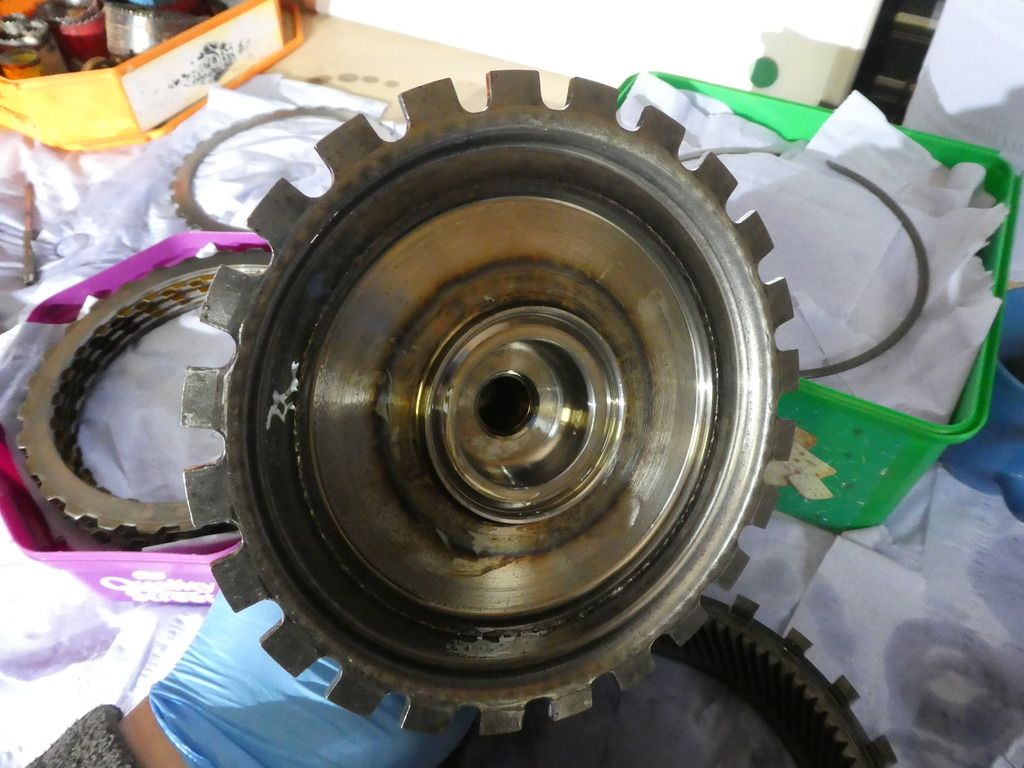
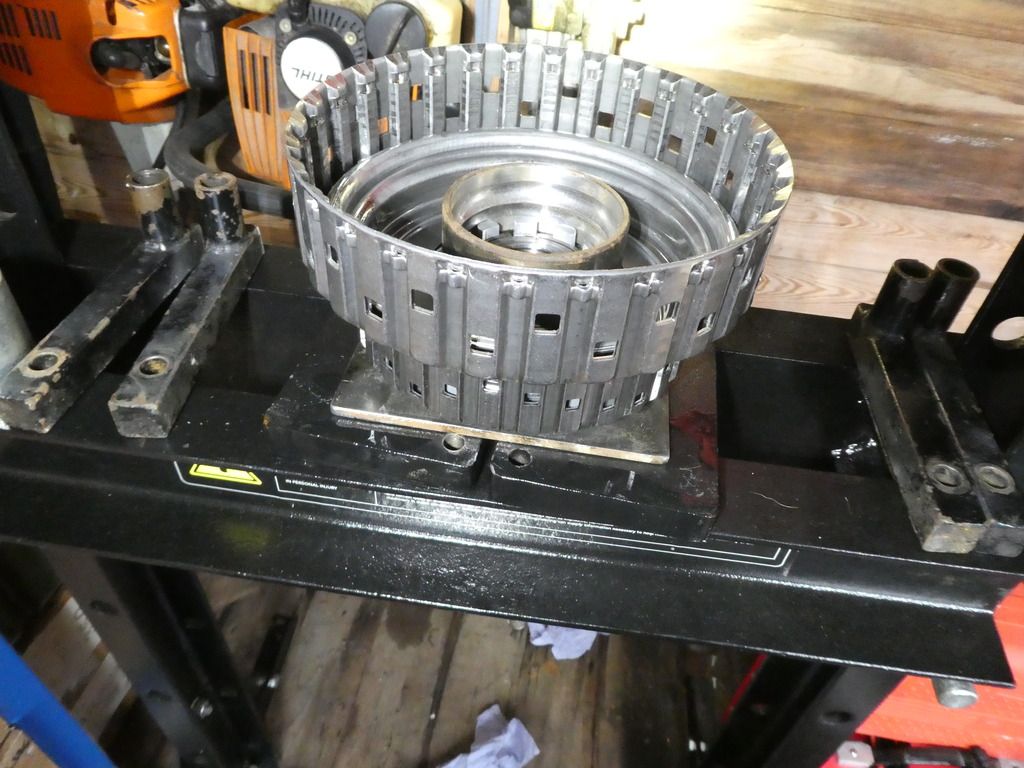
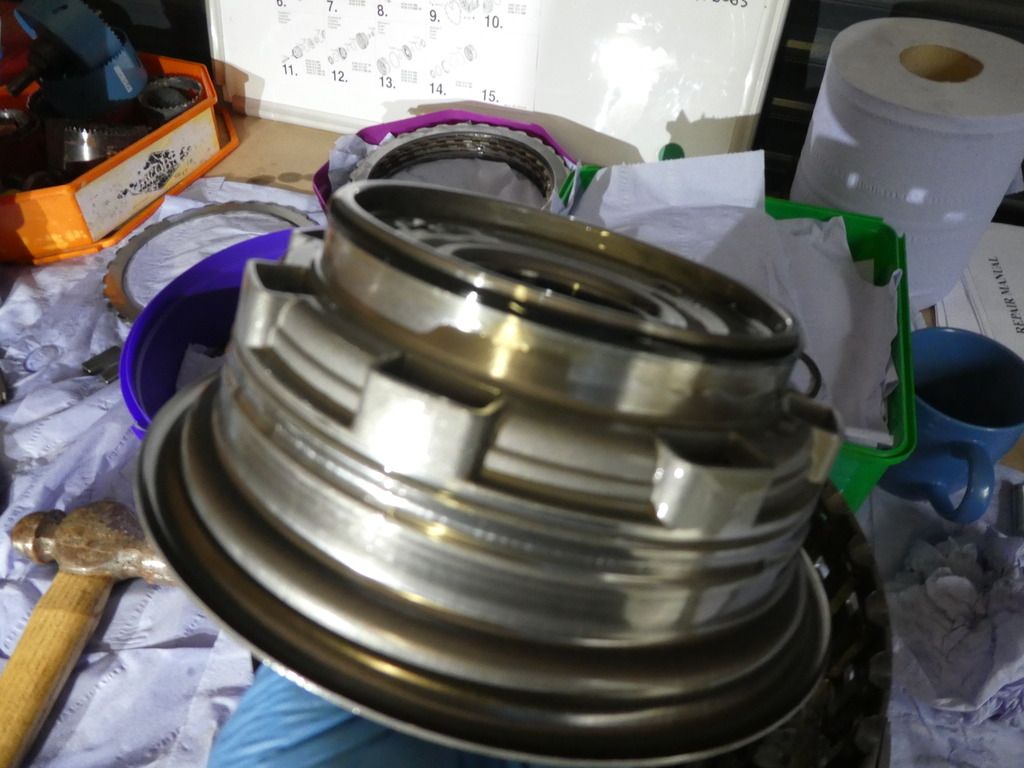
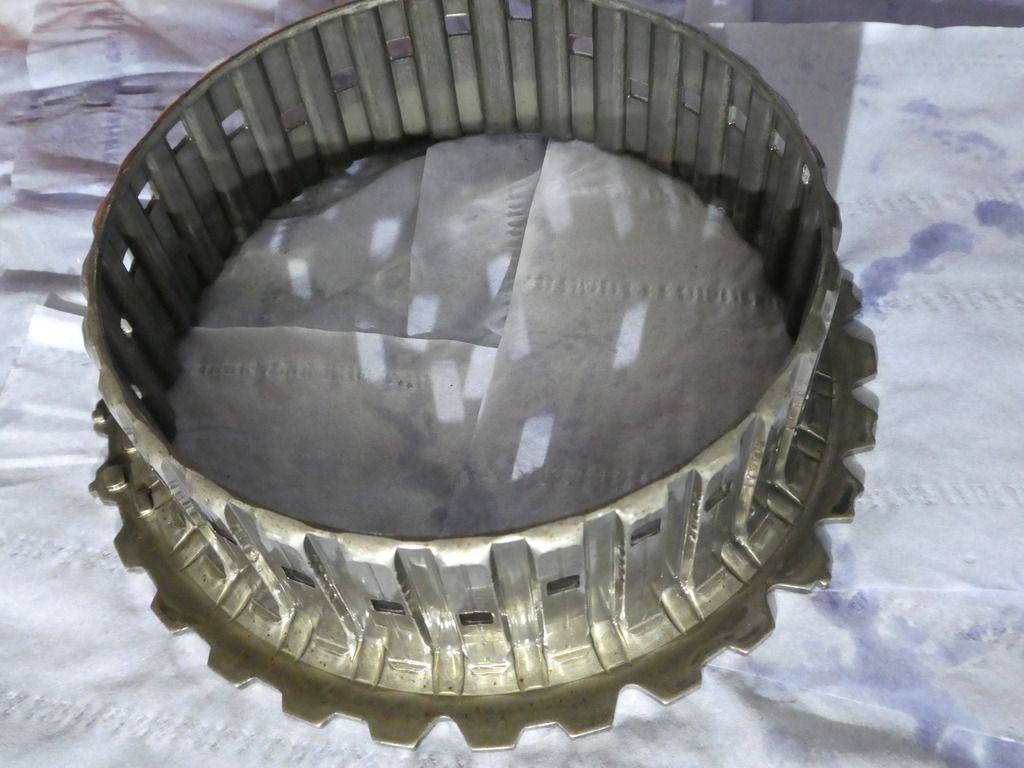
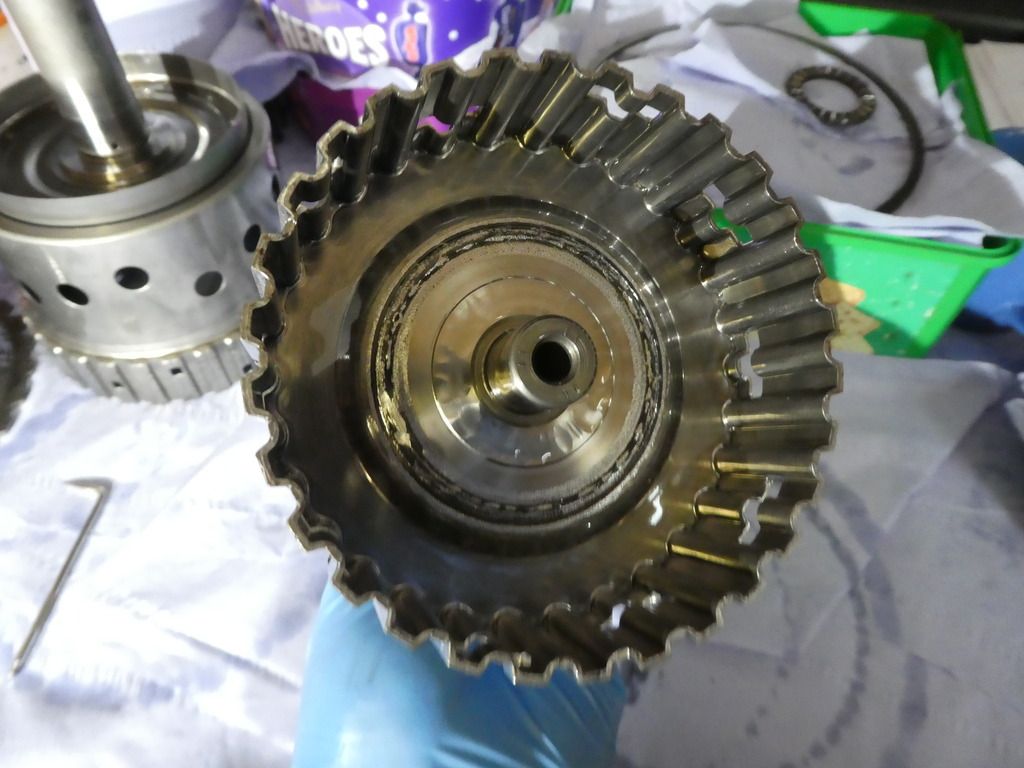
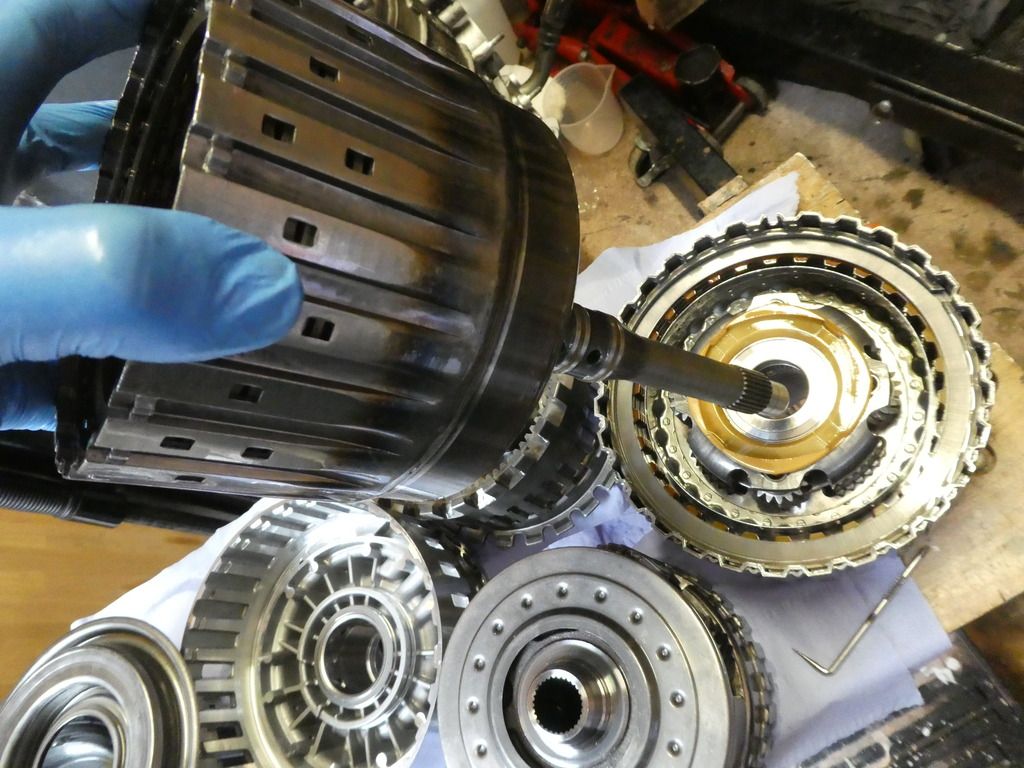
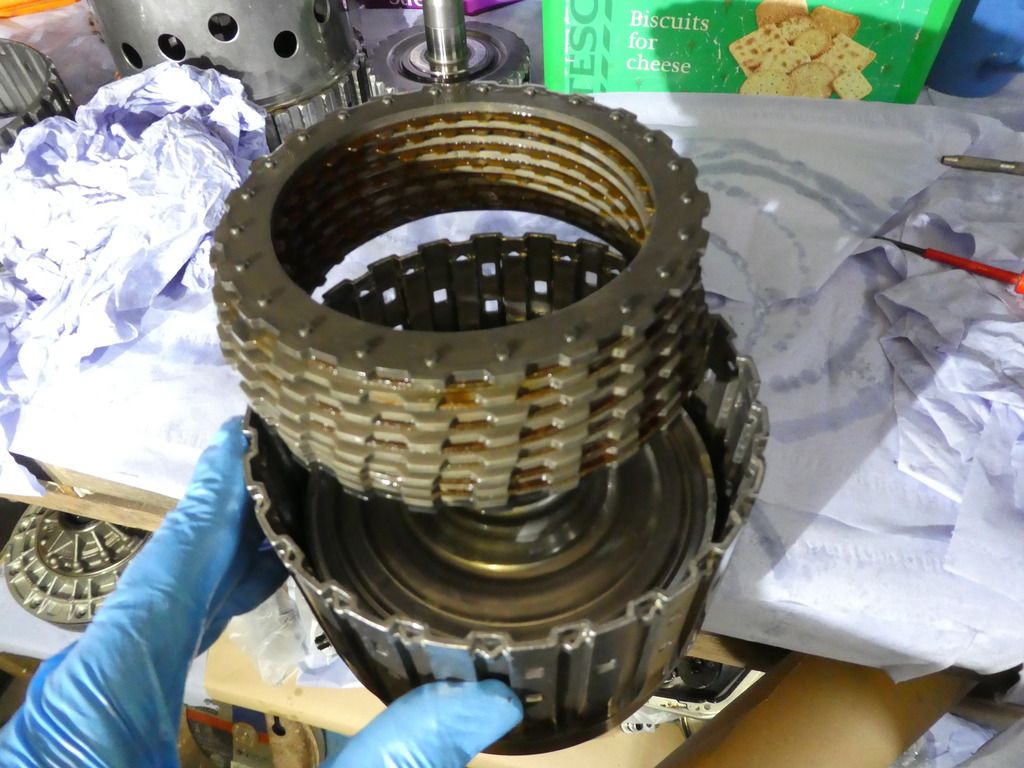
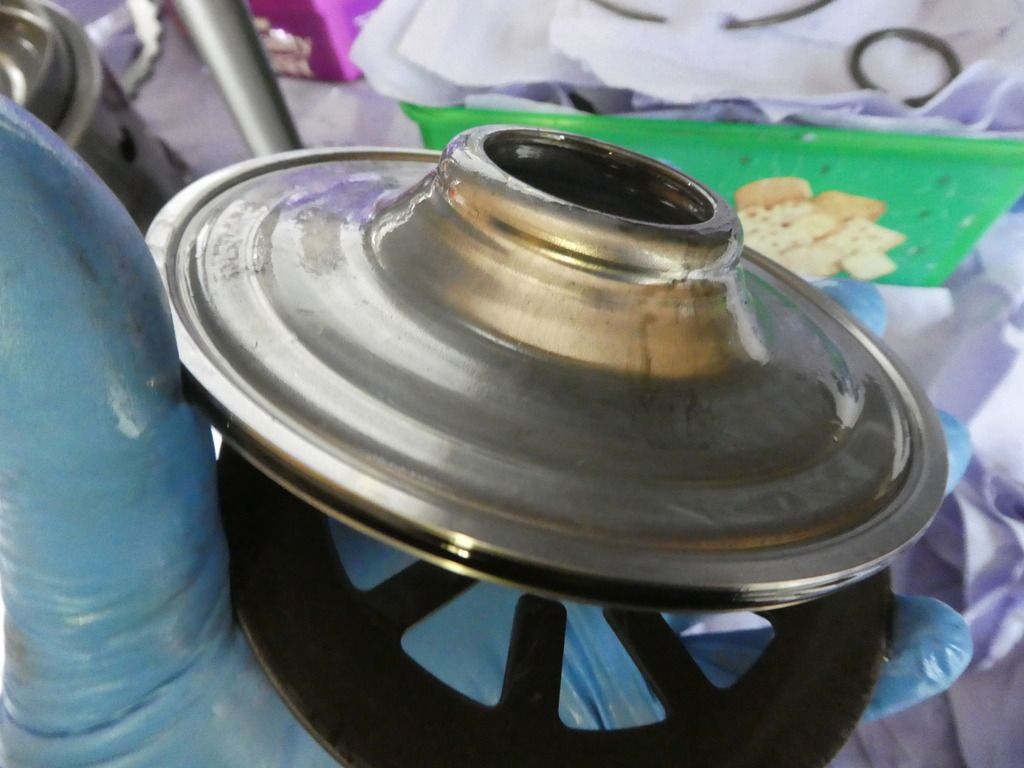
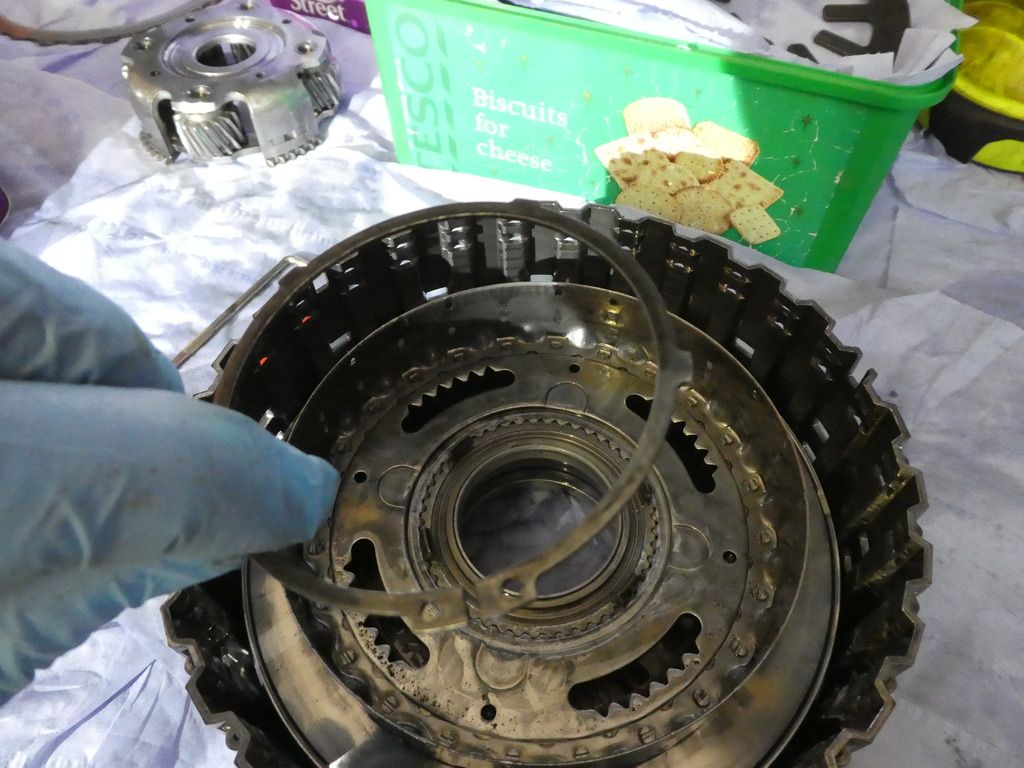
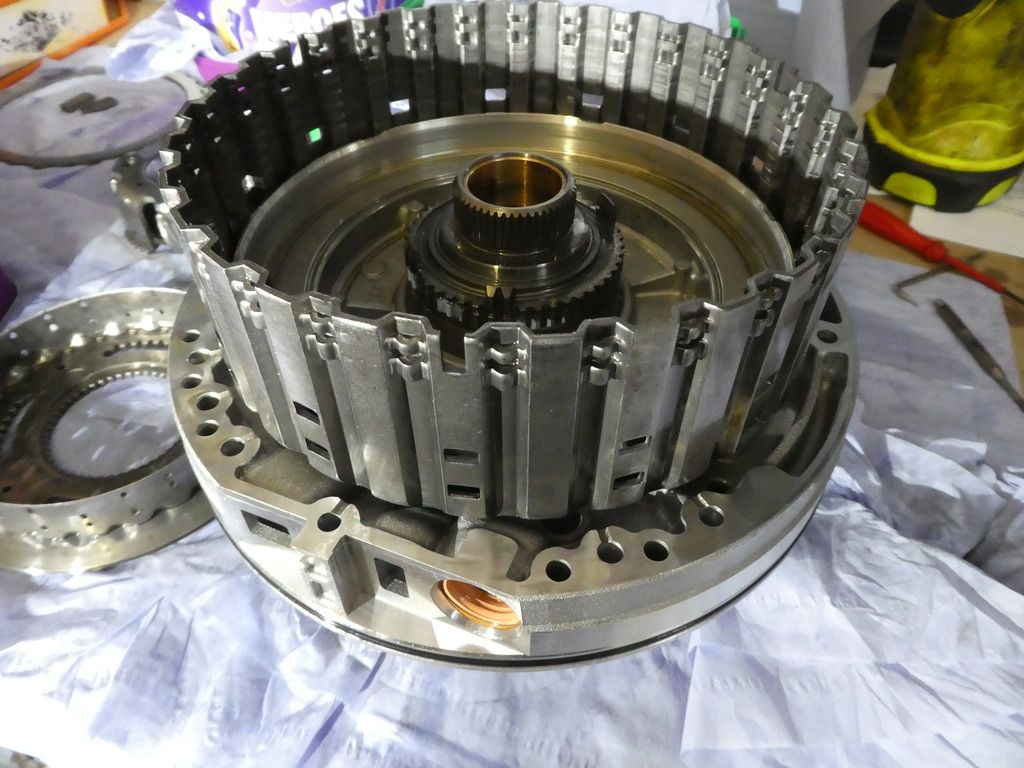
If we now flipthis upside down
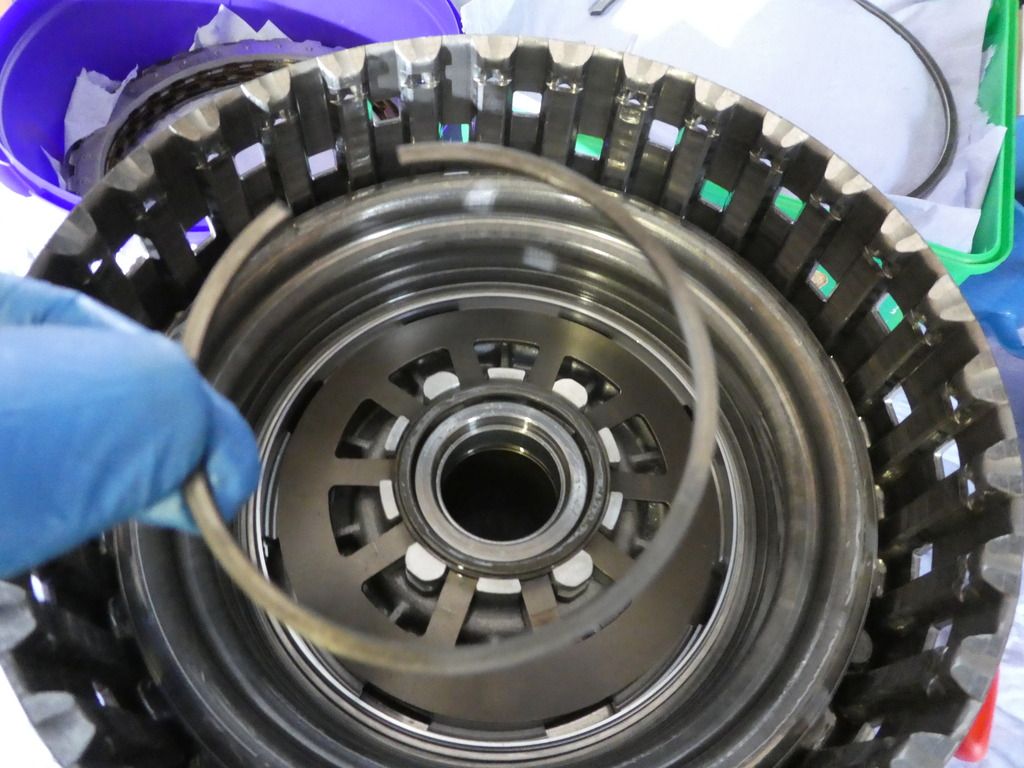
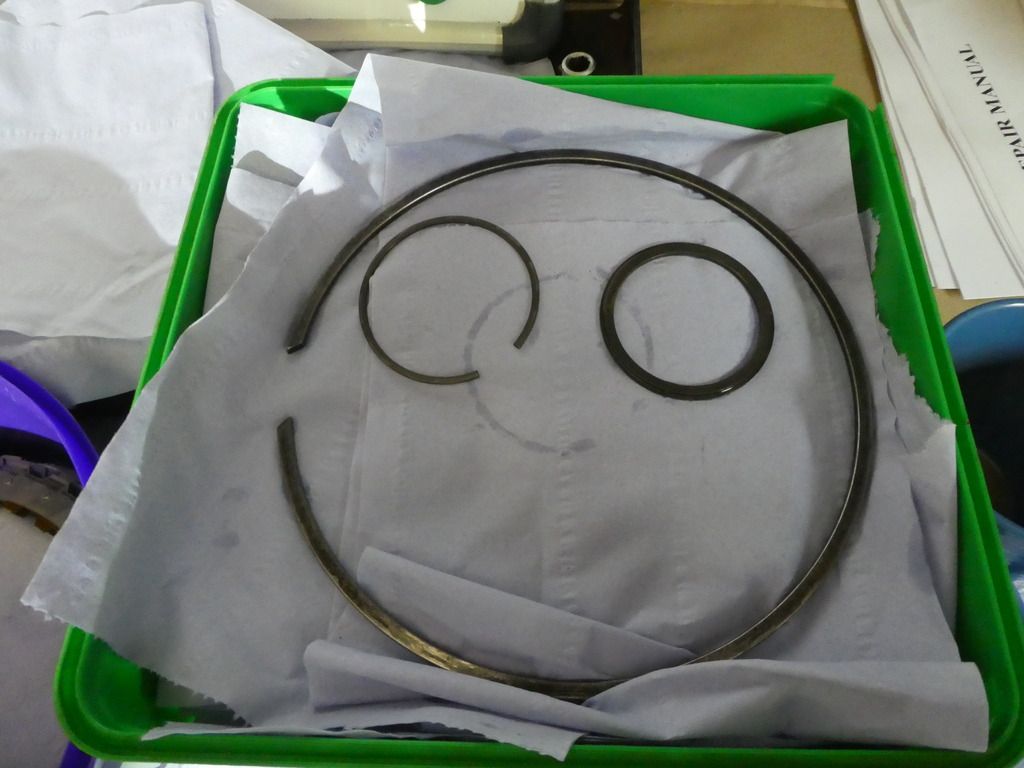
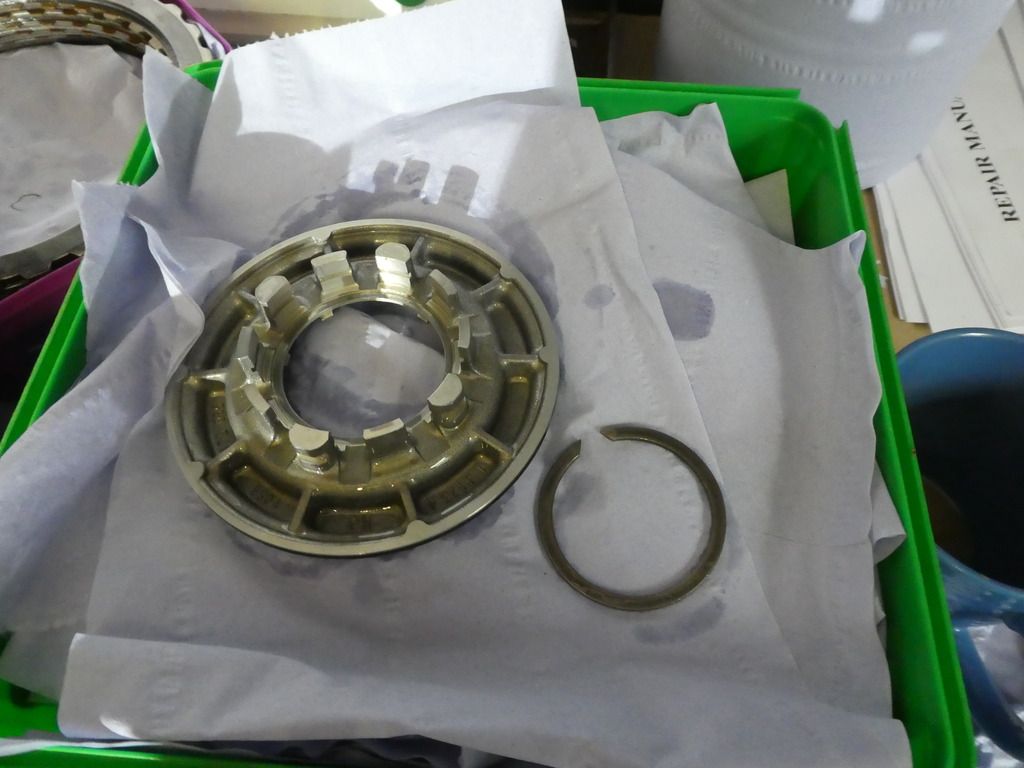
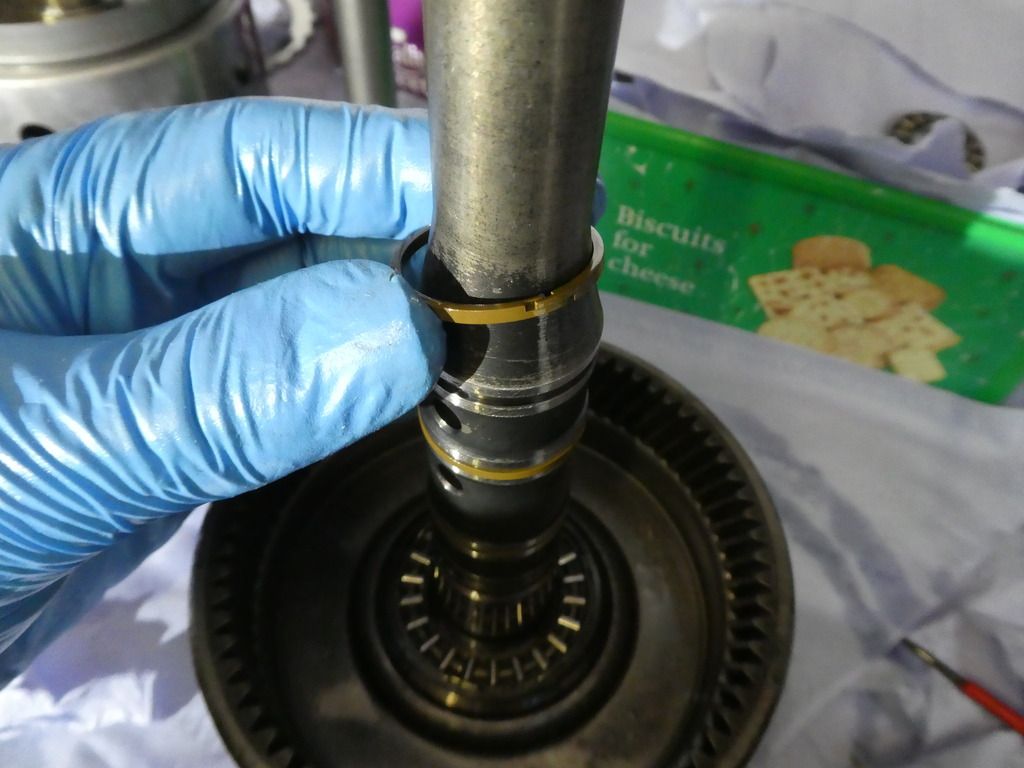
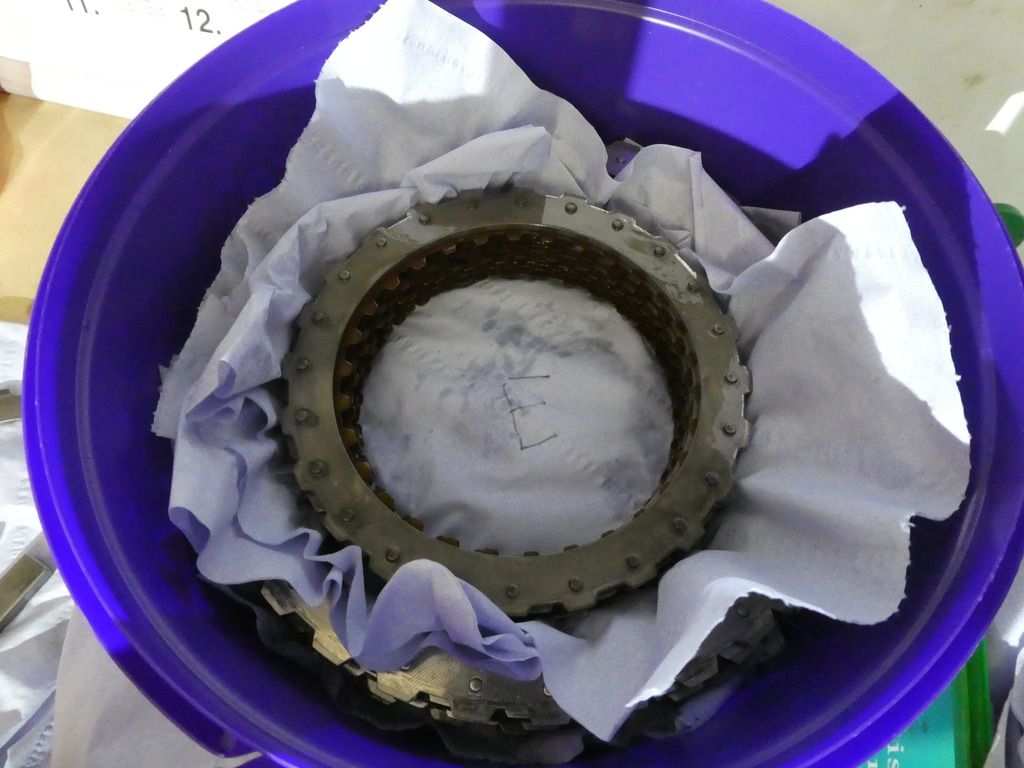
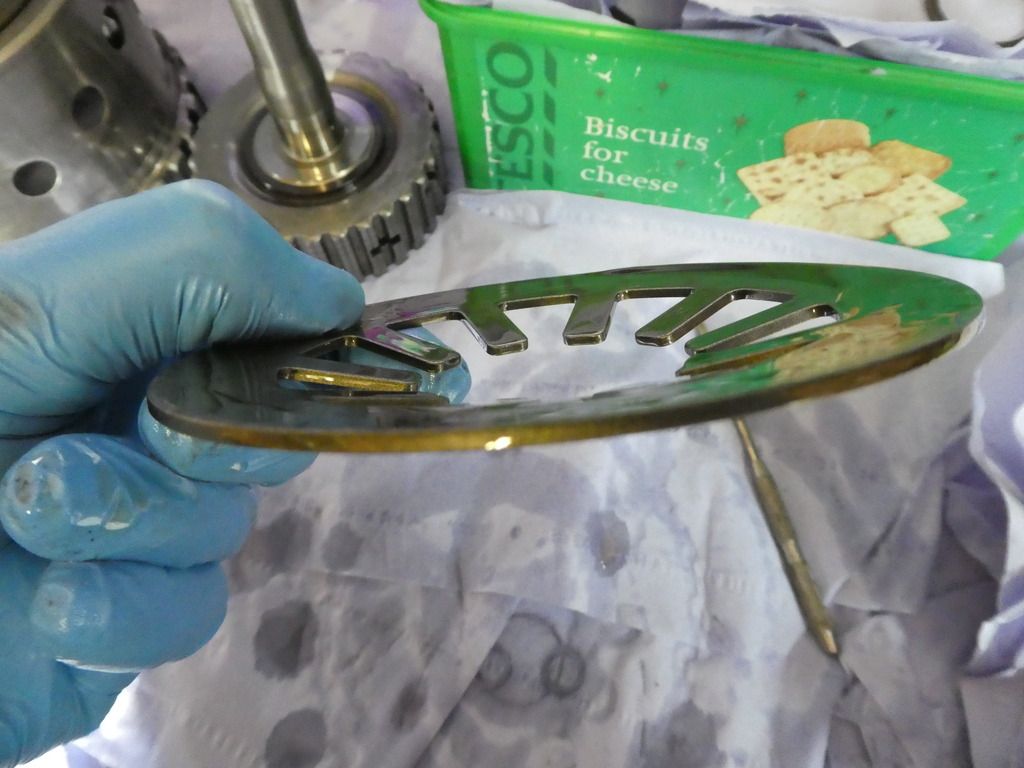
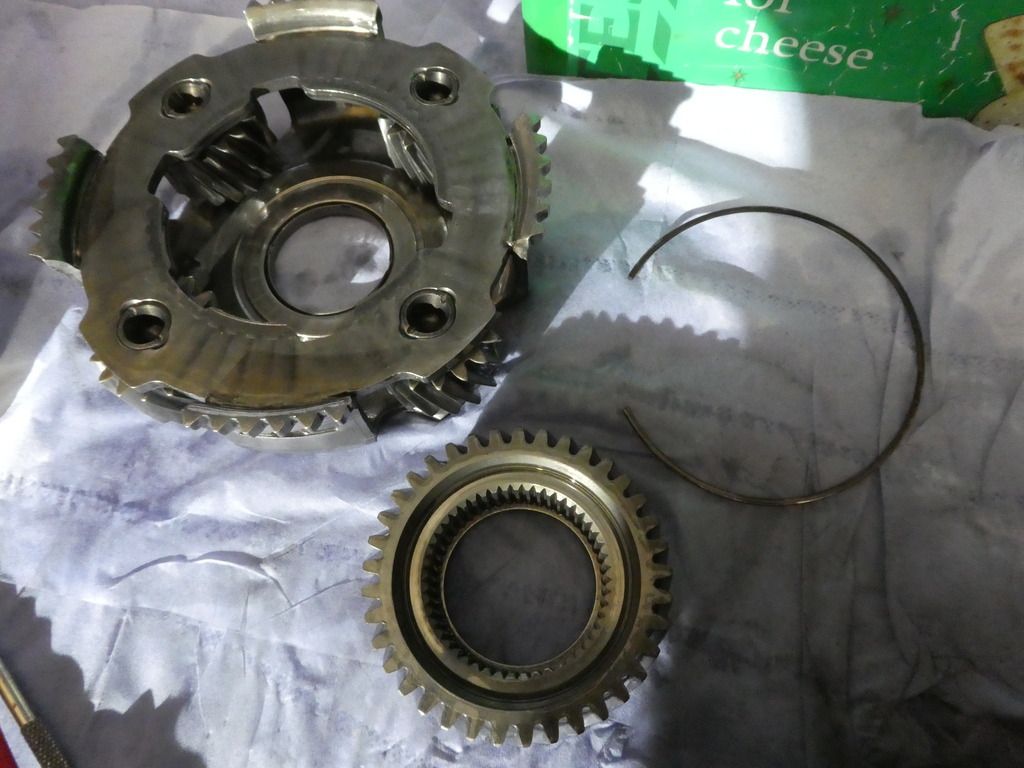
That's the sod there, if you want to replace this one its ZF code 0730.513.825, the book recommends you do so
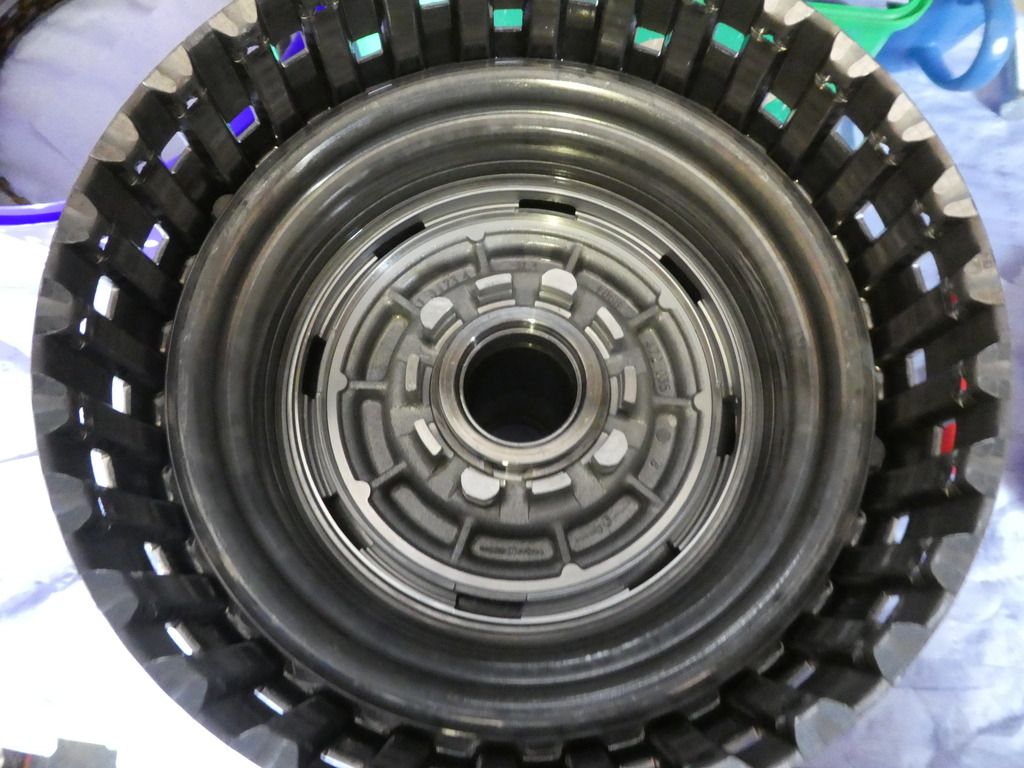
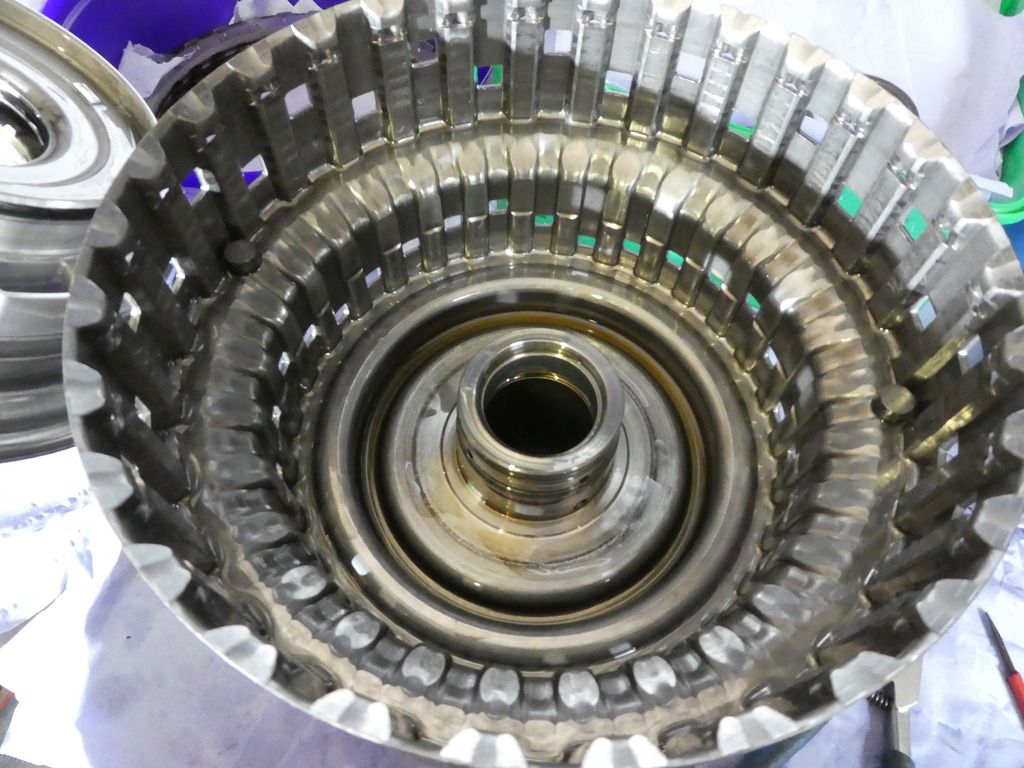
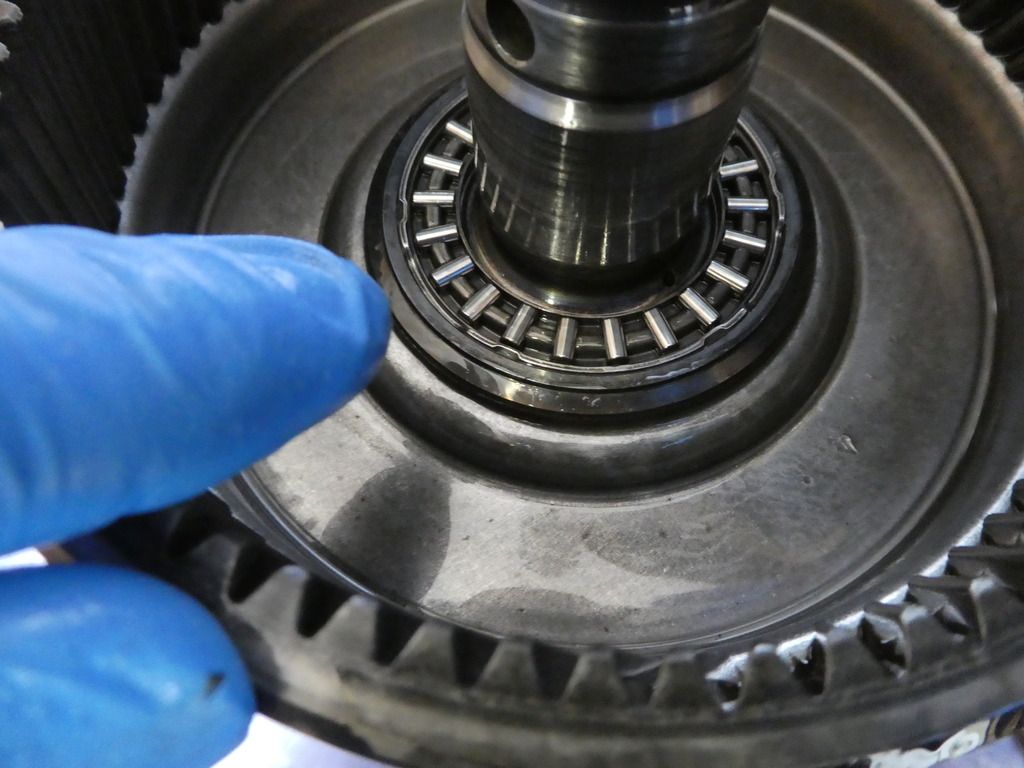
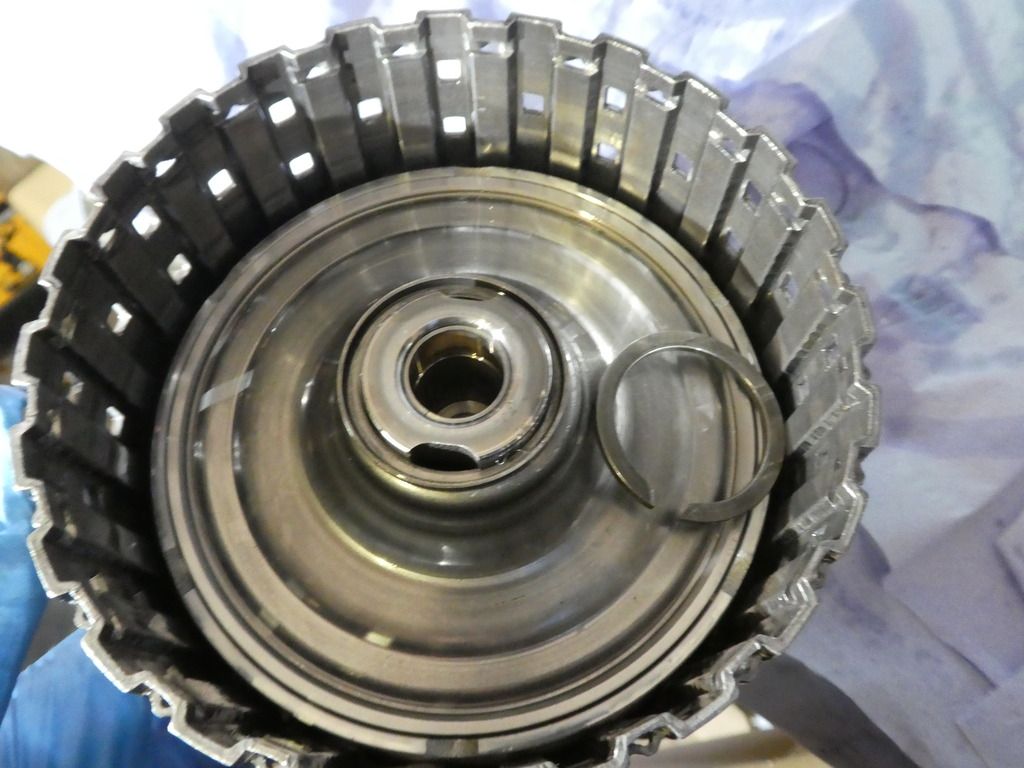
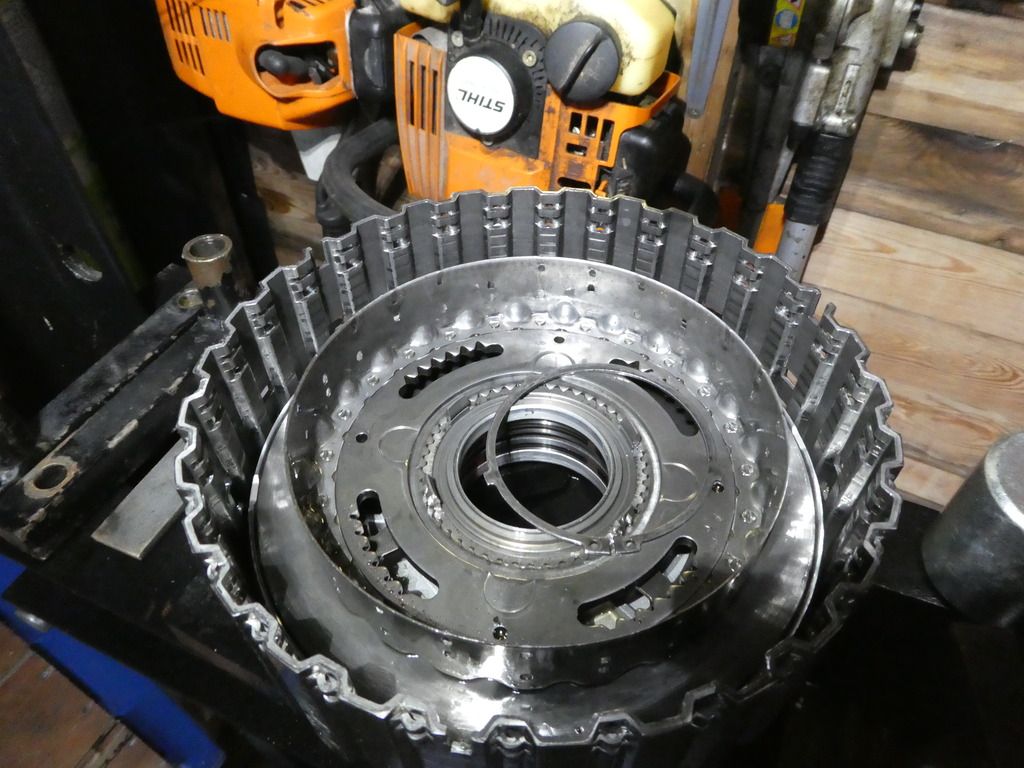
You can also clearly see the four inner recessed notches you need to get the driver onto to pry this clip off (easy to see now, not so easy with this in situ!)
Image

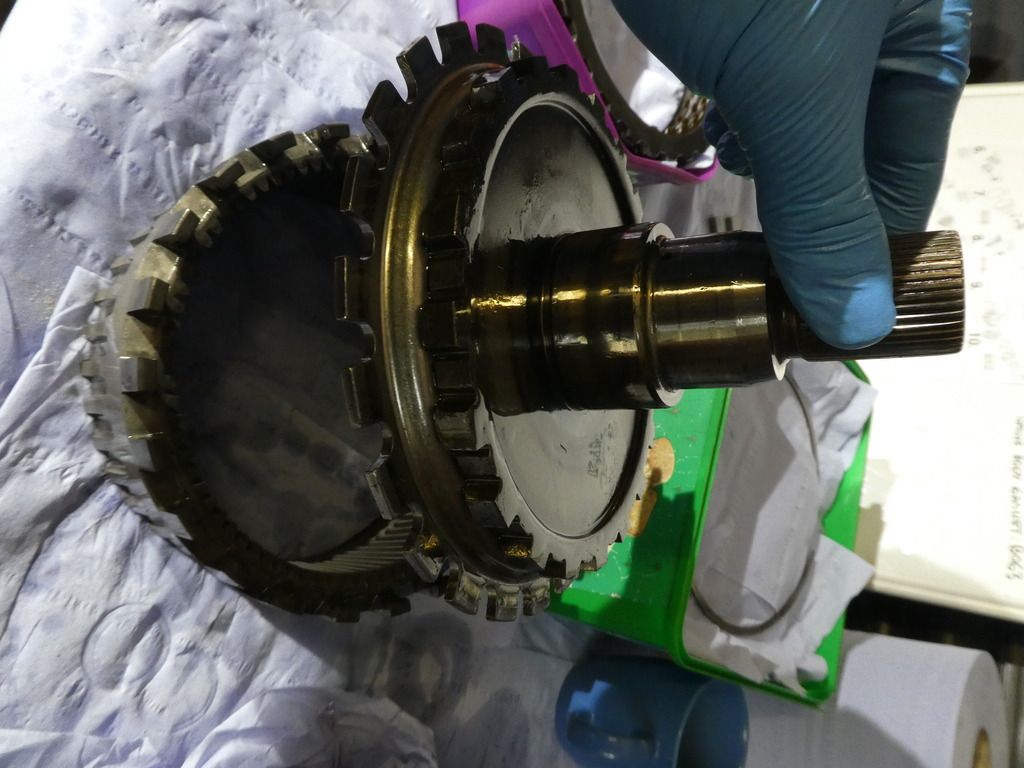
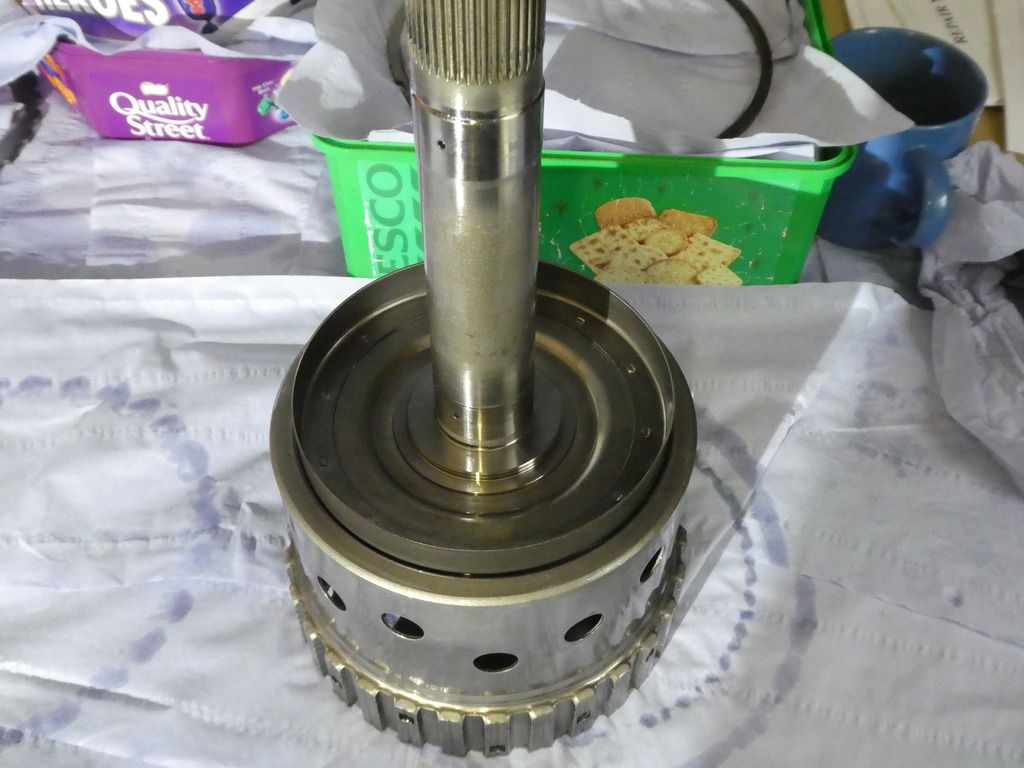
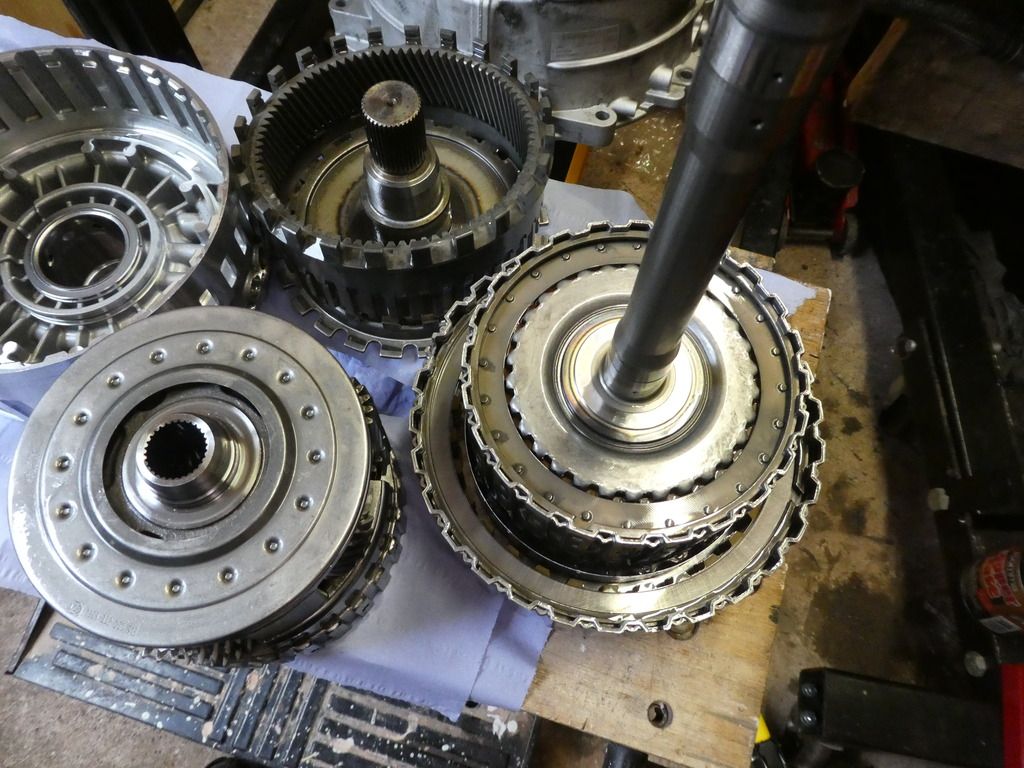
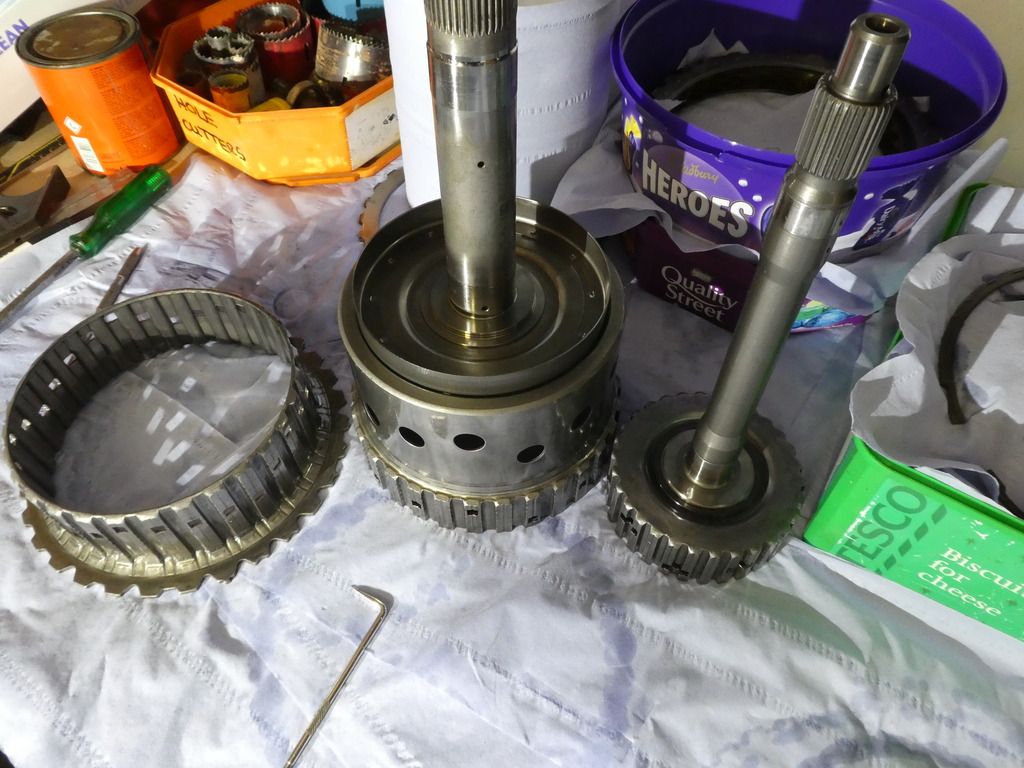
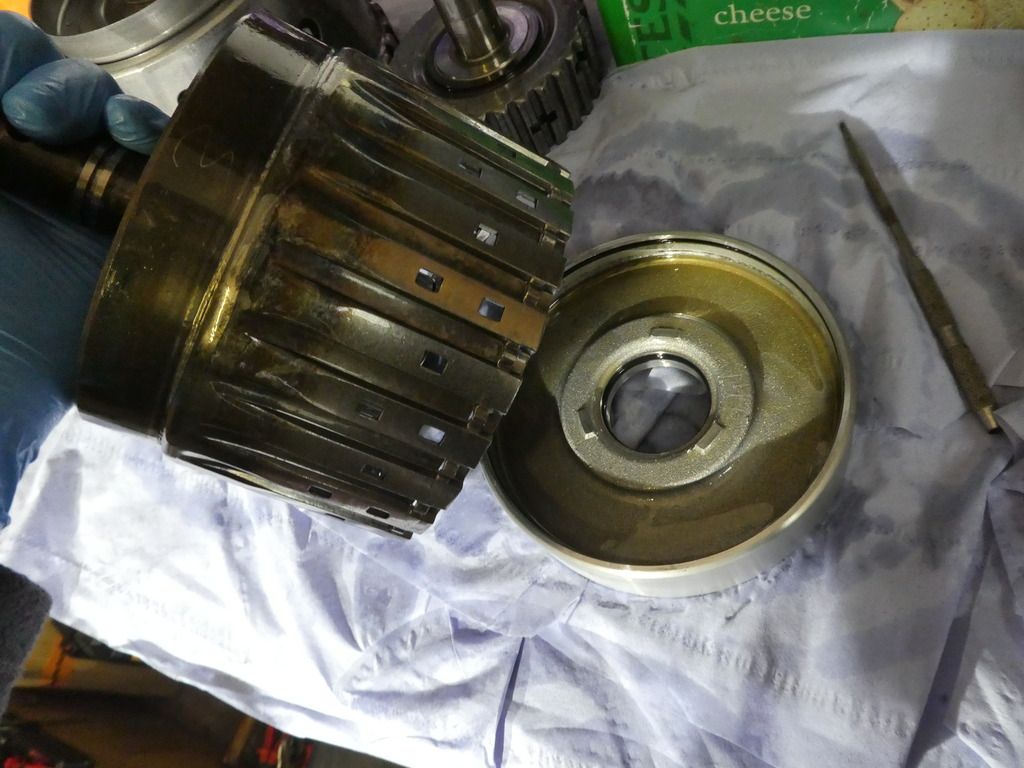
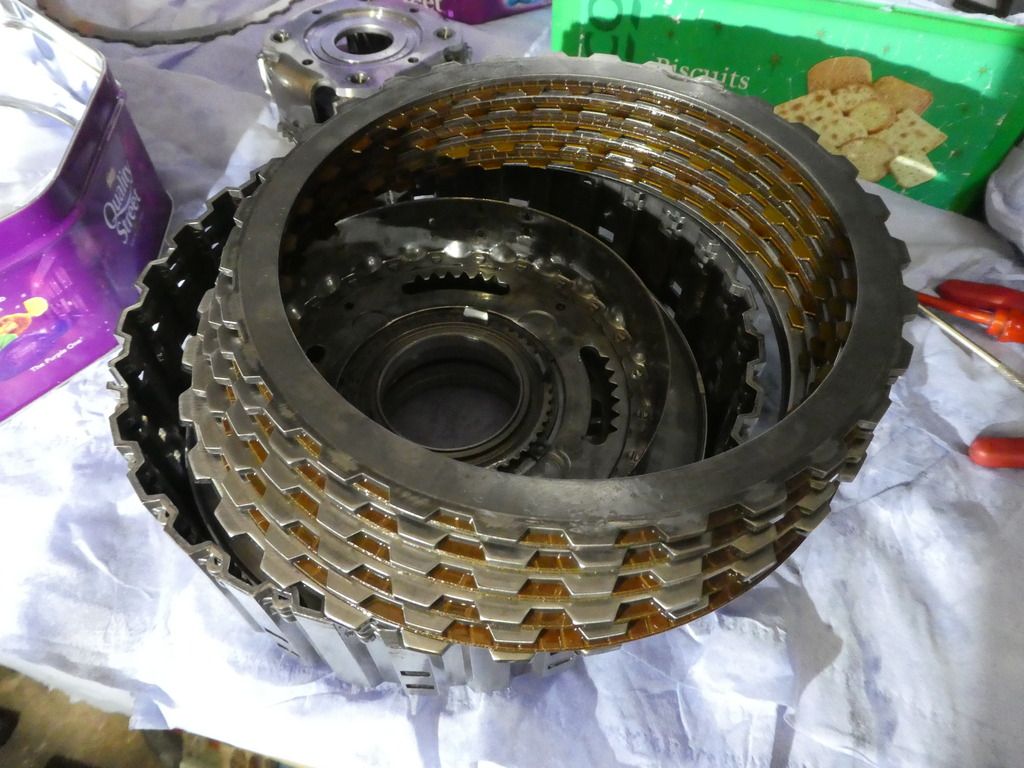
Now lift out the sun gear
Image

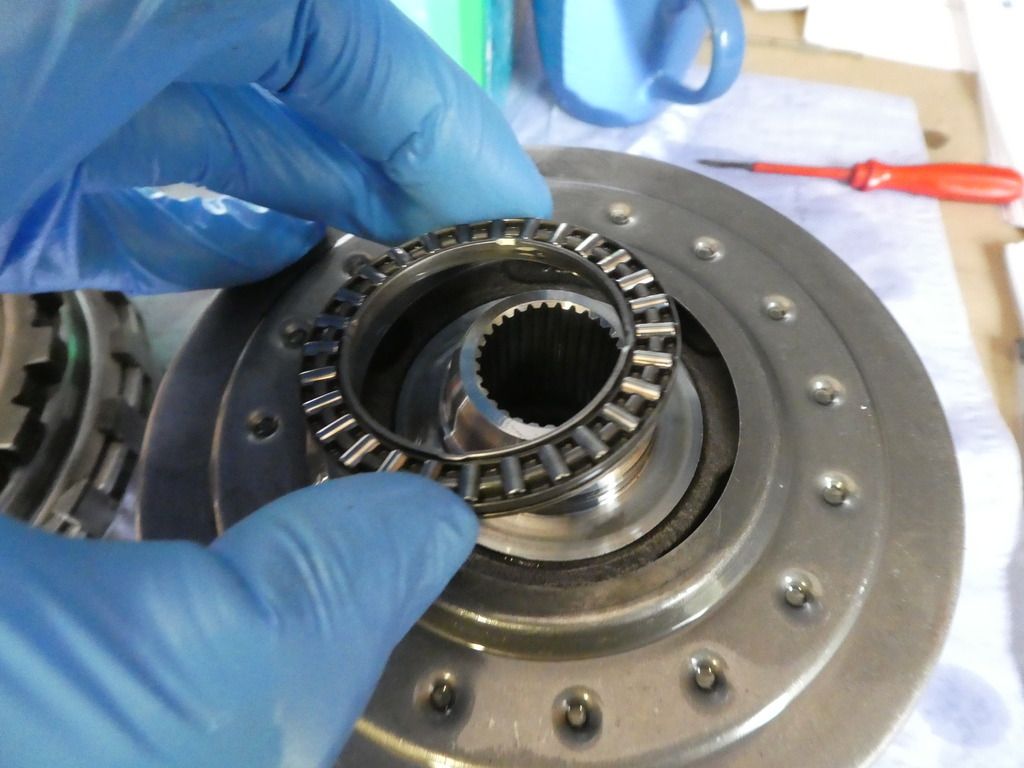
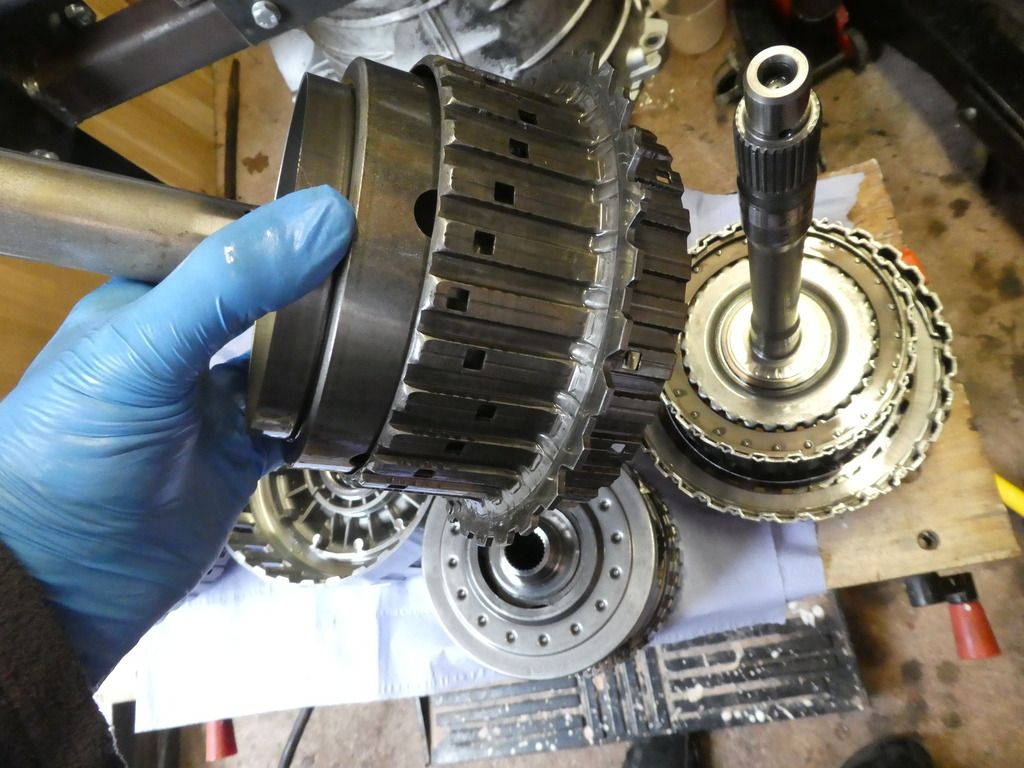
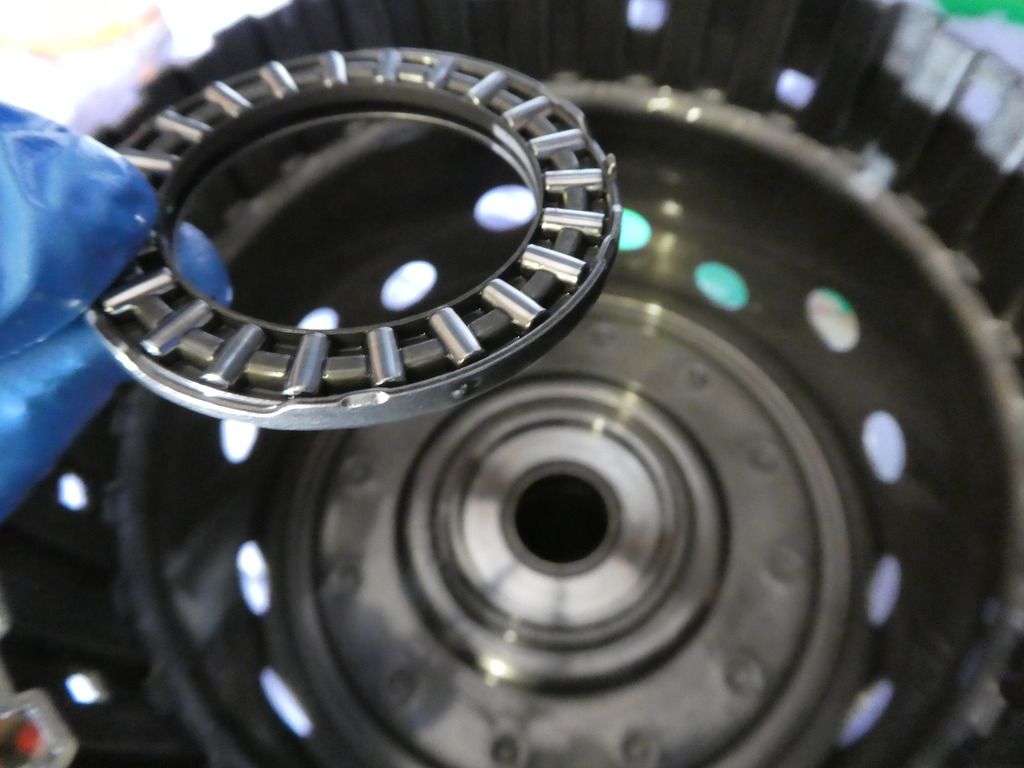
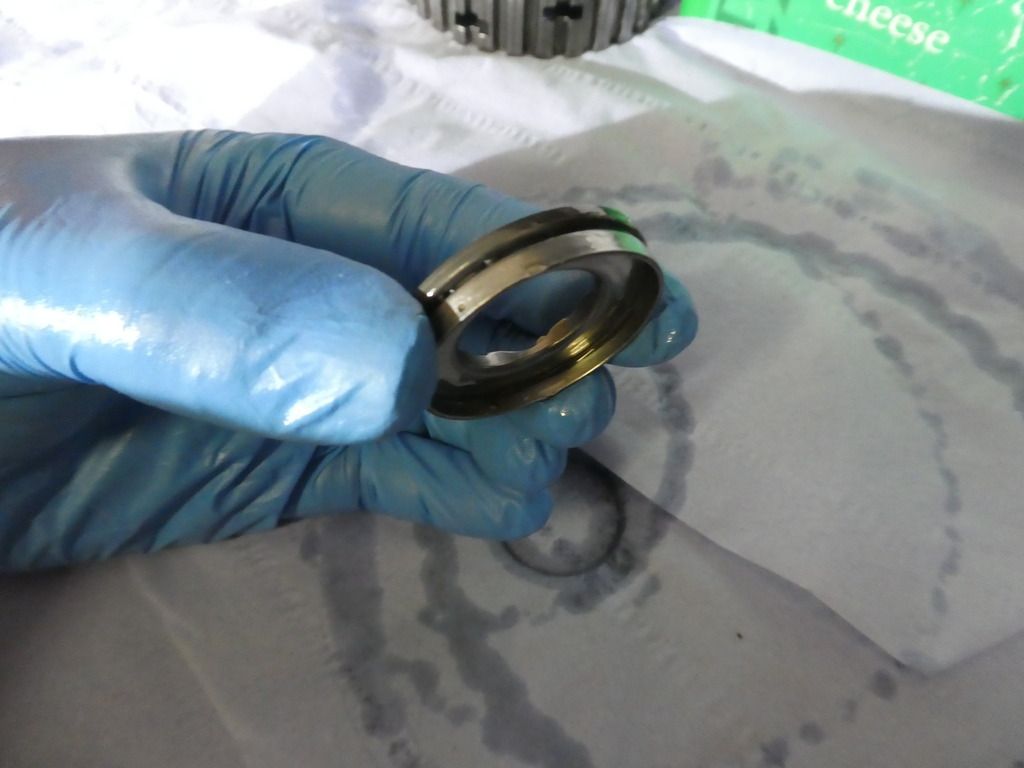
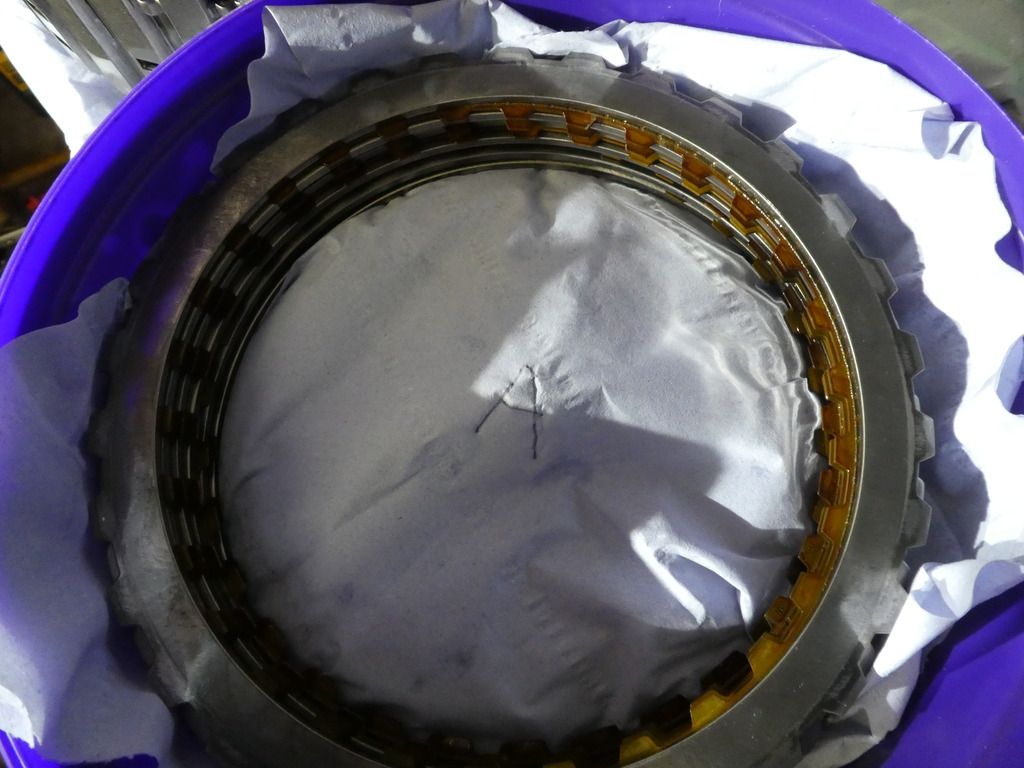
Unclip and inspect the needle bearing
Image
Image
Last edited by ATinOf on Mon Sep 10, 2018 9:33 pm, edited 7 times in total.

ATinOf
3rd Gear
Posts: 444
Joined: Fri Jul 06, 2018 7:32 pm
Location: Cheshire

Re: Gearbox Teardown & Refurbish - 6HP28A61

Post by ATinOf » Mon Sep 03, 2018 1:41 pm

Now to remove clutch pack A, unclip the circlip
Image

And withdraw the frictions and steels
Image
Image

And back to the press to release the piston, here I used an off cut of an old pipe (5" I think)
Image

Image
Image

And remove the circlip; this one is recommended to be replaced, not by the book though (it was a personal recommendation), ZF code 0730.513.792 - So I did replace it
Image
Last edited by ATinOf on Wed Sep 05, 2018 3:04 pm, edited 4 times in total.

ATinOf
3rd Gear
Posts: 444
Joined: Fri Jul 06, 2018 7:32 pm
Location: Cheshire

Re: Gearbox Teardown & Refurbish - 6HP28A61

Post by ATinOf » Mon Sep 03, 2018 1:44 pm

Remove clutch A retaining plate
Image
Image

And spring
Image

Its doubtful you will be able to pry this piston out very easily, so dont struggle - drop it back onto the pump housing and apply air pressure to the relevant port on the pump housing to force the piston out; you dont need masses of pressure, a bar should do it. The bore you are after is the third bore to the right of the ATF strainer inlet (assuming you have the strainer inlet directly in front of you as shown)
Image
Image
Image
Last edited by ATinOf on Wed Sep 05, 2018 3:12 pm, edited 4 times in total.

Post Reply

Return to “RS6 / RS6 Plus (C6 Typ 4F) 2008-2010”

Who is online

Users browsing this forum: No registered users and 165 guests