Page 1 of 17
Gearbox Teardown & Refurbish - 6HP28A61
Posted: Mon Sep 03, 2018 11:49 am
by ATinOf
The grand finale (Chapter 4) of the epic saga - This will be a truly epic post due to the sheer number of images, you will need a brew with you when you run through all of this. And you may want to check back when I have added the full commentary before you do so.
This one covers the actual tear down of the RS6 09E gearbox, including the valve body, complete refurbish (frictions, steels, seals and bushes) and rebuild. This is DIY at its very best, but not for the feint hearted.
The related chapters of this epic can be found here;
Chapter 1 - Engine / gearbox removal covered here:
viewtopic.php?f=47&t=129282
Chapter 2 - Making a gearbox stand covered here:
viewtopic.php?f=47&t=129271
Chapter 3 - Removing the Gearbox from the Engine:
viewtopic.php?f=47&t=129515
And it goes without saying this is not necessarily the best way to do this task,its how i did it; follow this method at your own peril!
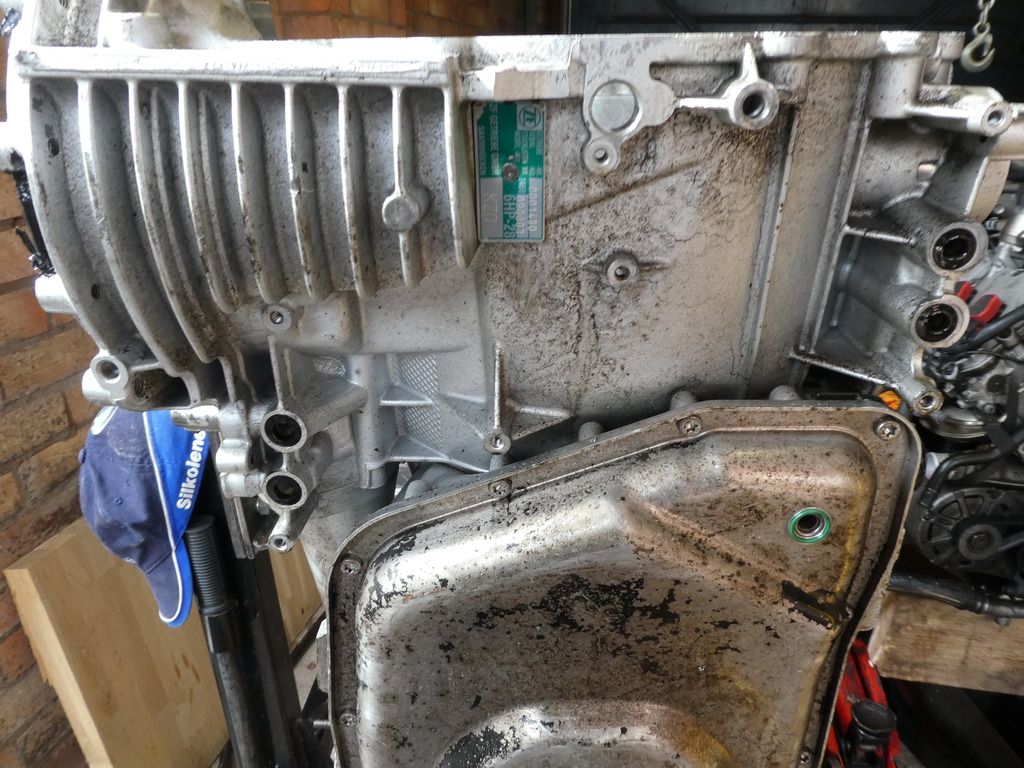
In my instance the Audi code for the gearbox is an 09EA, the model on the label being a KZQ
In terms of ZF this is called a 6HP28A61 (which is a second gen over the first gen 6HP26A61);the model code being 1068.090.003
The ZF parts catalogue for my box is code 1068.079.009
The Torque converter is a ZF-SACHS K110
If your box codes differ from these then its likely there will be differences not reflected here, and parts may differ to those I list (I also provide no guarantee I list the correct part numbers, we are all human, please check them yourself!)
Re: Gearbox Teardown & Refurbish - 6HP28A61
Posted: Mon Sep 03, 2018 11:52 am
by ATinOf

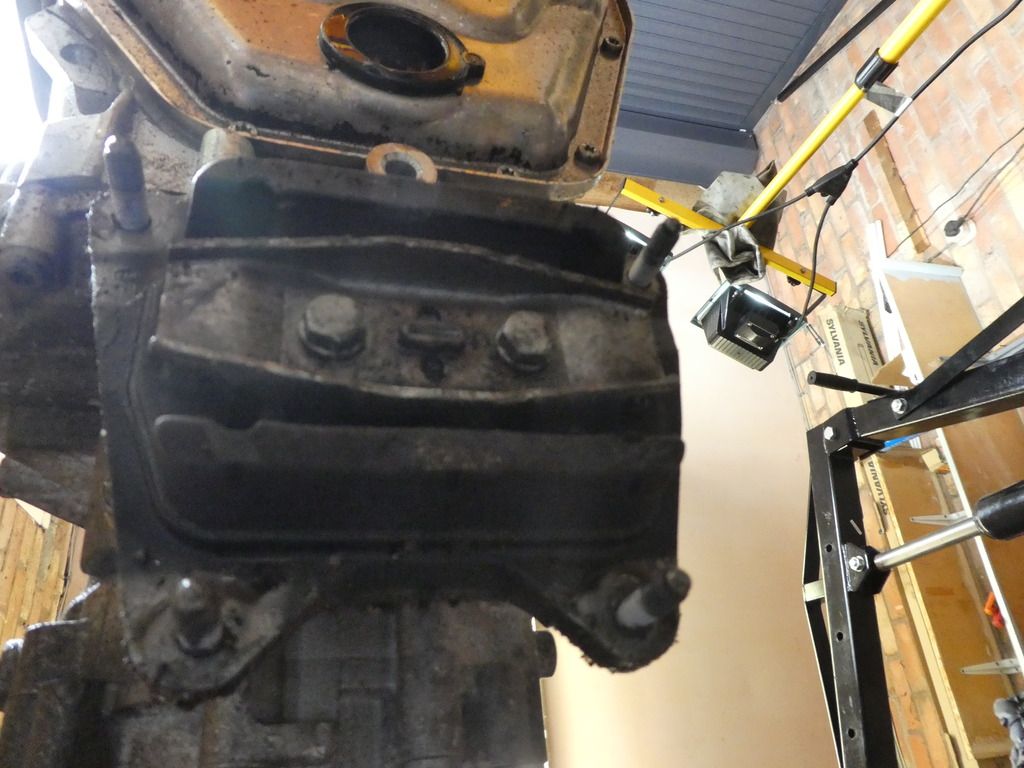
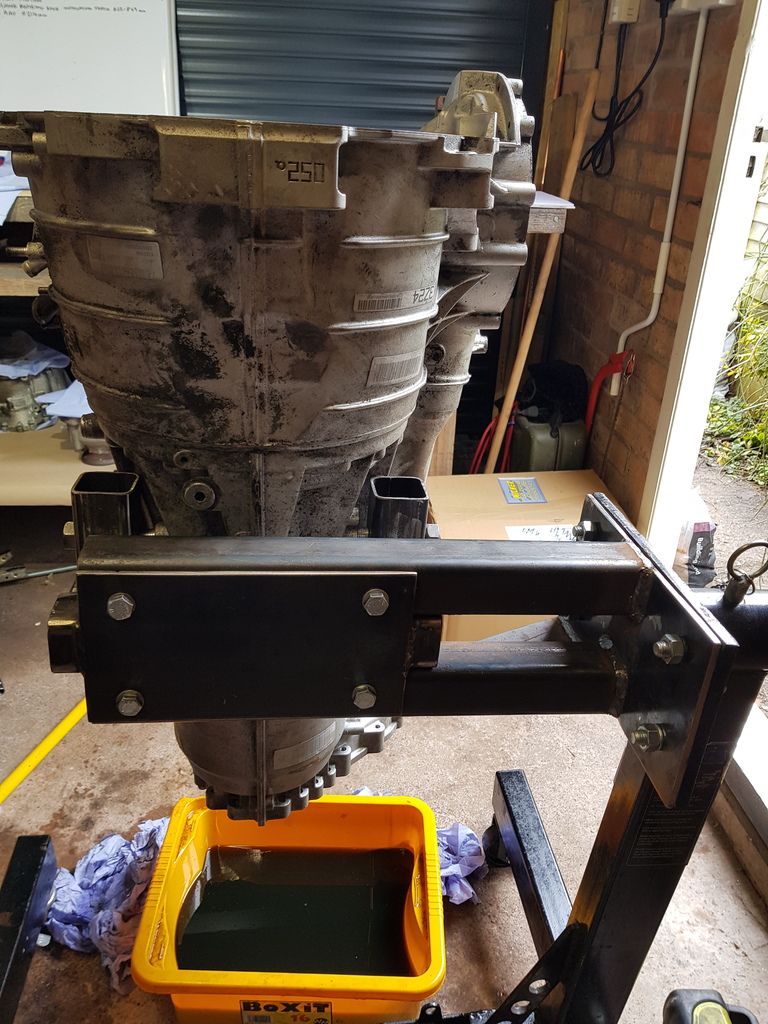
WTF??? - I know, its a bench
But that's not why its here - I cannot stress enough how important a clean working area is when working on an auto box; I find good quality brown paper is excellent for lining the bench, when it gets dirty wack on another piece - too easy for words, but words you've got.
Re: Gearbox Teardown & Refurbish - 6HP28A61
Posted: Mon Sep 03, 2018 11:56 am
by ATinOf
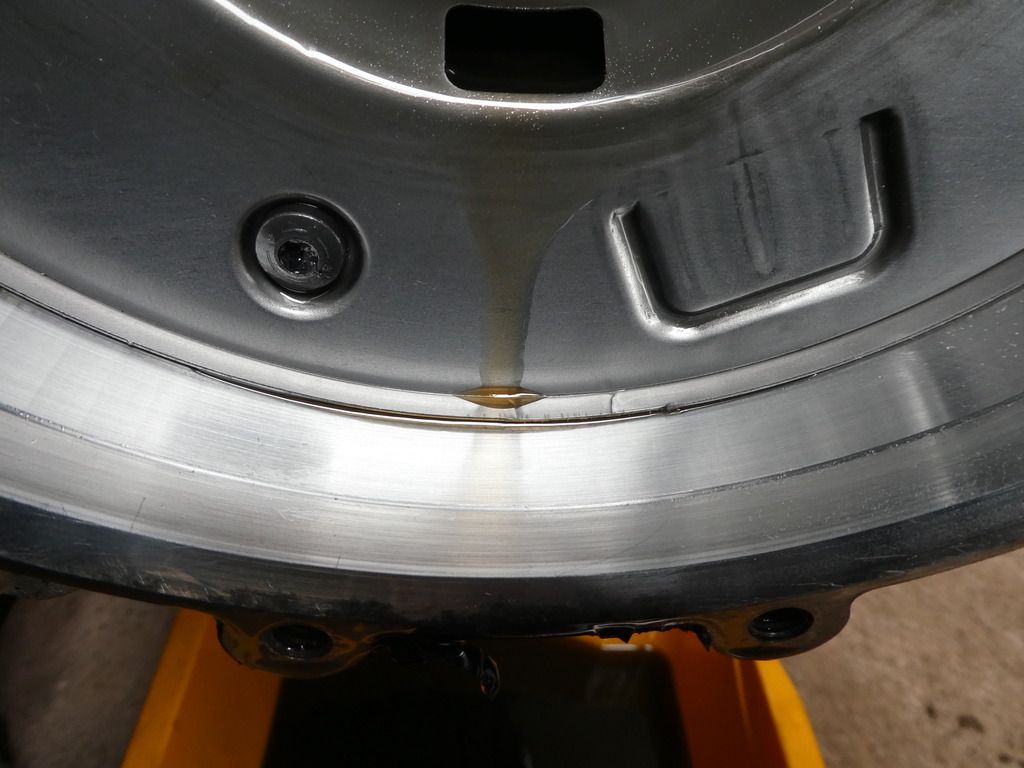
Make sure you collect all of the oil so that you can filter it and check the size of any solids found in it as part of your diagnosis, we'll come back to the results of that later. The colour of the oil also tells a story; in my case the gearbox fluid was a light brown, it hasnt done all that many miles as I've had it changed once; but the diff fluids were a dark brown - I collected it all in a single container but you are better off collecting it separately for filtering if you can. Extra large coffee filters are good for this, albeit slow going as they are a very fine filter.
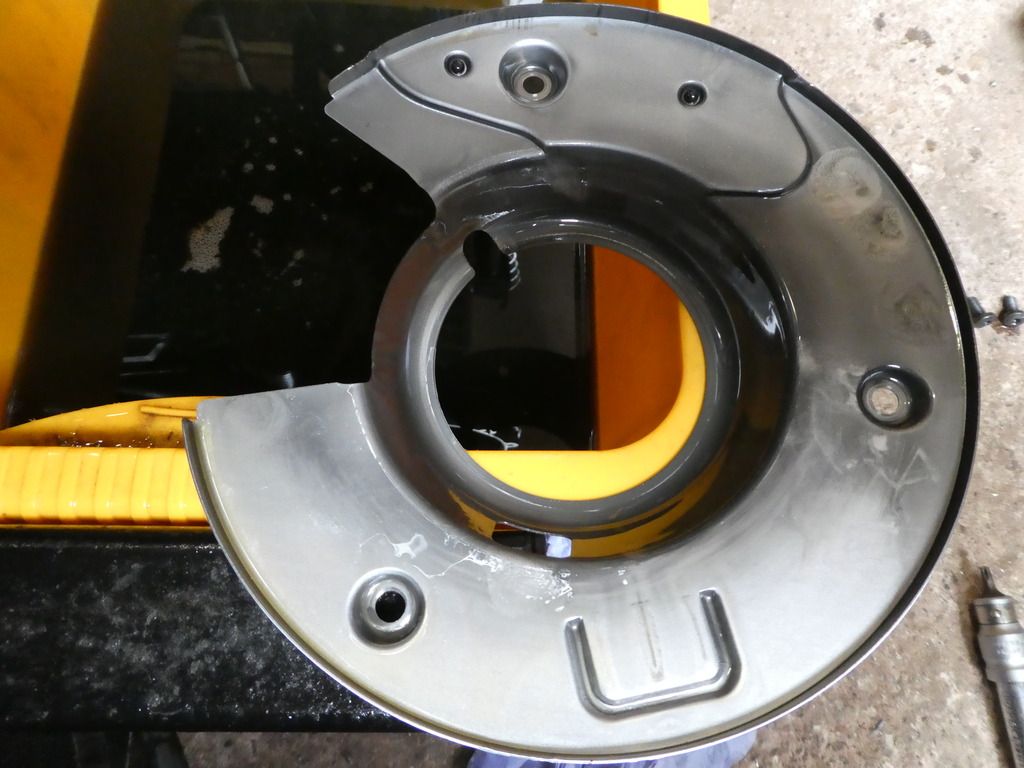
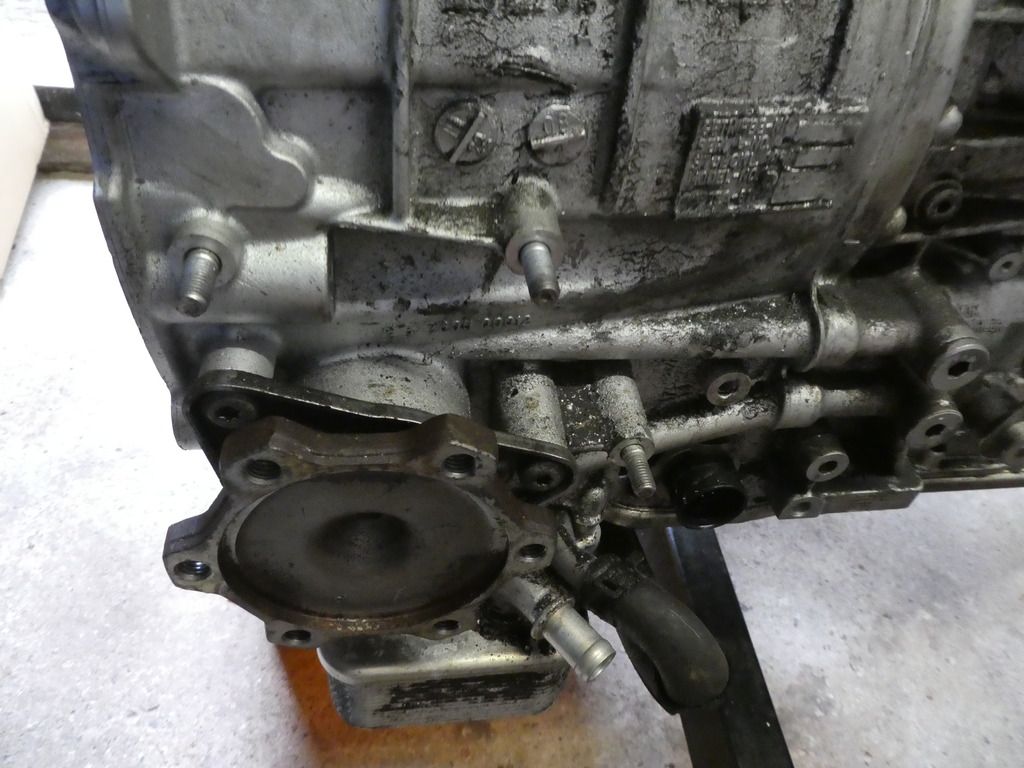
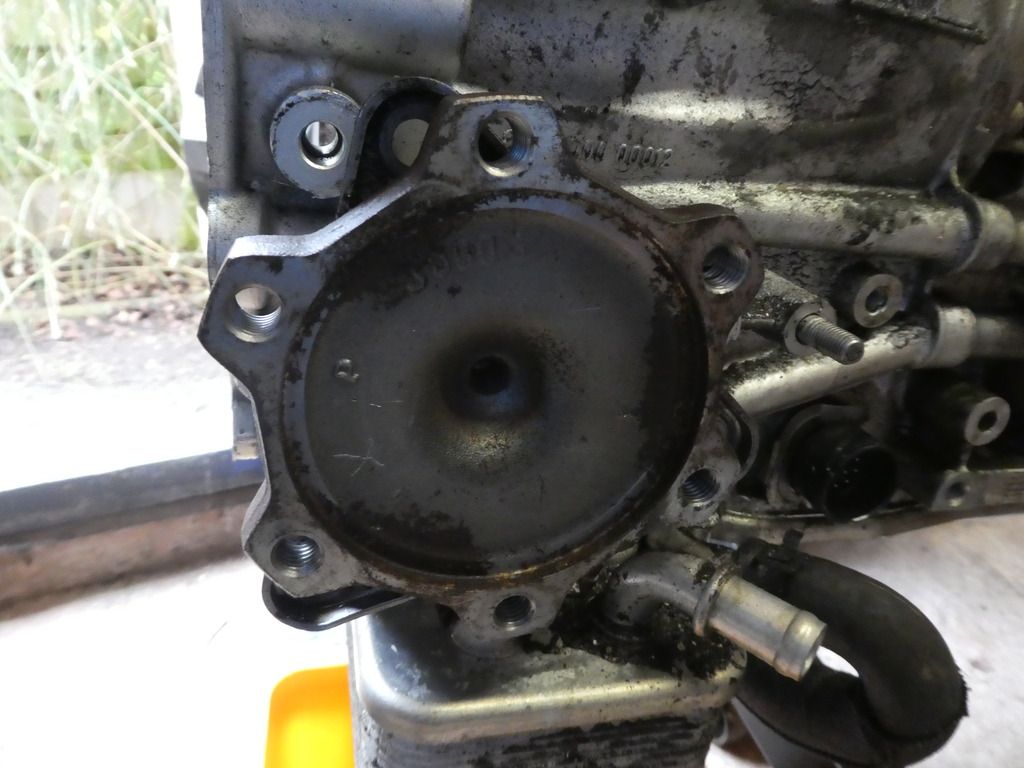
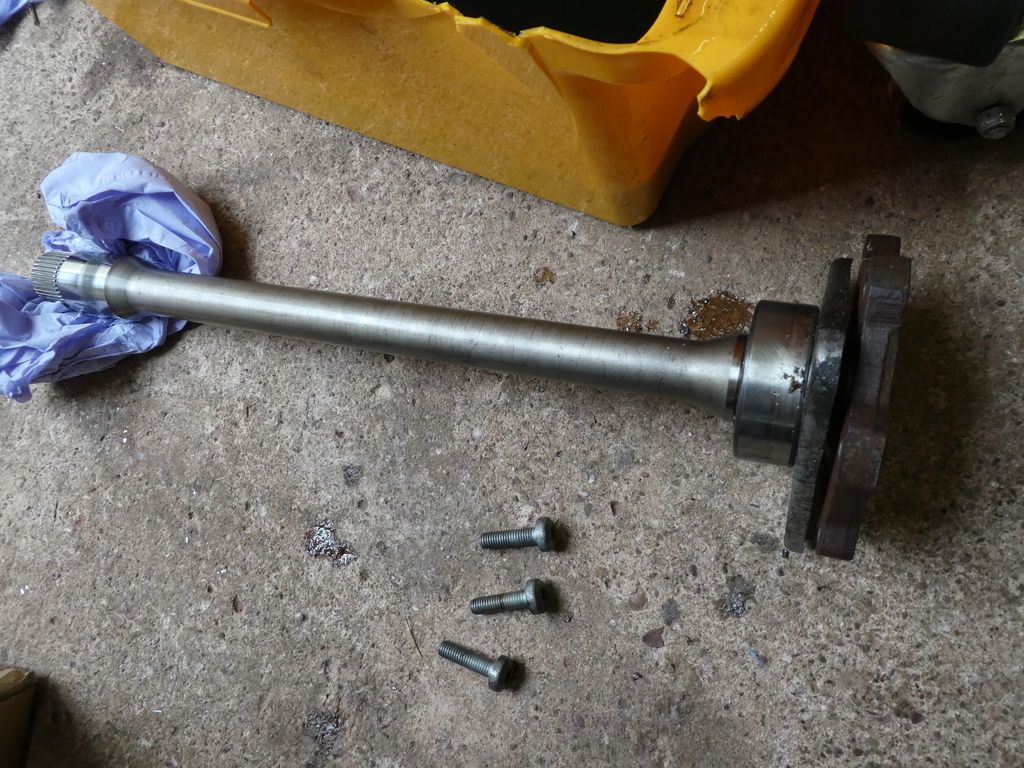
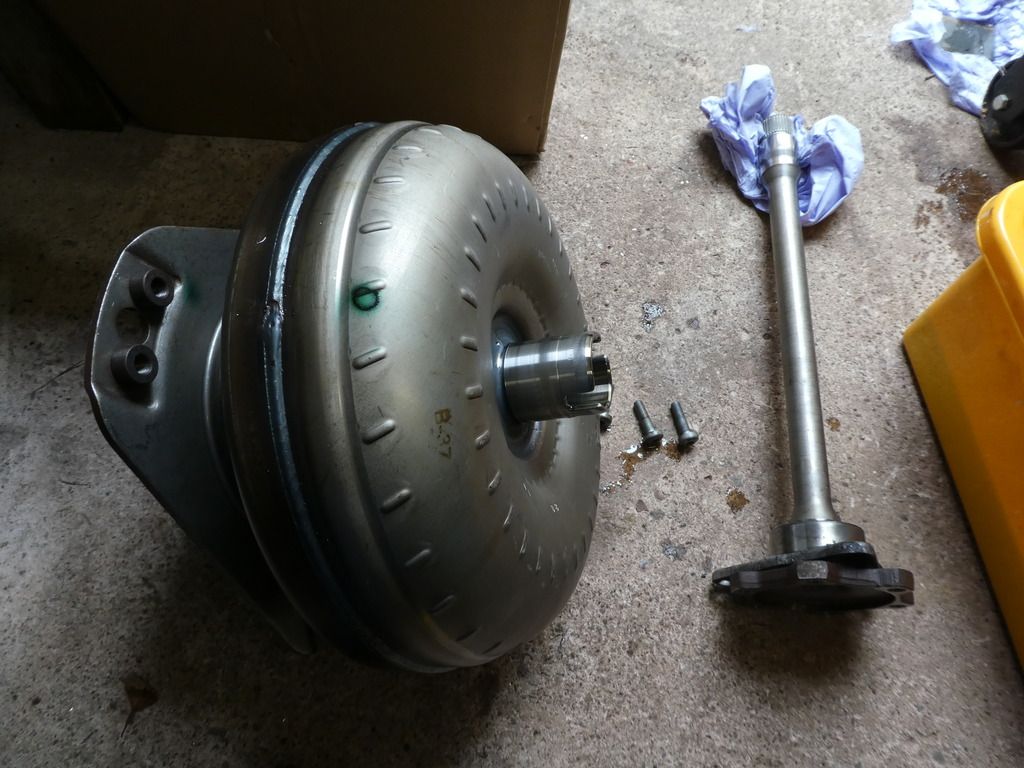
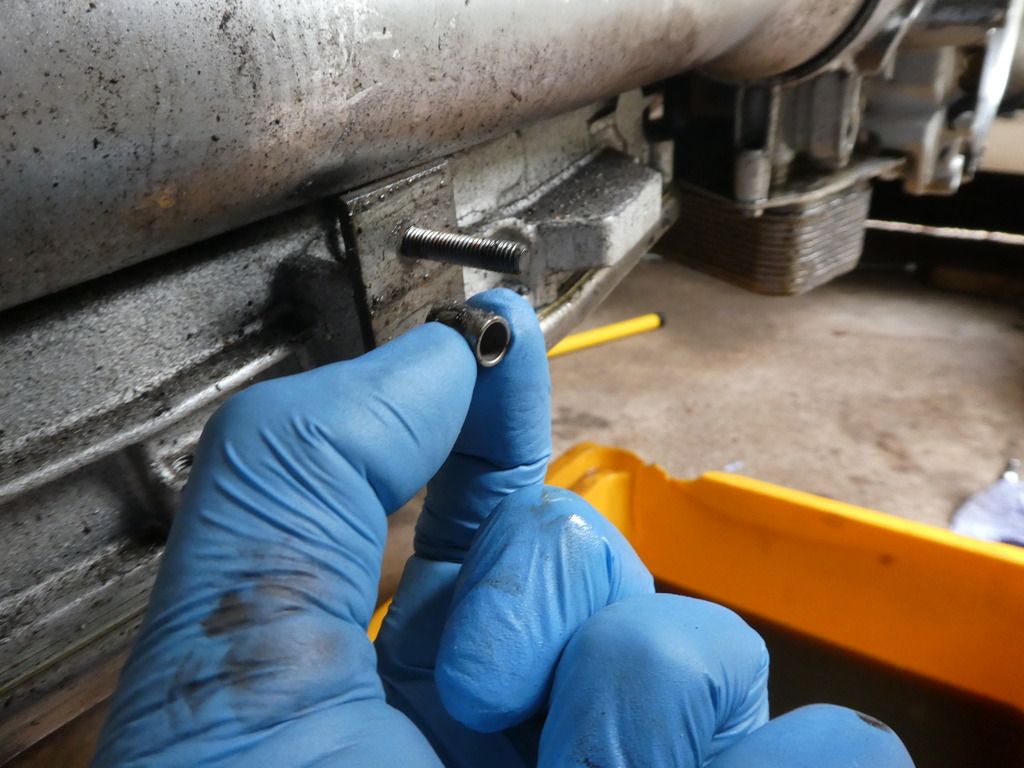
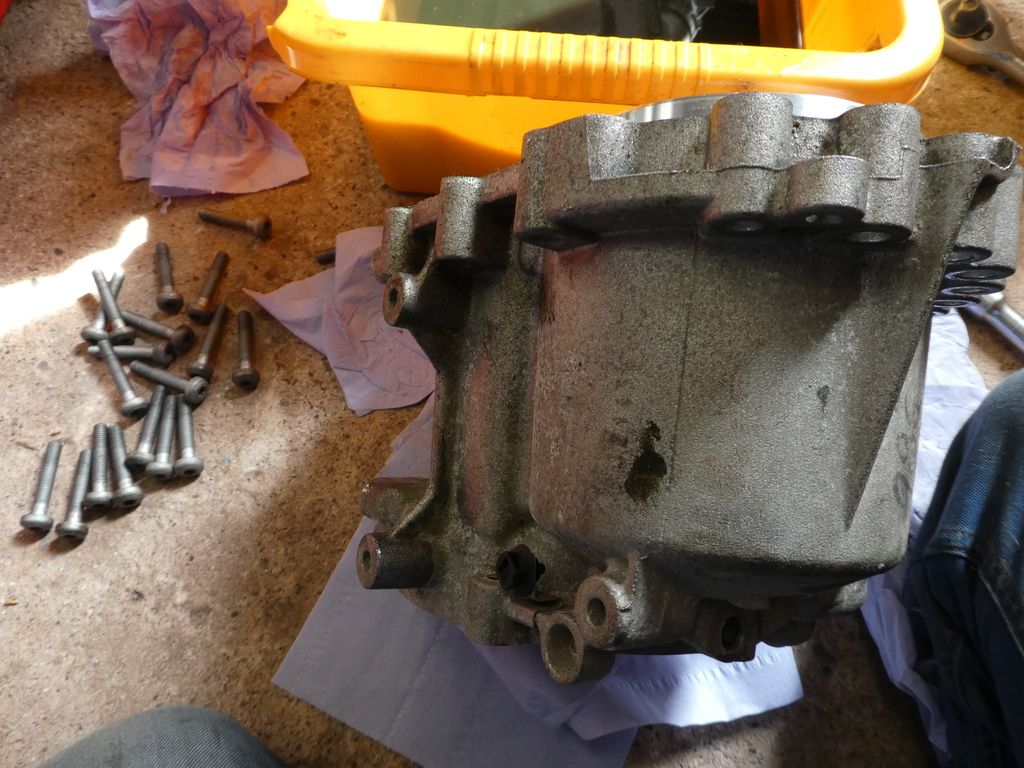
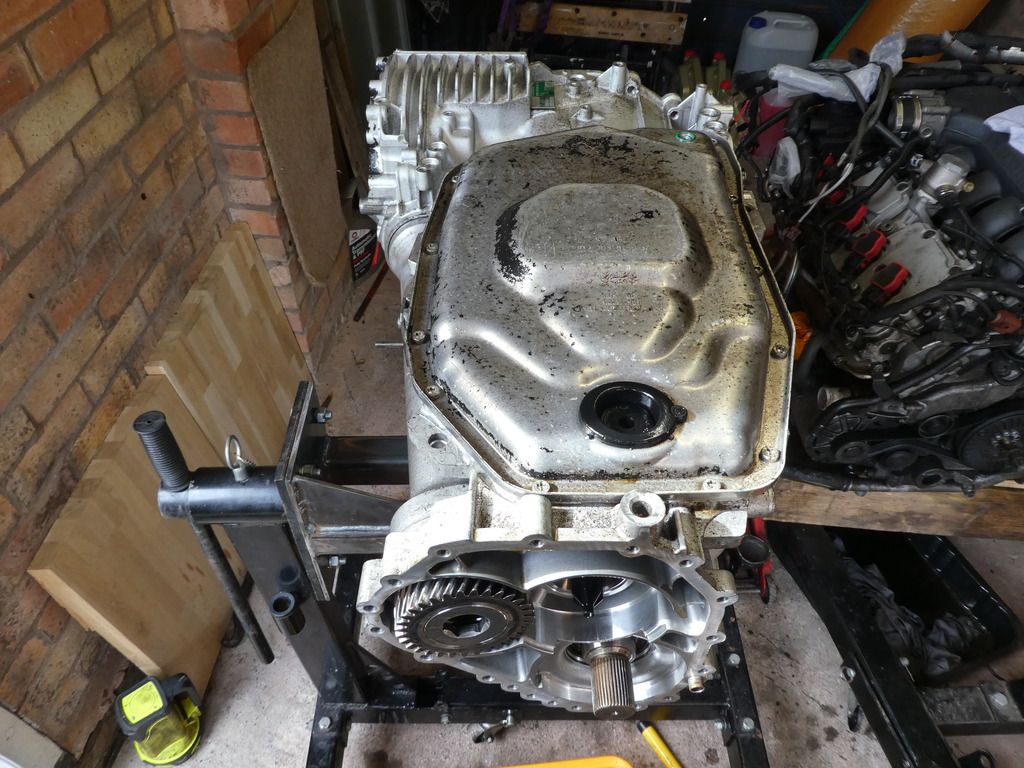
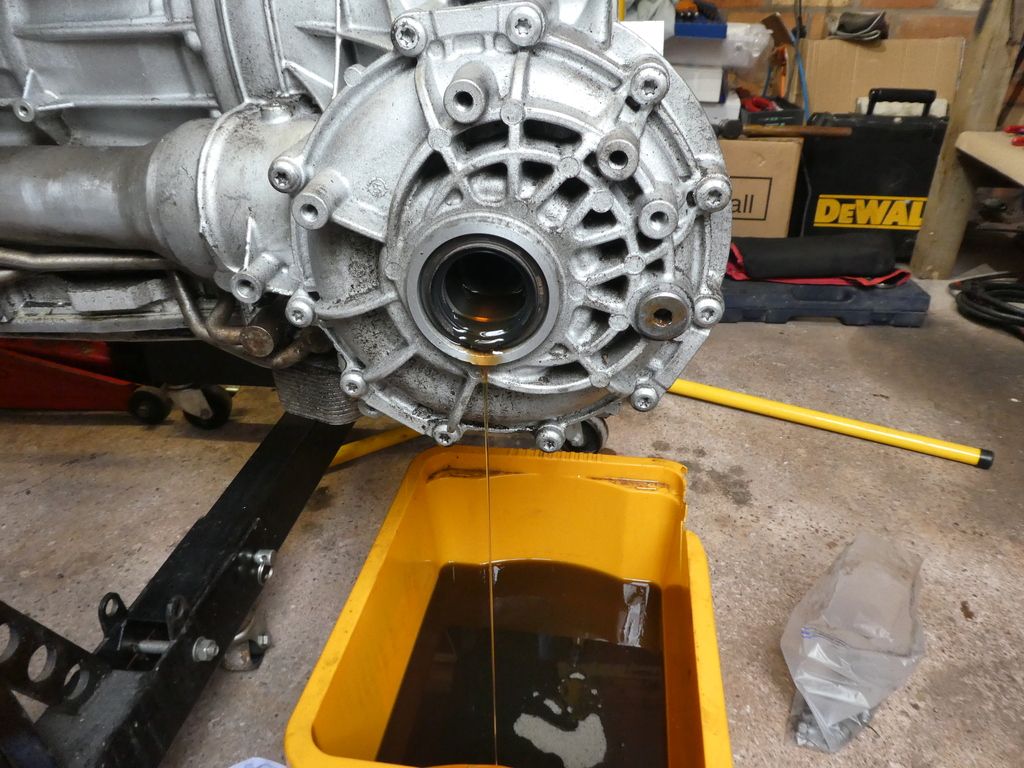
Starting at the front diff the of side drive shaft stub needs removing. there is a circular spring clip holding this in place much too strong just to pull off (if it does pull off you need a new spring clip! Regardless its recommended to replace this spring clip anyway); I used 2 small strips of steel flat bar 1" wide behind the bolt holes against the housing and drove 2 of the bolts through the shaft securing holes to push it off against the housing evenly.
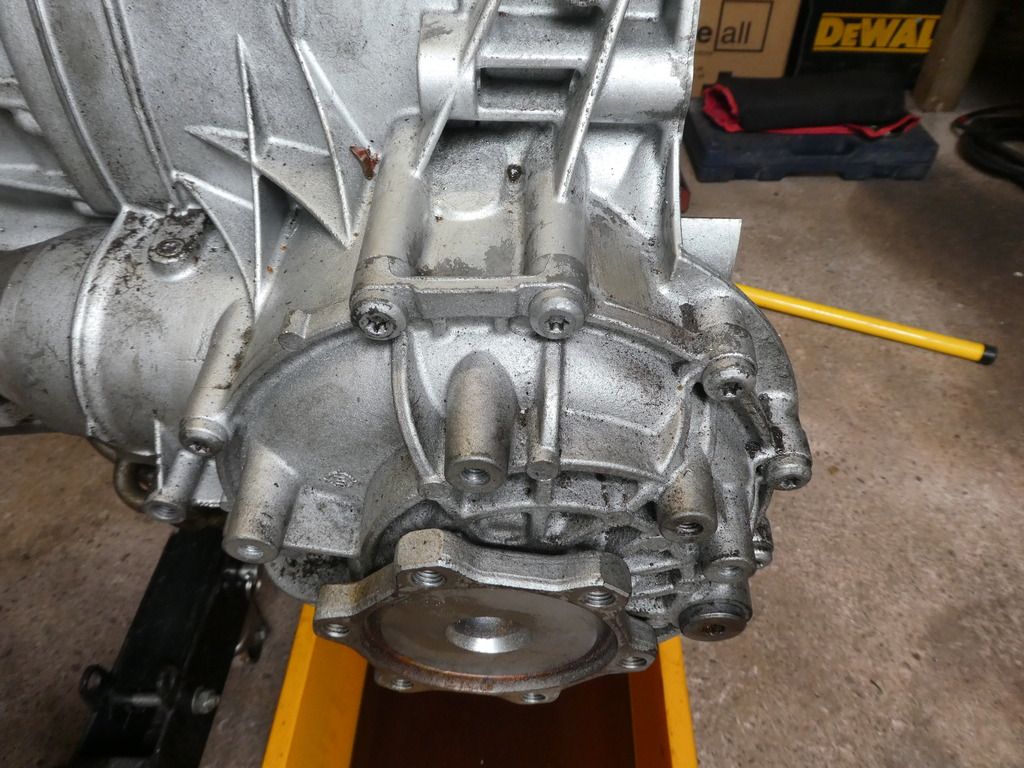
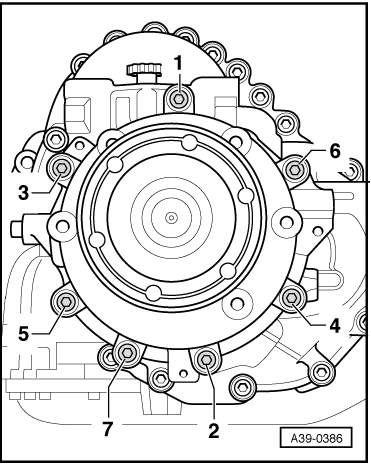
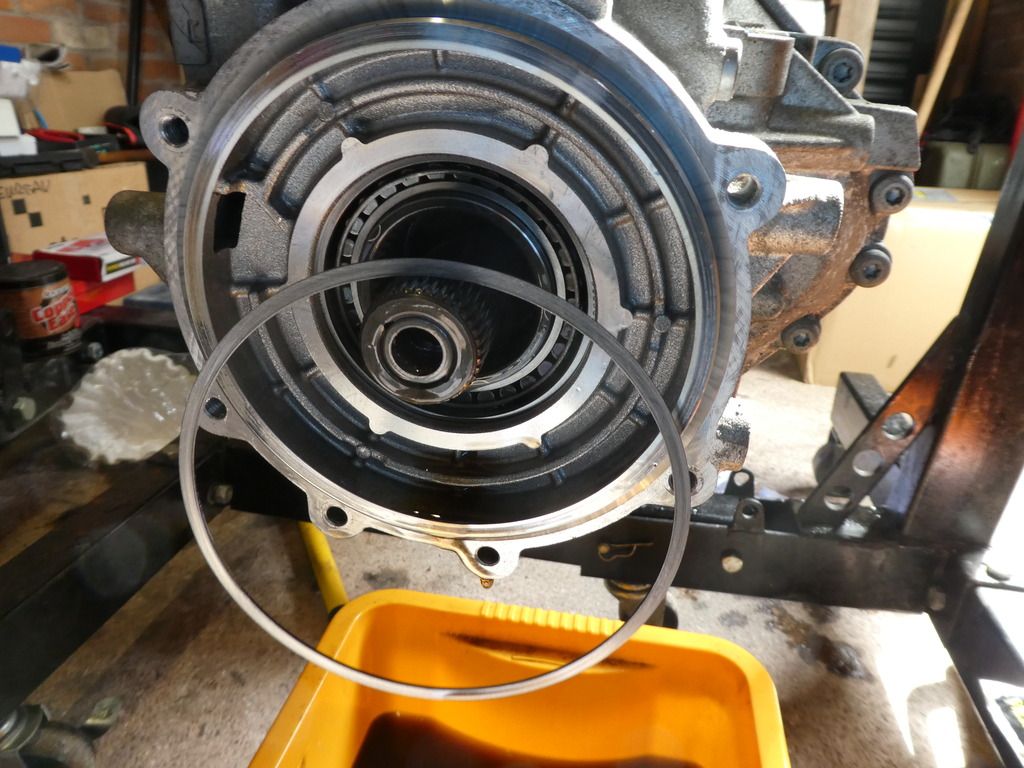
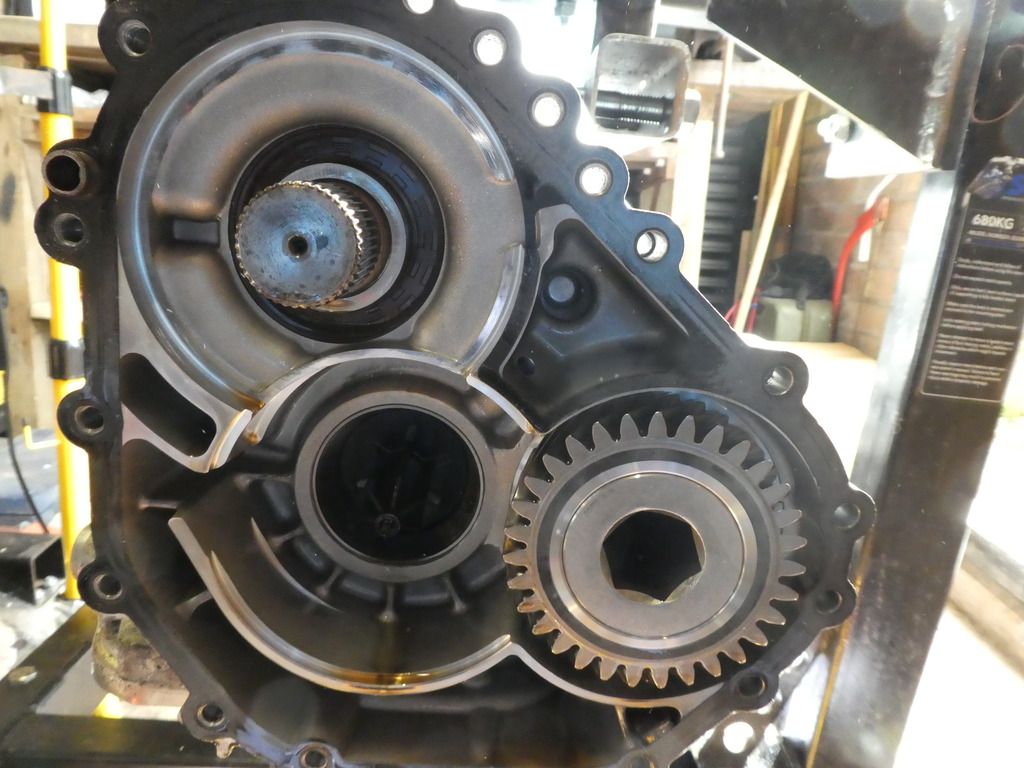
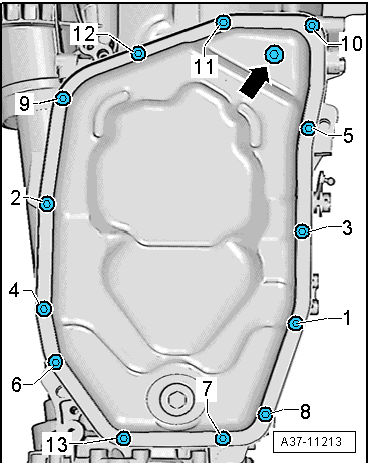
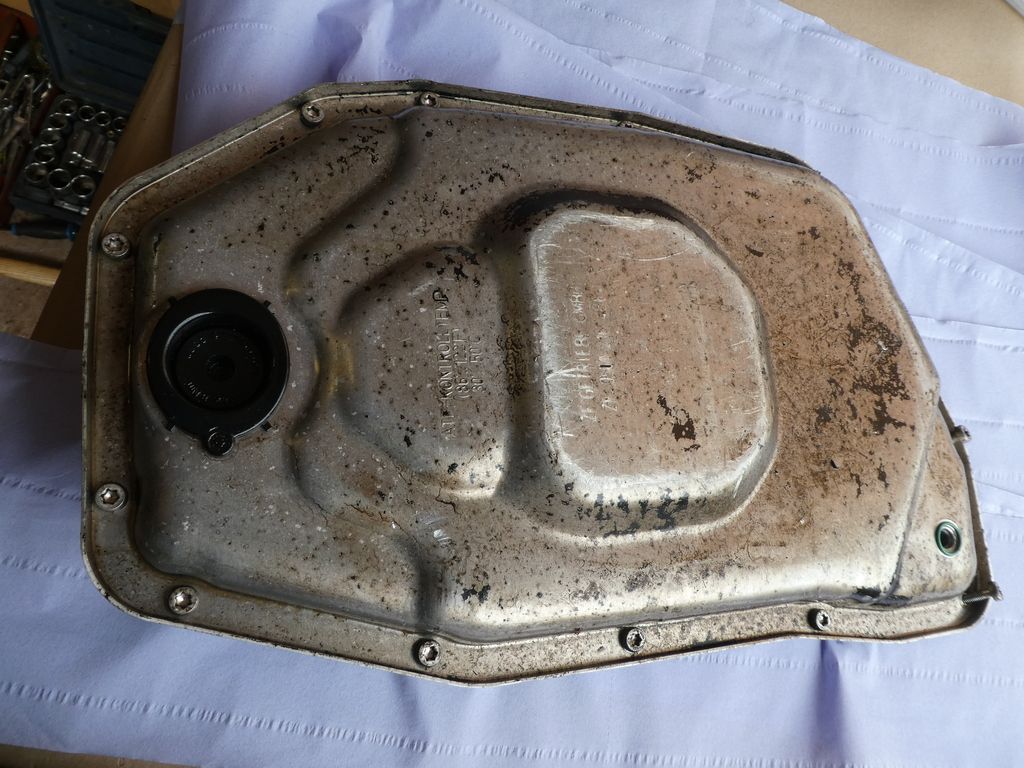
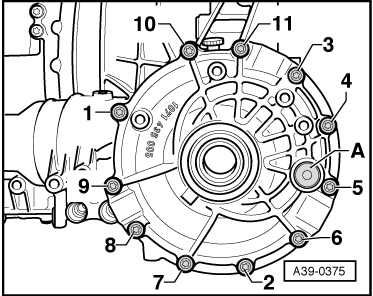
There is no drain plug on this cover, so I let the fluid fall out, the rest of it will spill out when we undo the housing screws. Undo in sequence 11 thro 1
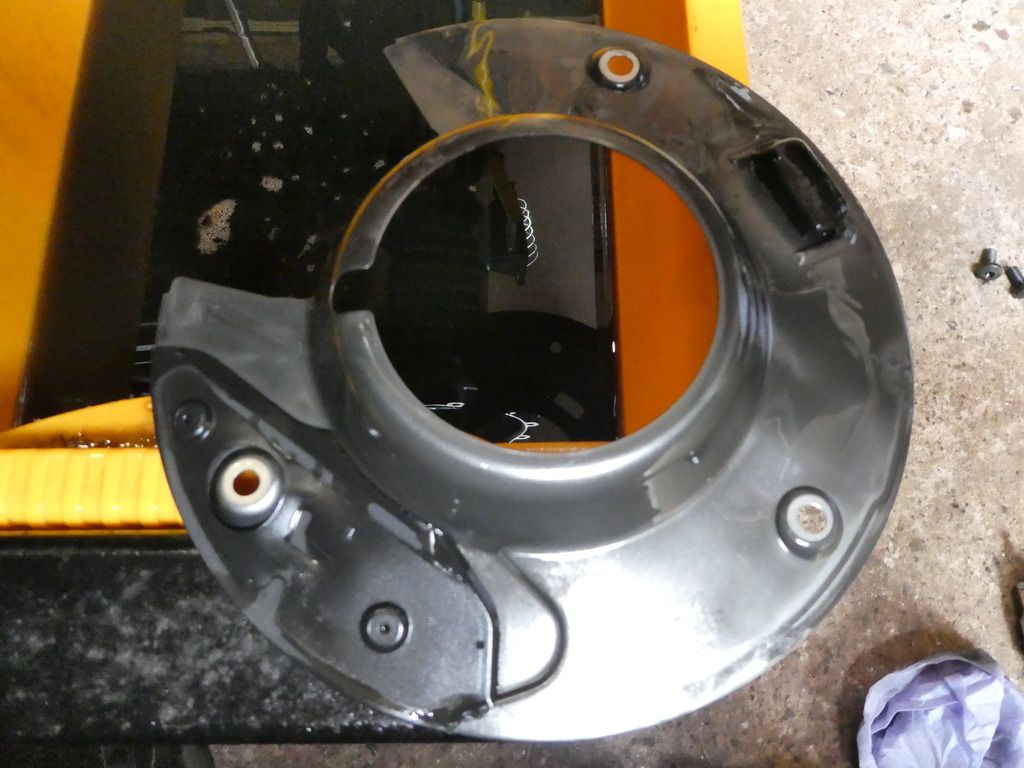
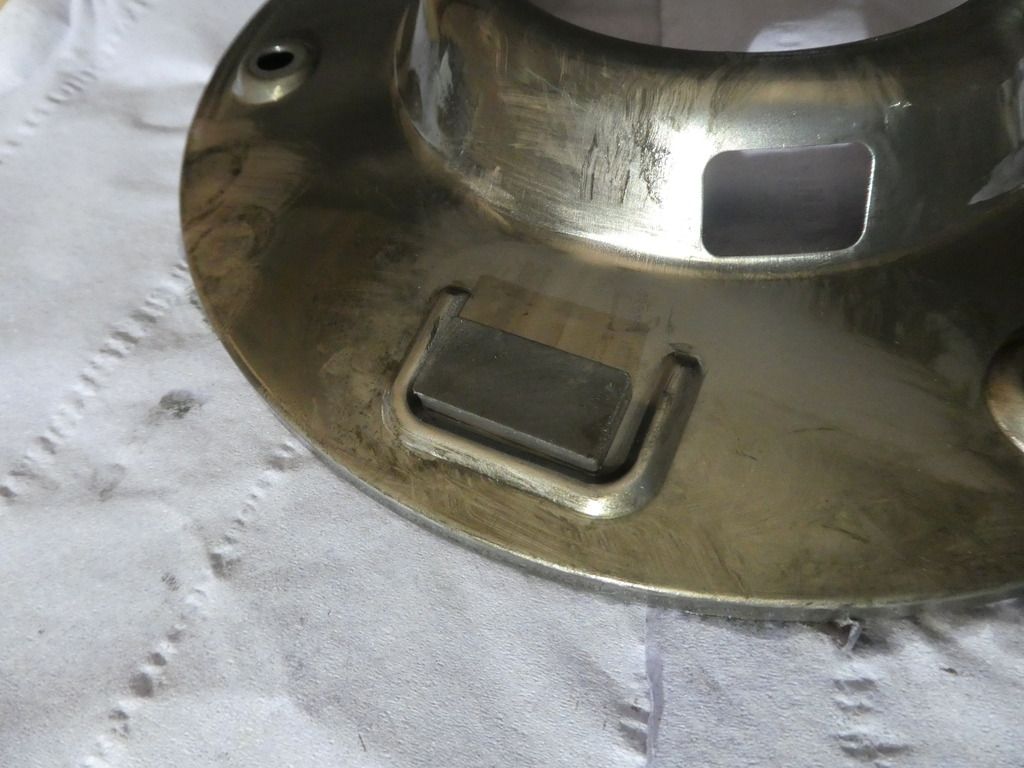
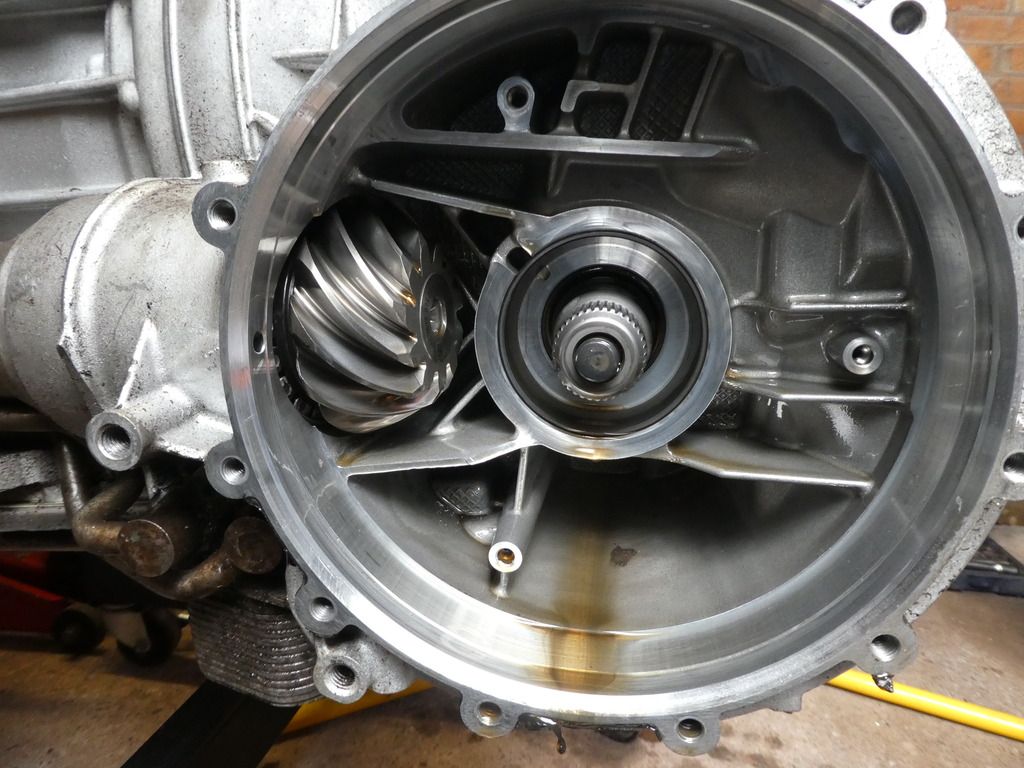
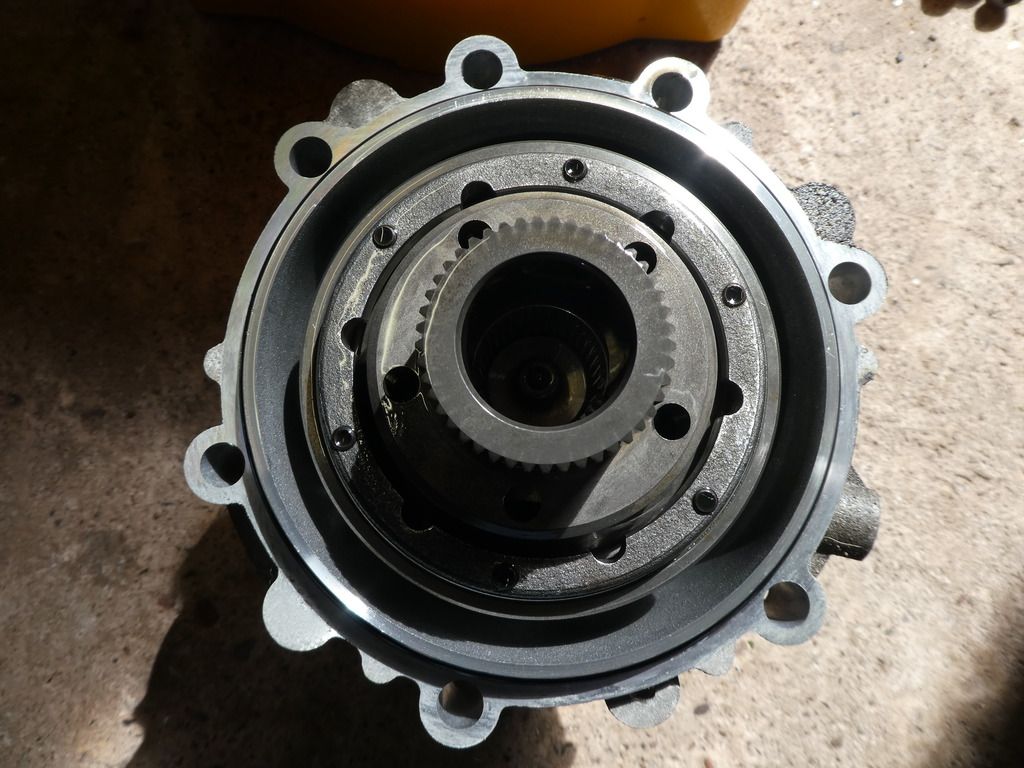
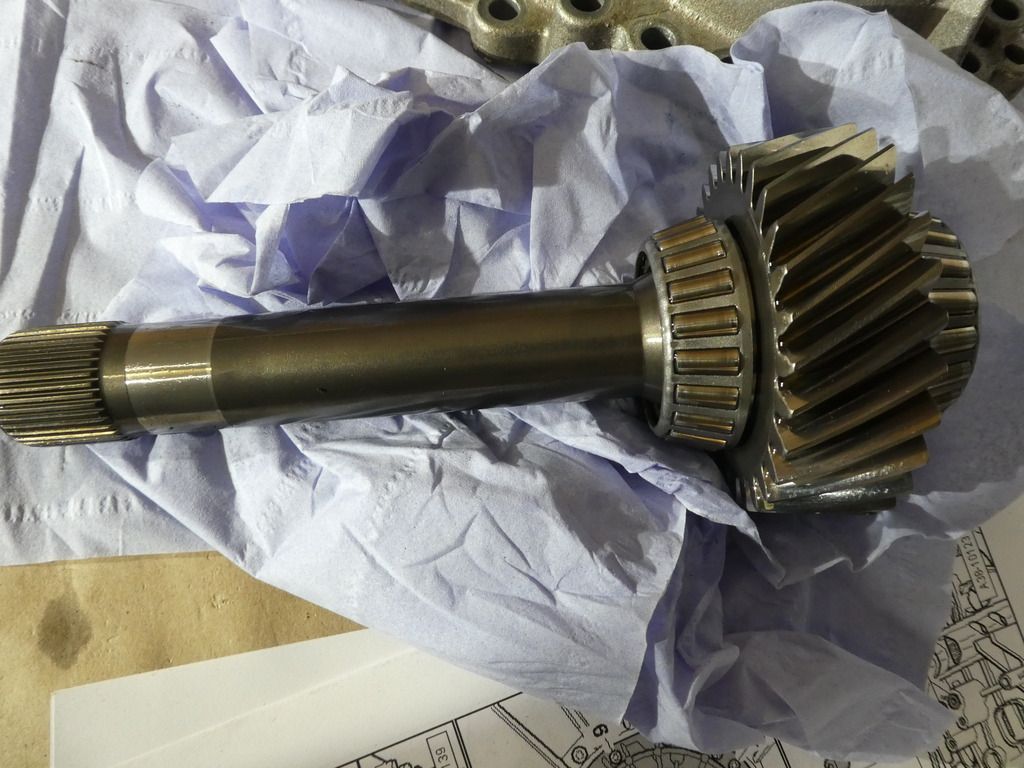
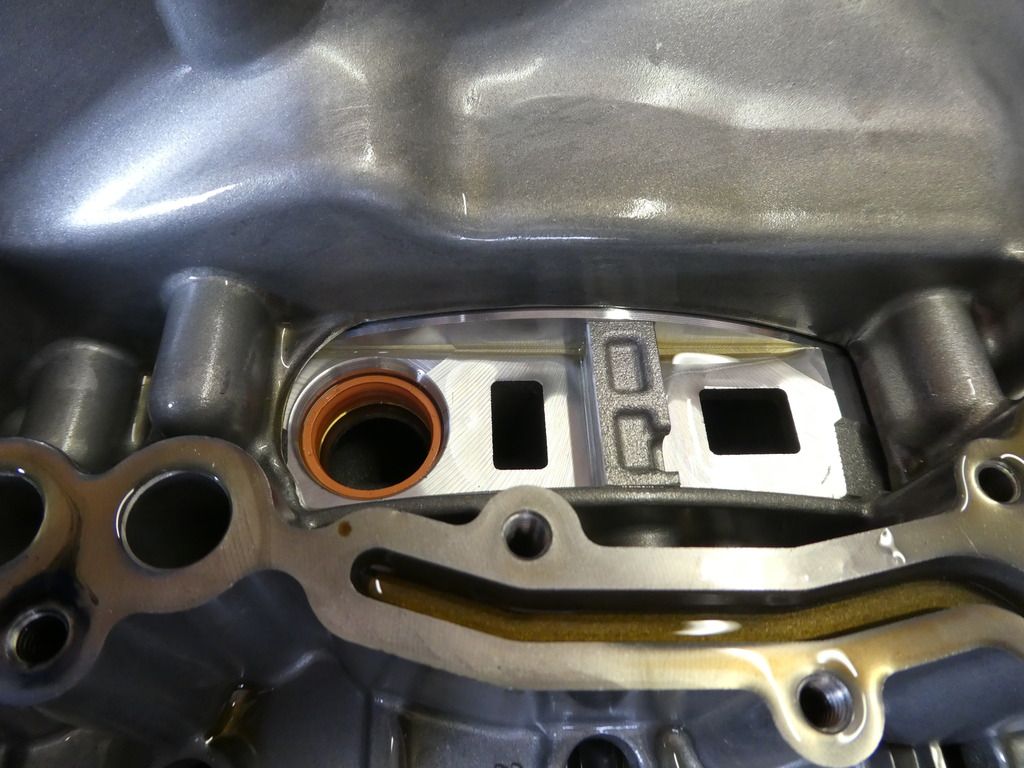
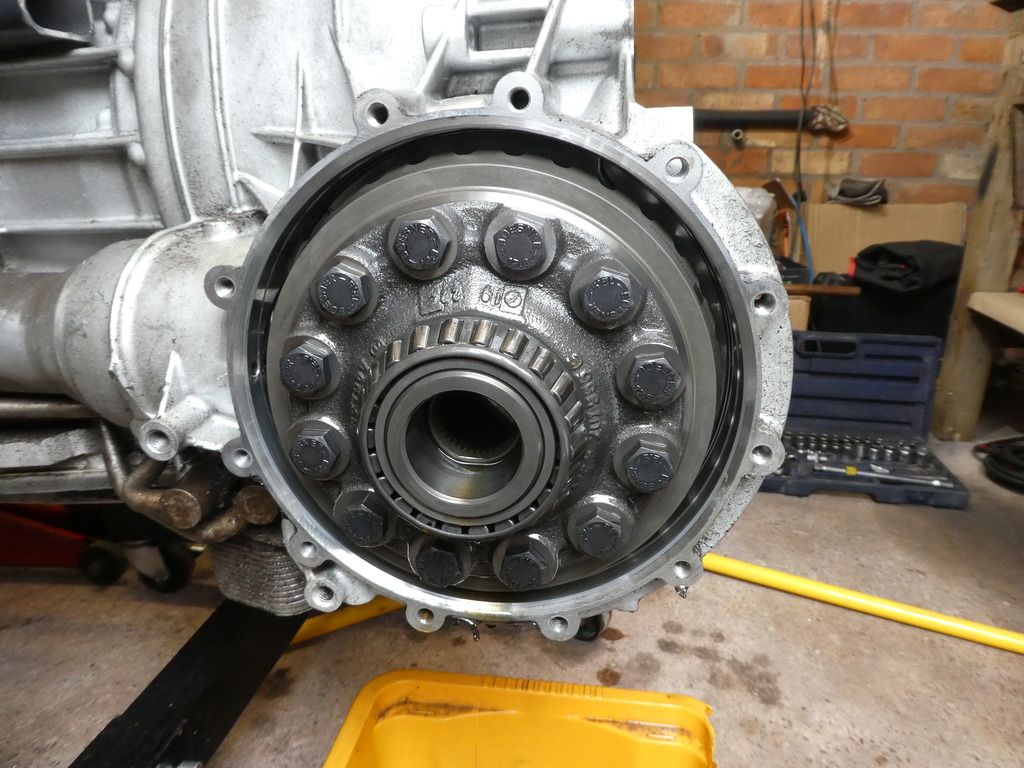
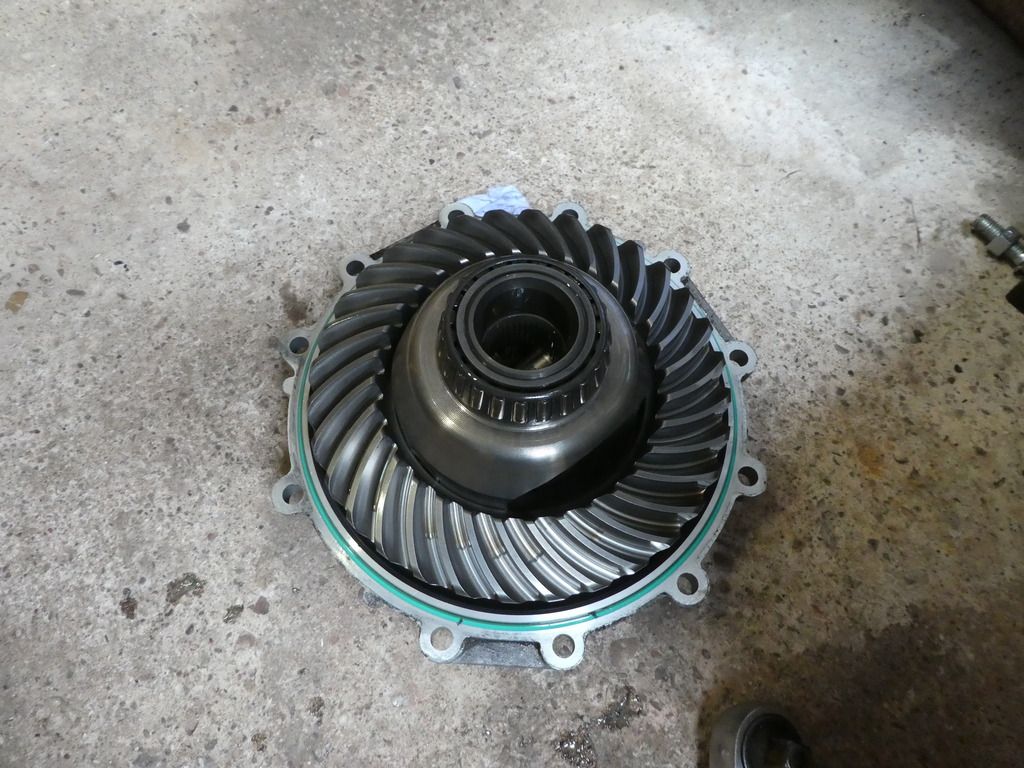
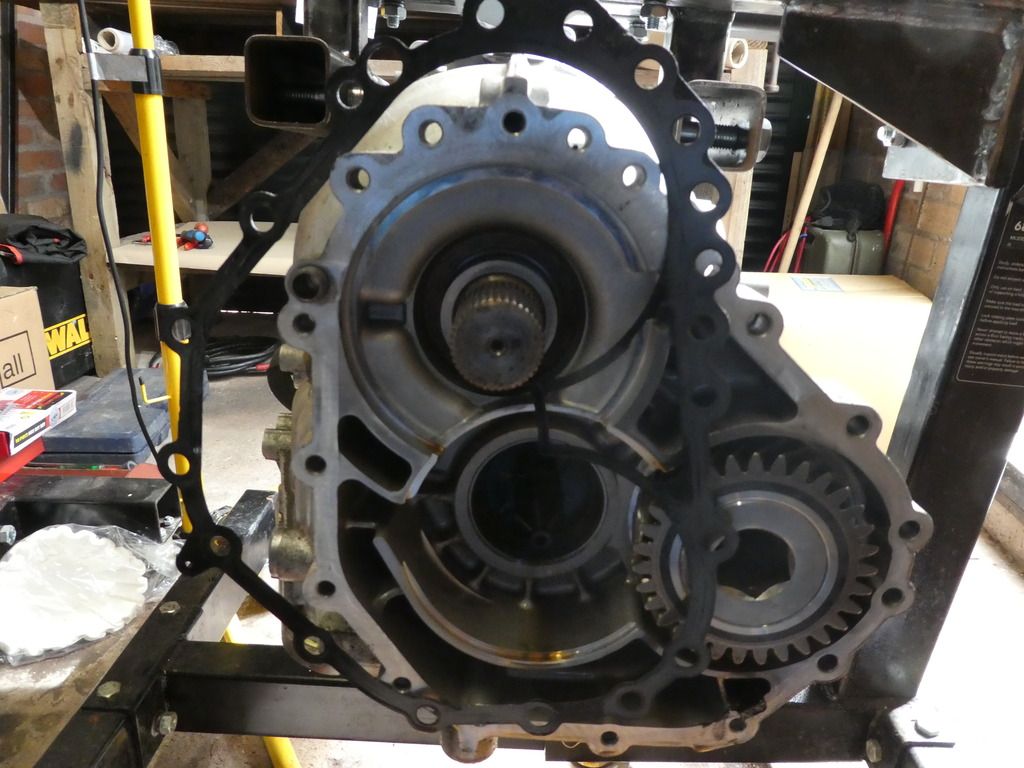
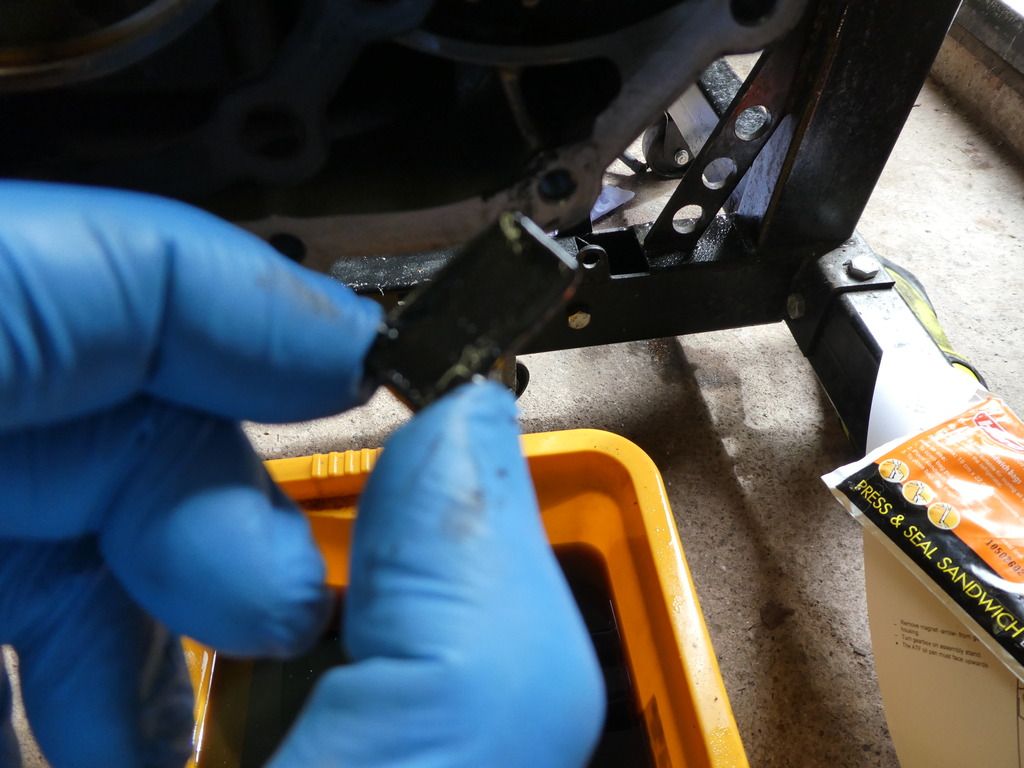
Now this was a perilous photo moment; you MUST always hold this gear as it is highly likely it will fall out, it will probably come away with the housing in actual fact, but whatever you do don't let it fall on the floor!
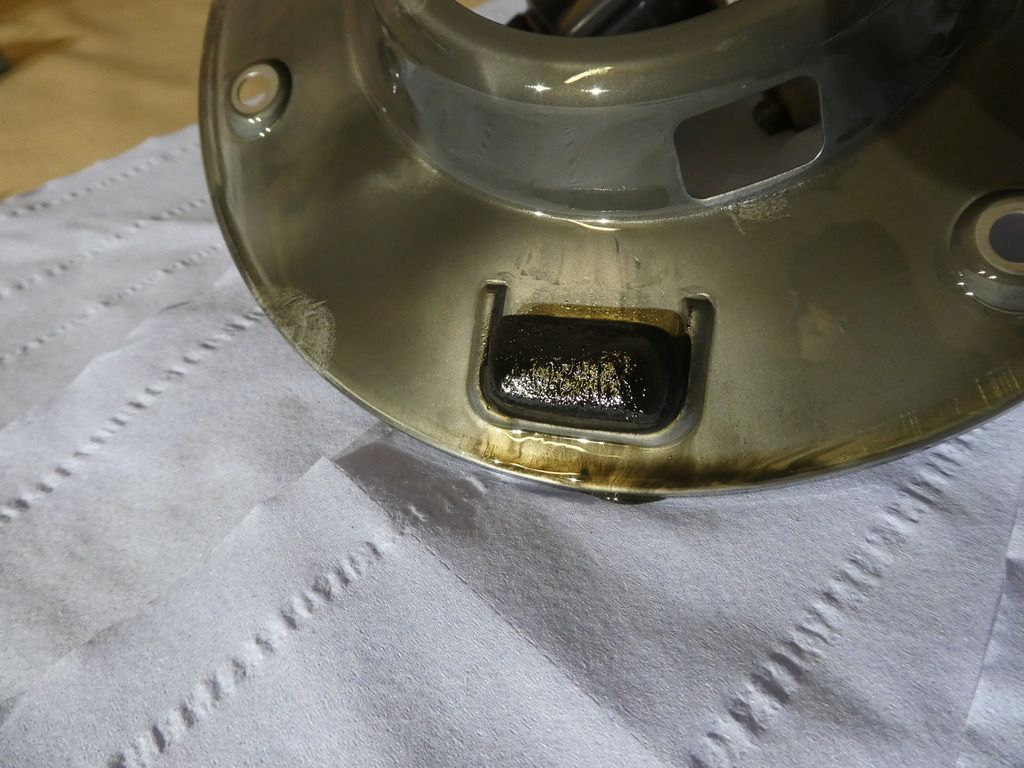
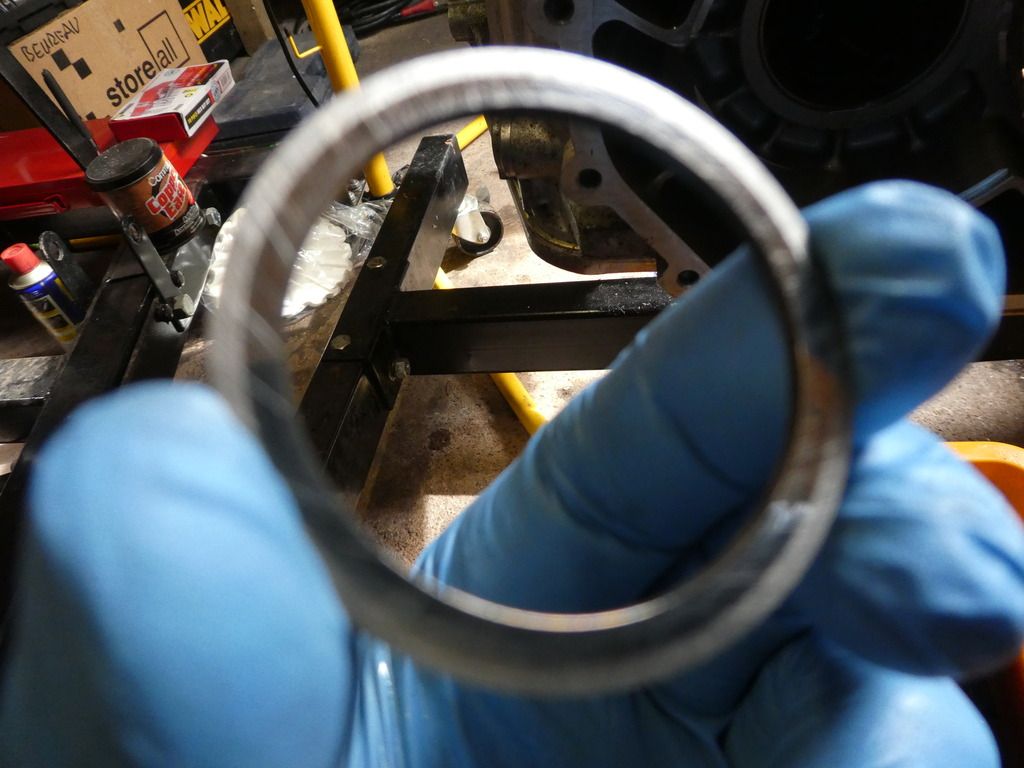
If you have followed my prior posts you will know I suspected this green O-Ring of failure due to oil leakage, it was mis-shapen at the top side and there are 2 distinct marks on it at the top, I believe its been off once and trapped at some point in its life before me - it should have been replaced

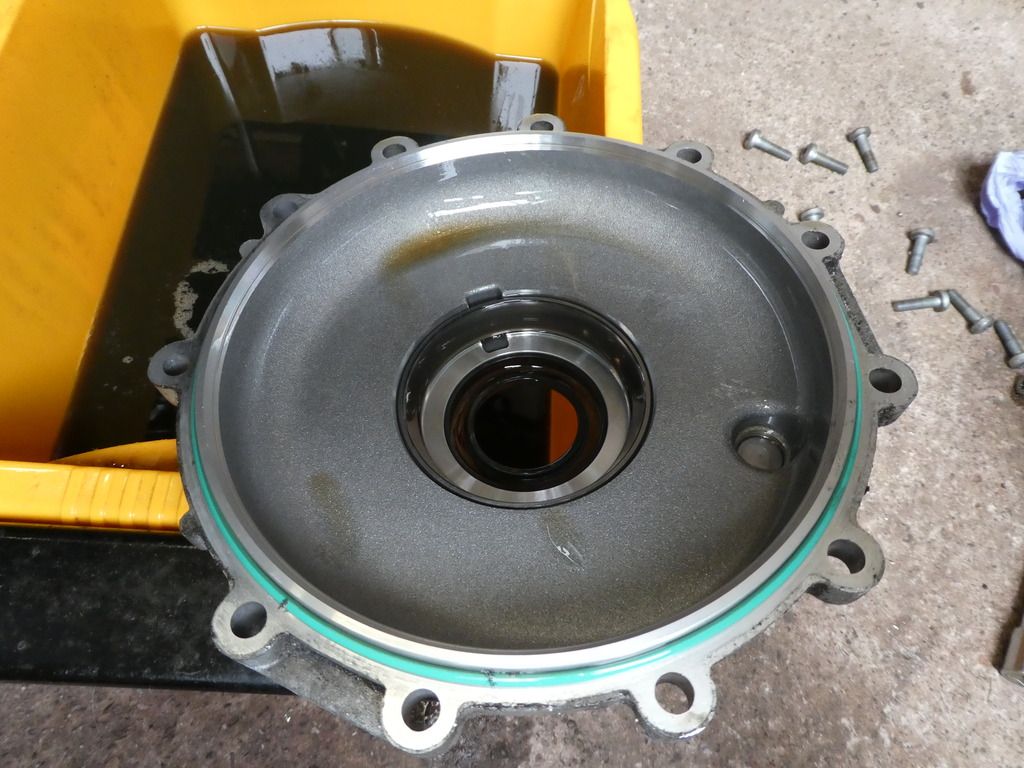
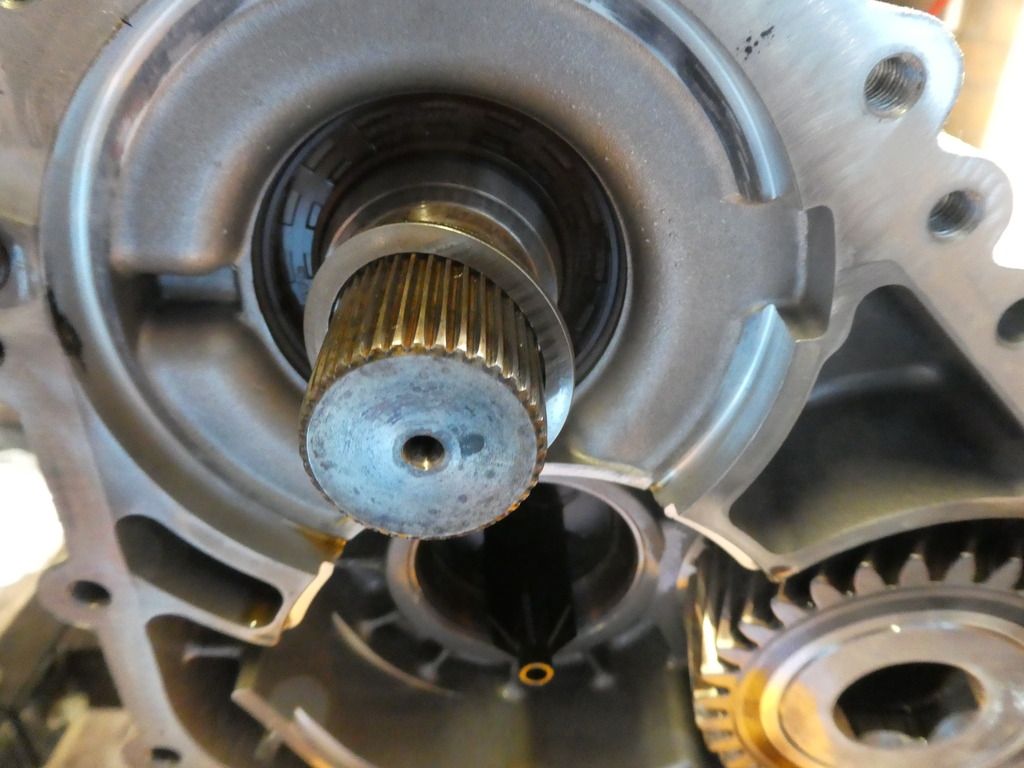
I suspect Its typical of the rear bearing race of this gear to be left in the bell housing in its seat, but its not a tight fit so don't be too concerned if it comes away with the gear
Re: Gearbox Teardown & Refurbish - 6HP28A61
Posted: Mon Sep 03, 2018 12:03 pm
by ATinOf
Re: Gearbox Teardown & Refurbish - 6HP28A61
Posted: Mon Sep 03, 2018 12:09 pm
by ATinOf
Re: Gearbox Teardown & Refurbish - 6HP28A61
Posted: Mon Sep 03, 2018 12:12 pm
by ATinOf
Re: Gearbox Teardown & Refurbish - 6HP28A61
Posted: Mon Sep 03, 2018 12:15 pm
by ATinOf
Re: Gearbox Teardown & Refurbish - 6HP28A61
Posted: Mon Sep 03, 2018 12:16 pm
by ATinOf
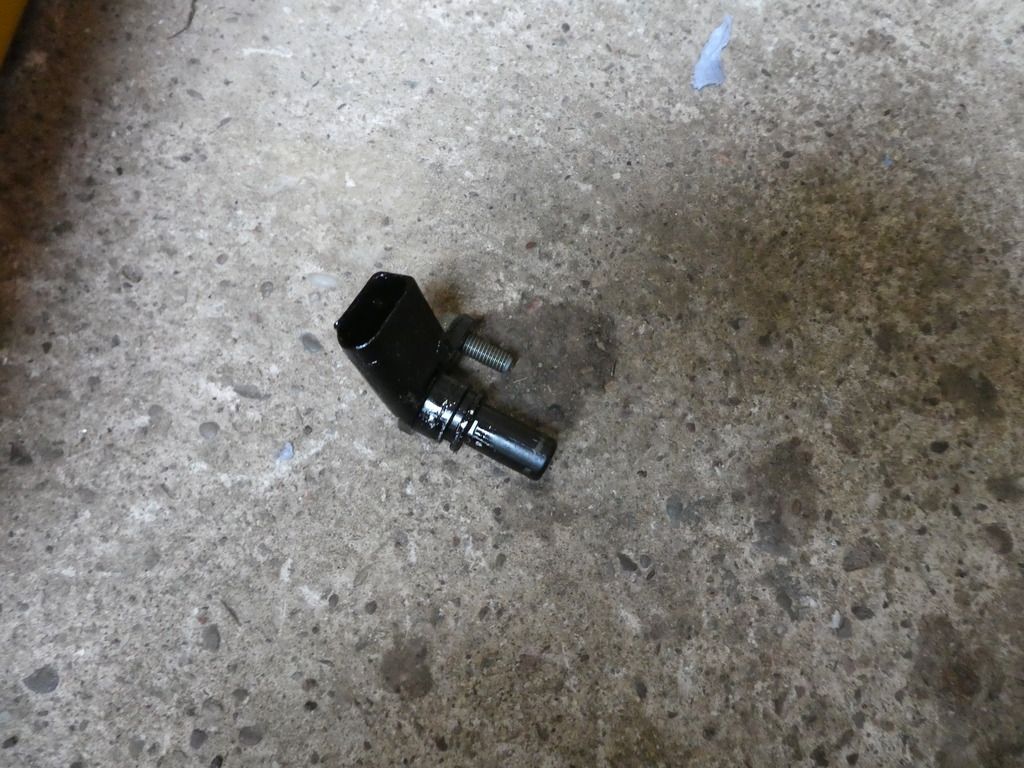
You dont need to remove this (torque converter, gearbox input speed) rotation sensor, but to ensure its not damaged its wise to
Re: Gearbox Teardown & Refurbish - 6HP28A61
Posted: Mon Sep 03, 2018 12:19 pm
by ATinOf
Re: Gearbox Teardown & Refurbish - 6HP28A61
Posted: Mon Sep 03, 2018 12:21 pm
by ATinOf
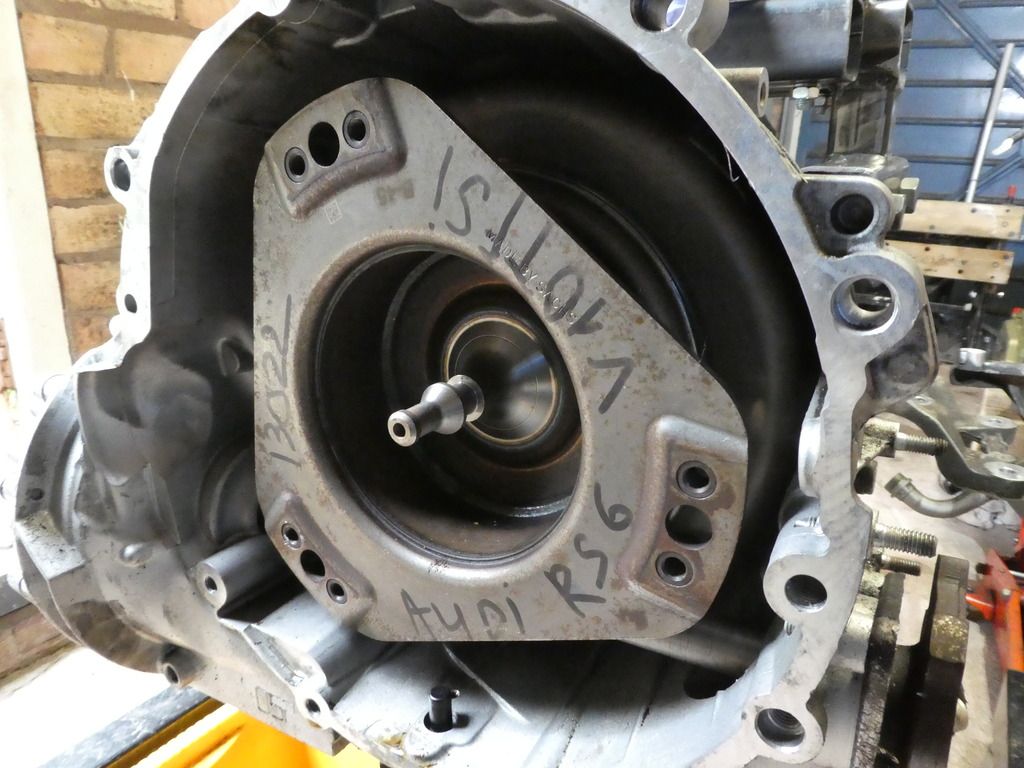
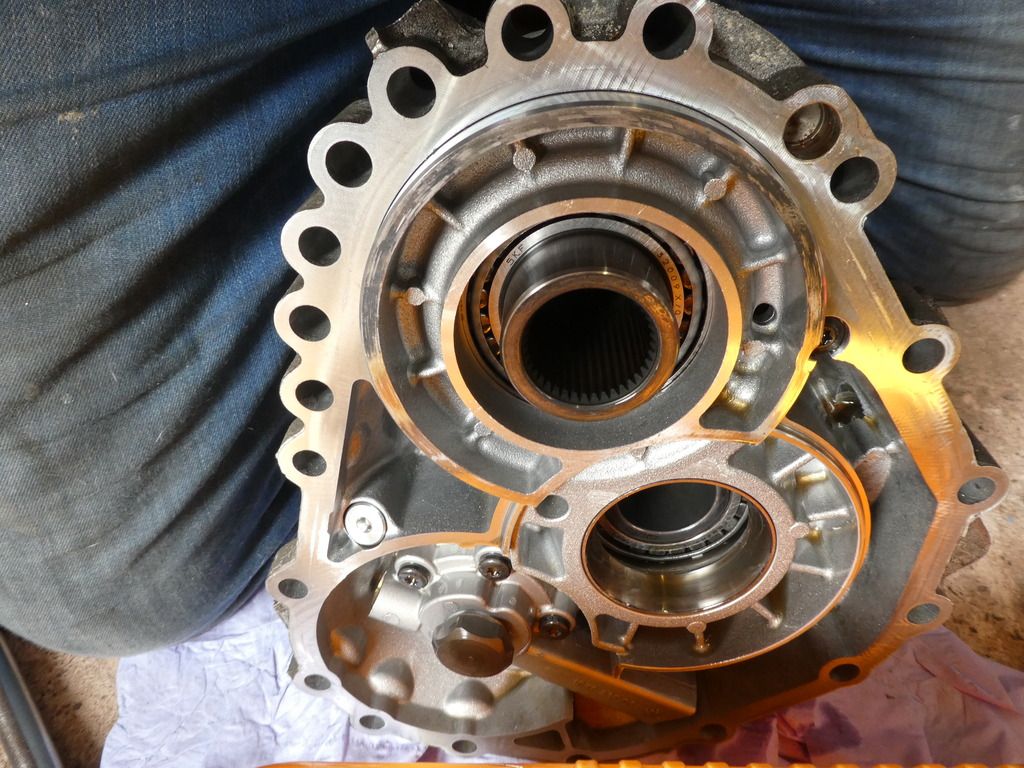
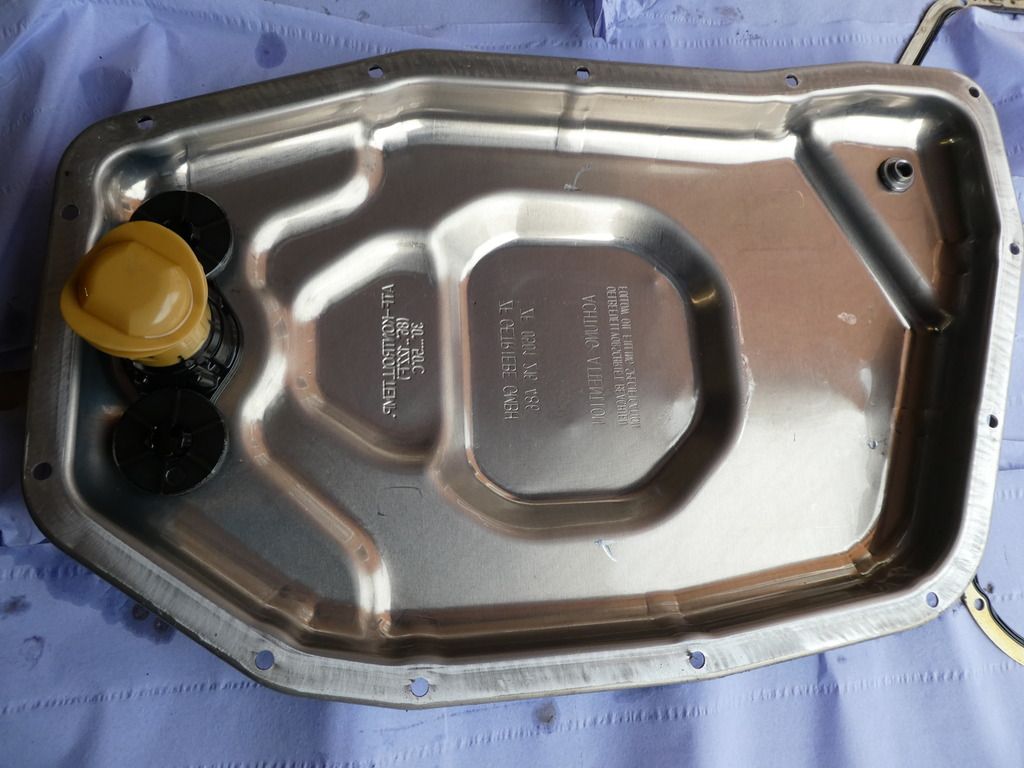
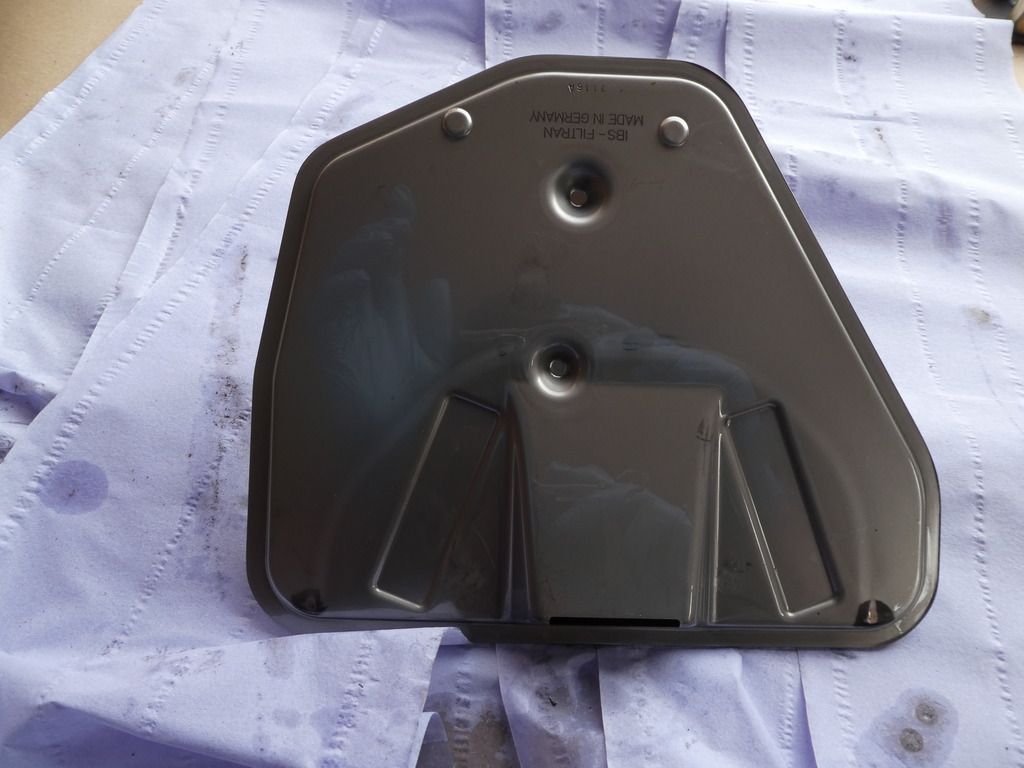
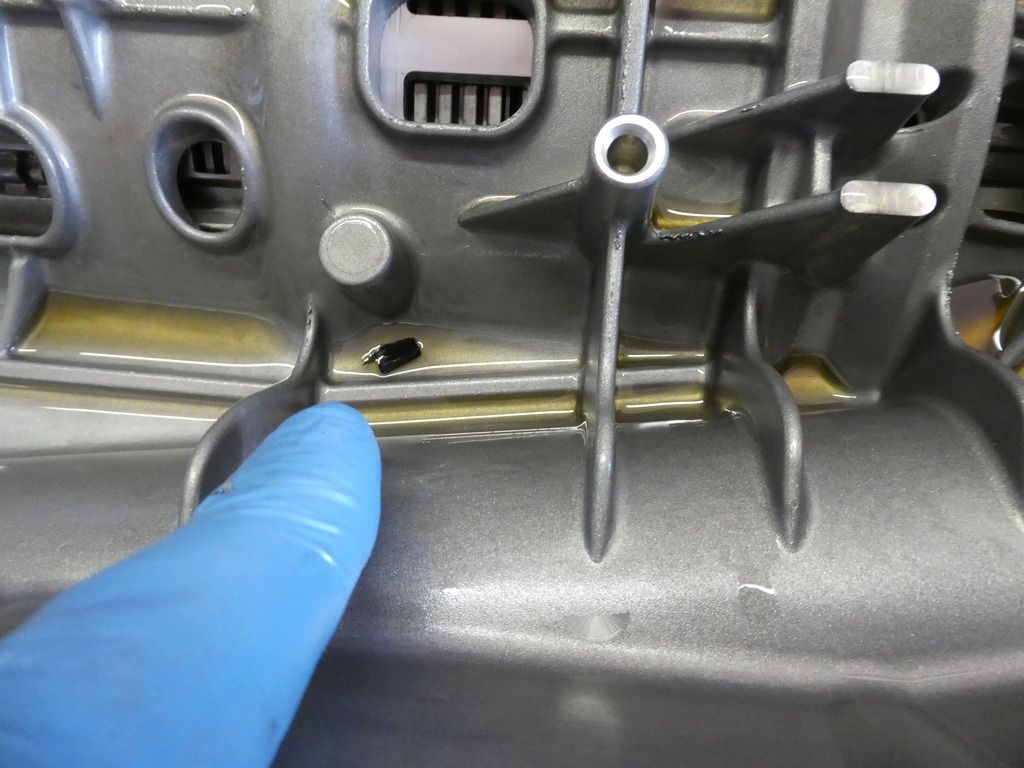
Remove the steel gasket and discard
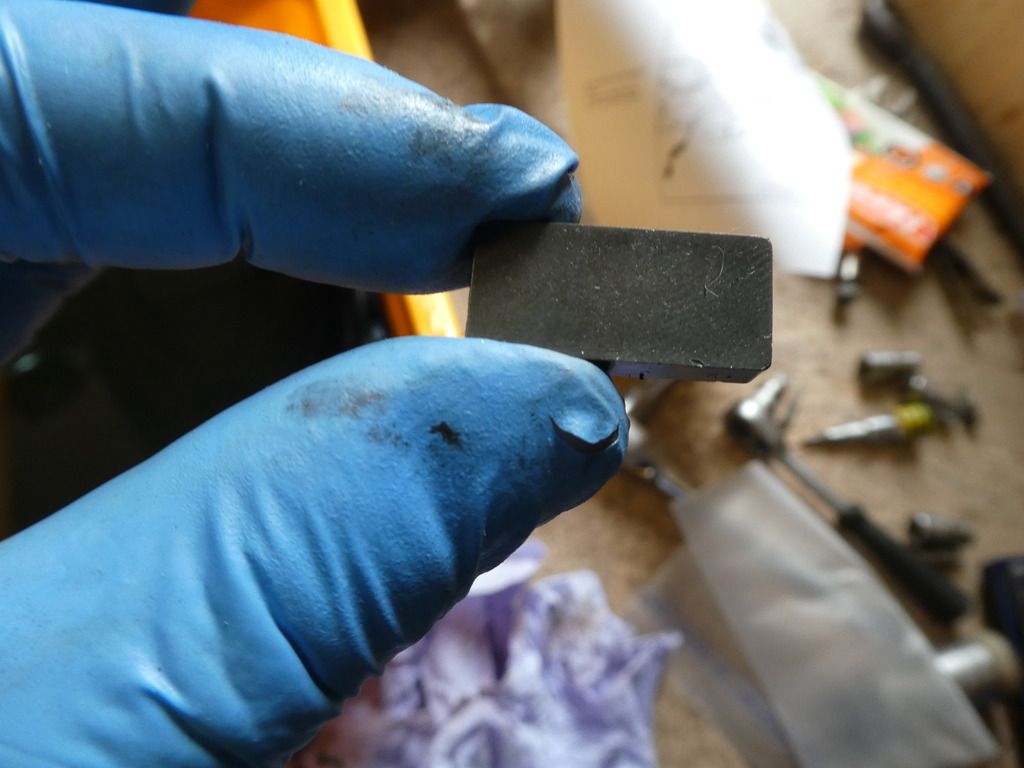
Look closely at the niche there sits the magnet
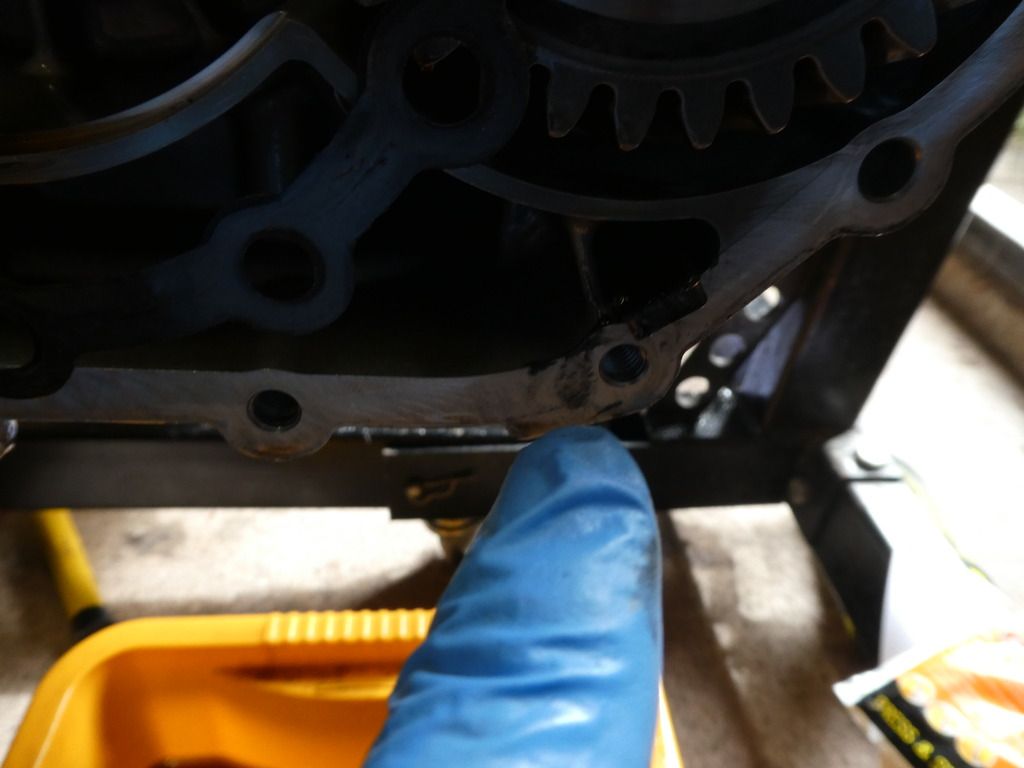
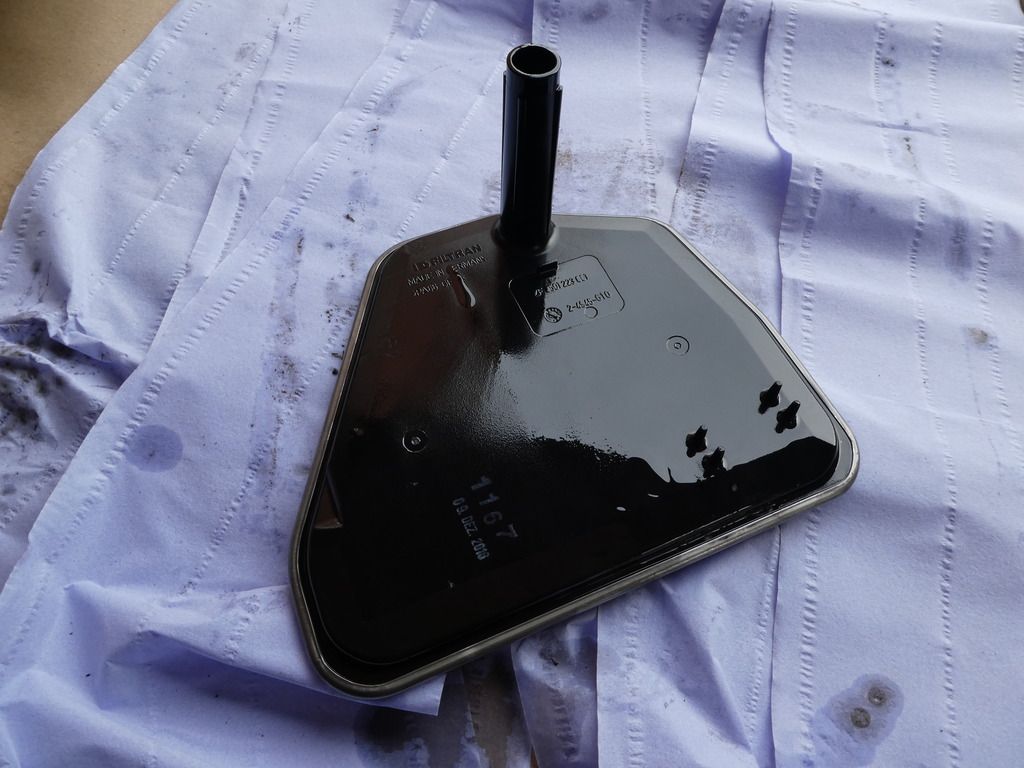
Again inspect the fines on the magnet whilst cleaning it
Remove this shim washer from the gearbox output shaft
Re: Gearbox Teardown & Refurbish - 6HP28A61
Posted: Mon Sep 03, 2018 12:22 pm
by ATinOf
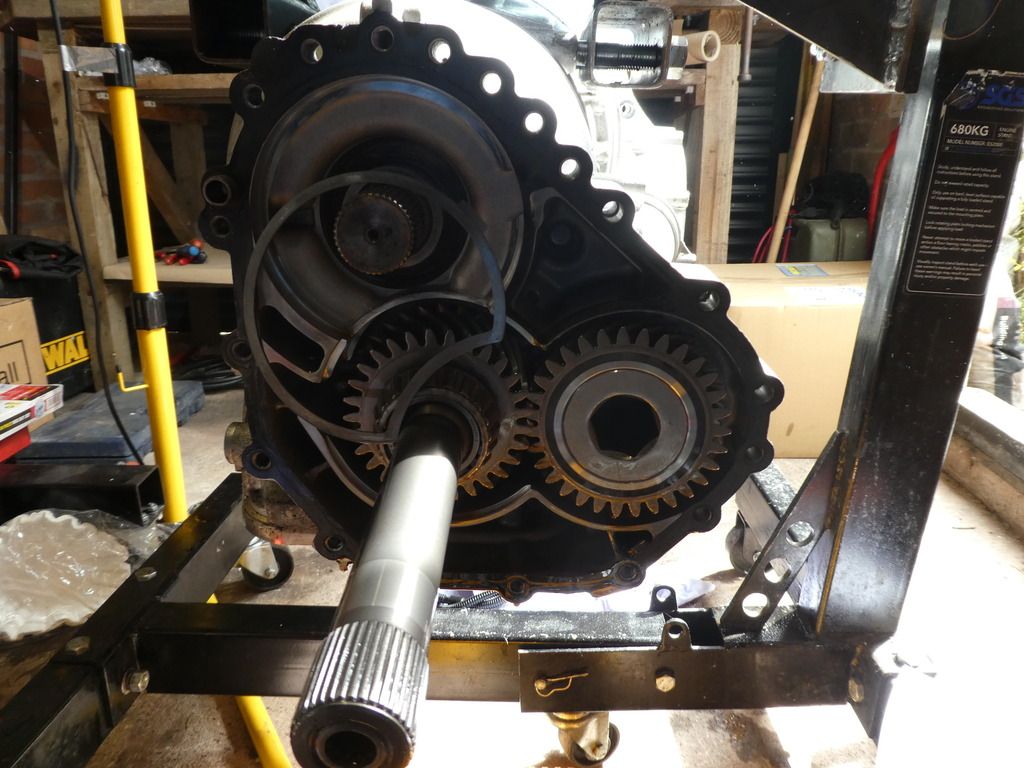
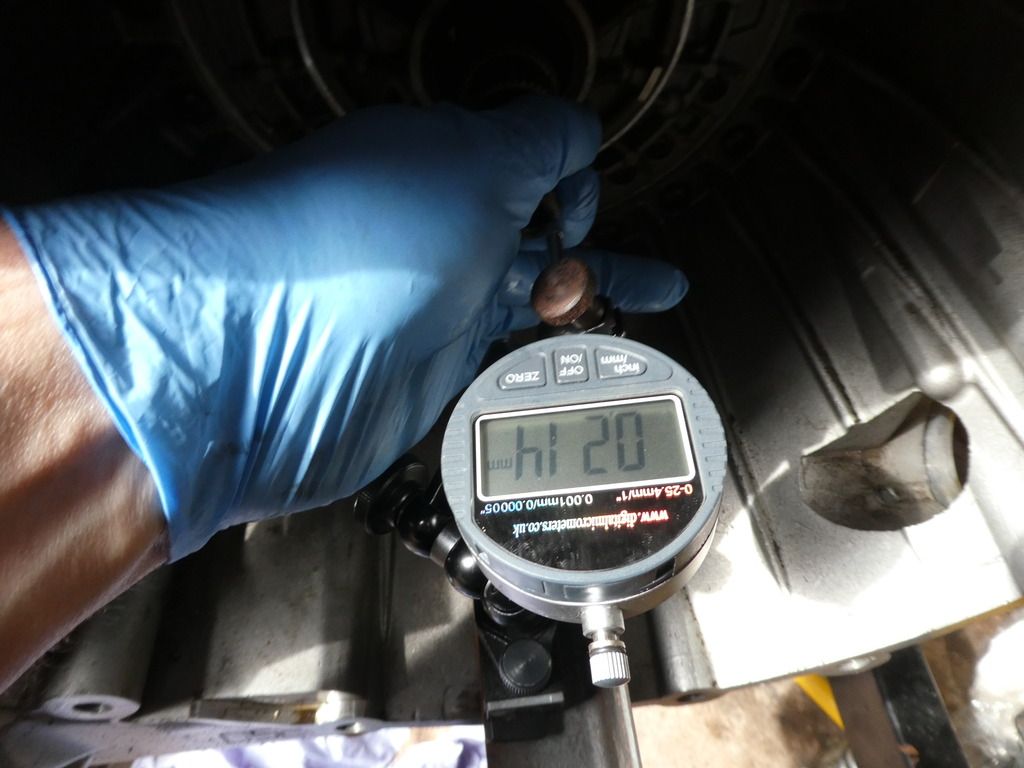
Now is a good time to check the gearbox input shaft axial play and record it, you could have done this earlier, as long as its done before the gearbox is stripped.
You may well ask why we haven't done the diff output axial play, its unlikely this will be worn to the degree of concern on this low mileage car and I was not planning on fine tuning the diff clearances. We are not changing any diff components.
However since we ARE planning on changing frictions and steels where required in the gearbox we WILL be affecting the gearbox axial clearance. Besides which given the inspection so far hints at this box being off at least once before I want to know where it stands now, to determine how good a job was done! Push the shaft in to datum the DTI
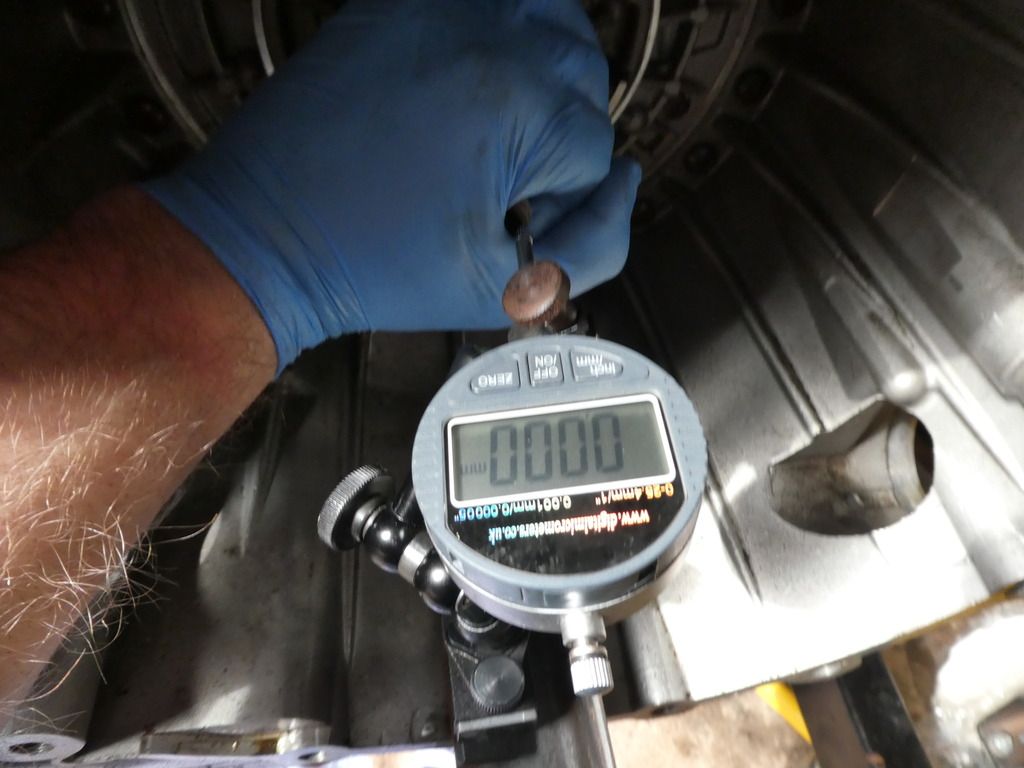
Clearance is actually within spec, 0.2-0.4mm ; however since the spec states this clearance is 'dry', given this box is now 'wet' (i.e. its oiled up) I suspect the clearance was probably greater than this measurement when dry, by how much I couldnt guess. The measurement is also to be taken at 200N force (ie a 20kg pull, which isn't easy to do on the splined shaft! I attached a jubilee clip and some insulation tape to get a good grip; of course there is always the ZF tooling you can buy!)
Re: Gearbox Teardown & Refurbish - 6HP28A61
Posted: Mon Sep 03, 2018 12:24 pm
by ATinOf
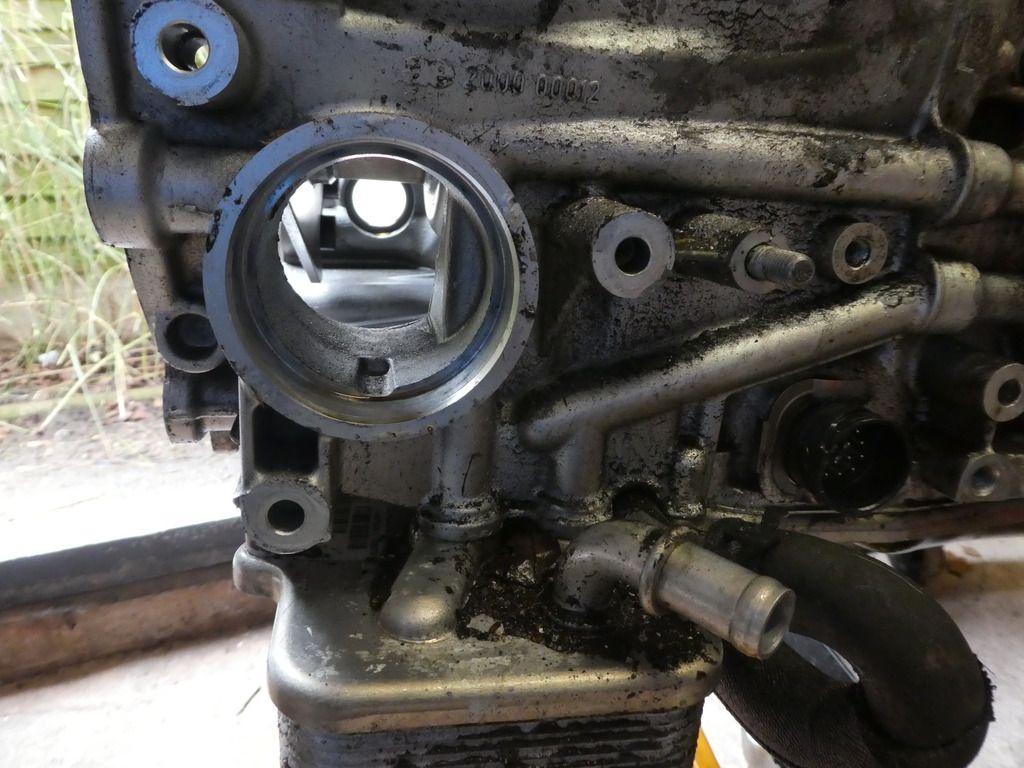
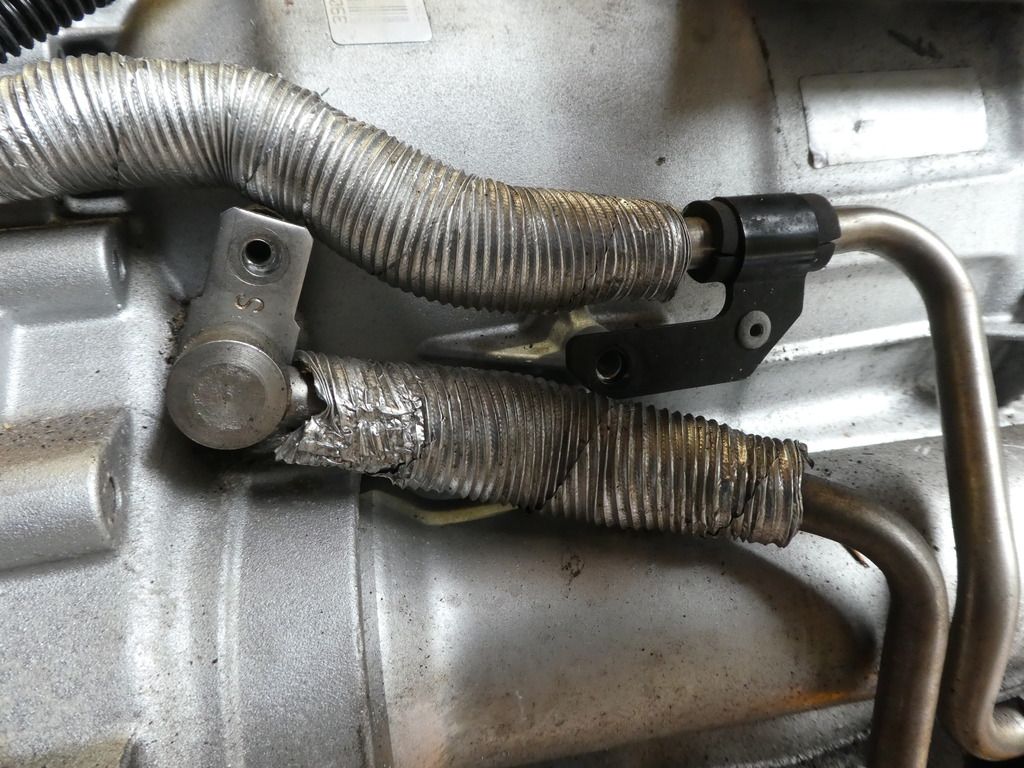
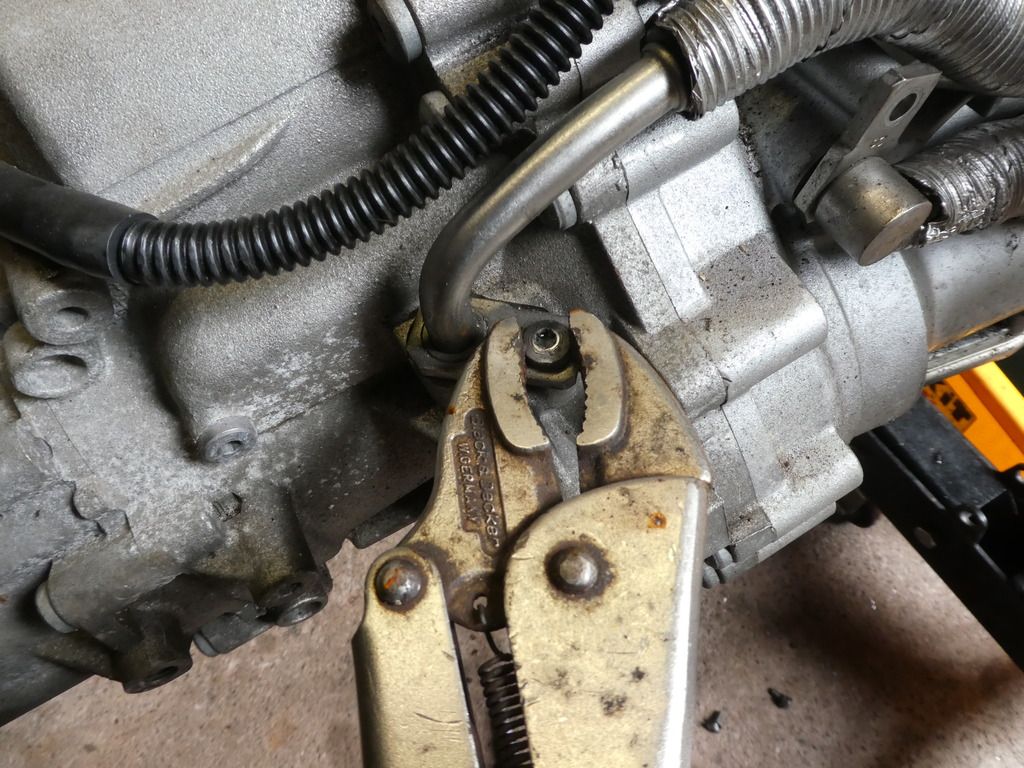
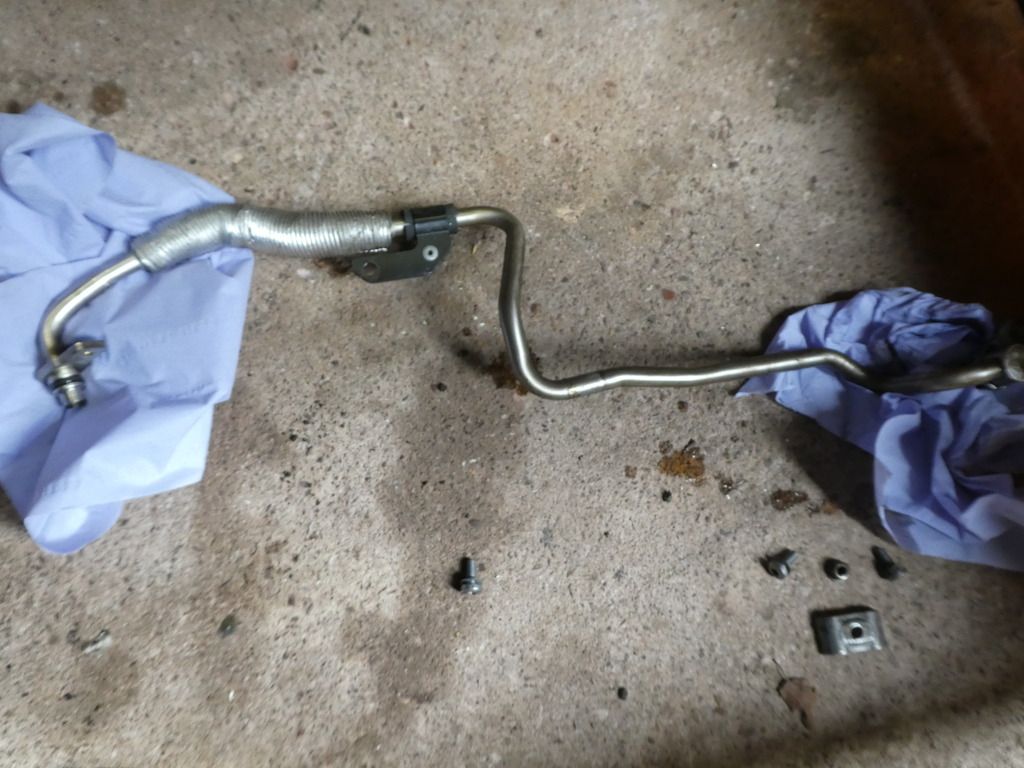
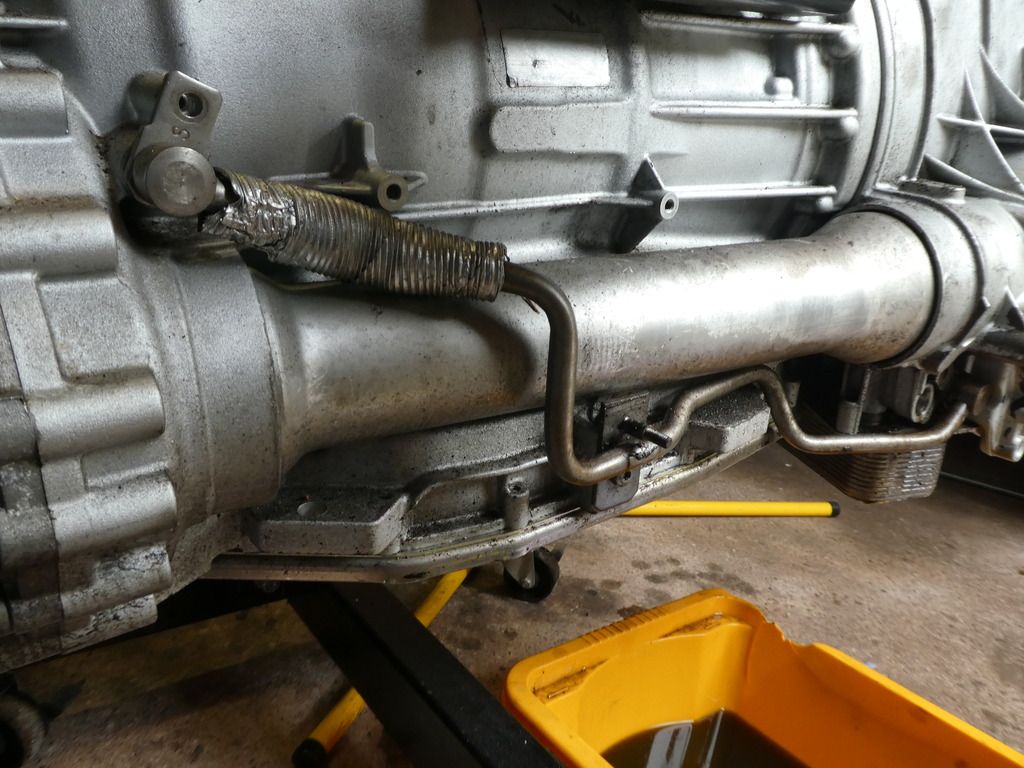
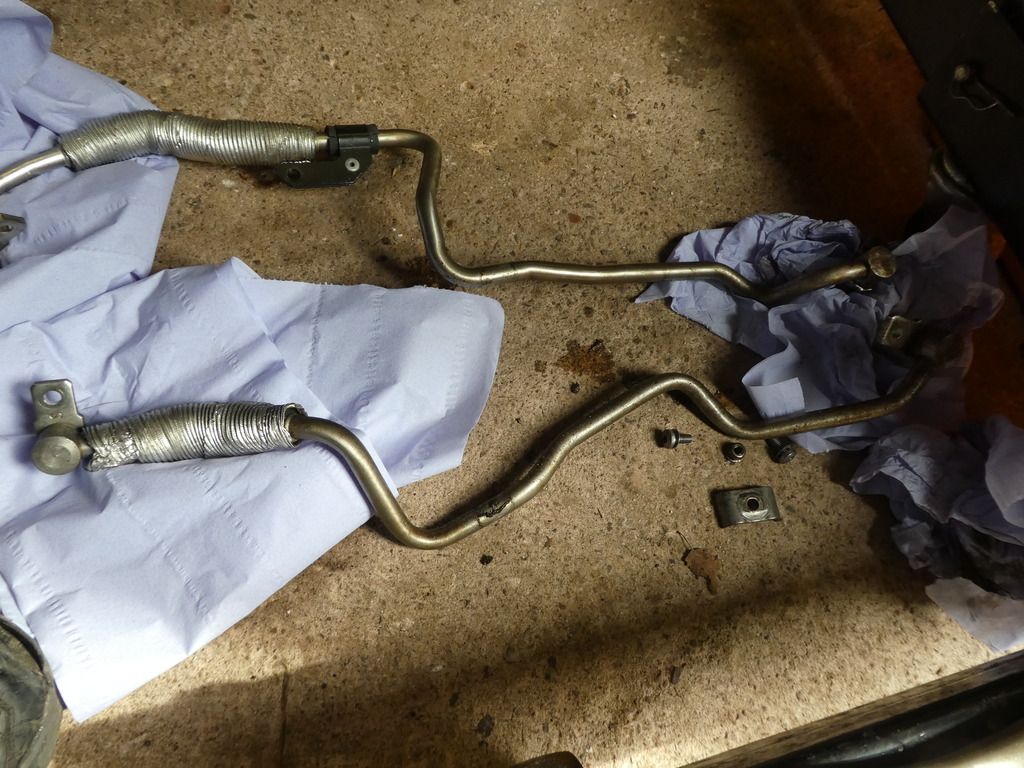
Now to remove the oil coolers, starting with the transfer diff oil cooler. It seems we have some more screws to order; malgrips put to use again!
These screws are Audi supply; 01V 919 838, although they are the same M6 x 15 Torx fixings as the cooler pipe screw; ZF dont list them for the gear oil coolers.
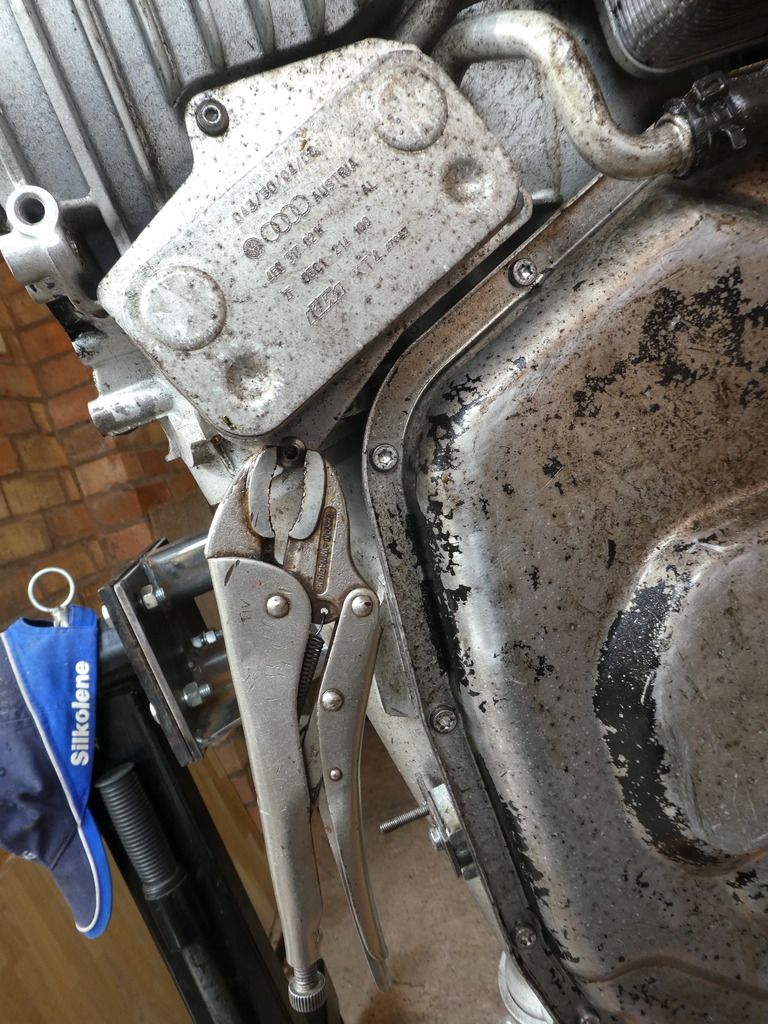
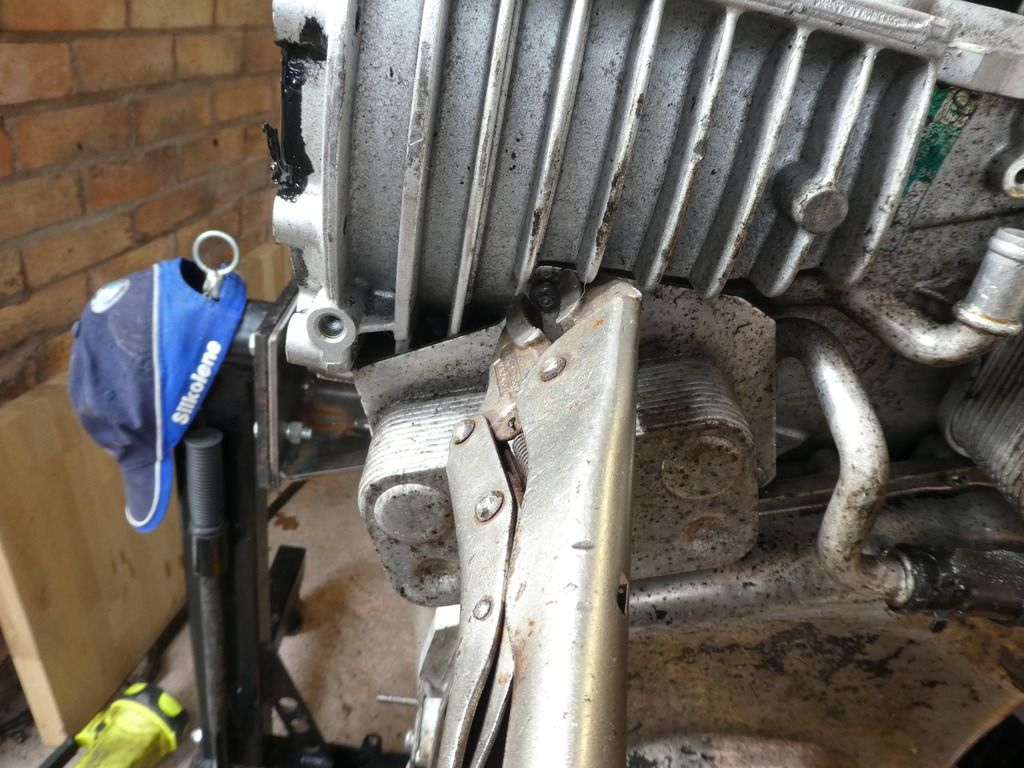
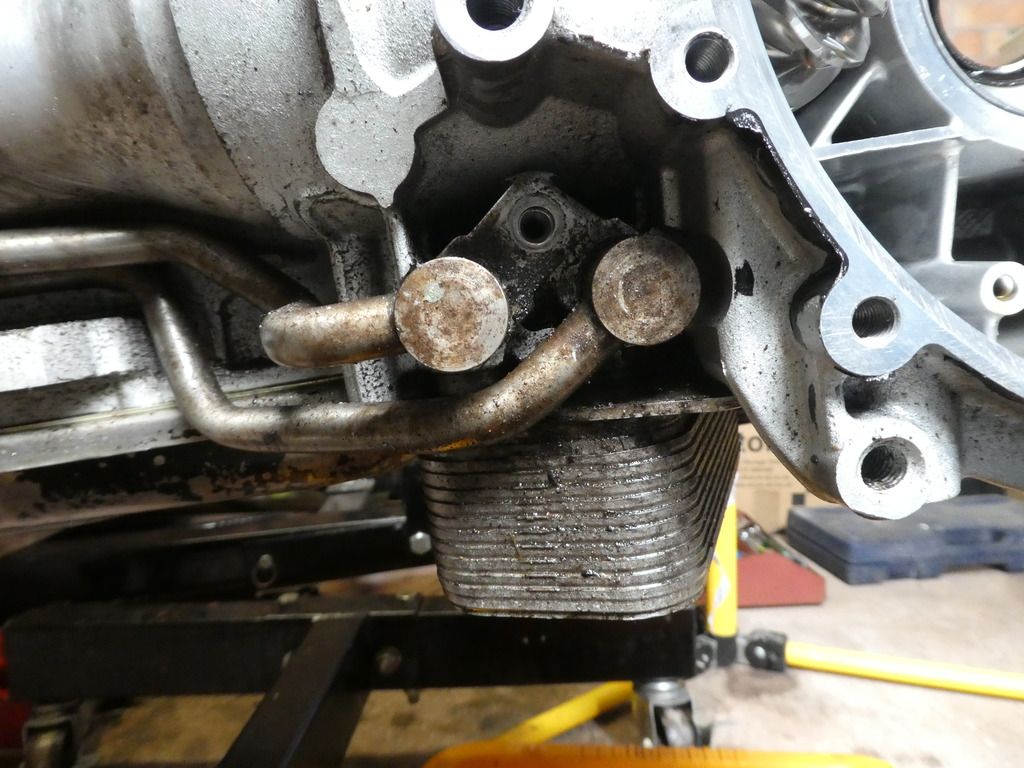
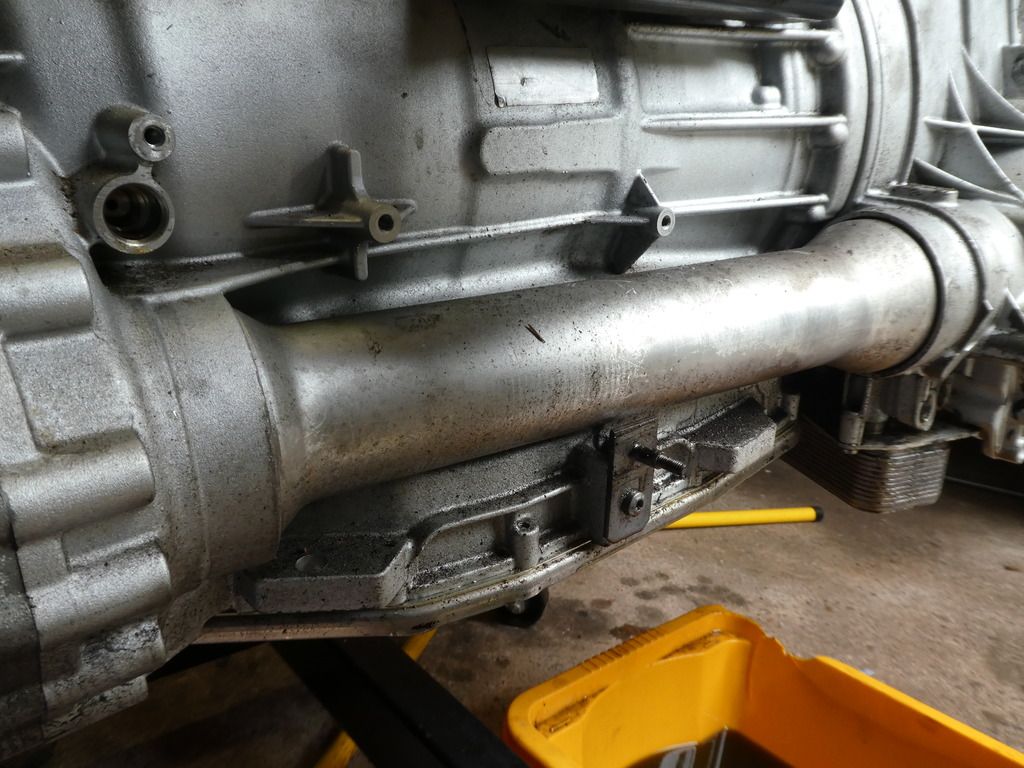
After the transfer diff cooler remove the gearbox oil cooler adjacent
Re: Gearbox Teardown & Refurbish - 6HP28A61
Posted: Mon Sep 03, 2018 12:26 pm
by ATinOf
Re: Gearbox Teardown & Refurbish - 6HP28A61
Posted: Mon Sep 03, 2018 12:29 pm
by ATinOf
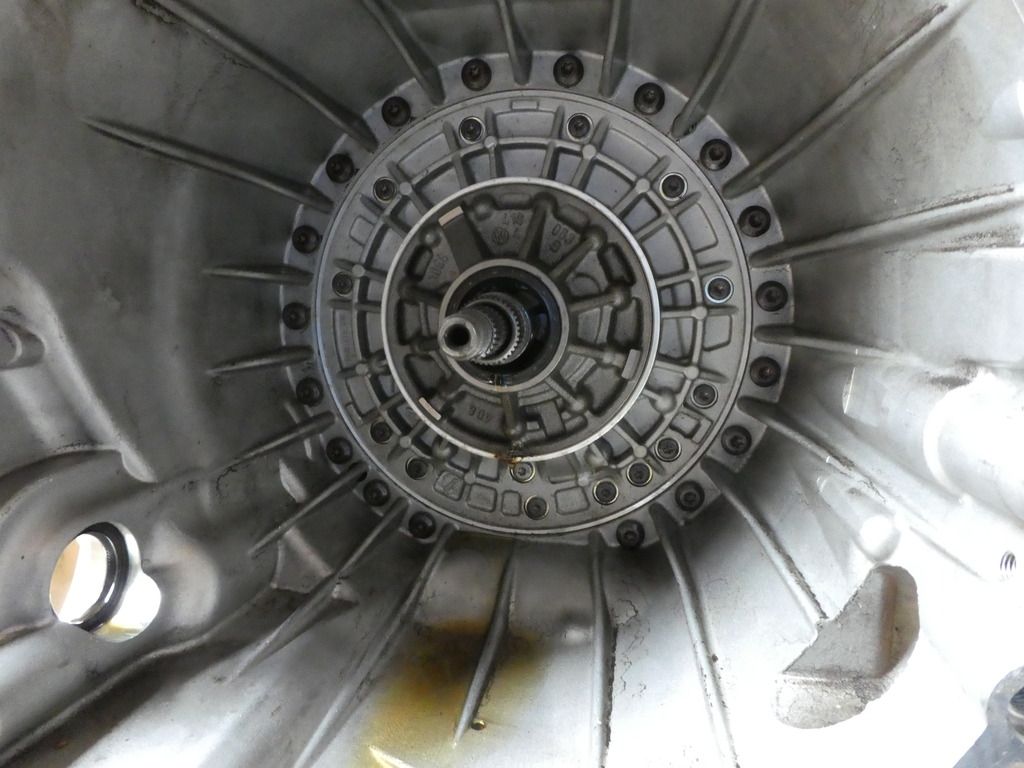
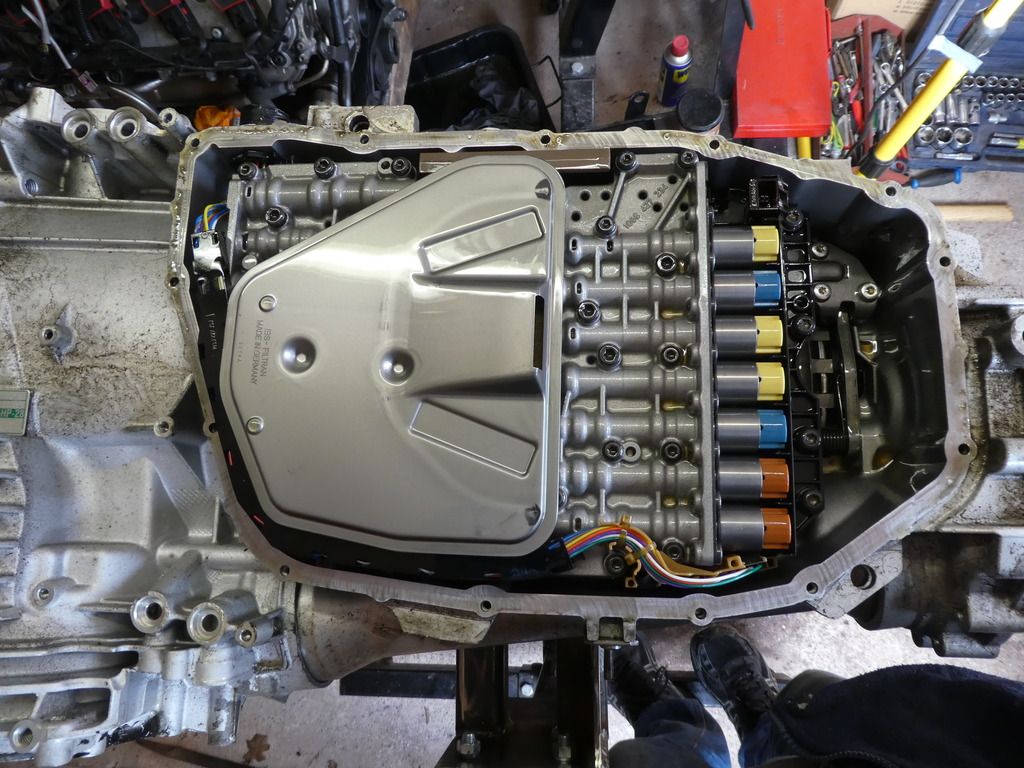
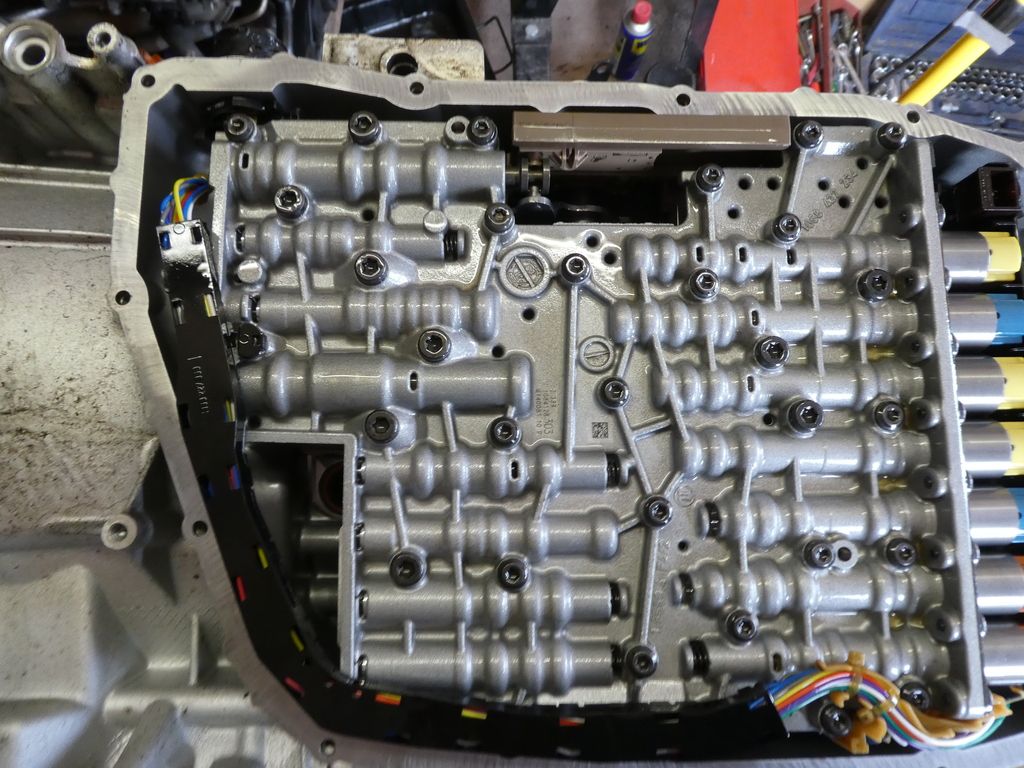
Now to get the valve body out, starting with these 4 base screws at the side of the solenoids
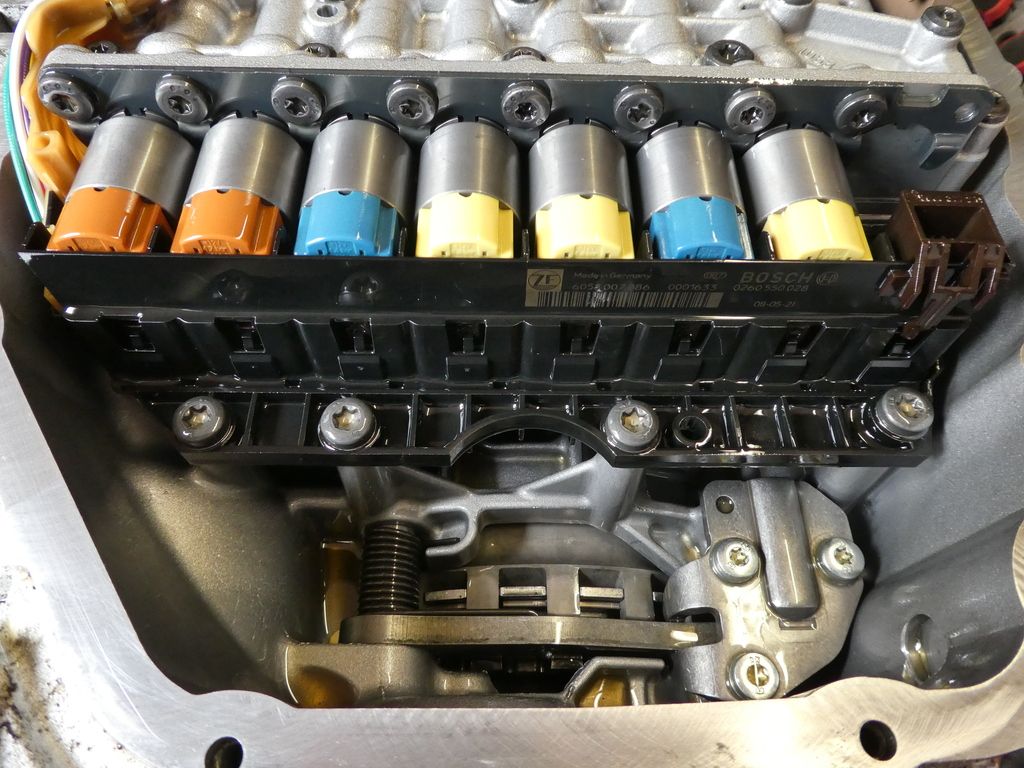
VERY carefully unclip the loom support from the screw heads (held at 2 I think), be warned this gets brittle and if you break this at the supports (they only clip on) you should replace it, it should not be left to dangle on its own, you run the risk of stressing the cables at the connection ends
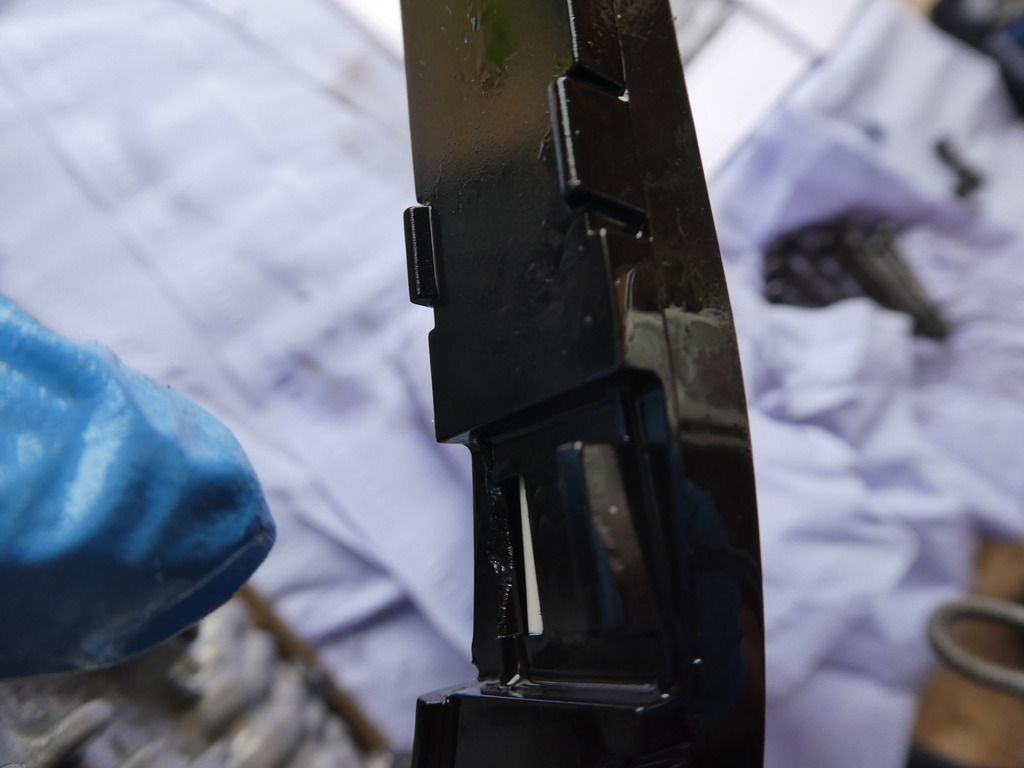
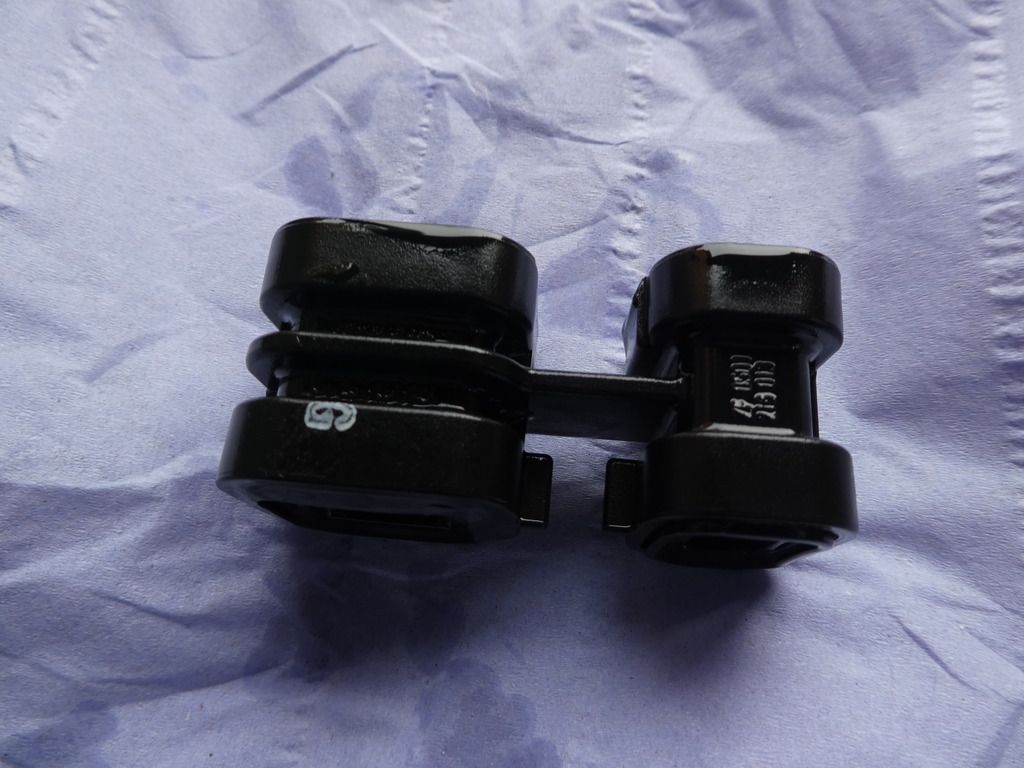
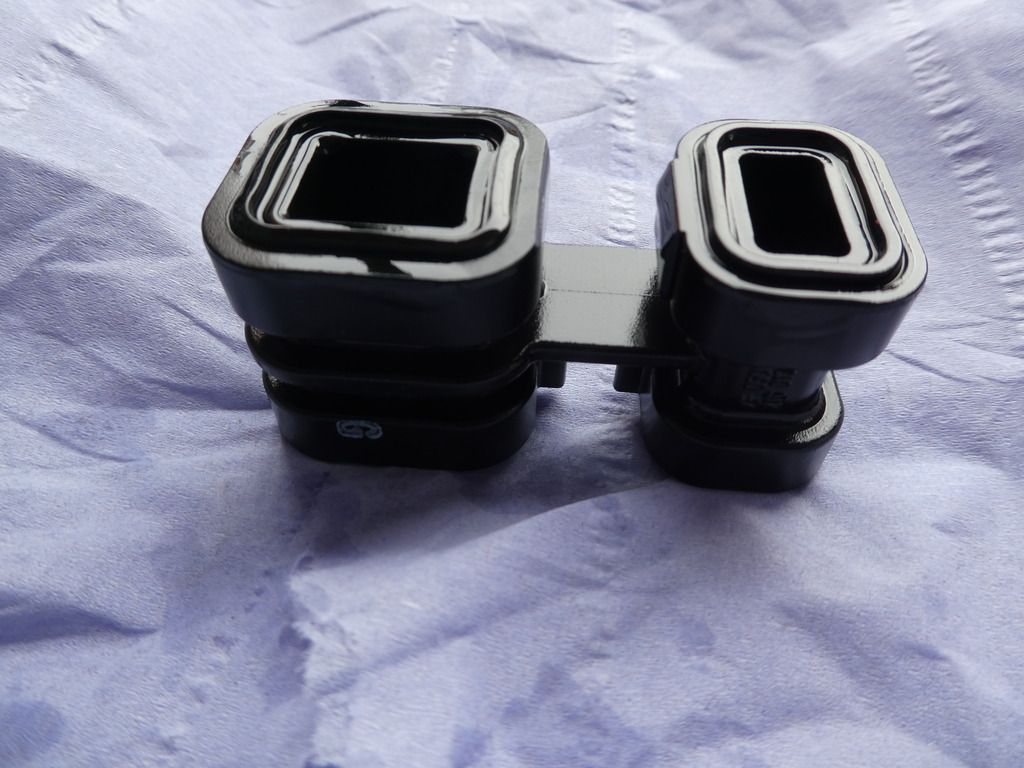
Now remove the clip holding the connector sealed inplace

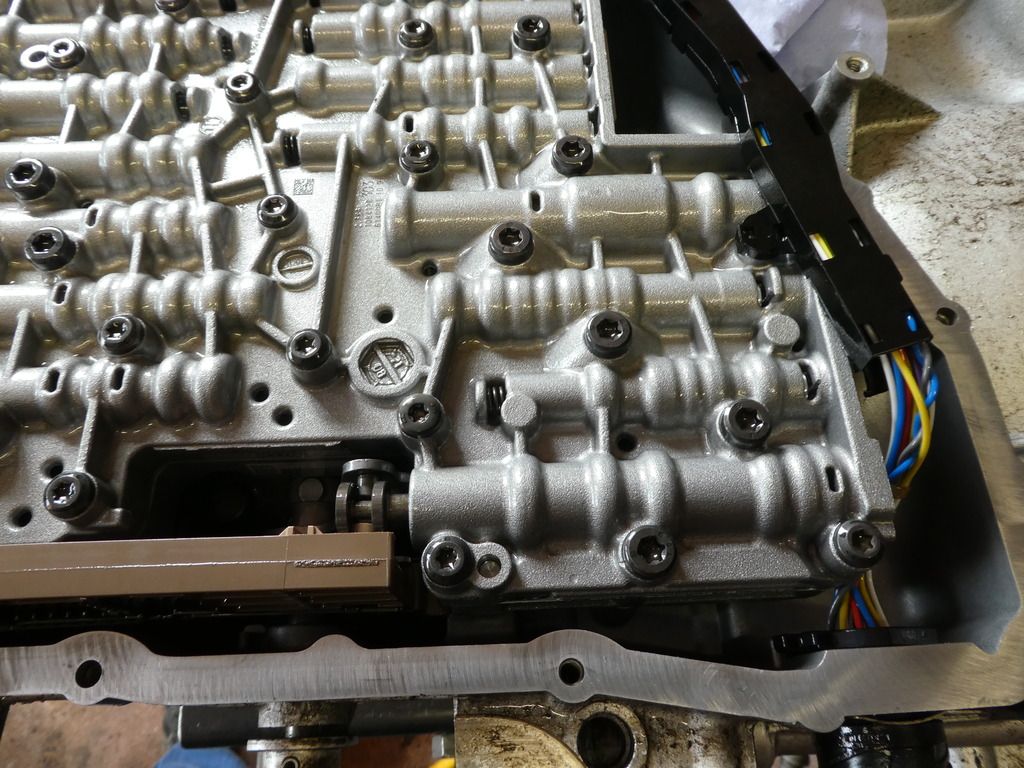
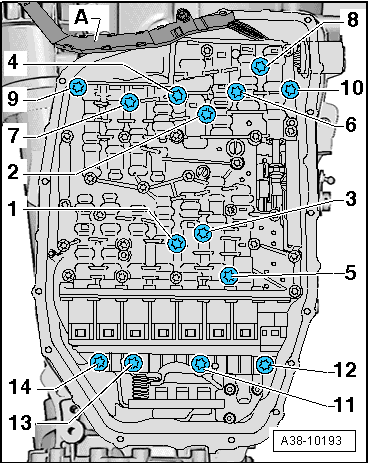
Unscrew the Torx40 larger headed M6 screws, ten of them I think, holding the valve body to the gearbox - ** NOTE there is a sequence to follow for these screws to ensure you do not introduce warping into the valve body ** which is essentially start from the out-side (10) and work your way inside diagonally (to 1)
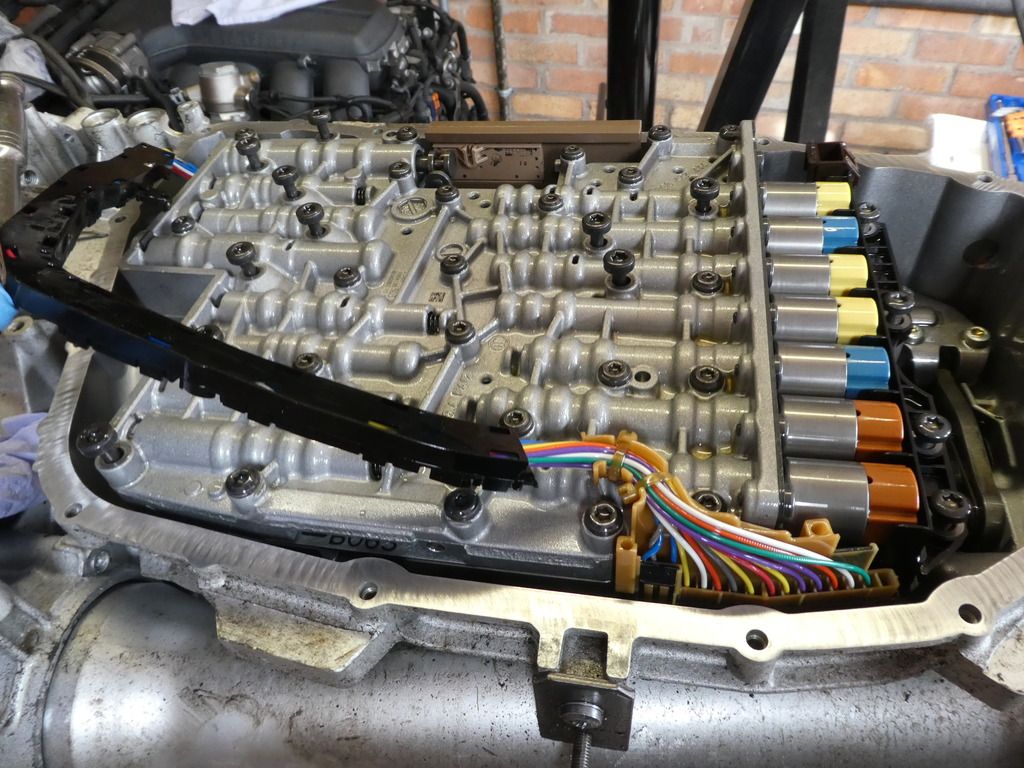
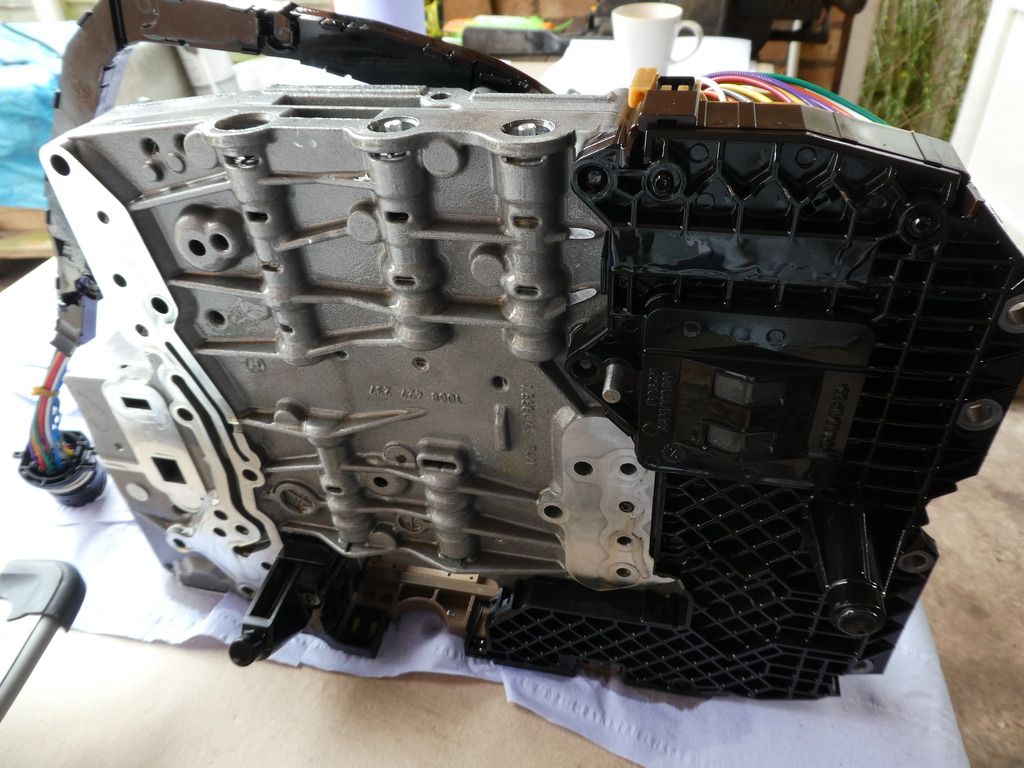
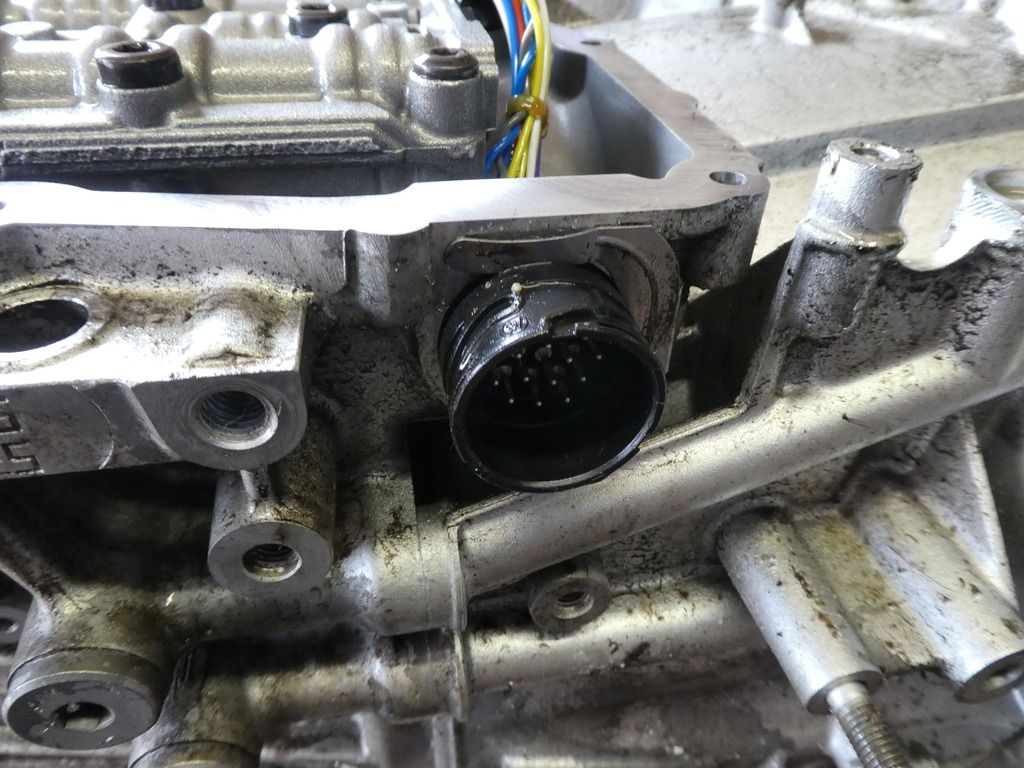
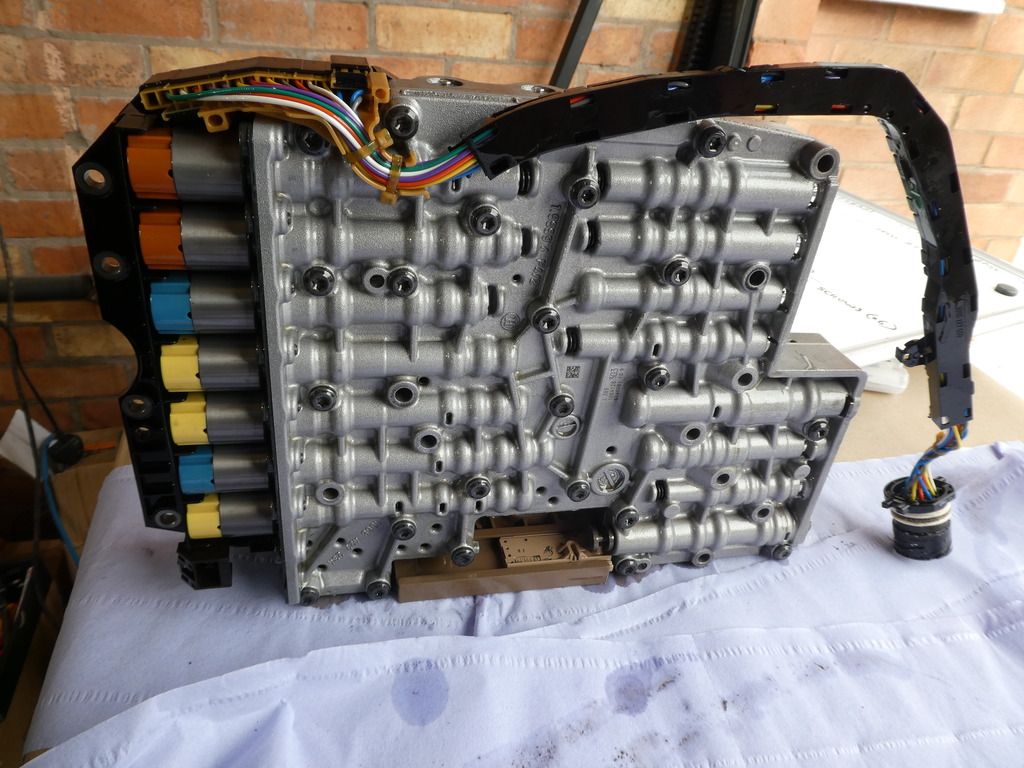
And carefully lift the valve body out, along with the double sealed connector body (with a slight twisting motion and a little WD40, since we are replacing the seals anyway, to aid it out)
Re: Gearbox Teardown & Refurbish - 6HP28A61
Posted: Mon Sep 03, 2018 12:31 pm
by ATinOf