Engine / Gearbox Removal

5.0 V10 50v biturbo - 571 bhp
ATinOf
3rd Gear
Posts: 395
Joined: Fri Jul 06, 2018 7:32 pm
Location: Cheshire

Re: Engine / Gearbox Removal

Post by ATinOf » Sun Jul 15, 2018 8:32 am

Now its really important you dont forget this bit on reassembly, or she wont start.
Disconnect the earth cable for the engine under the o/s chassis stub
Image

That's installment 1, I will try and find some time this evening to continue this.
Last edited by ATinOf on Sun Jul 15, 2018 7:12 pm, edited 1 time in total.

ATinOf
3rd Gear
Posts: 395
Joined: Fri Jul 06, 2018 7:32 pm
Location: Cheshire

Re: Engine / Gearbox Removal

Post by ATinOf » Sun Jul 15, 2018 7:11 pm

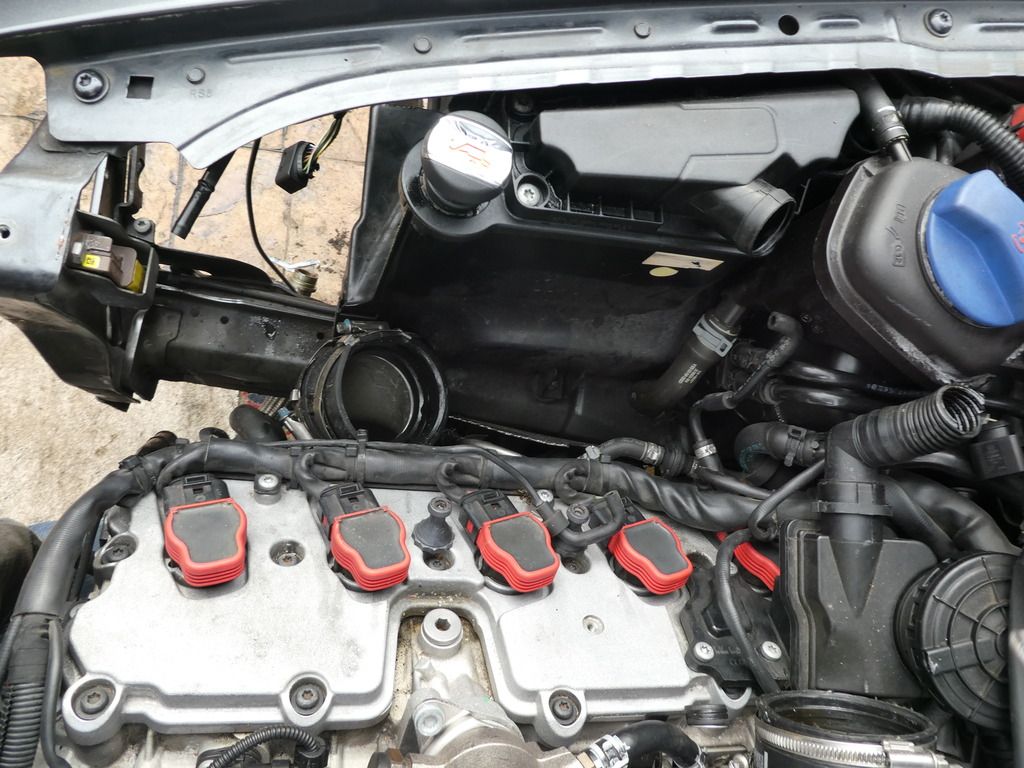
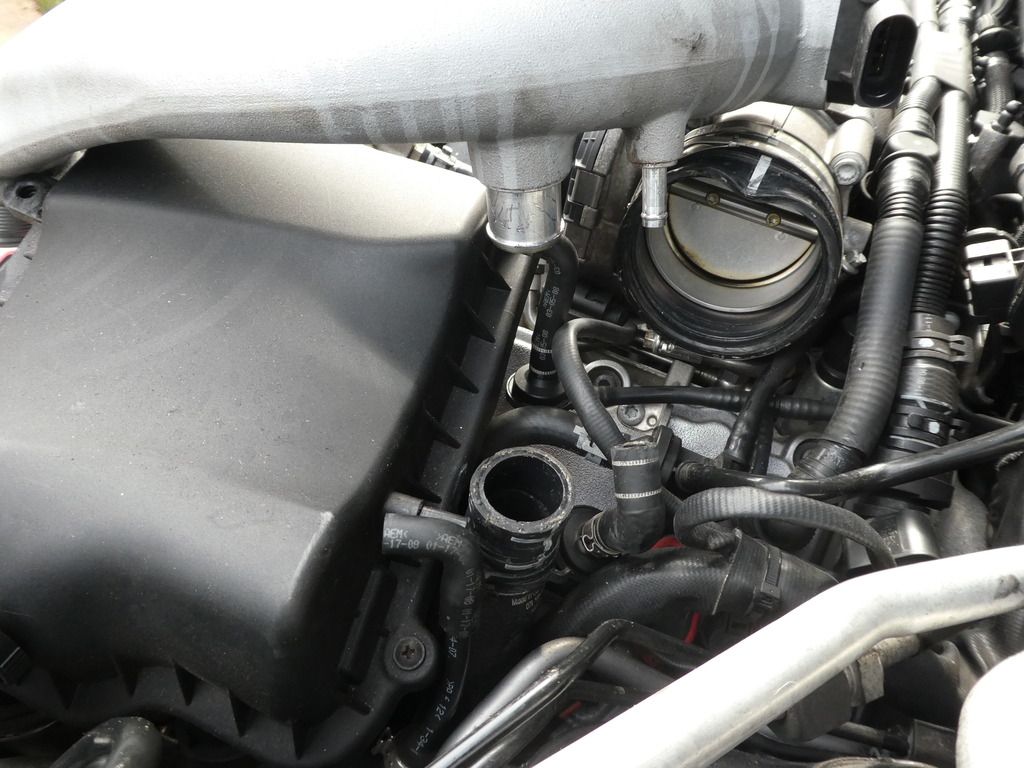
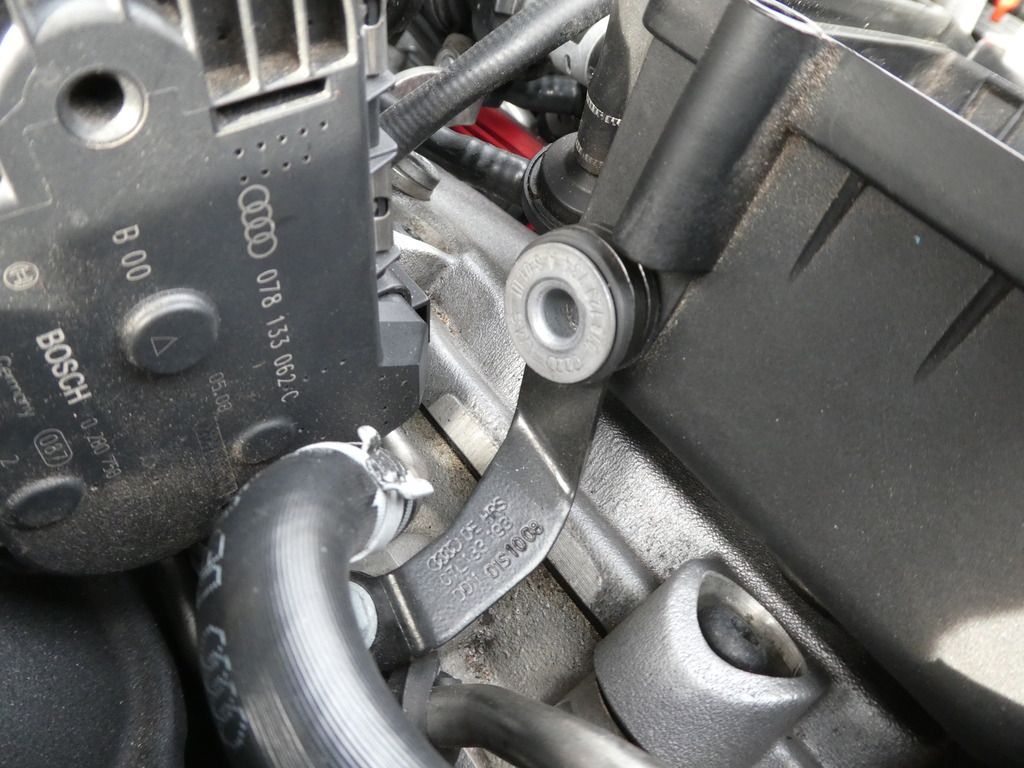
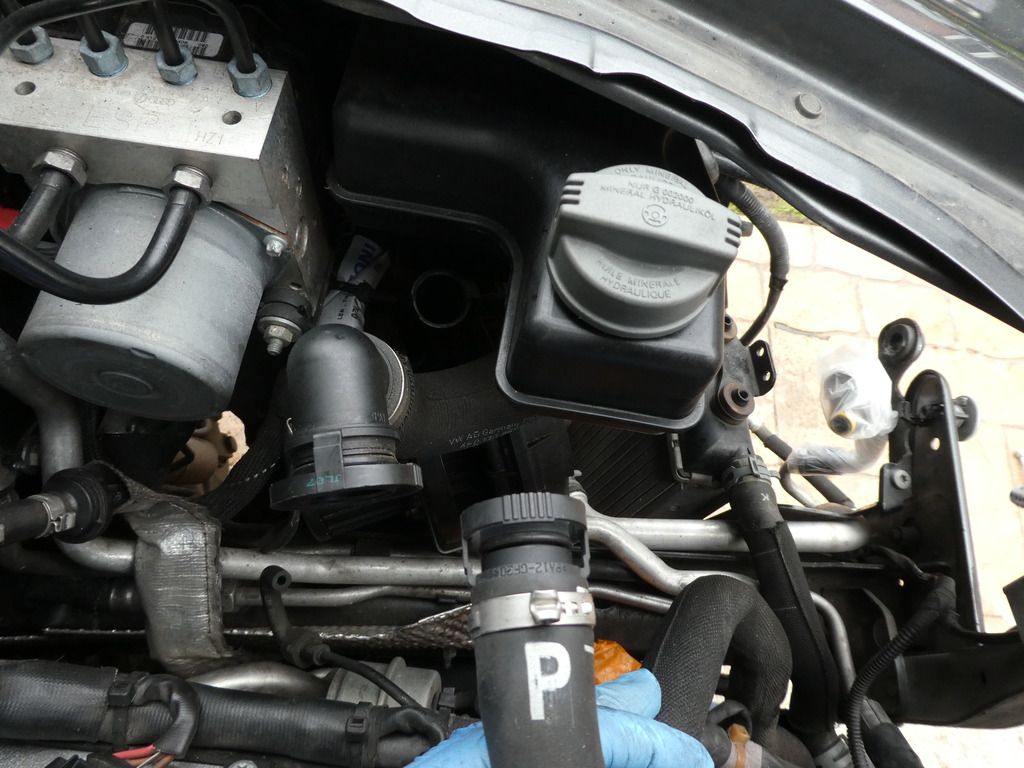
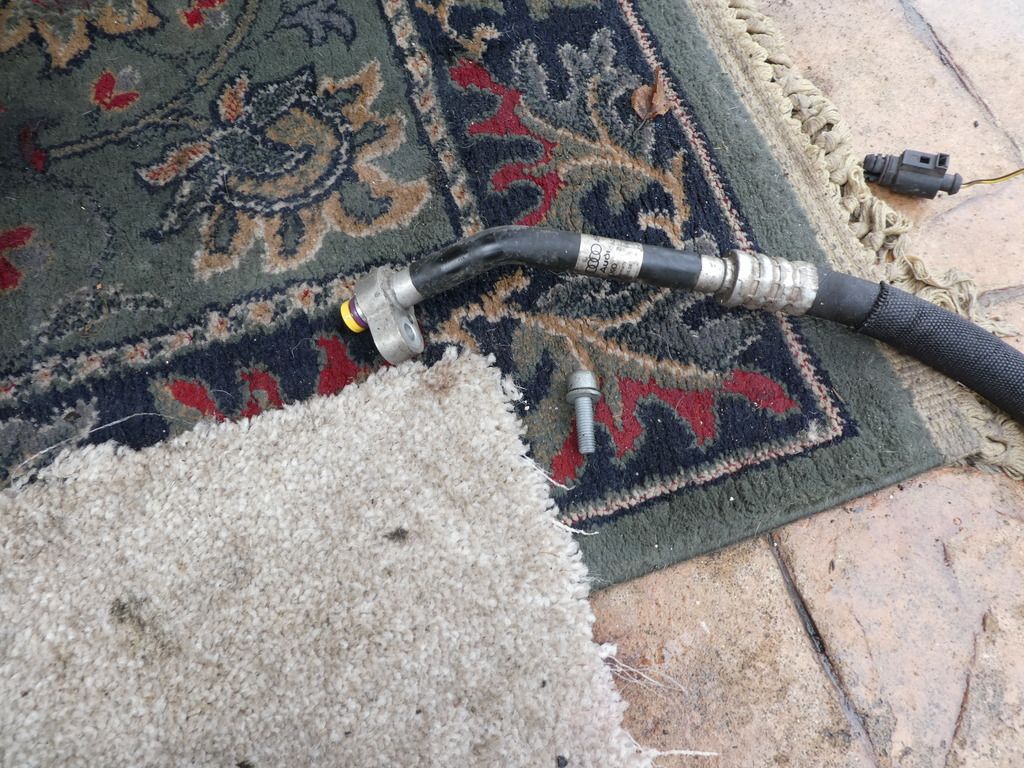
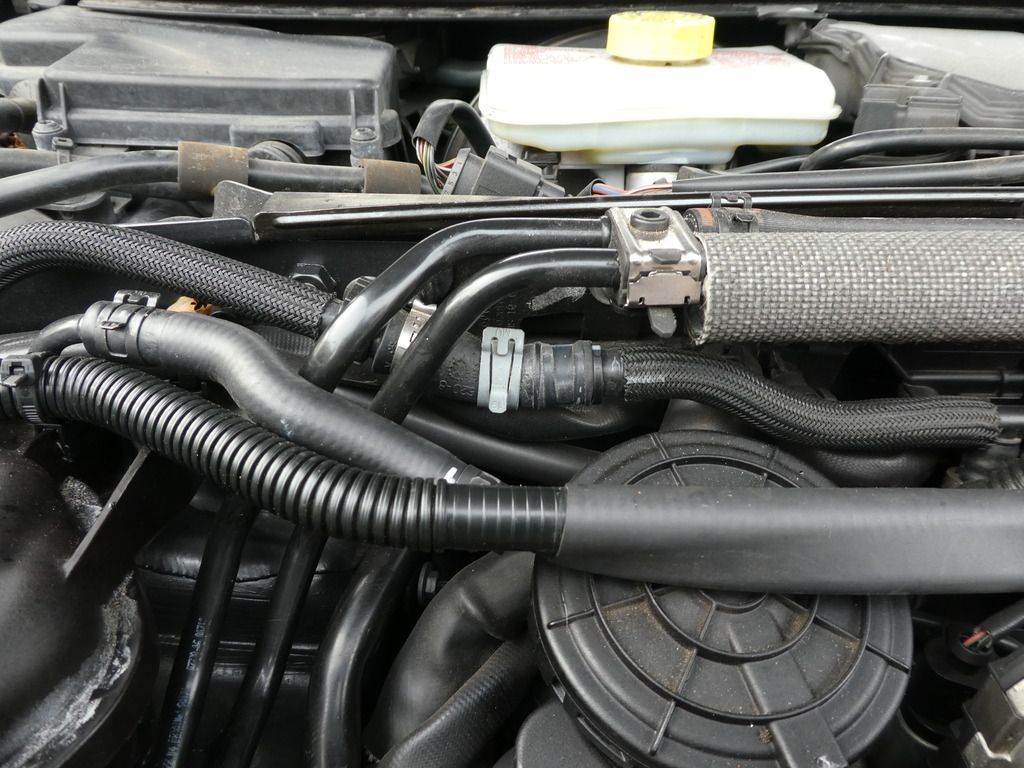
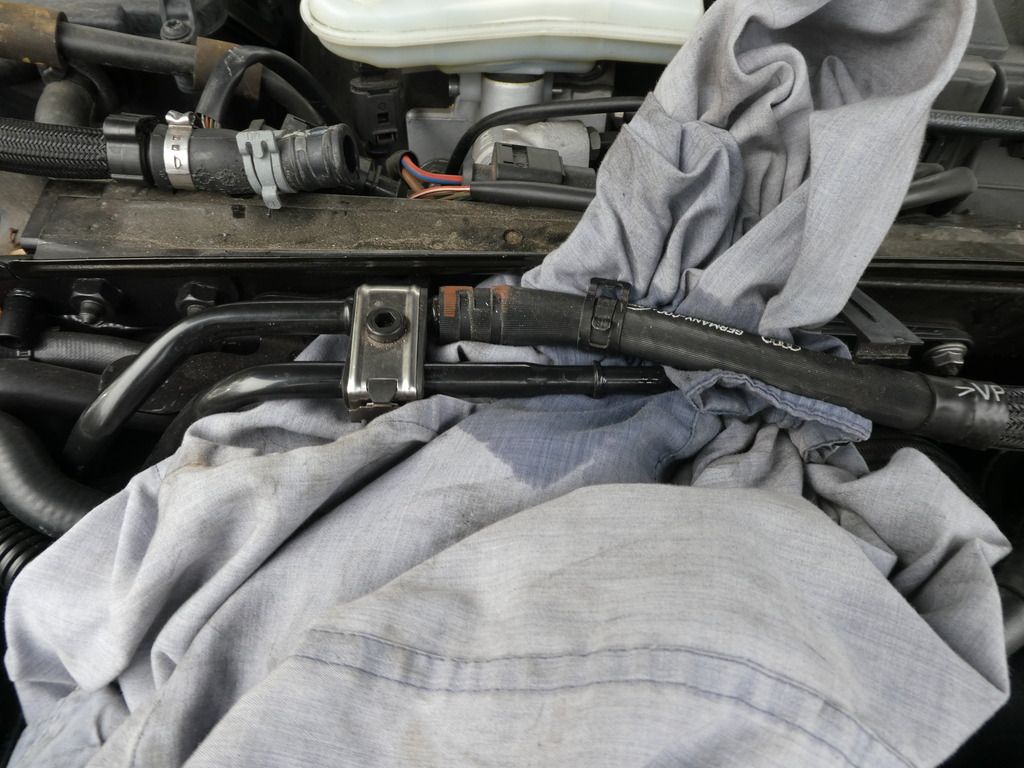
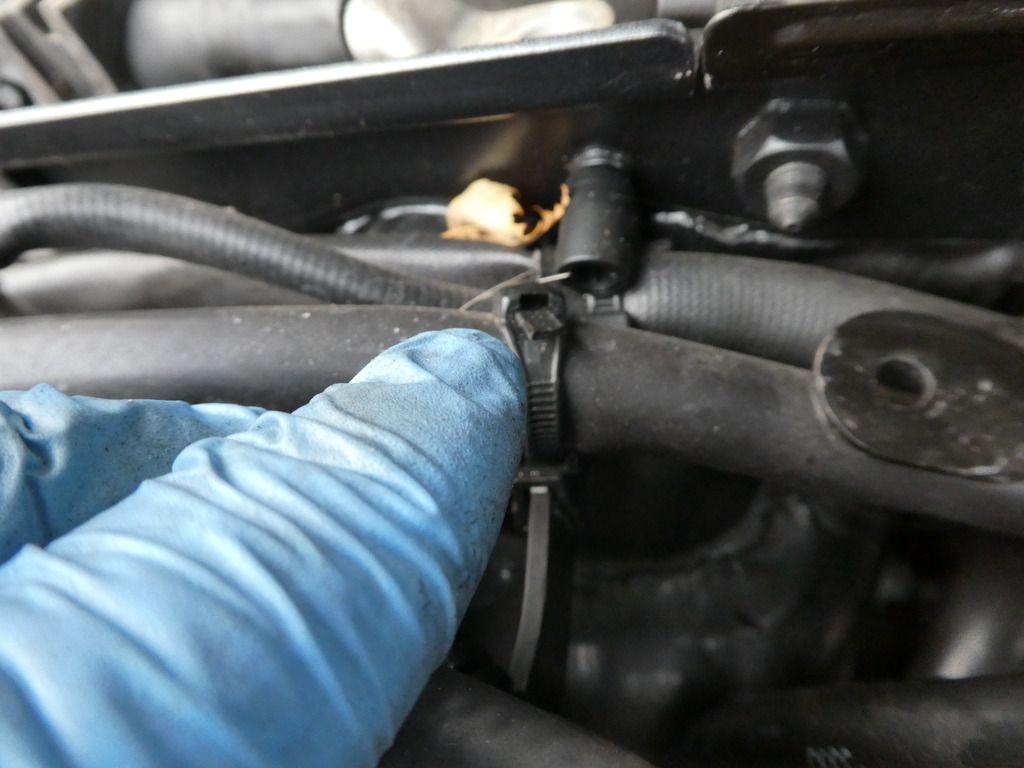
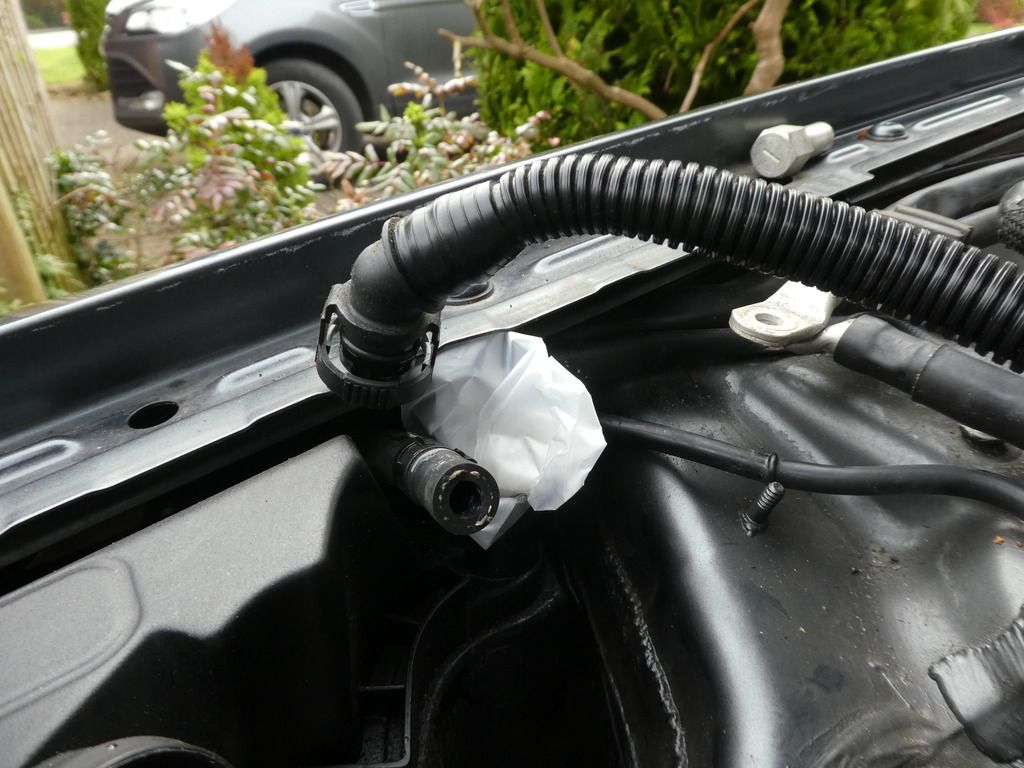
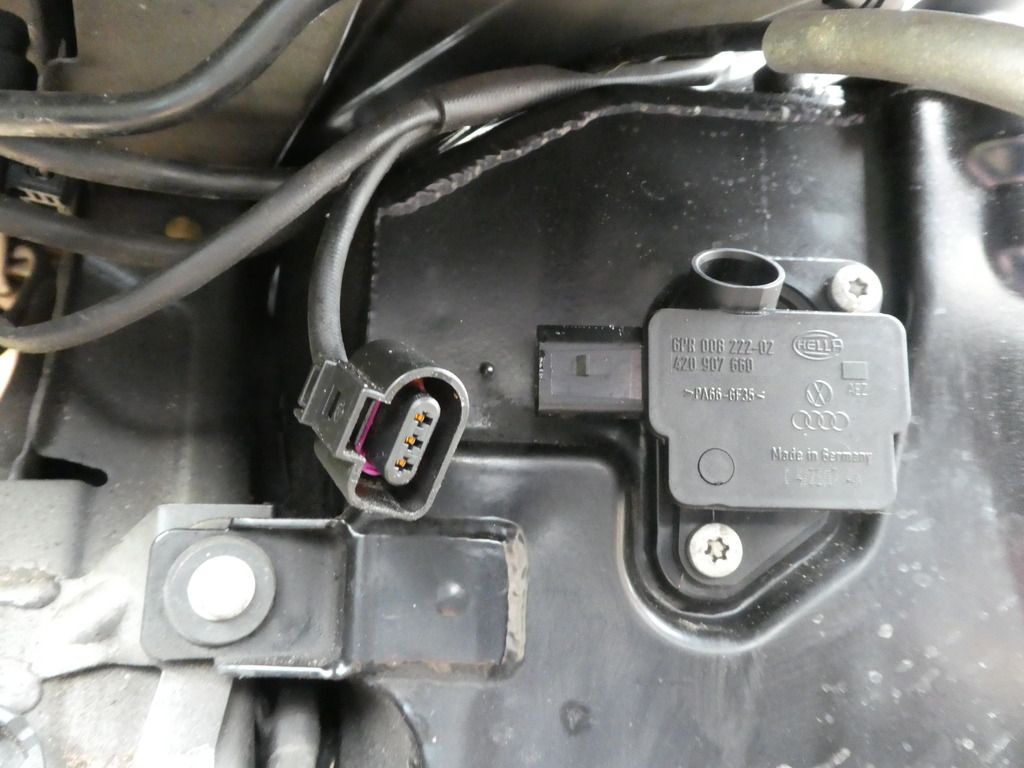
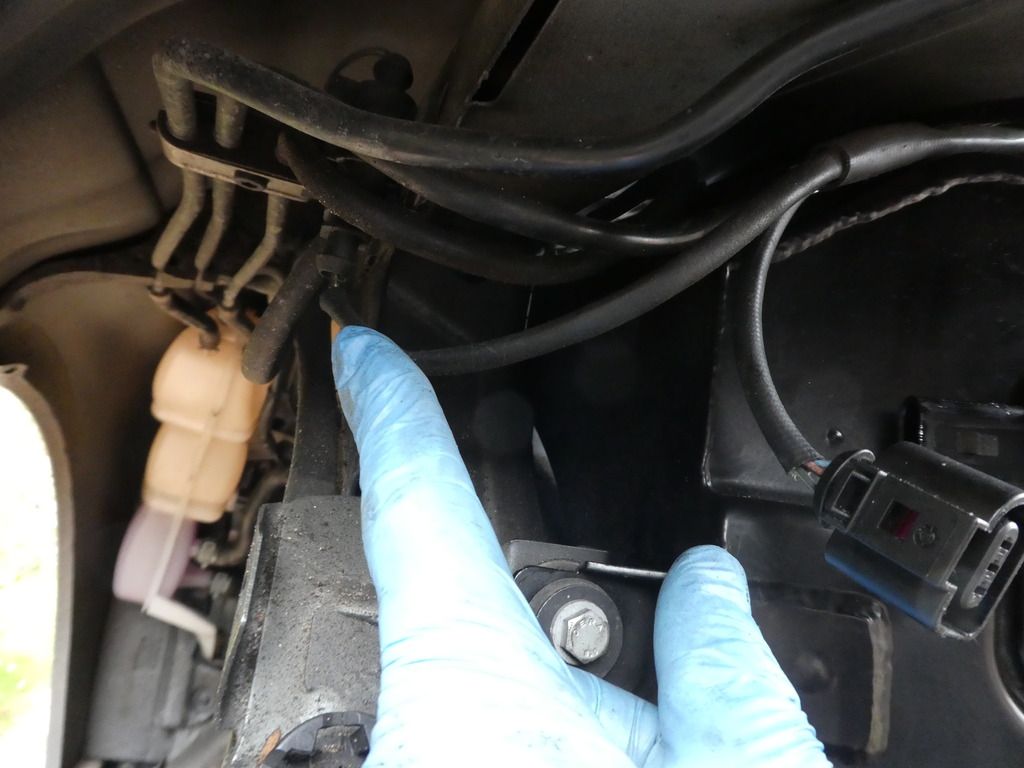
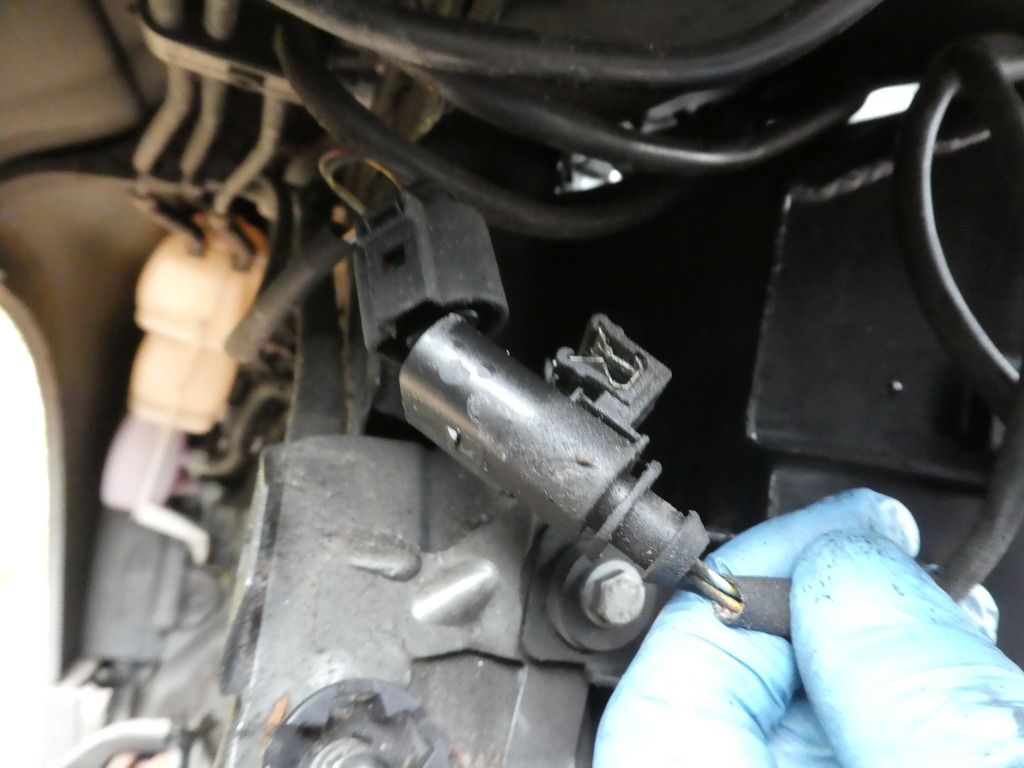
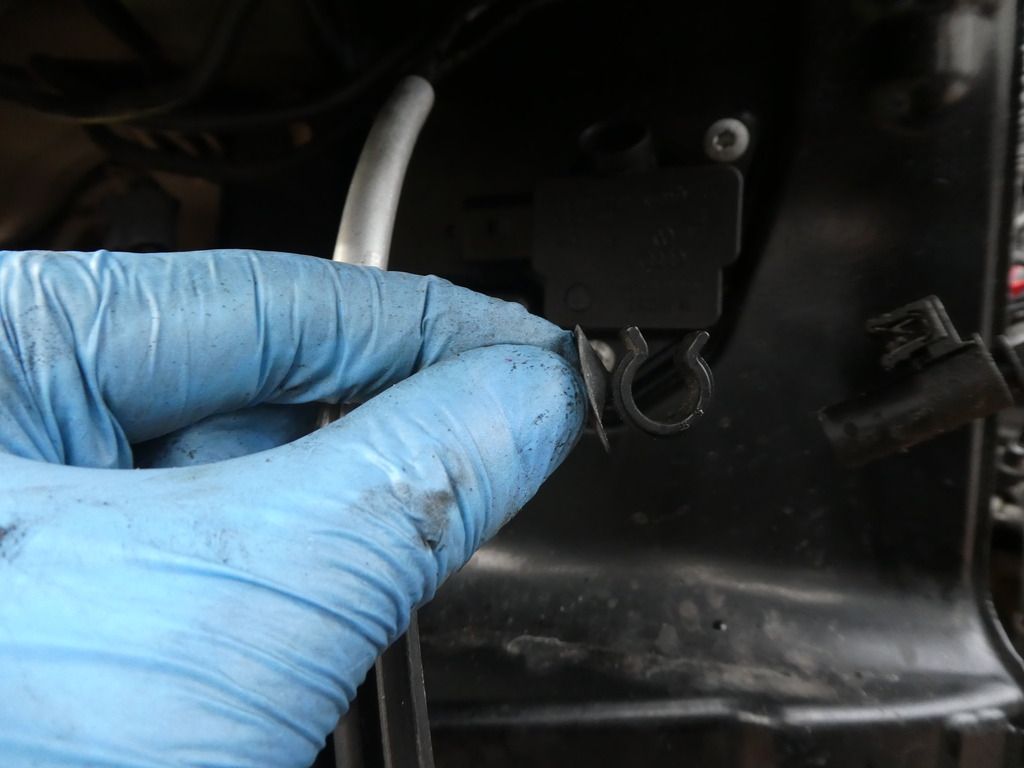
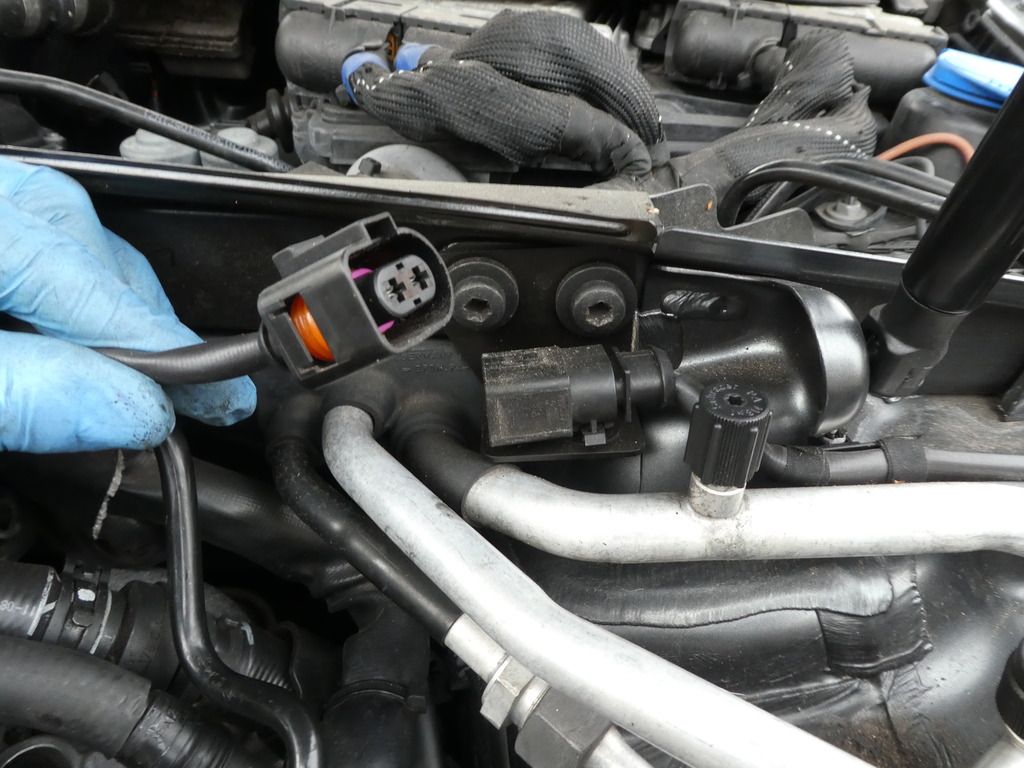
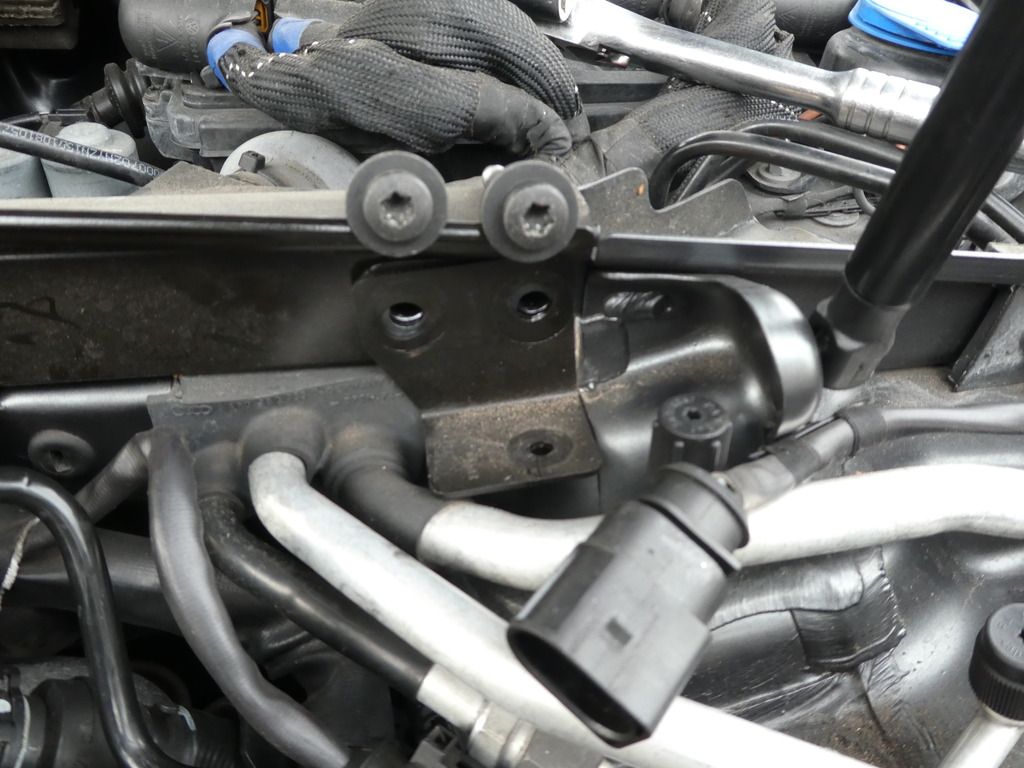
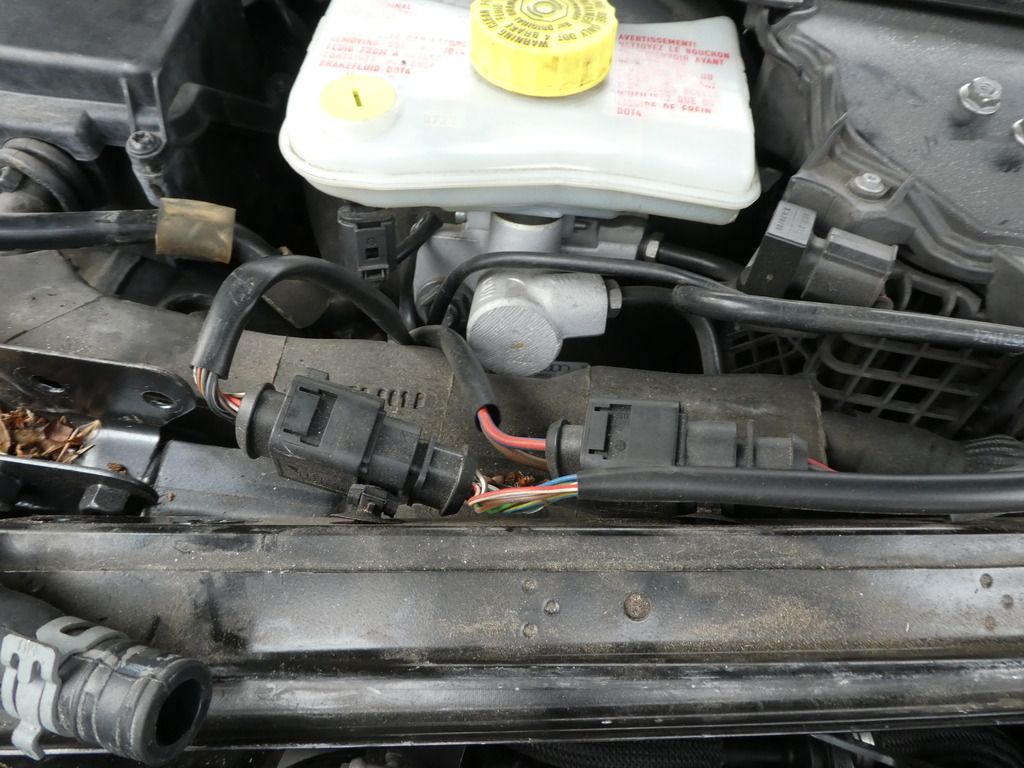
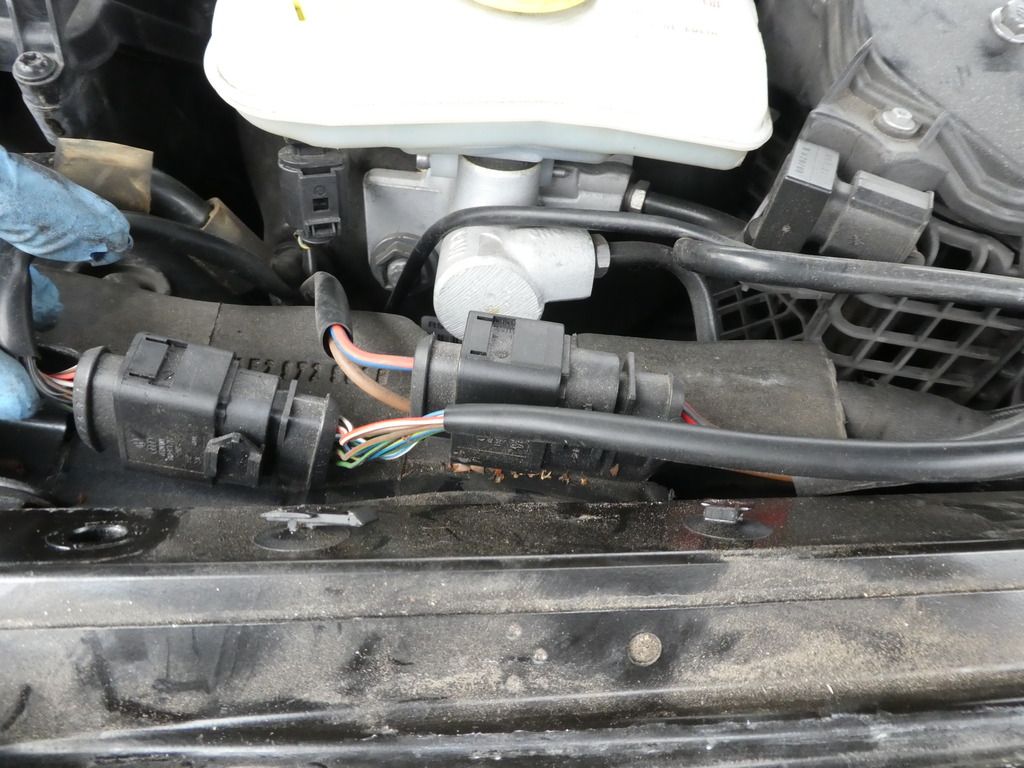
Disconnect the o/s charge pressure sender
Image

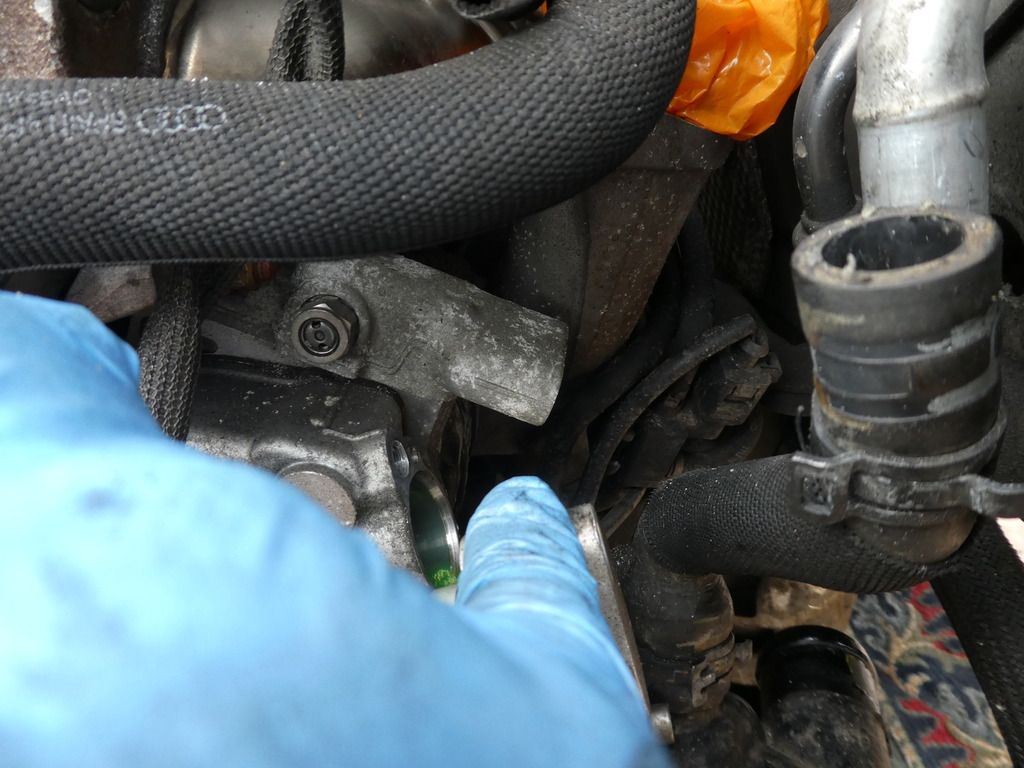
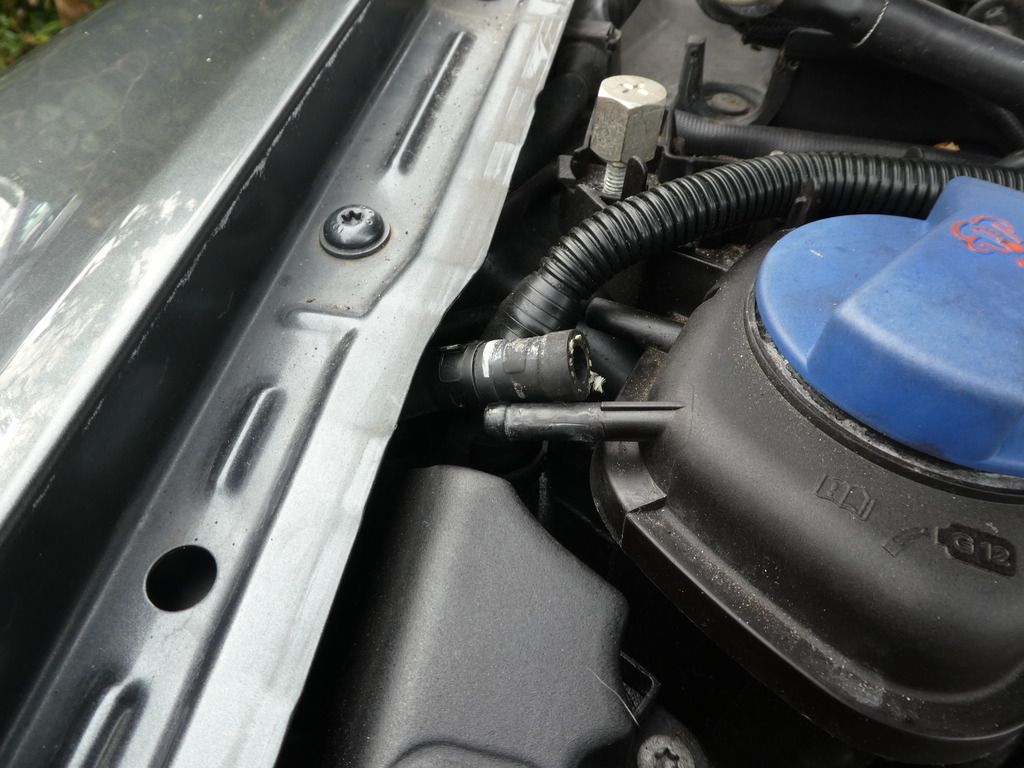
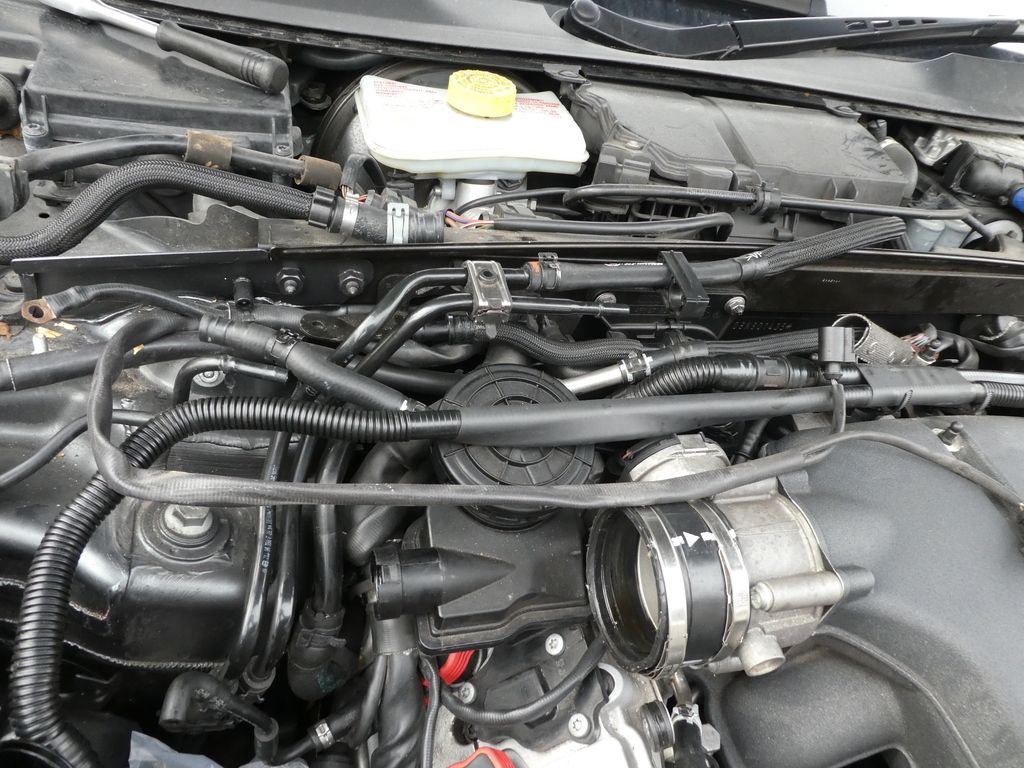
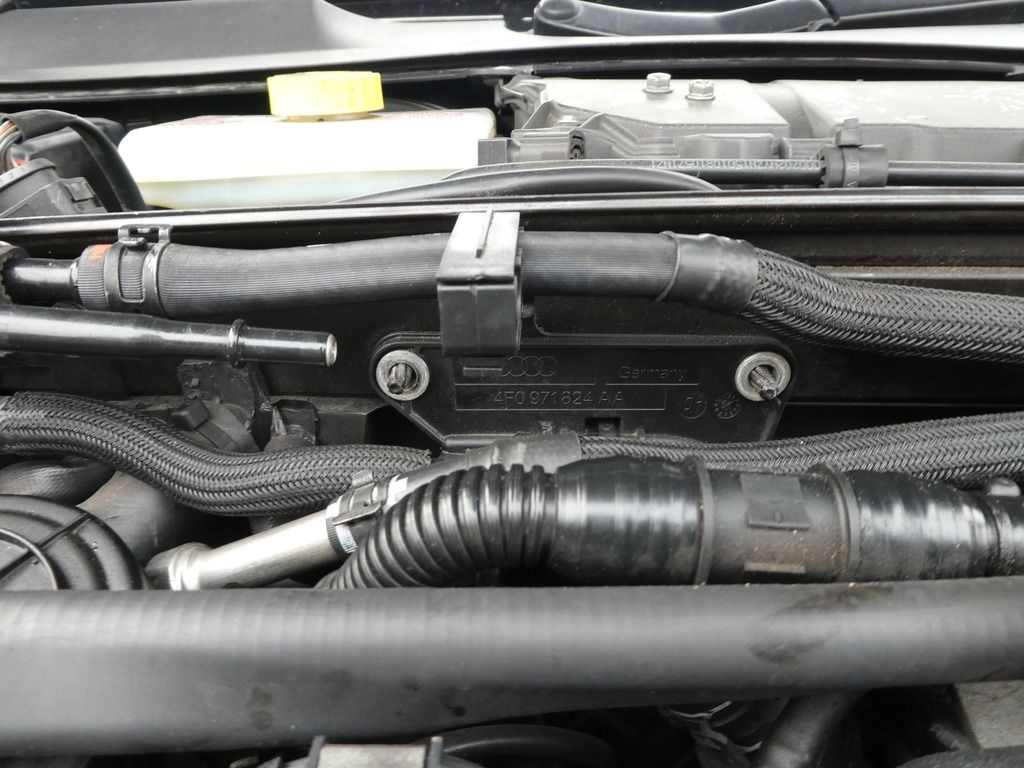
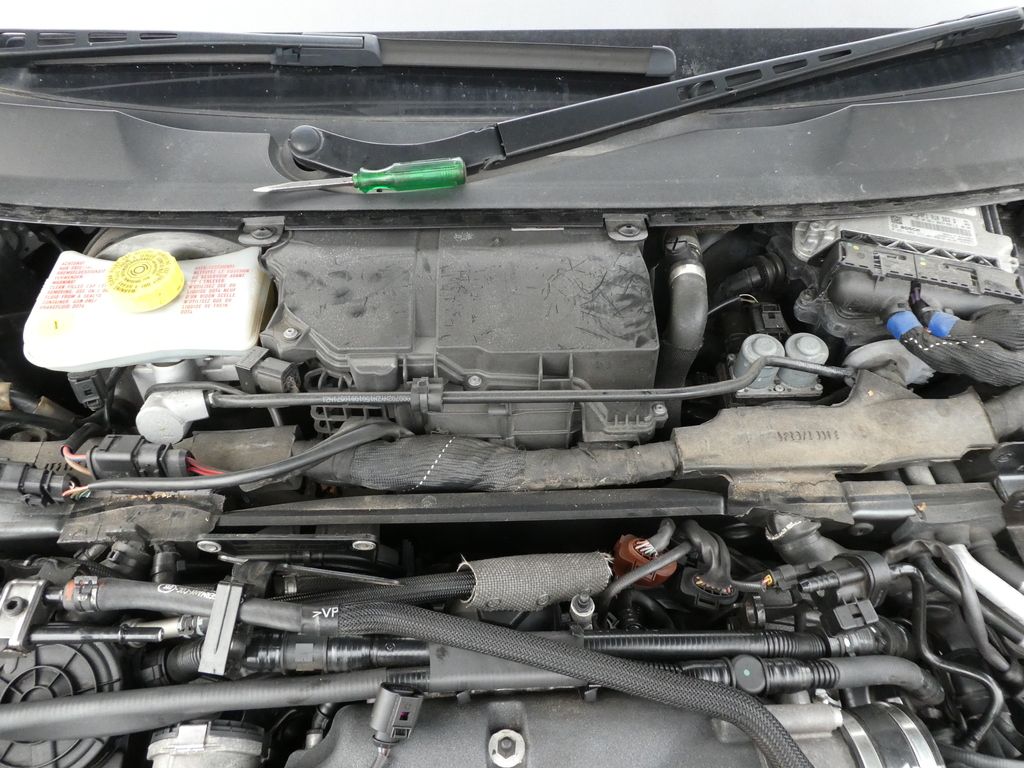
And unscrew the Air charge tube from the air filter box
Image

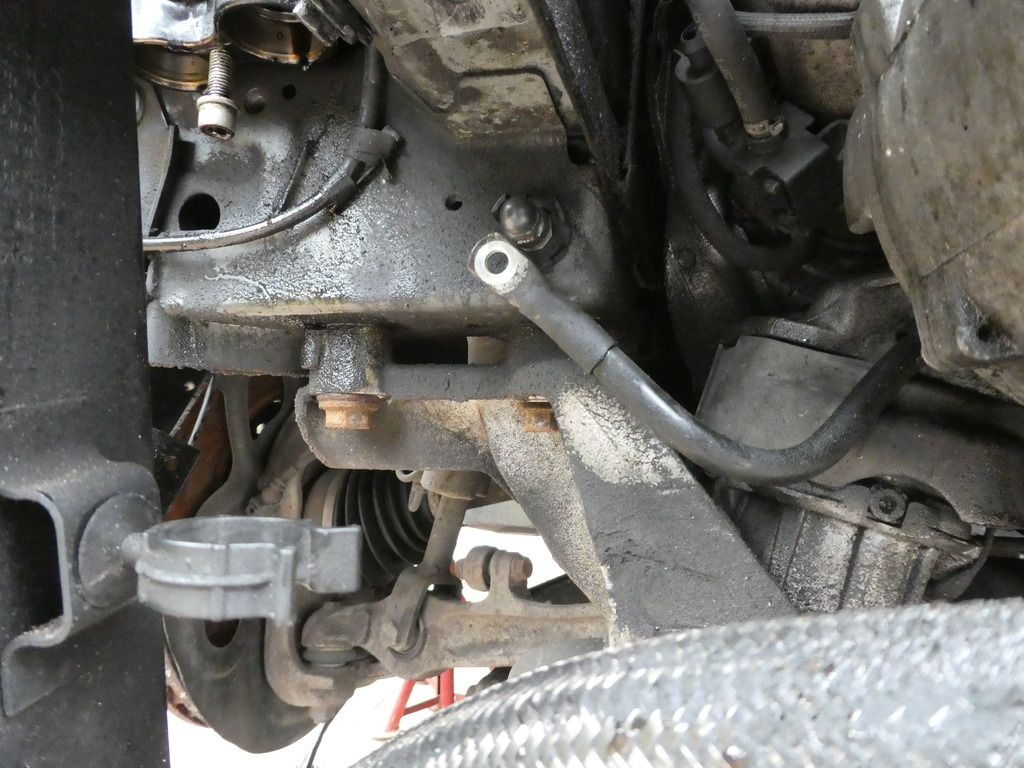
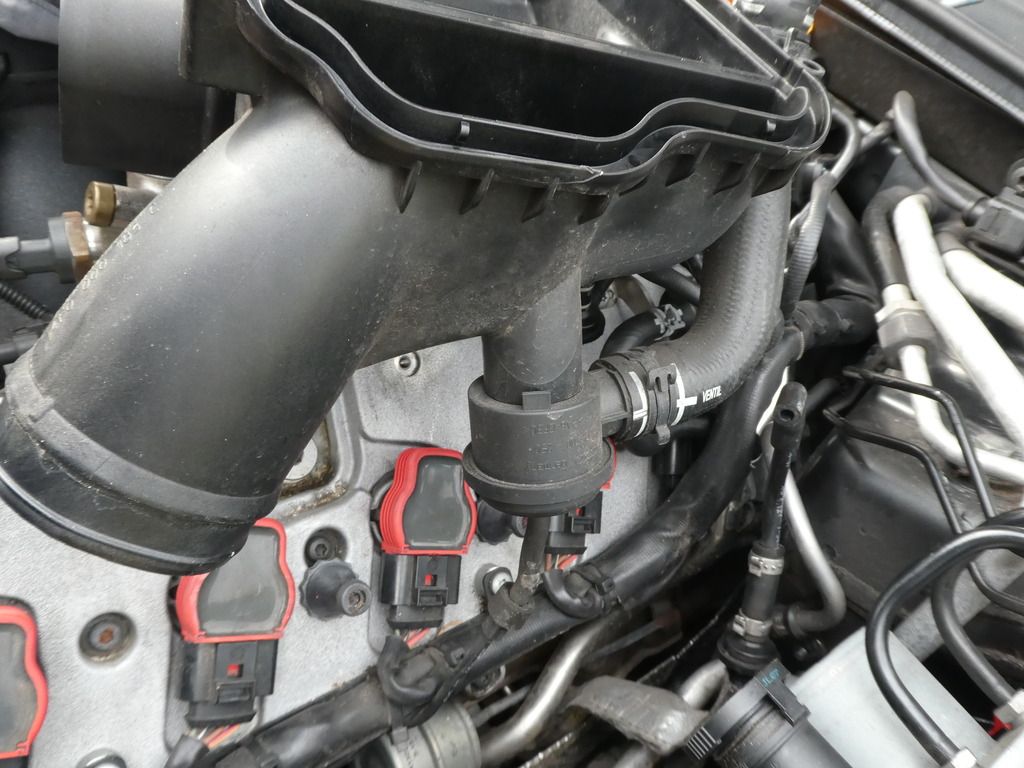
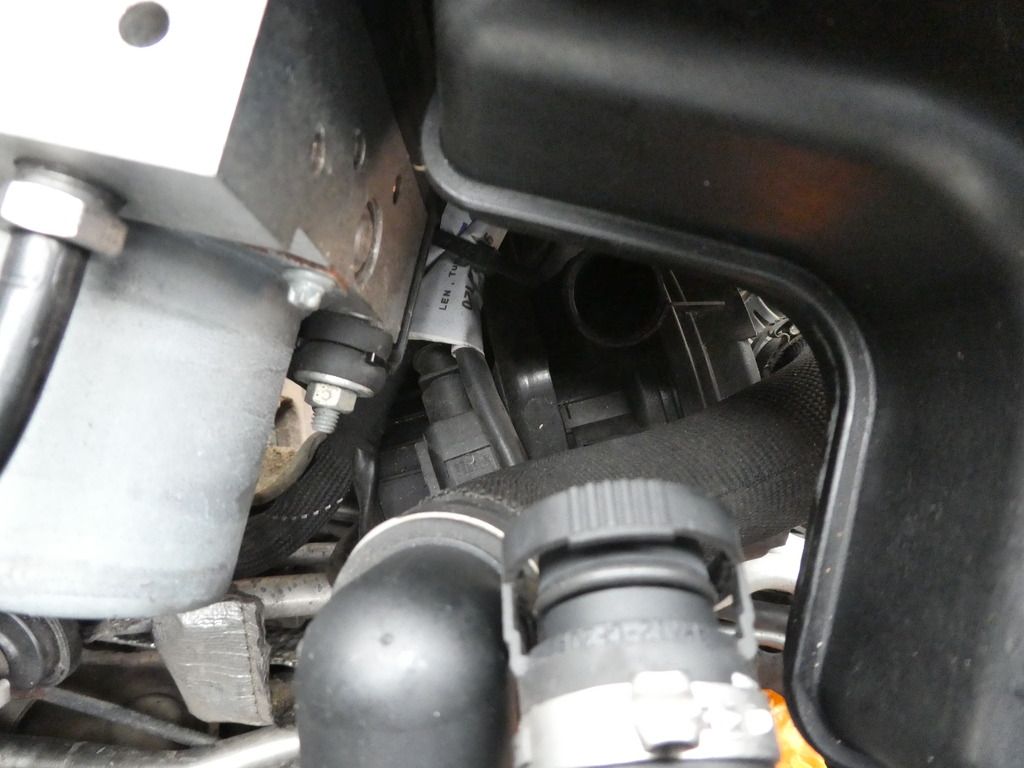
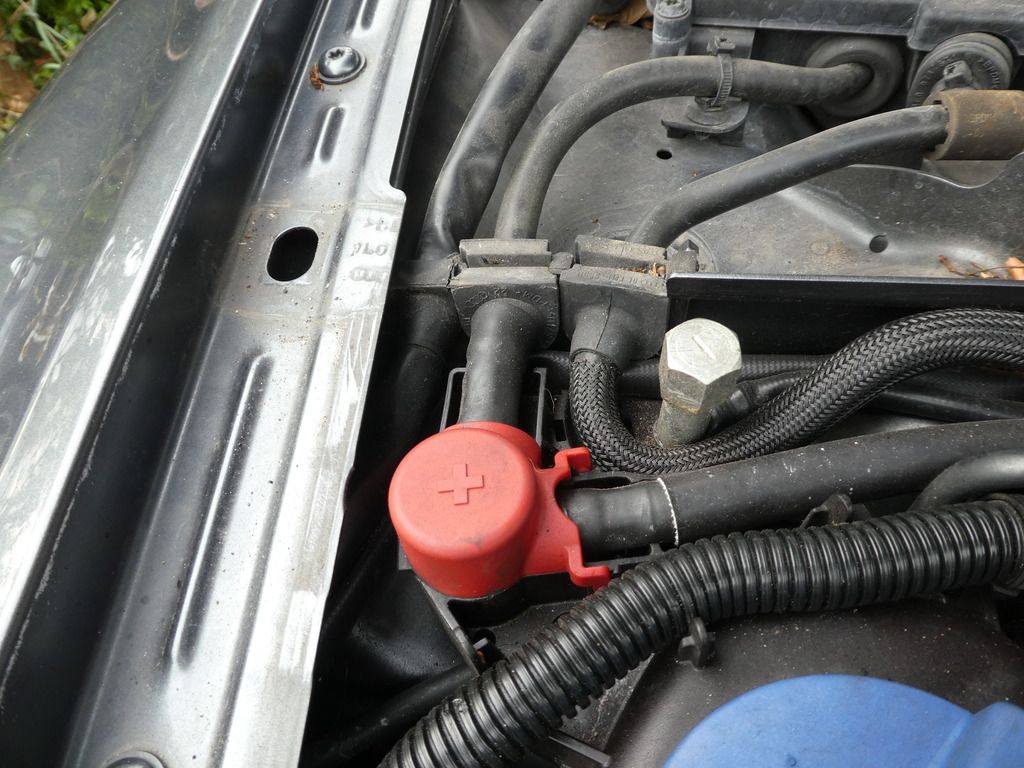
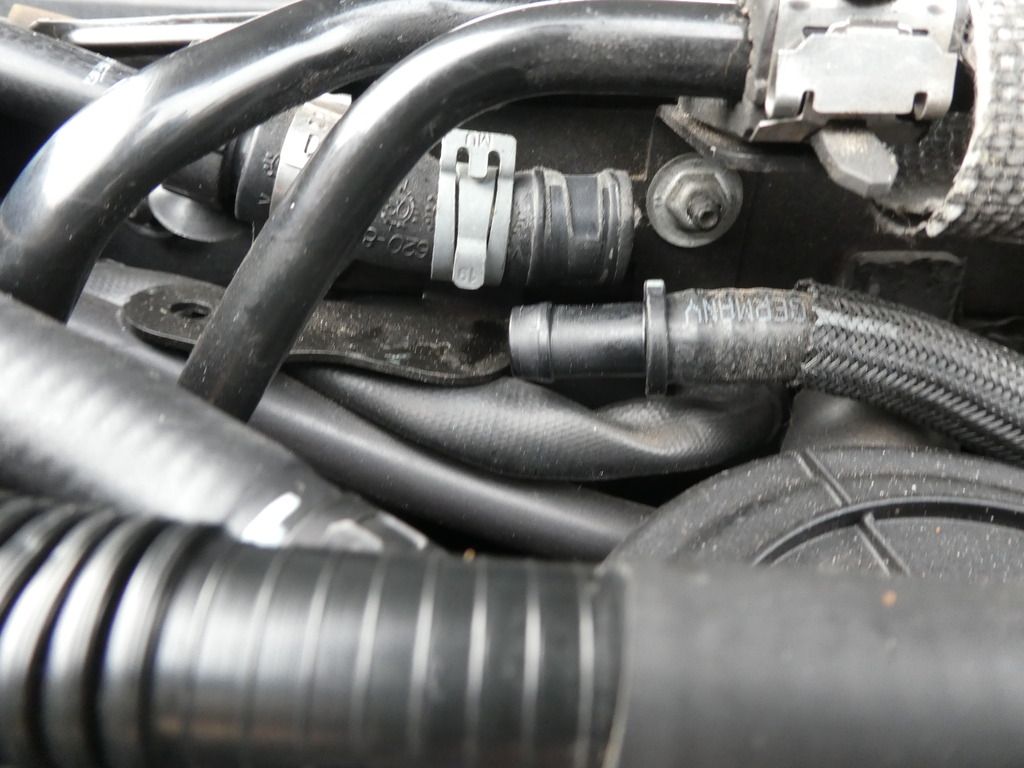
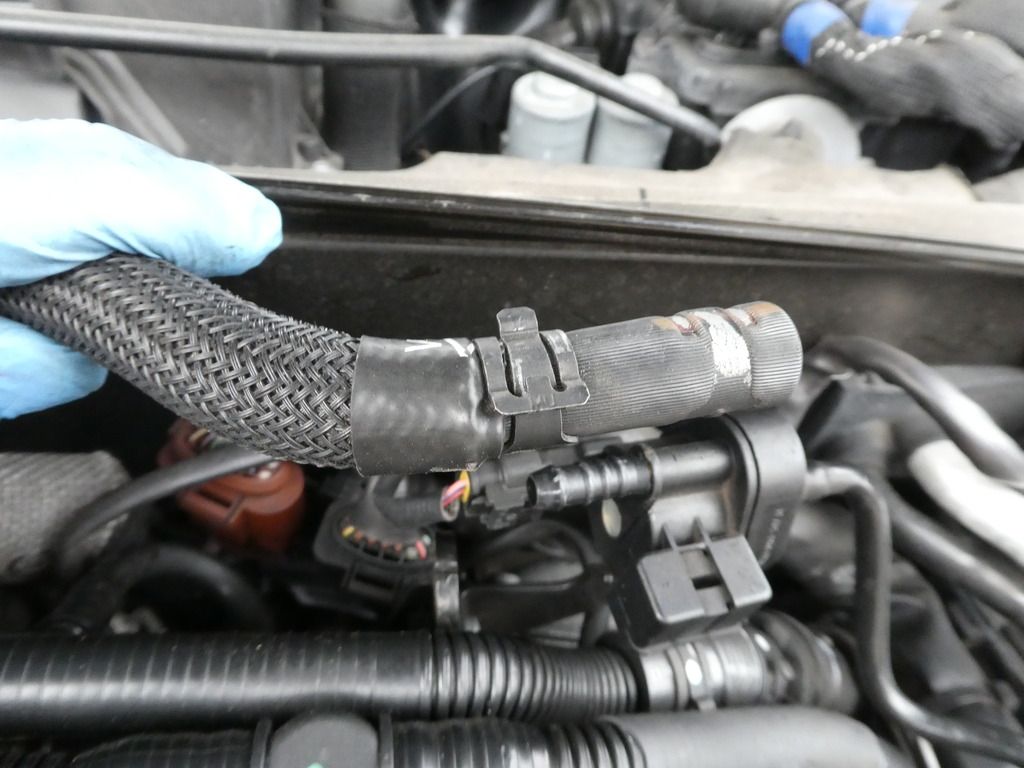
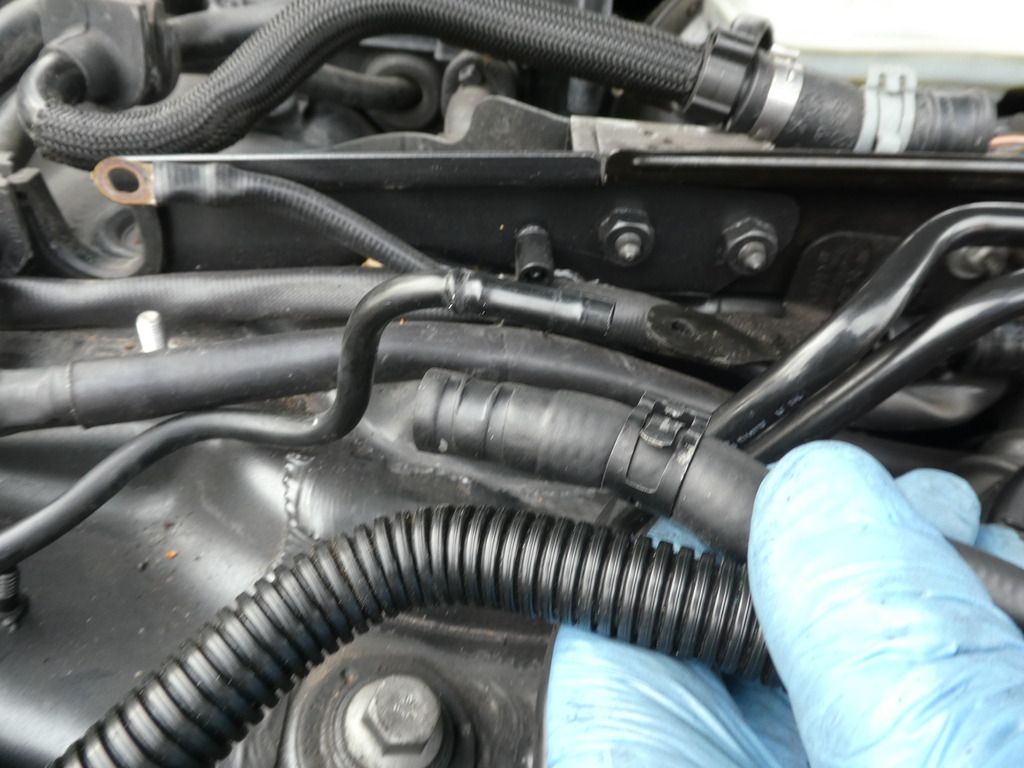
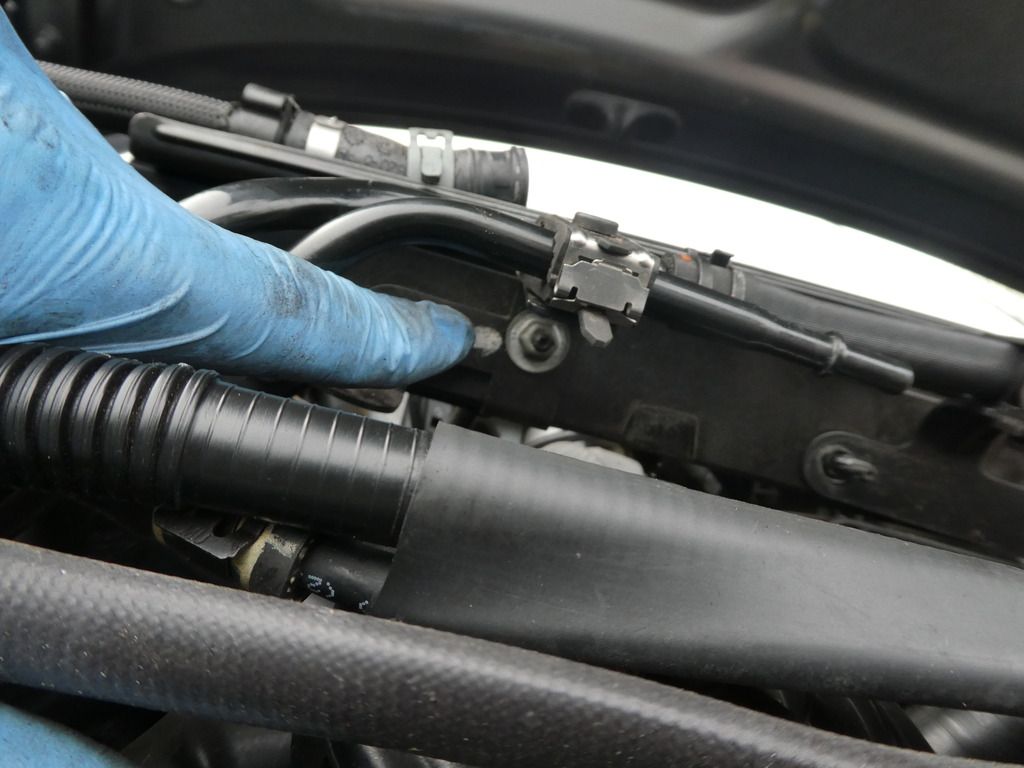
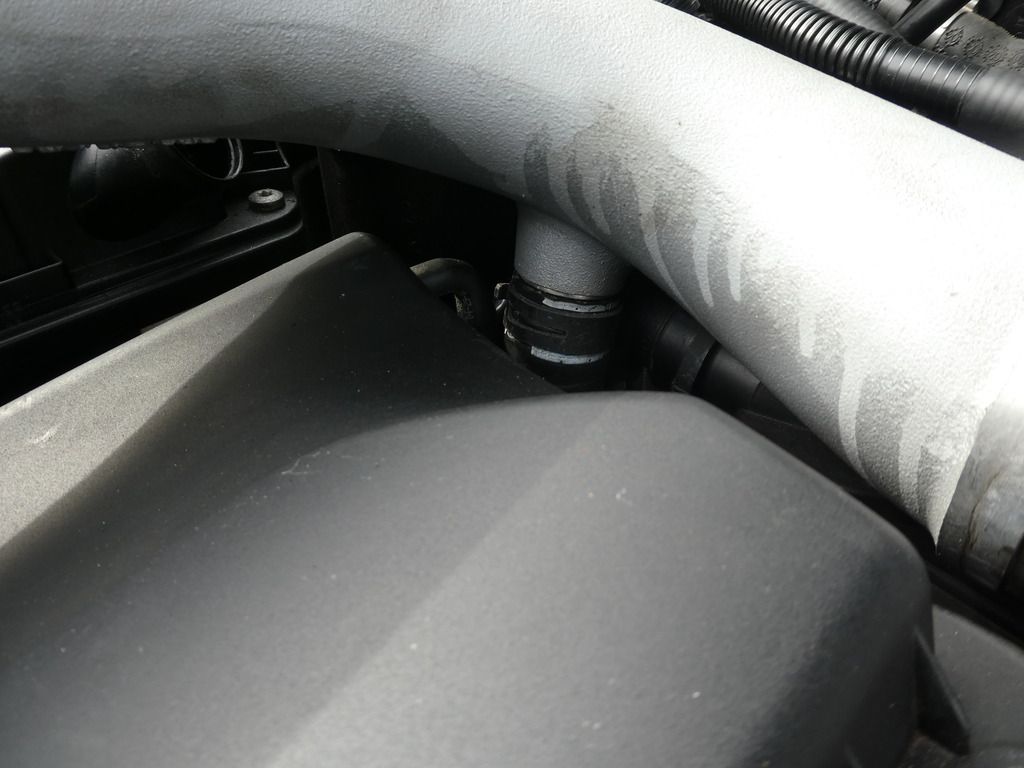
Unclip the hard to get to hose beneath the tube
Image

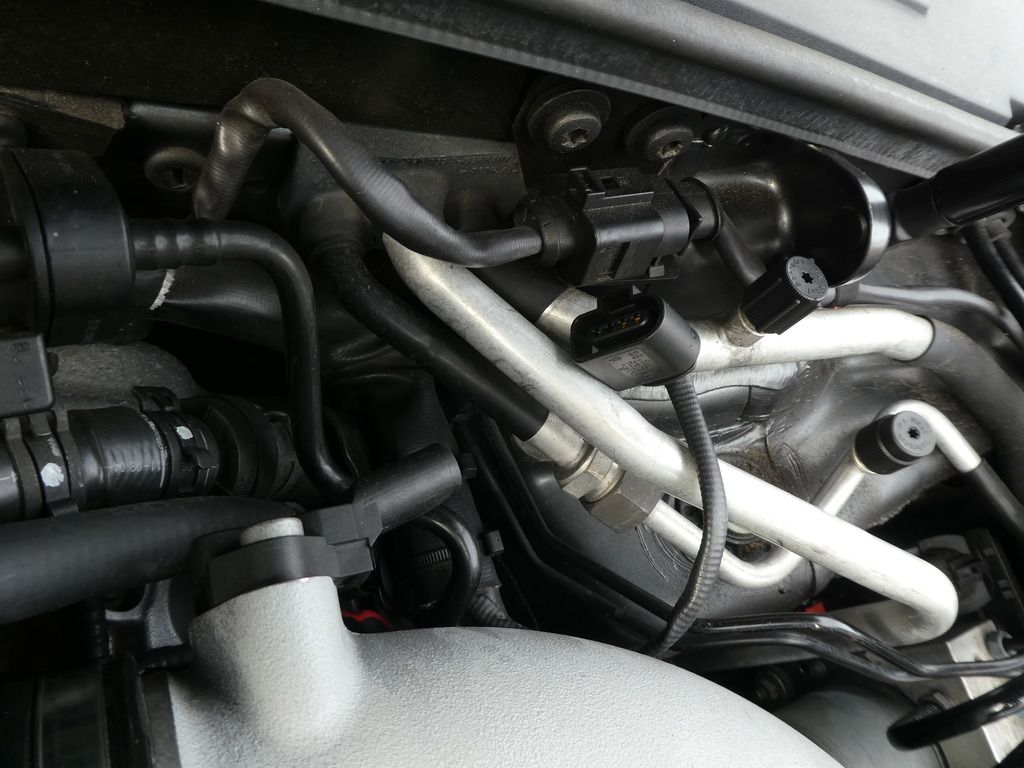
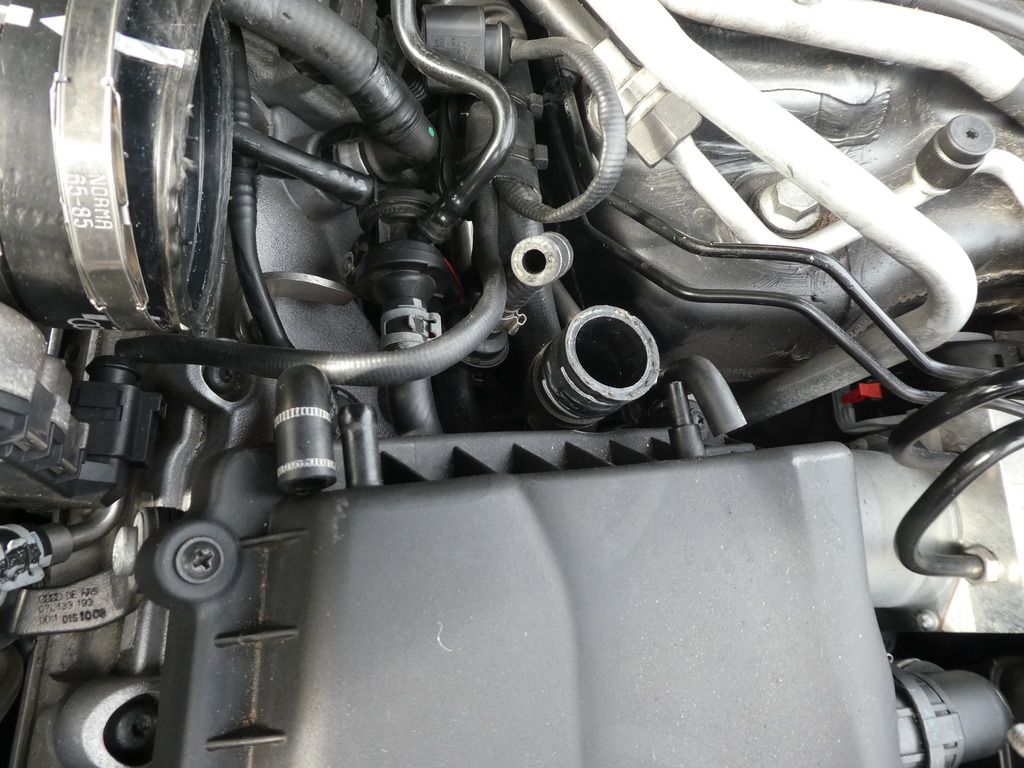
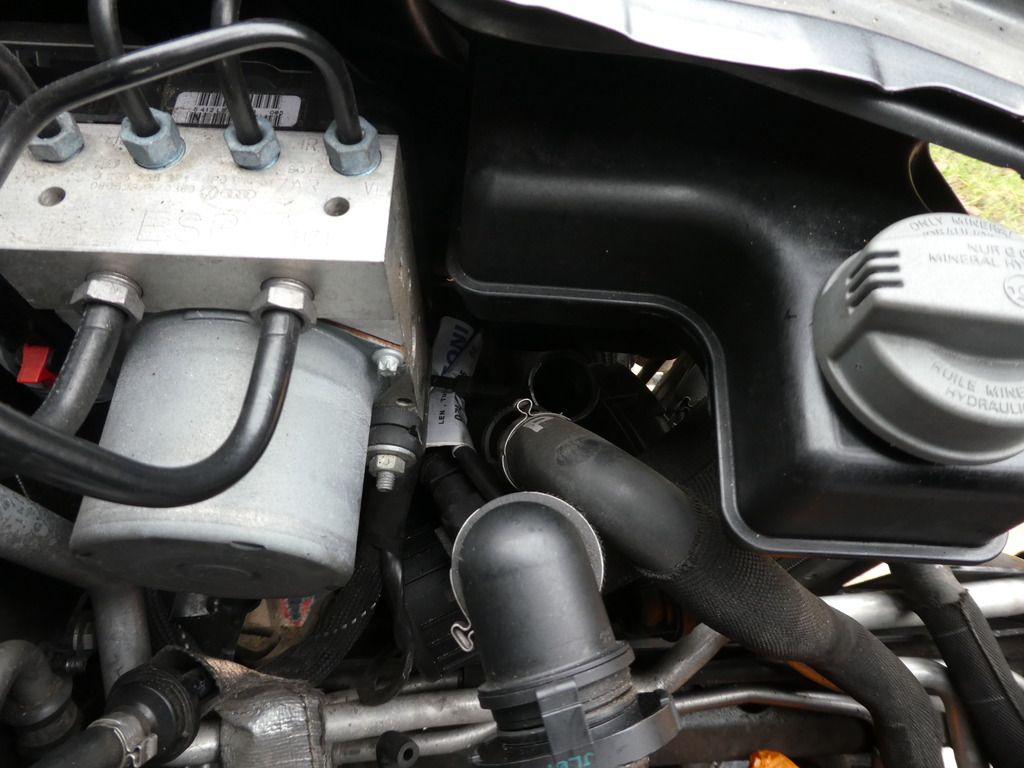
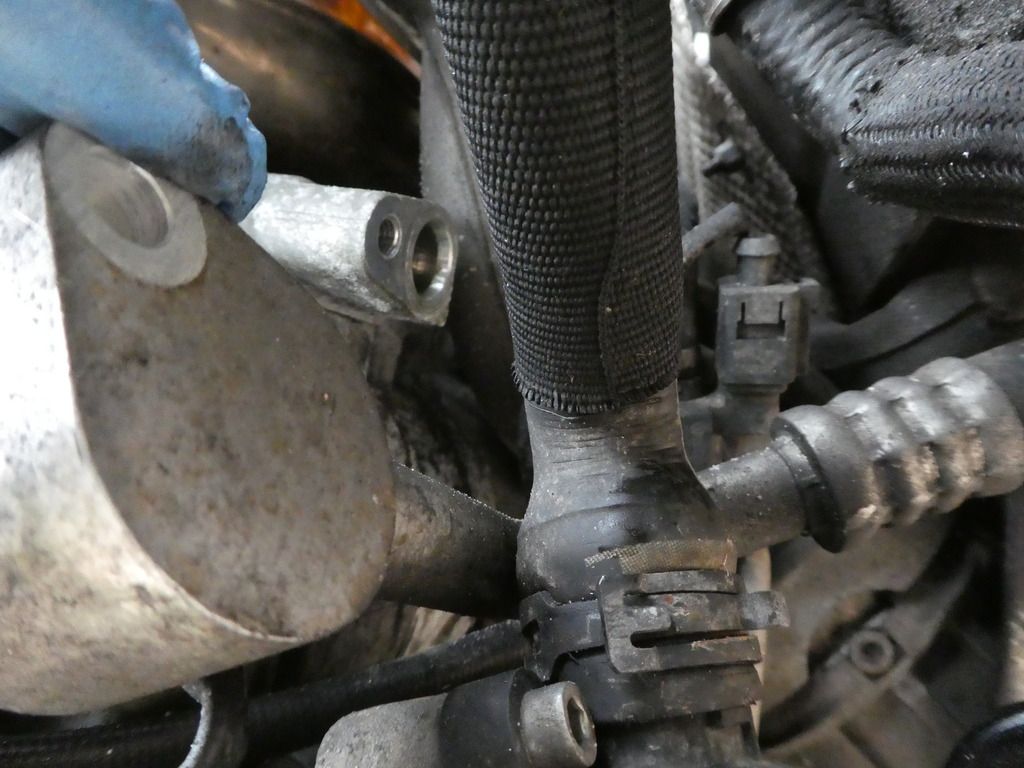
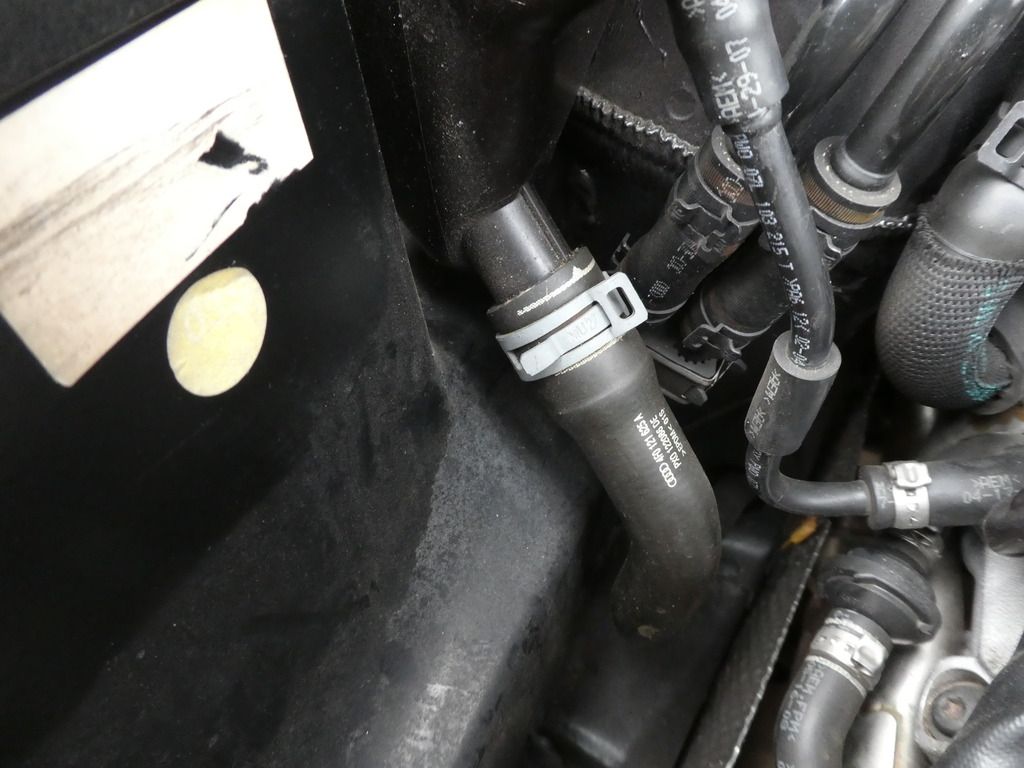
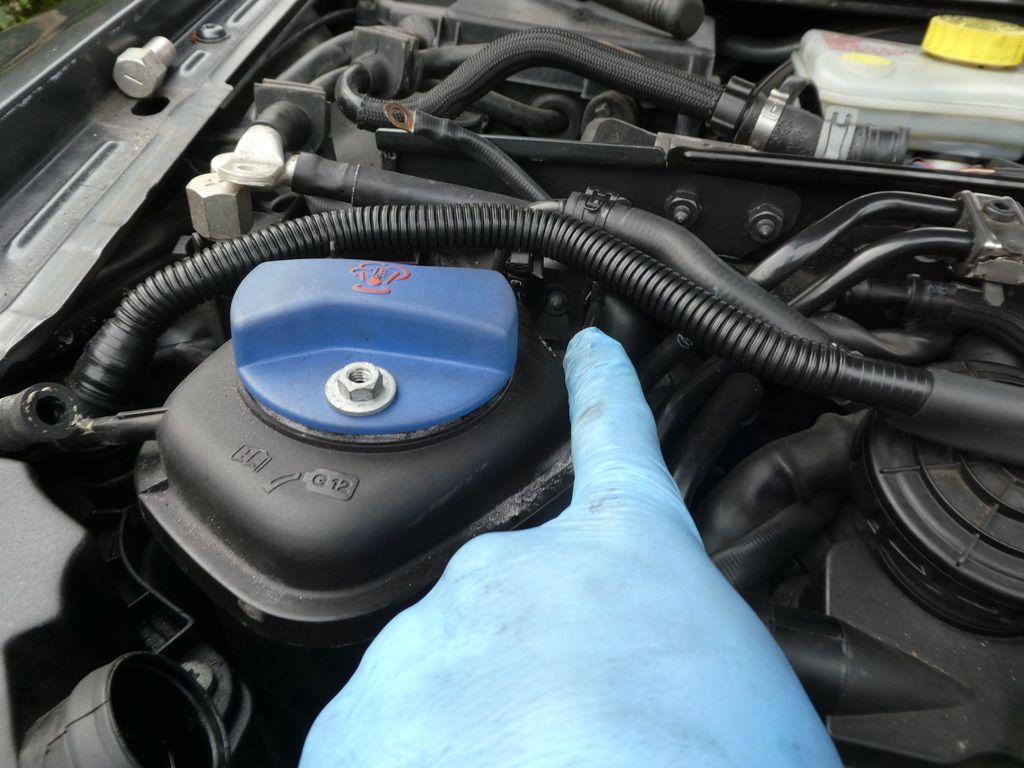
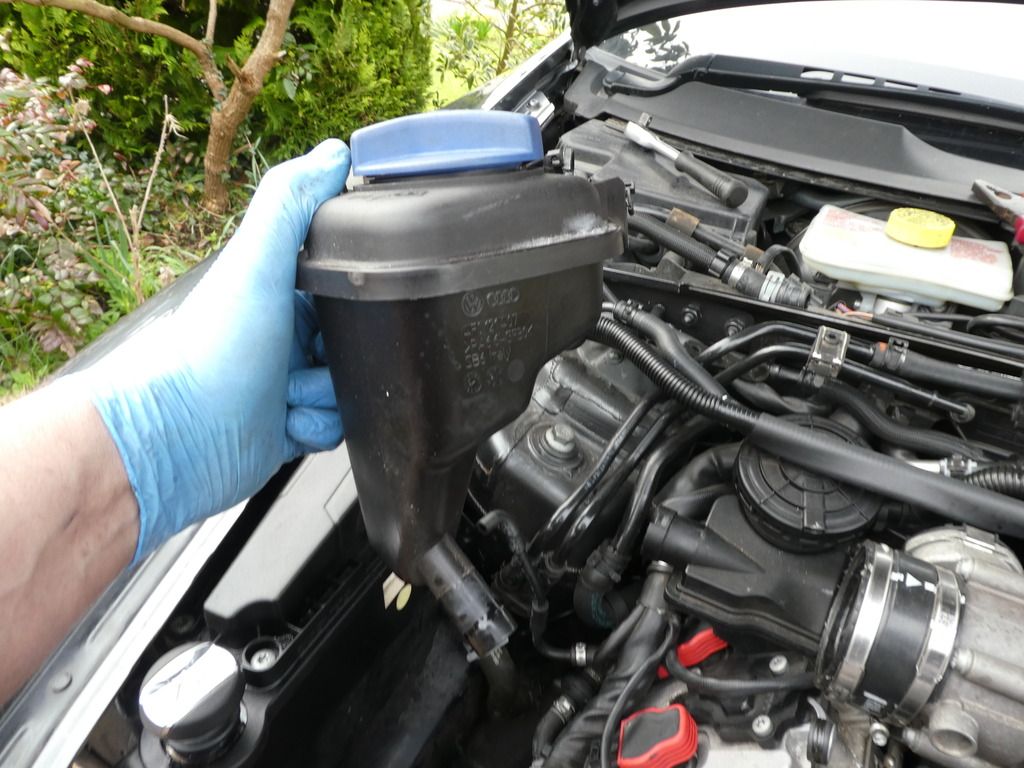
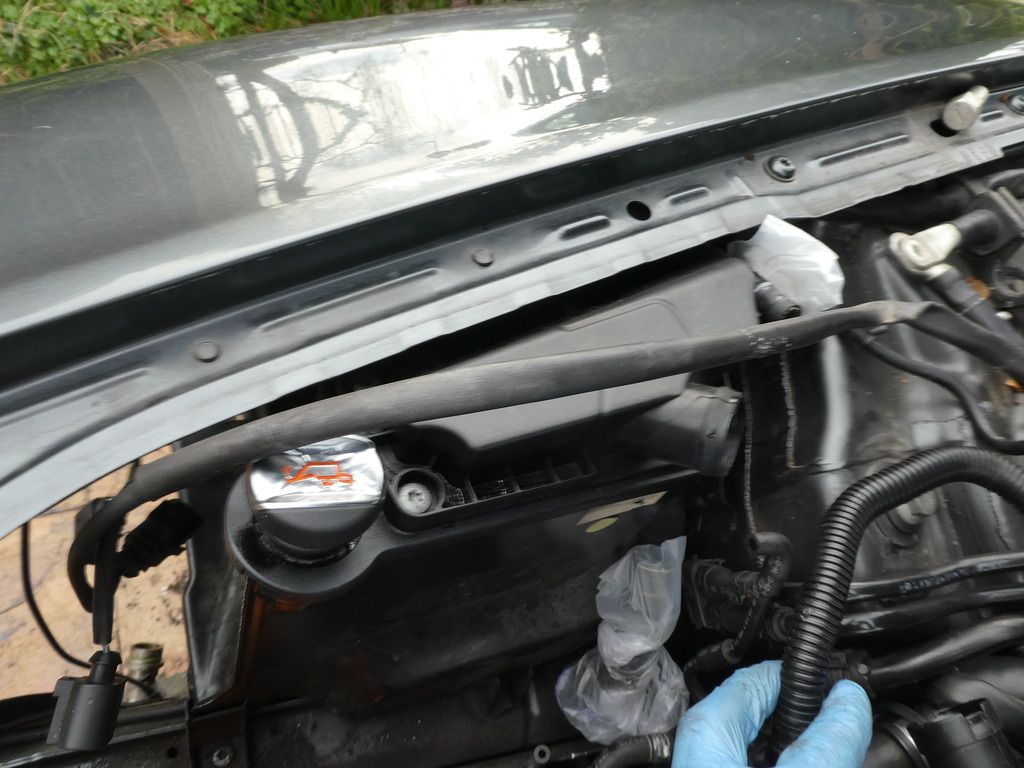
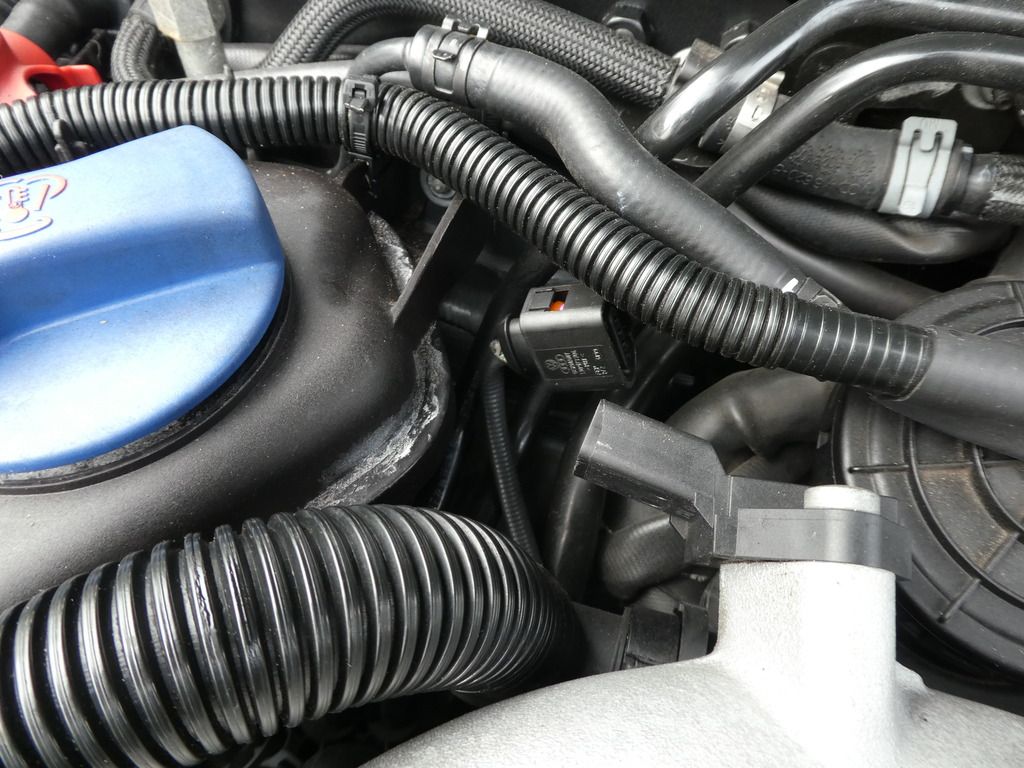
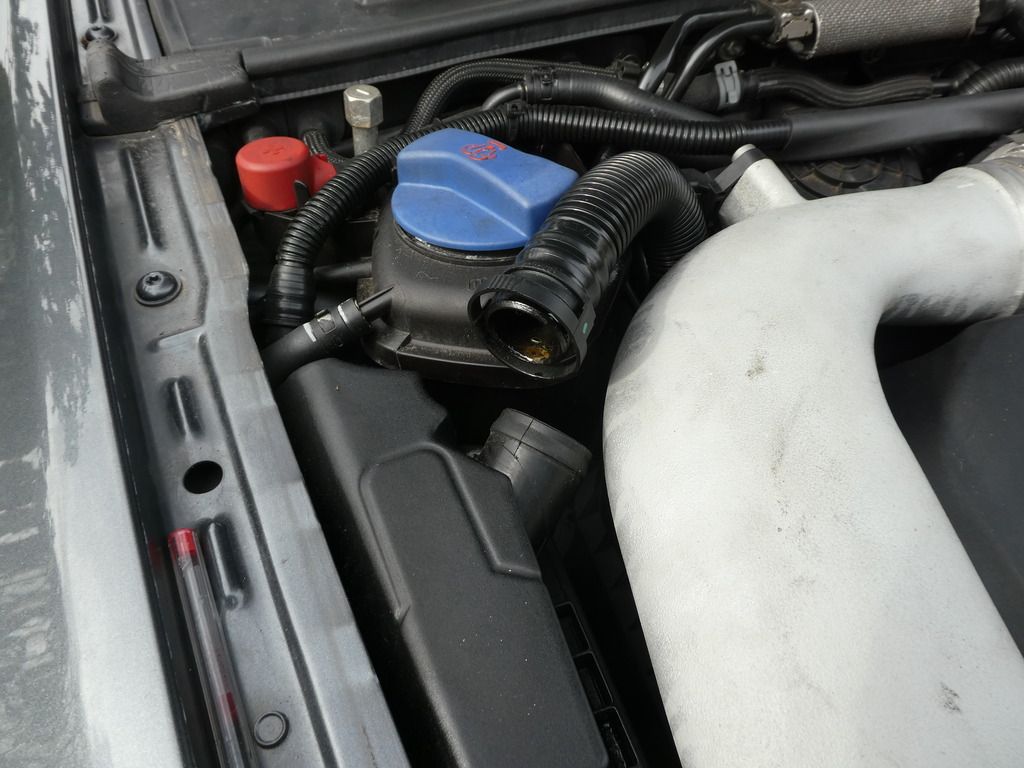
I unclipped the oil breather hose from the oil tank to aid access, as you will see next up whilst this improved the access the pipe was so brittle it snapped as soon as I tried to move it out the way
ImageImage

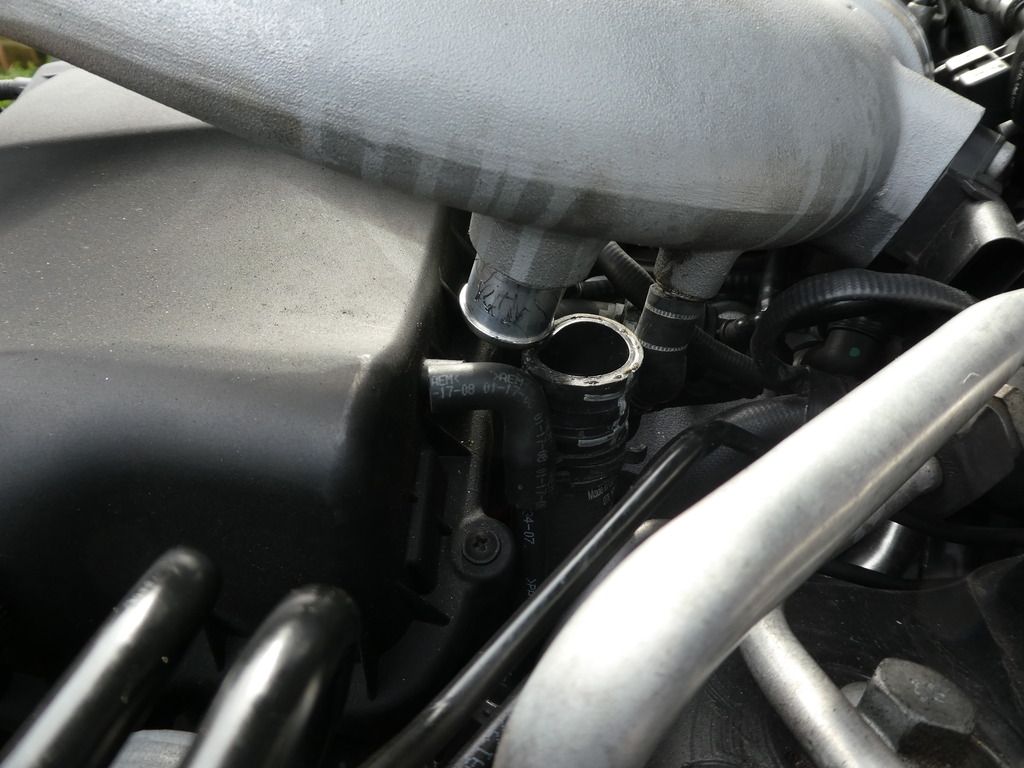
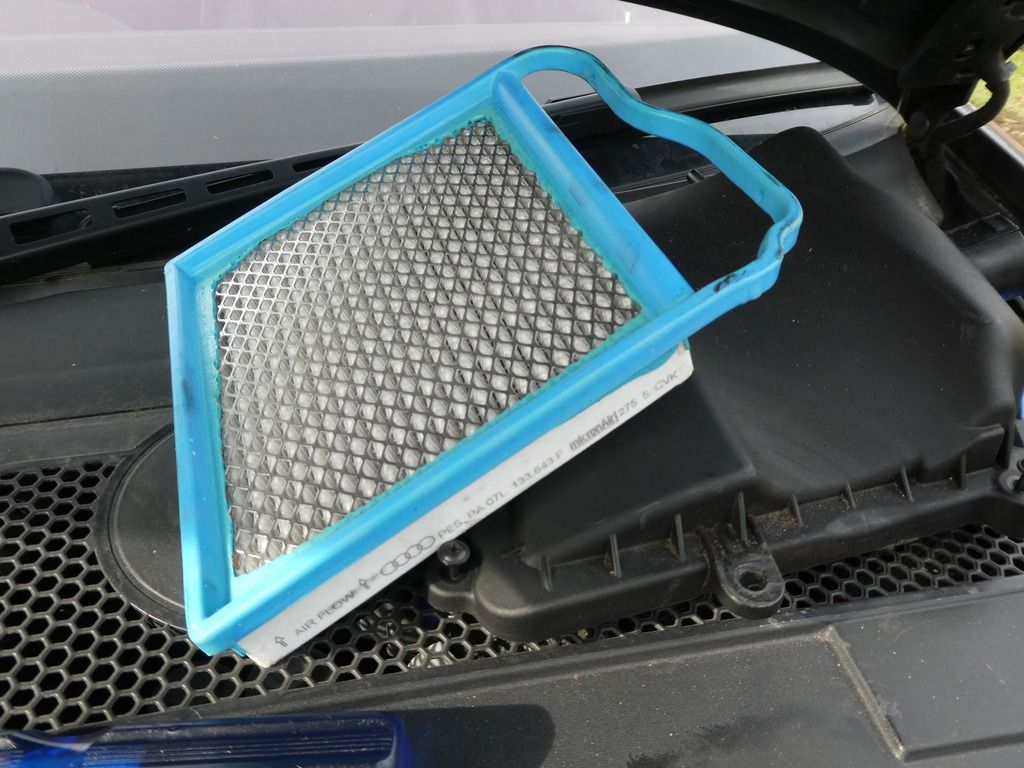
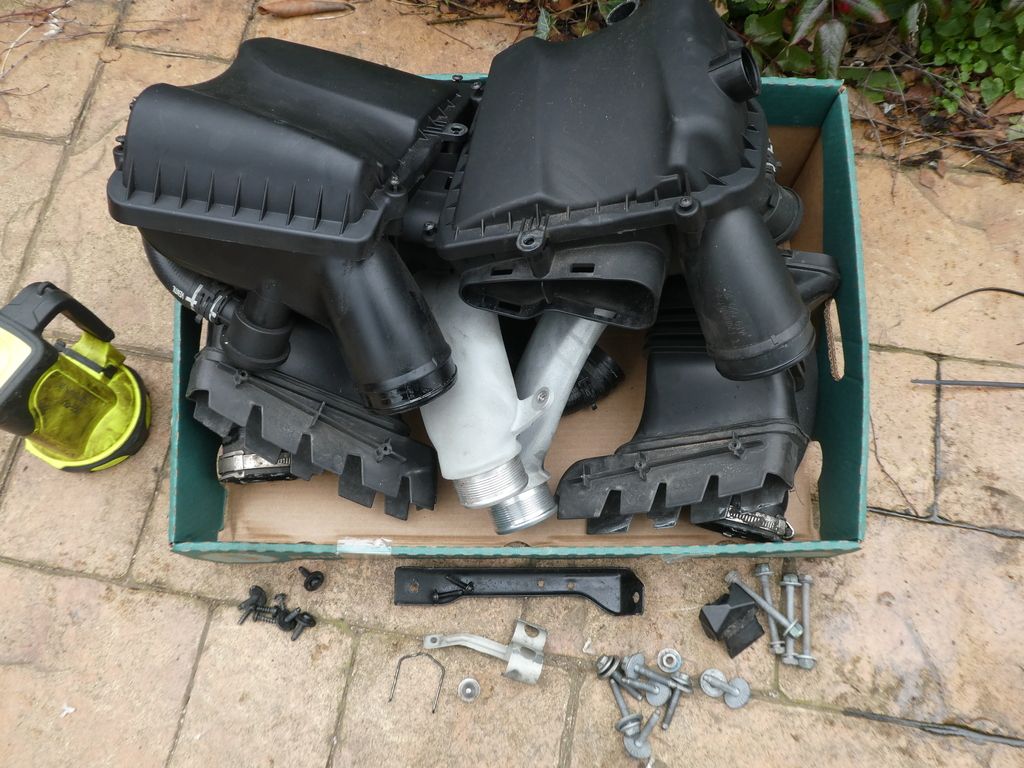
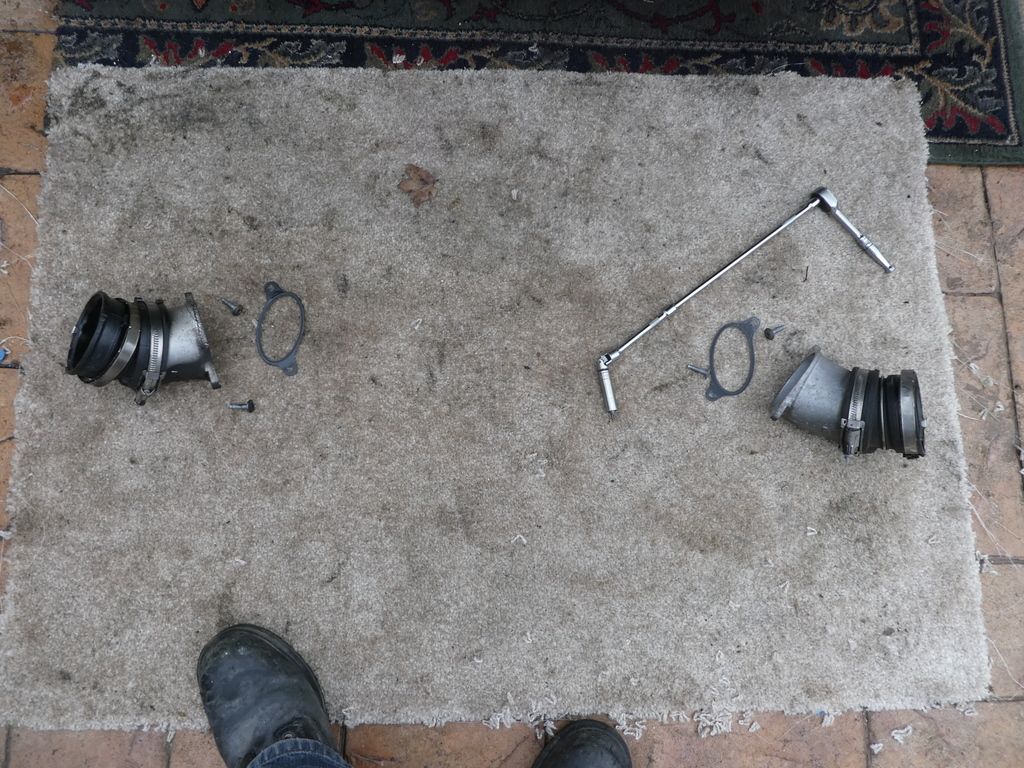
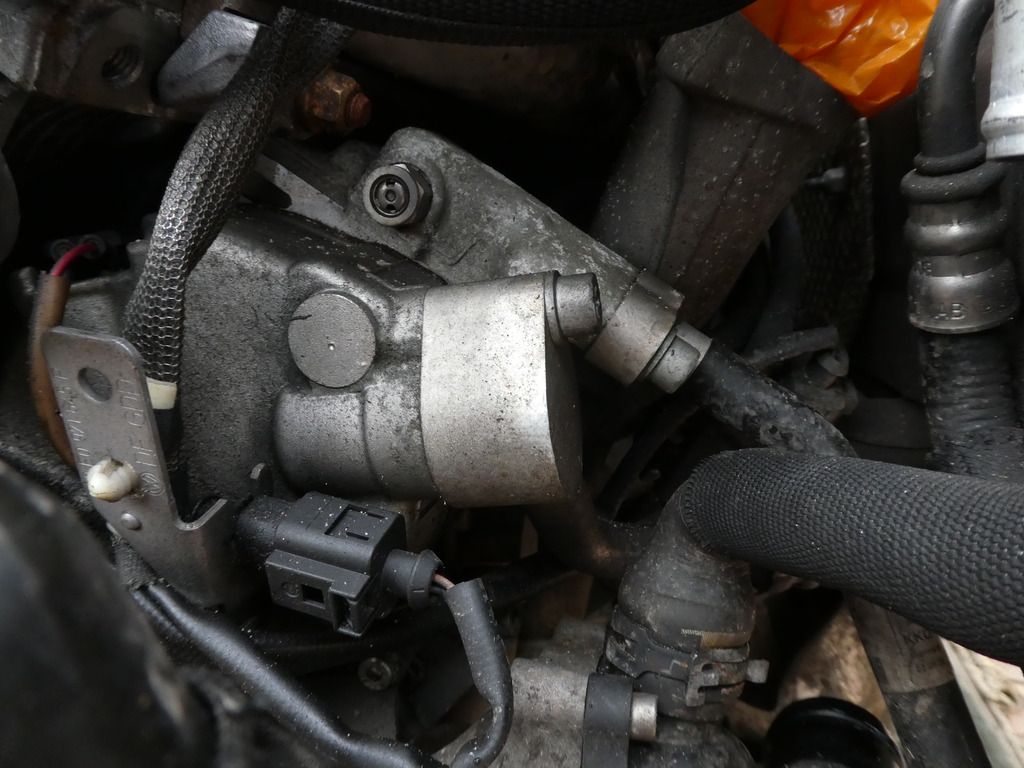
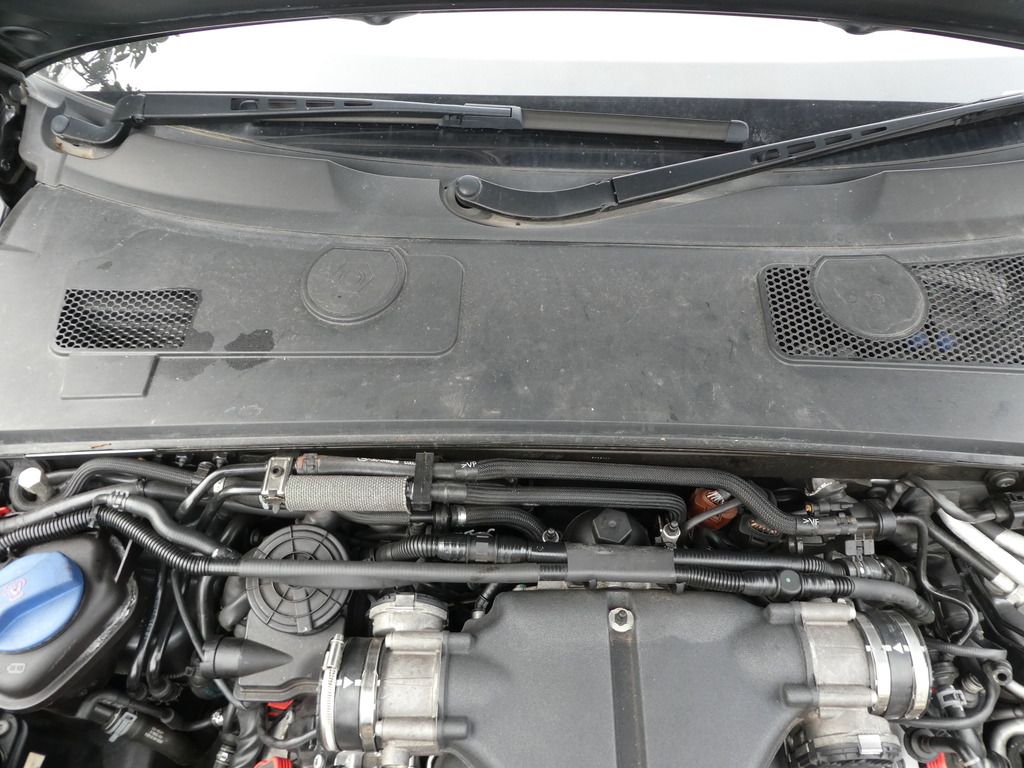
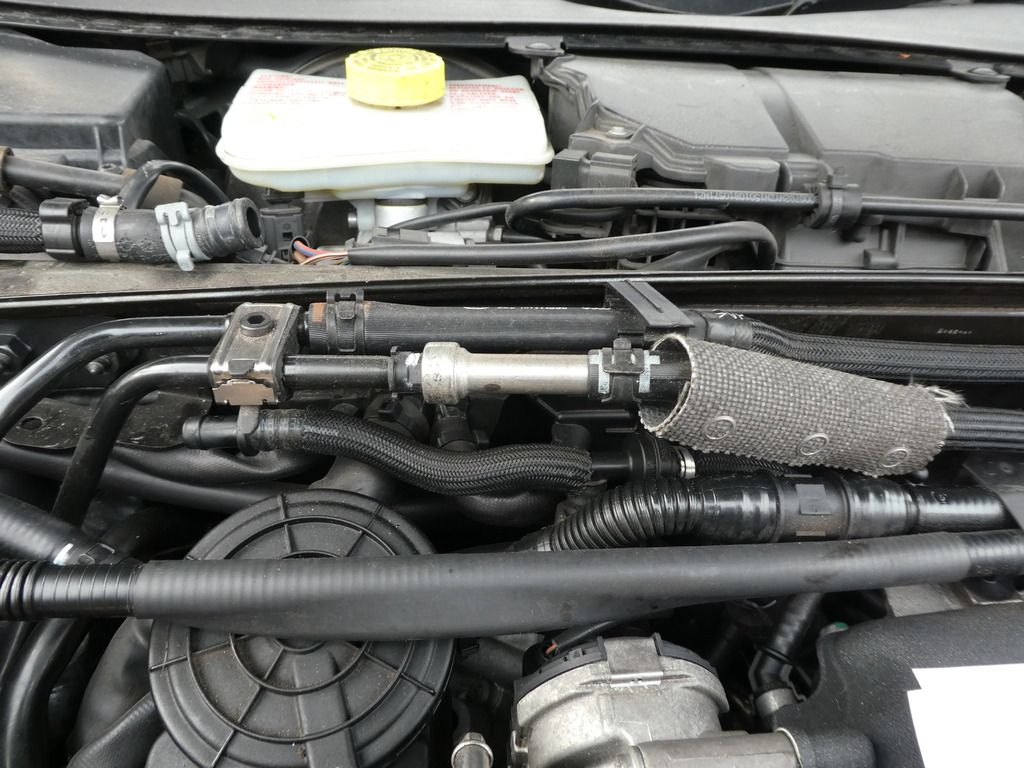
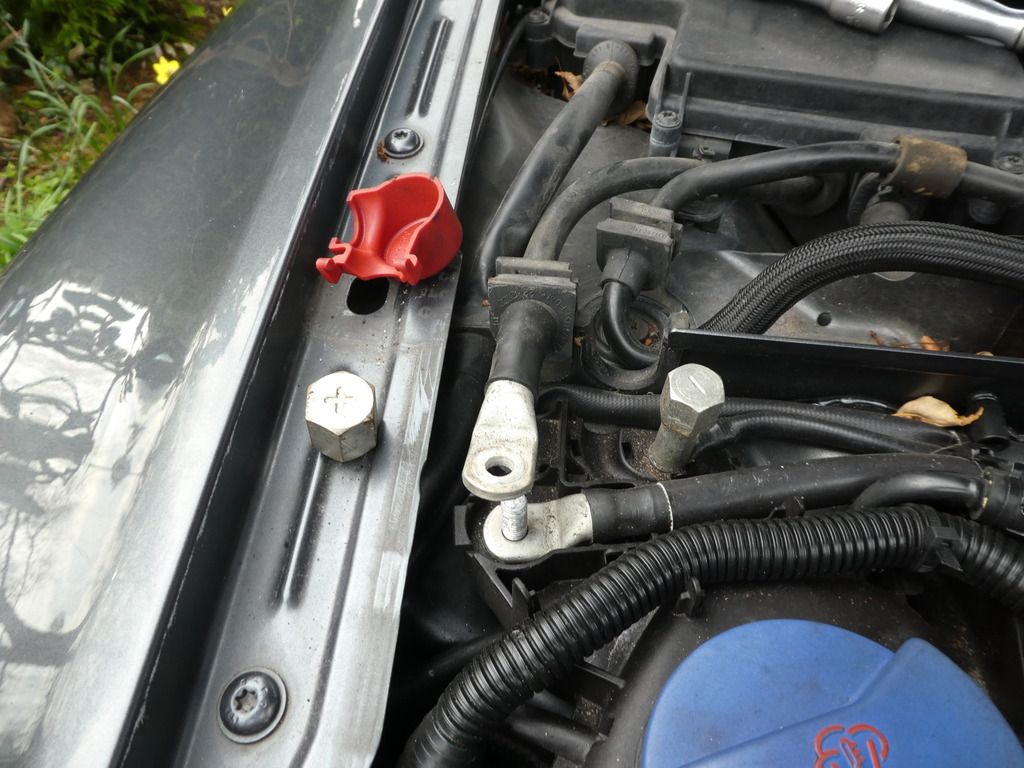
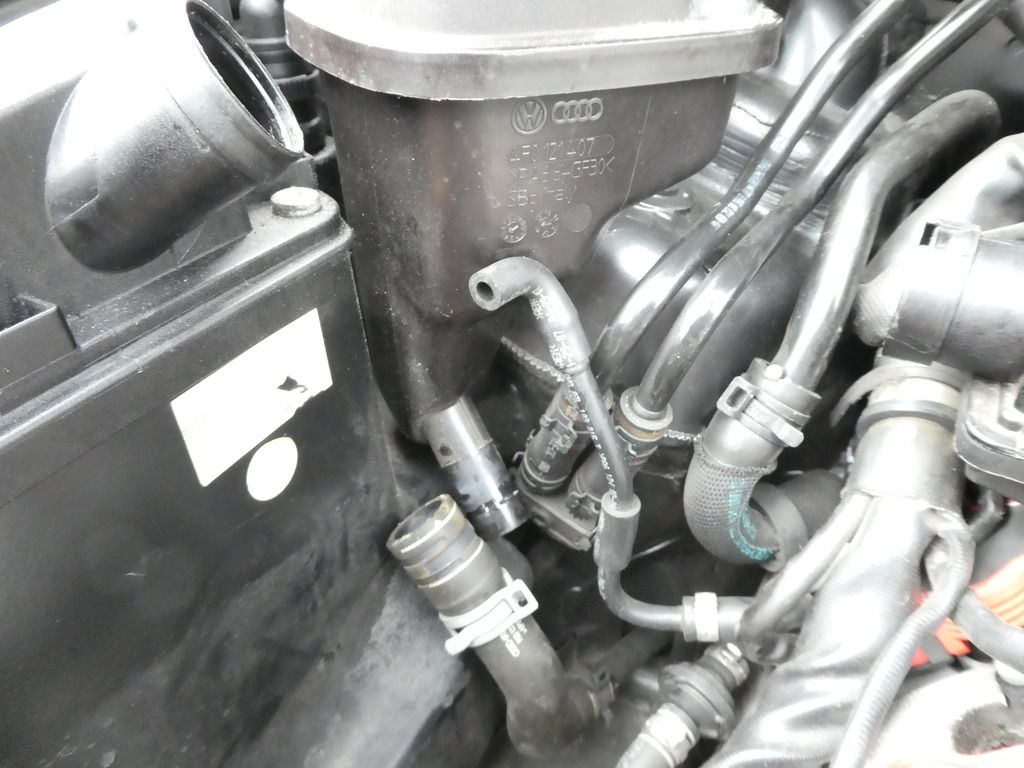
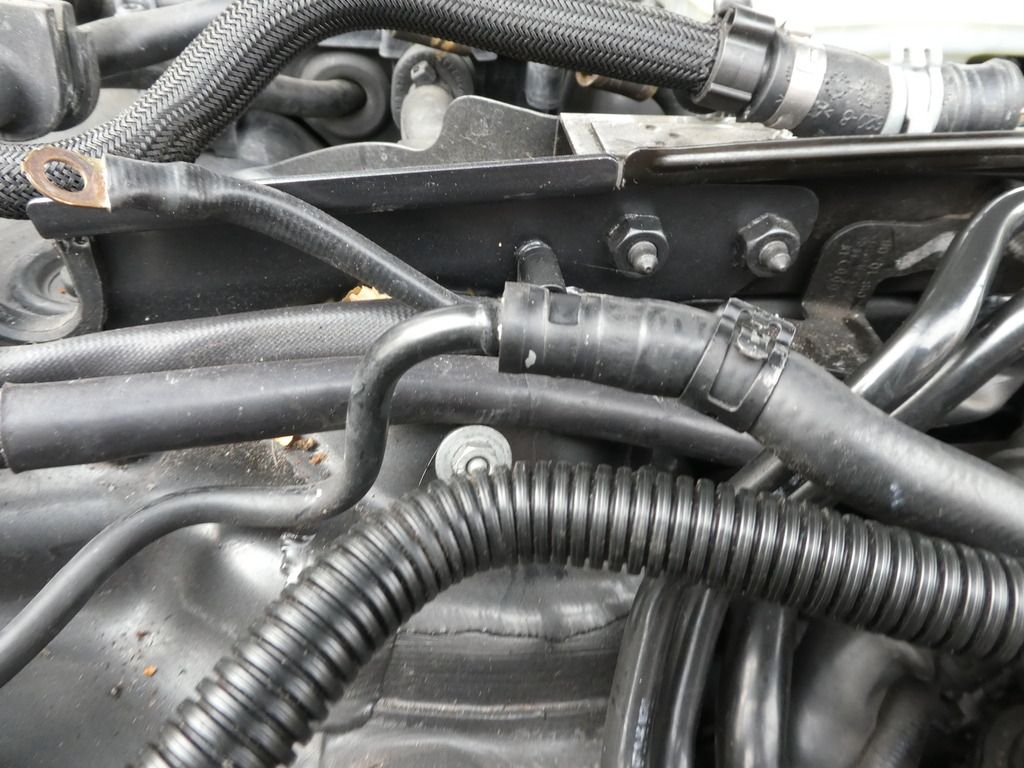
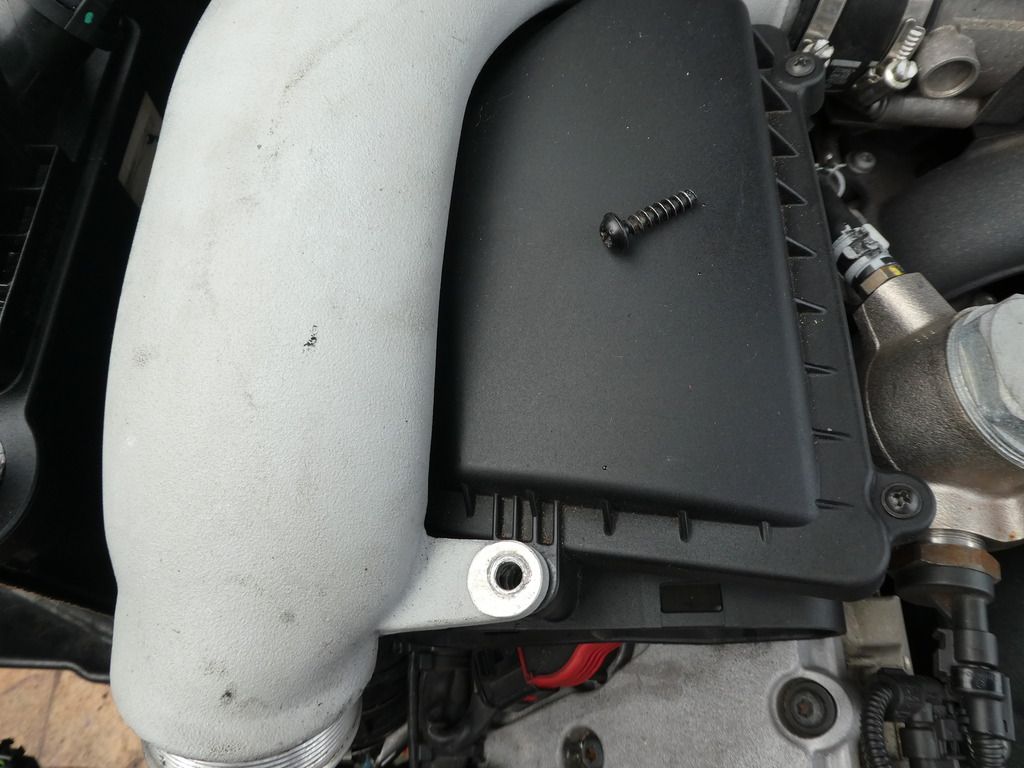
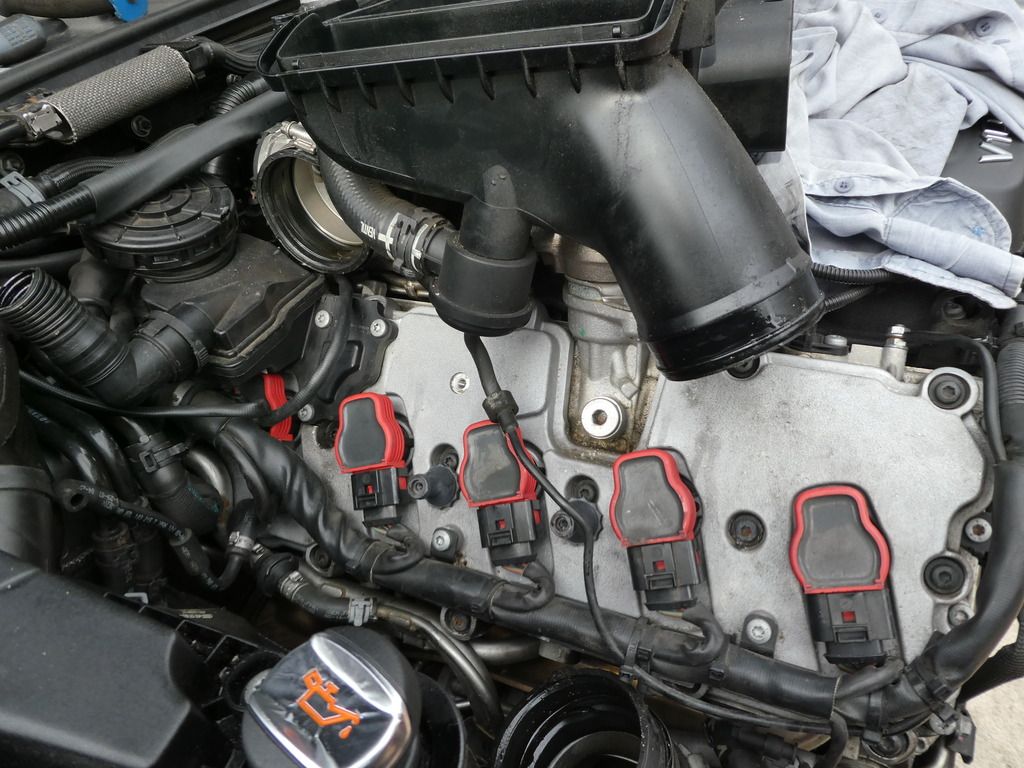
Remove the charge tube from the throttle body and remove, unscrew the air box lid, remove the air filter; remove the side screw securing the air box (not shown) [oh and I forgot to mention the vac pipe behind the air box to remove]
Image

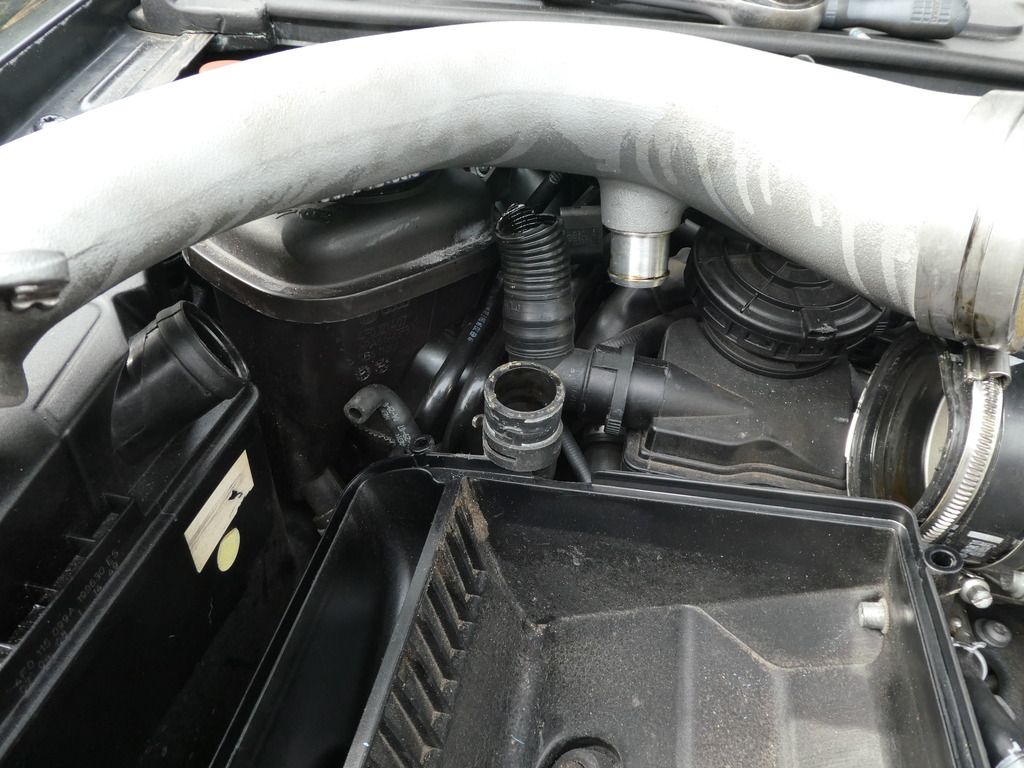
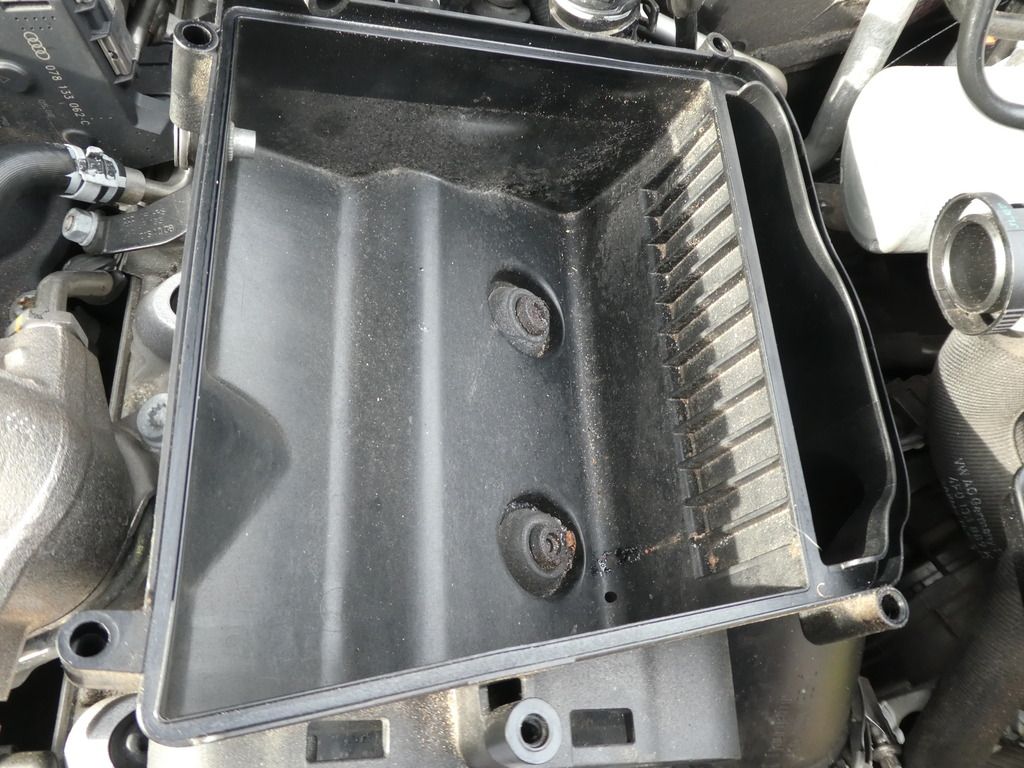
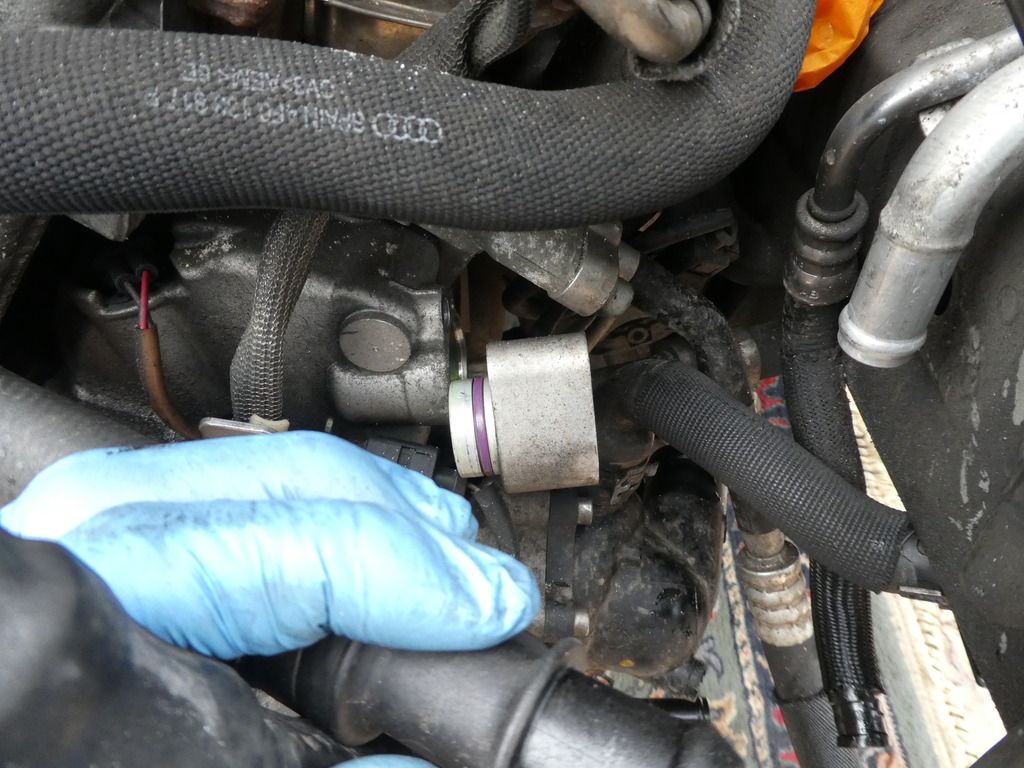
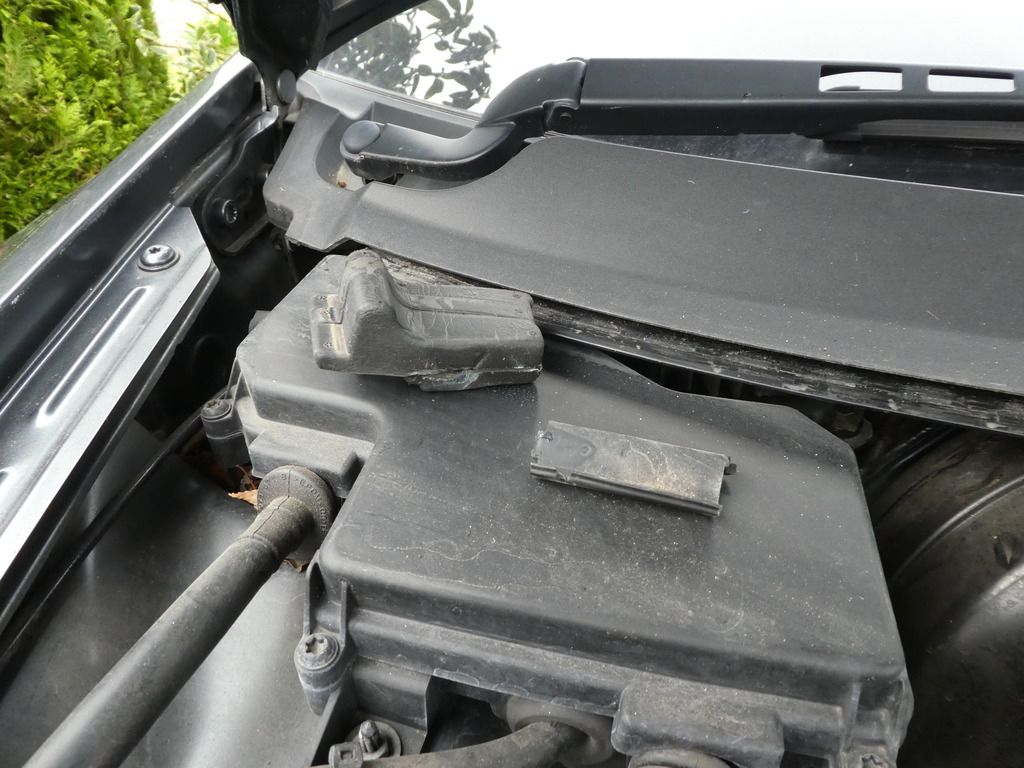
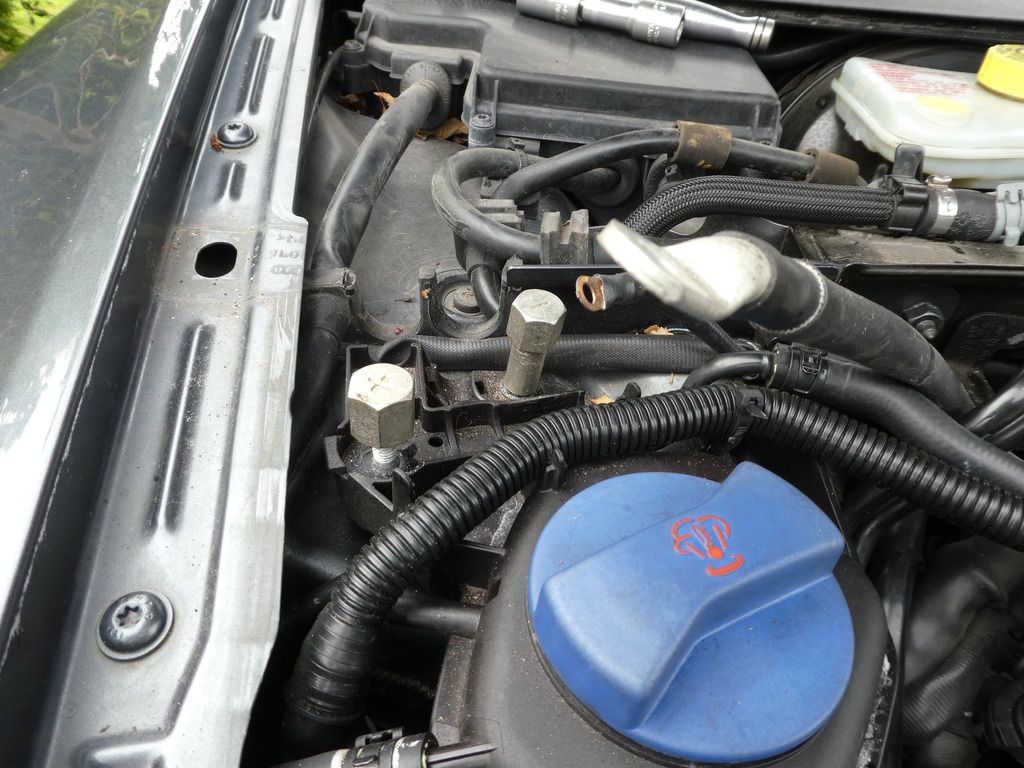
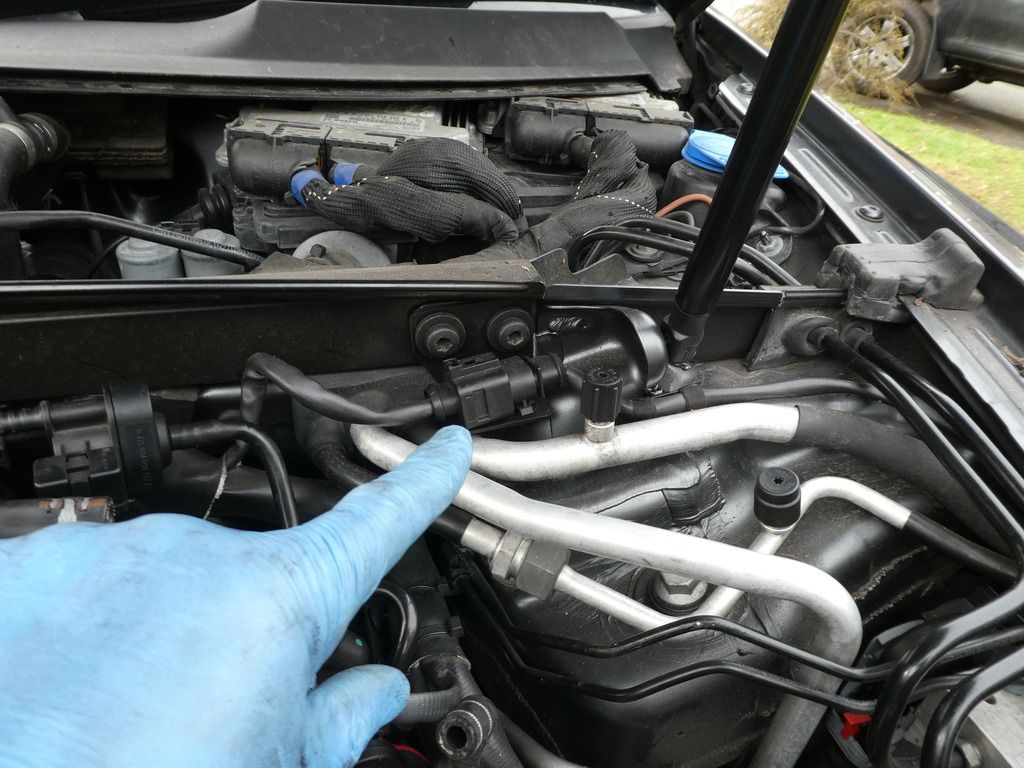
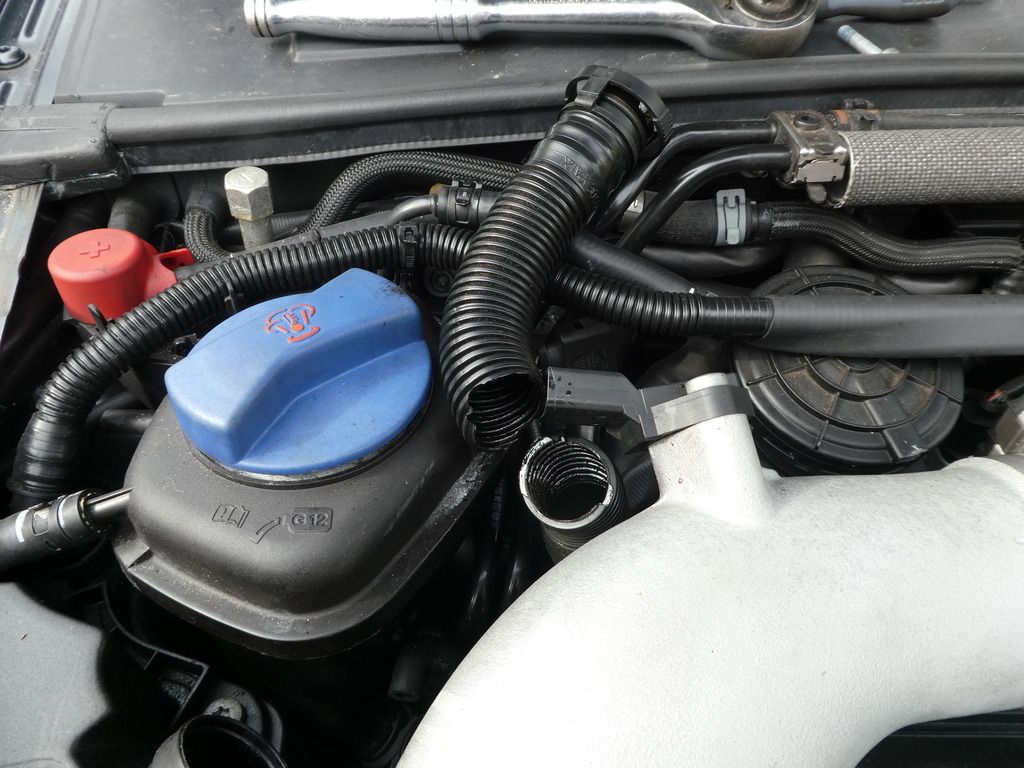
With some elbow grease pull the air box free of its lower grommets and you can access the vacuum pipe and remove it from the recirc valve
Image Image

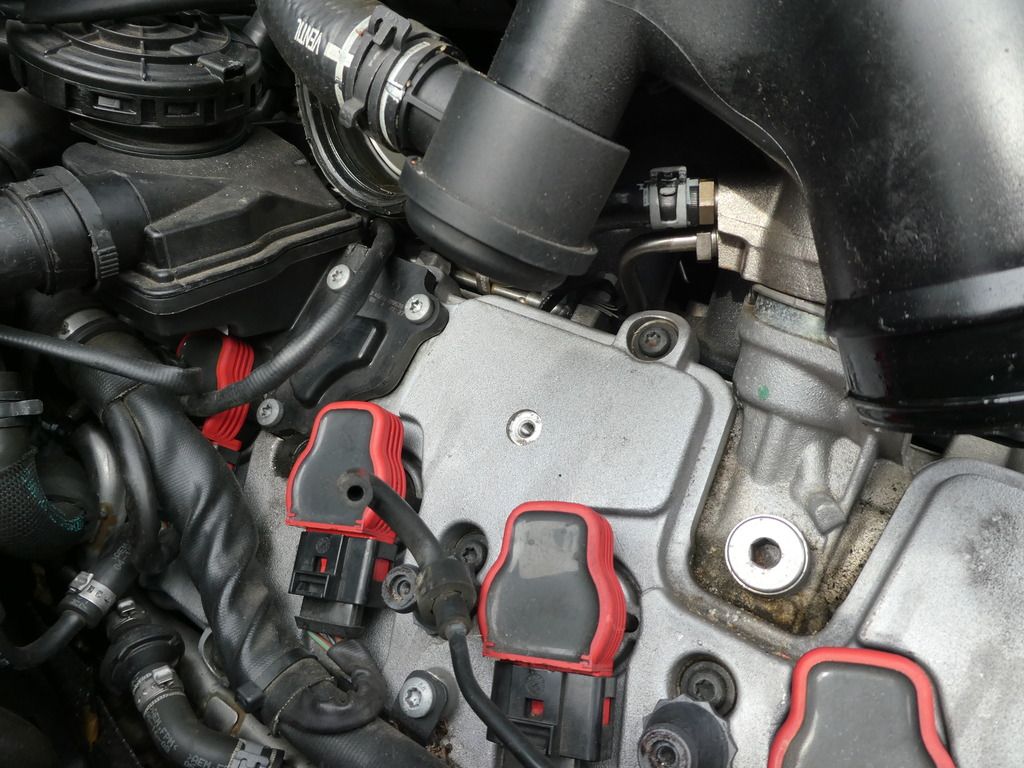
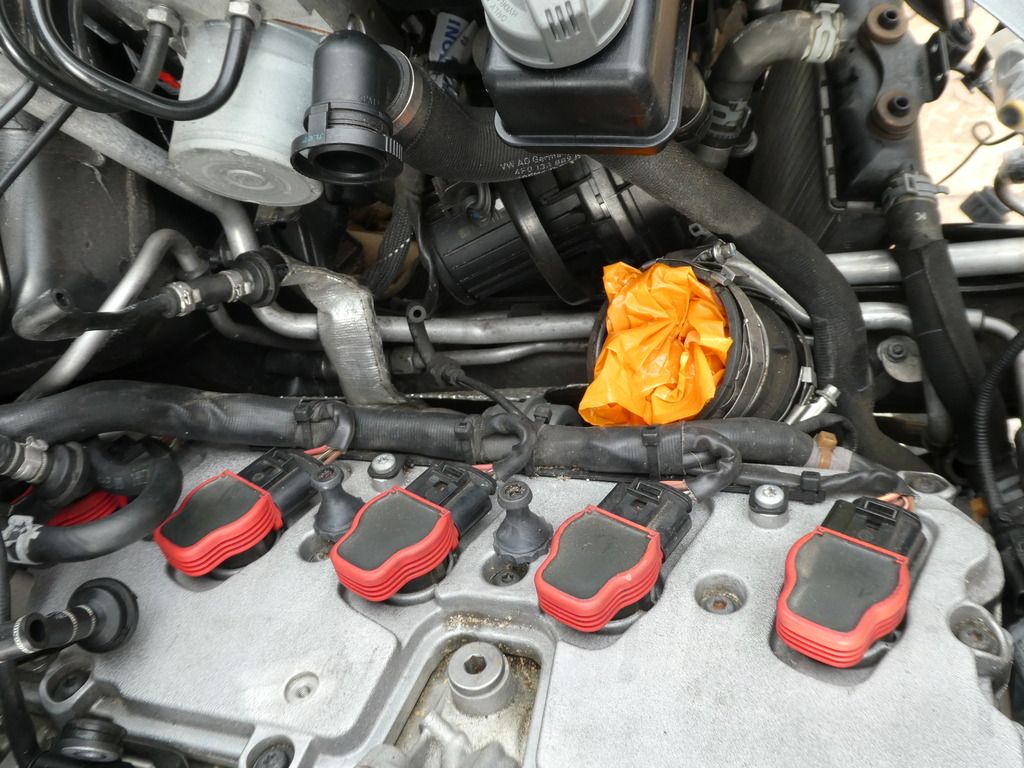
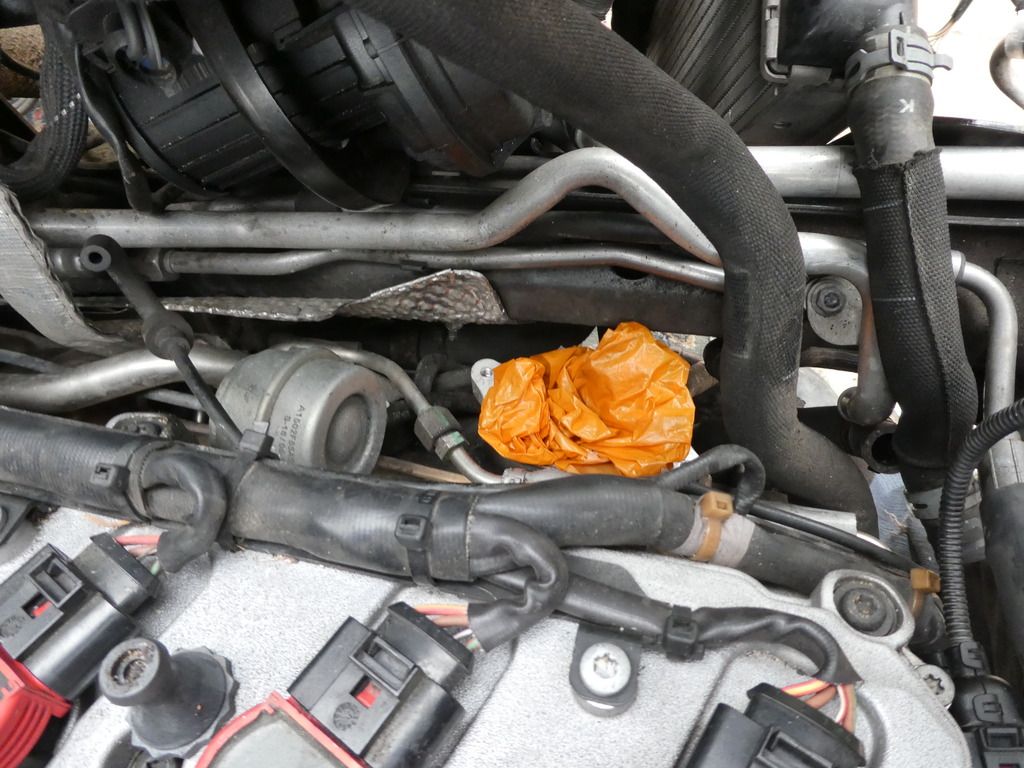
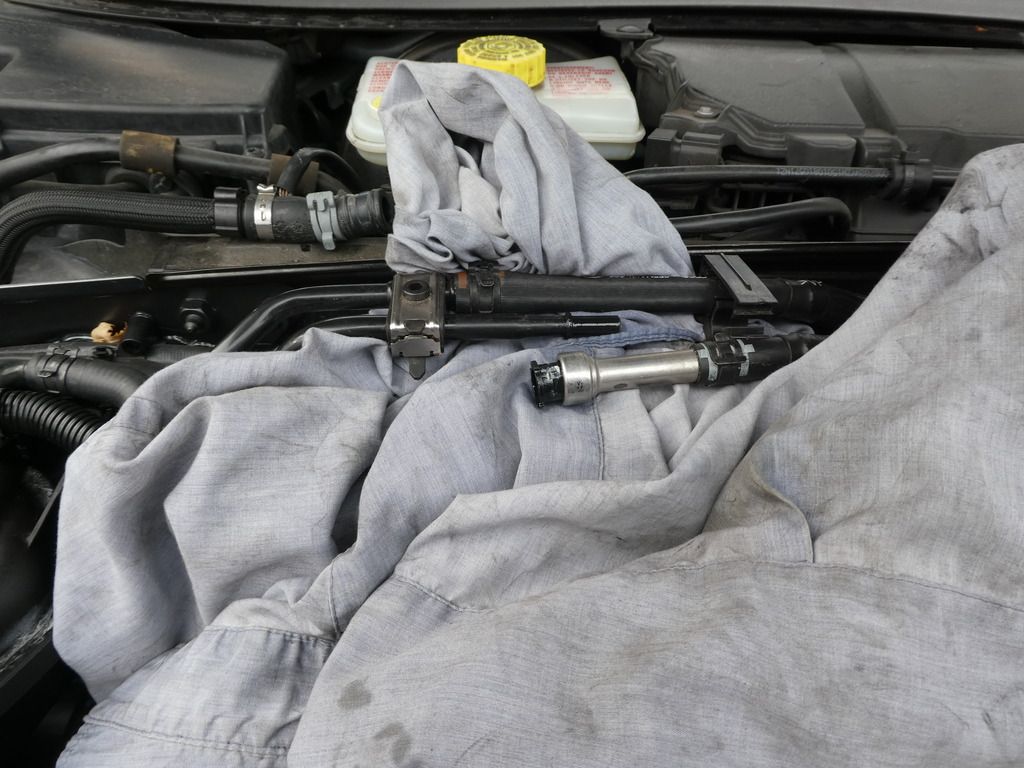
And lift the air box off; Top tip - put something in that exposed turbo hose, you dont want anything falling down there! I find 10p shopping bags ideal but a smelly old sock works just as well.
Image

ATinOf
3rd Gear
Posts: 395
Joined: Fri Jul 06, 2018 7:32 pm
Location: Cheshire

Re: Engine / Gearbox Removal

Post by ATinOf » Sun Jul 15, 2018 7:22 pm

The above process is much the same for the n/s air box and charge tube; ;
Image

with the added complication there are 2 hard to reach hoses under the charge tube to disconnect
Image Image
Image

and also 2 hoses to disconnect at the back of the air box;
Image

Plus this side you have the secondary air pump supply take-off to disconnect
Image

ImageImage
Image
Image

Dont forget to plug that turbo hose, even if you are about to take it off, play safe
Image
Last edited by ATinOf on Mon Jul 16, 2018 9:23 am, edited 1 time in total.

ATinOf
3rd Gear
Posts: 395
Joined: Fri Jul 06, 2018 7:32 pm
Location: Cheshire

Re: Engine / Gearbox Removal

Post by ATinOf » Sun Jul 15, 2018 7:24 pm

Dont under-estimate the storage space you will need for all this gear your removing
Image

We are making progress
Image

ATinOf
3rd Gear
Posts: 395
Joined: Fri Jul 06, 2018 7:32 pm
Location: Cheshire

Re: Engine / Gearbox Removal

Post by ATinOf » Sun Jul 15, 2018 7:27 pm

Now you will need to take off those top turbo hoses you stuffed up, they will foul on the chassis stubs when the engine comes out the front (because we need to drop the engine a bit to do that)

Image

But again stuff up the turbos
Image

ATinOf
3rd Gear
Posts: 395
Joined: Fri Jul 06, 2018 7:32 pm
Location: Cheshire

Re: Engine / Gearbox Removal

Post by ATinOf » Sun Jul 15, 2018 7:33 pm

Now we've just got a few more hoses before we turn our attention to electrics

We need to unclip the secondary air outlet from the pump, conveniently marked 'P'
Image Image

Its not very easy to reach in there!
Image

I tied this back out the way
Image

ATinOf
3rd Gear
Posts: 395
Joined: Fri Jul 06, 2018 7:32 pm
Location: Cheshire

Re: Engine / Gearbox Removal

Post by ATinOf » Sun Jul 15, 2018 7:35 pm

Again to protect the A/C pipes from damage I disconnected these from the outlets near the A/C pump

Image Image
Image Image
Image

ATinOf
3rd Gear
Posts: 395
Joined: Fri Jul 06, 2018 7:32 pm
Location: Cheshire

Re: Engine / Gearbox Removal

Post by ATinOf » Sun Jul 15, 2018 7:39 pm

Remove the trim seal and trim from the bulkhead
Image Image

And unclip the V10, RS6 covers off the inlet manifold
Image

ATinOf
3rd Gear
Posts: 395
Joined: Fri Jul 06, 2018 7:32 pm
Location: Cheshire

Re: Engine / Gearbox Removal

Post by ATinOf » Sun Jul 15, 2018 7:48 pm

Remove the seal cover and seal over the battery charger connection cables where they pass over the bulkhead

ImageImage

Disconnect the brake servo vac hose under the fuel pipe
Image Image

Expose the fuel pipe and pop the quick disconnect; be prepared for a little fuel spillage,
Image Image

Now disconnect the vac hose from the activated carbon filter solenoid
Image Image

Remove the cover and disconnect the battery charge terminals to split the wiring - Its pretty important you have disconnected the battery before doing this if you haven't already!!
Image Image

ATinOf
3rd Gear
Posts: 395
Joined: Fri Jul 06, 2018 7:32 pm
Location: Cheshire

Re: Engine / Gearbox Removal

Post by ATinOf » Sun Jul 15, 2018 7:53 pm

Take a note of every securing tie you cut off and ensure you refit them on reassembly; I'm not showing every instance here (I doubt I have every original one fitted on the gal given what Ive noted to date)

Image

ATinOf
3rd Gear
Posts: 395
Joined: Fri Jul 06, 2018 7:32 pm
Location: Cheshire

Re: Engine / Gearbox Removal

Post by ATinOf » Sun Jul 15, 2018 7:57 pm

Nows time to remove the coolant filler; disconnect the small hose at the side
Image

And the one on the outlet at the bottom;
Image Image

Unclip the breather hose to get to the bulkhead nut
Image

And remove
Image

ATinOf
3rd Gear
Posts: 395
Joined: Fri Jul 06, 2018 7:32 pm
Location: Cheshire

Re: Engine / Gearbox Removal

Post by ATinOf » Sun Jul 15, 2018 8:03 pm

Unclip the small breather hose at the back of the oil tank
Image

If you are conscientious like me and your cars out in the weather, the garage being delegated to engine and gearbox rework space, bag the tank outlet
Image

This breather hose comes integrated with a coolant pipe (heatshrink sleeved together), disconnect the other hose (coolant);
ImageImage

ATinOf
3rd Gear
Posts: 395
Joined: Fri Jul 06, 2018 7:32 pm
Location: Cheshire

Re: Engine / Gearbox Removal

Post by ATinOf » Sun Jul 15, 2018 8:08 pm

To remove the cabling routed by the oil tank as its part of the engine loom; disconnect the oil level sender at the front of the oil tank
Image

And the (coolant level switch I think) connector under the o/s wing
ImageImage

I also noted a clip fell off for the bonnet catch cable; noted for later
Image

Now this bit of cabling can be pulled back ready
ImageImage

ATinOf
3rd Gear
Posts: 395
Joined: Fri Jul 06, 2018 7:32 pm
Location: Cheshire

Re: Engine / Gearbox Removal

Post by ATinOf » Sun Jul 15, 2018 8:14 pm

Now disconnect the activated carbon filter solenoid connector
ImageImage

The solenoid is on a rubber mount and can be unclipped to expose the bolts for the top bulkhead cross member n/s
Image

Undo the 2 nuts holding the fuel hose support bracket to remove the bracket from the bulkhead cross member
Image

There's also a lone nut on a bracket adjacent
Image

Unclip the 2 connector pairs clipped to this bulkhead member
ImageImage

And remove the cross member exposing the engine loom pass throughs
Image

ATinOf
3rd Gear
Posts: 395
Joined: Fri Jul 06, 2018 7:32 pm
Location: Cheshire

Re: Engine / Gearbox Removal

Post by ATinOf » Sun Jul 15, 2018 8:23 pm

Next up its time to start on the disconnection of the engine loom, hold that thought for a mo,I'll be back with the third installment

Post Reply

Return to “RS6 / RS6 Plus (C6 Typ 4F) 2008-2010”

Who is online

Users browsing this forum: No registered users and 46 guests