There are also some pretty good photos on this thread about the rebuild of an engine
viewtopic.php?f=2&t=116787&hilit=tensioner
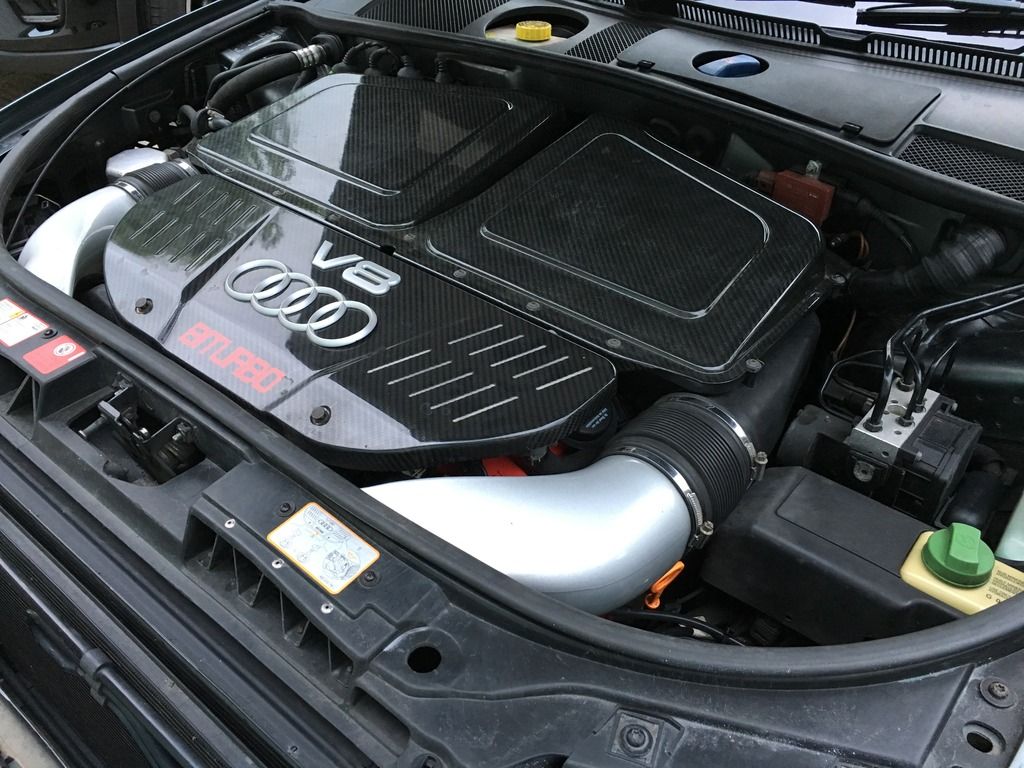
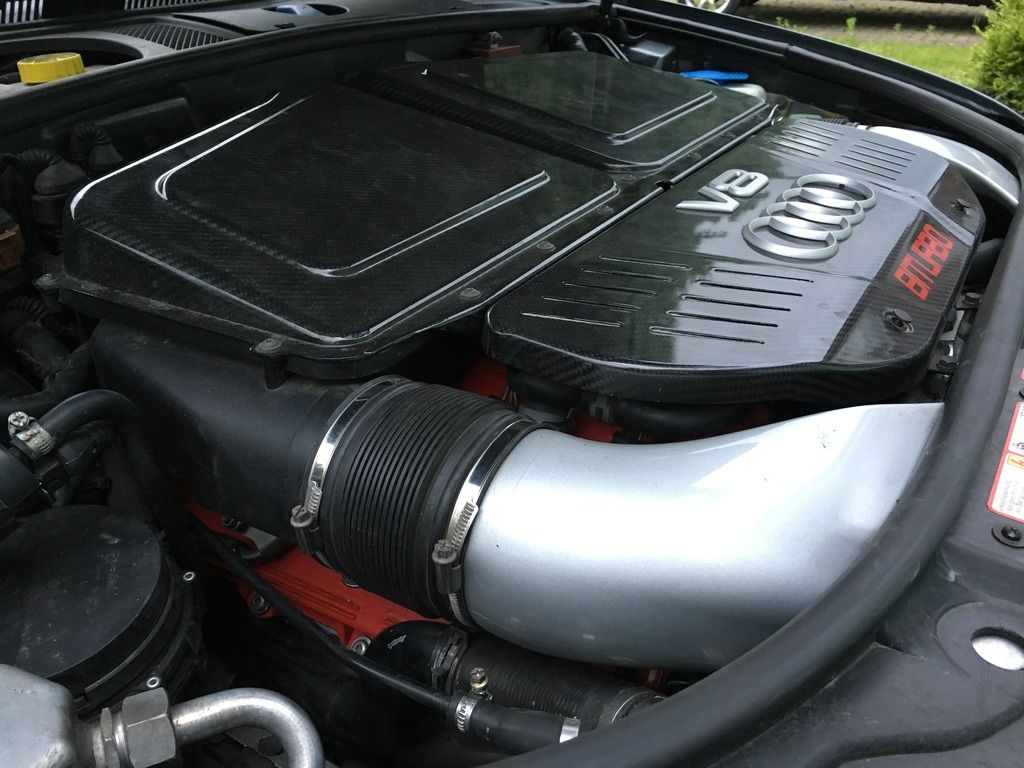
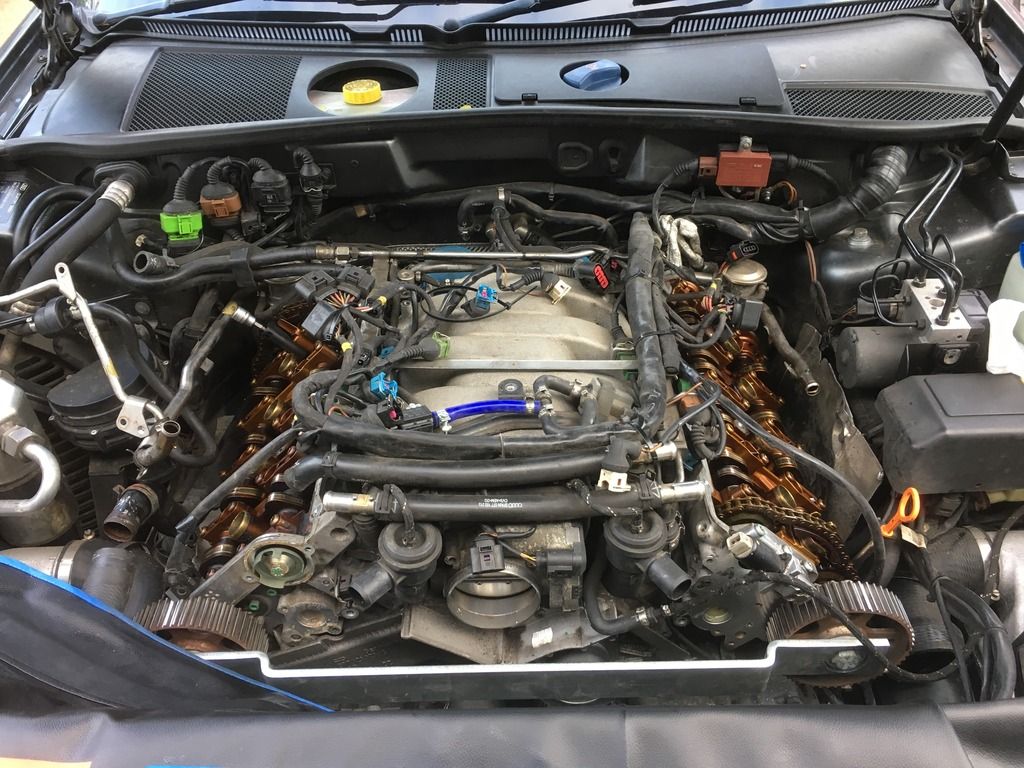
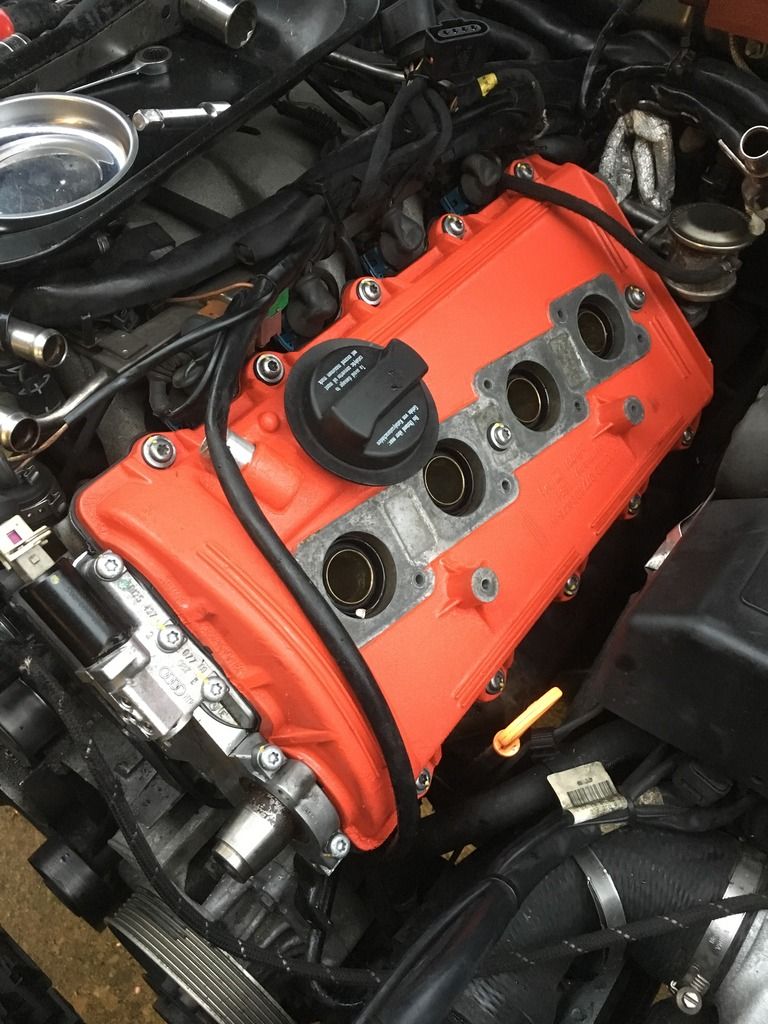
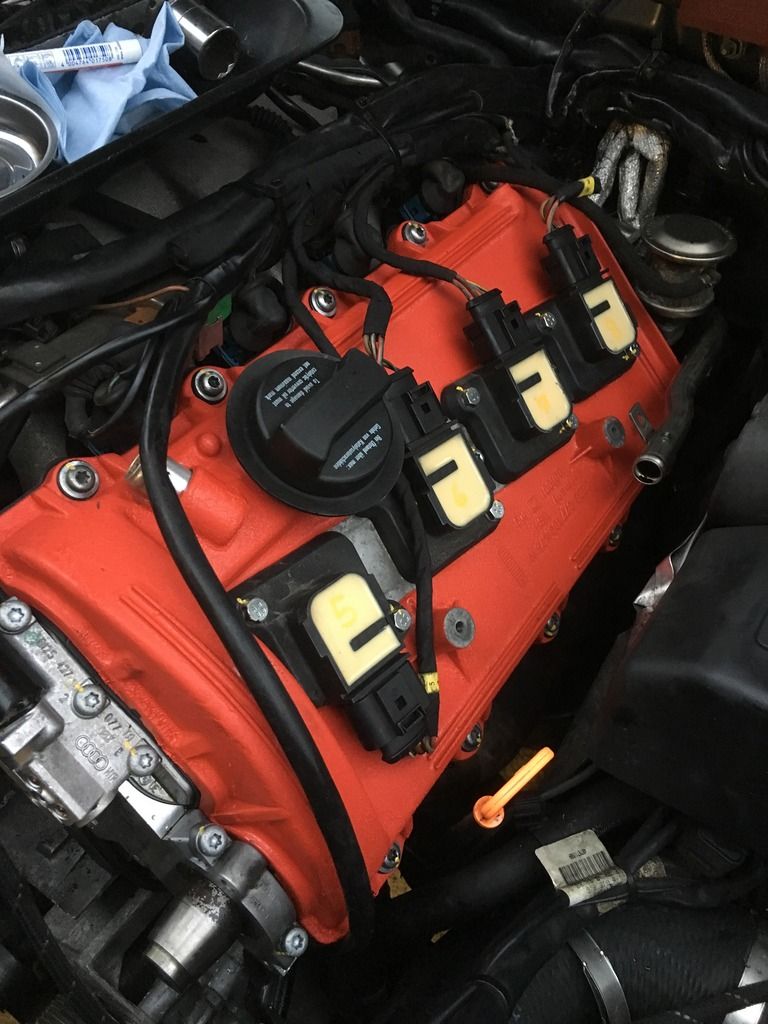
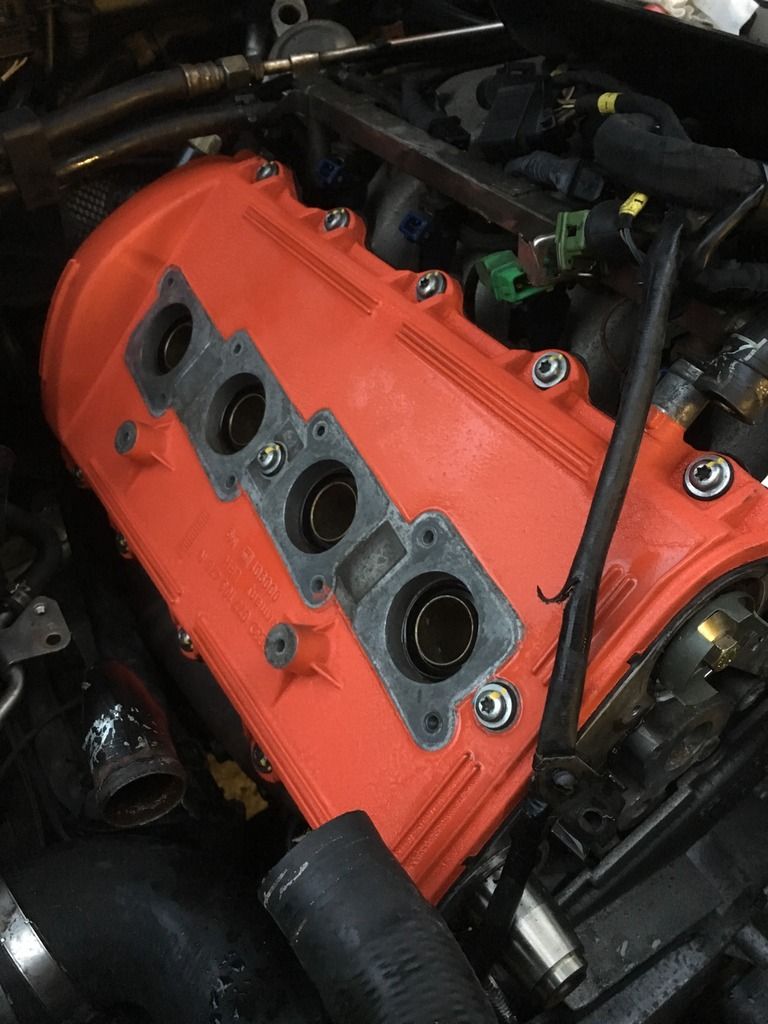
As ongoing maintenance of my RS6 I thought I’d take a look at the cam chains, tensioners pads (maybe tensioners themselves) and whilst I’m at it the need to replace all sorts of seals and gaskets. I've been meaning to do this for quite a while but never had the time as I knew it'd take a fair few hours to do it. As it turns out it was probably 20+ hours of work in the end, spread over 3 or 4 days. Whilst it was all in bits I also cleaned up th rocker covers and painted in crackle red. Doesn't look half bad to me!
In the past 3 or 4 months I’d noticed that the chain was a little noisier on the drivers side (bank A – Cylinders 1-4). No majorly bad noise just more pronounced compared to the passenger side (Bank B). For quite a while I’d also noticed that when the car hits the 1200rpm cam dephasing moment there is also a tiny ‘clack’ noise when the chains are tensioned. Initially I thought it was a really bad sign, but with more investigation its more of less confirmed that most cars (if not all) do it. The cam phasing is fairly simple compared to the newer design with a moveable cam pulley(s), vanos or VVT.
I think (so correct me if I’m wrong), that the exhaust cams are fixed and connected to eachother via the cambelt which is turned by the crankshaft. The inlet cams are the ones which do all the moving and are only ever in 2 positions. 0 or 25 degrees dephased. The movement is made by the movement of the cam tensioners which have one fixed tensioner pad and 1 which moves. On Bank A it’s the lower pad which moves out and on Bank B it’s the upper pad that moves. When 1200rpm is reached high pressure oil is let into the tensioner and this pushes one pad outwards, also taking up the slight slack in the other side of the chain. This also rotates the inlet cam slightly in relation to the exhaust cam, giving earlier (or is it later) opening of the valves.
My car has done just over 100k miles now so it’s a good point to check the tensioners and pads. Once they were removed its plain to see that they are significantly worn. They were considerably worse on the adjustable side of the tensioners. If they get very worn there is a risk that you won’t get full dephasing of the cams or worse them breaking off completely. There haven’t been many instances of the tensioners actually breaking, with a more common remedial action to just replace the pads. The tensioners themselves (077109087/077109088) are pretty expensive - £500 each, so I was reluctant to buy new ones when I didn’t even think they were broken. Instead I opted for new pads, therein lies another type of problem….. Audi do not sell the pads on their own. They are quite easy to get hold of but the quality of them is a real gamble. I assume they are a touch durable type of plastic as they seem to be injection moulded, but I’m not an expert. So, where to get them? Ebay/Amazon/Blauparts/Europaparts all sell them of sorts, but you’ll never really know if them are good quality or cheap Chinese junk. In the end I bought a set from German ebay from a link which someone on a german Audi site had recommended. They weren’t the most expensive available nor the cheapest. I’m going to check mine in a few months time to see how the wear is.
NB: You can actually buy aftermarket tensioners too, but these are all completely unbranded too and at 1/5 of the OE price that seems even more of a risk than just the non OE pads. They have the part numbers stamped on them but NOT the Audi logos etc..
How do you do it then?
First off this isn’t a quick task. It took me 3 or 4 days on and off, taking time out to go to work and then work on in the evenings and a bit of time dodging the stormy weather. The task generally involves removing everything that you would do to change the cambelt, then also removing the rocker covers and getting to the cams. There is also a guide to changing the tensioners which involves leaving the cambelt on and removing the inlet cams only, for this you can lock the cams and keep the cambelt on then remove the exhaust cam only. It’d be pretty tight but I think its achievable. I decided to swap the cam chains over too which involved more work, but also meant I could change all the gaskets and seals in one go. Here's the other guide - http://forums.quattroworld.com/a8/msgs/55496.phtml
Parts needed:
- 2x Rocker cover gaskets (£38 each)
- 2x Cambelt bolts plus funny shaped locating washers (£5 each)
- 2x Cambelt black end cap seals (£5 each)
- 4x Cambelt orange/brown seals (£5 each)
- 2x Moon gaskets (included in rocker cover gasket set or as part of tensioner gaskets)
- 2x Chain tensioner gaskets (£7 each)
- 2x Cam chains (£45 each)
- 52x (yes 52) cam cap bolts. These are stretch bolts so once torqued then can't be reused.
- 1x tube of silicone sealant
- 4x tensioner pads (various sources: wouldn't want to scrimp on these) or 2x new tensioners (£500 each).
- 1x new cambelt (around £45).

Level of difficulty: 4 spanner out of 5. No more difficult than changing a cambelt, but there is so much going on that one incorrect thing could ruin your engine.
Step 1 - Cambelt stuff:
Do the cambelt change guide upto the point where you would remove the belt but not all the idlers, water pump, tensioners etc.. If you this in with completely changing everything then remove it all, otherwise just think of it as just putting a new belt on only.
- Remove air filter, front bumper and put lock carrier in service position.
- Remove big alloy air inlet pipe that bolts to the throttle
- Remove aux belt (inc idler).
- Take off the cambelt covers to expose everything. Rotate the engine so cylinder 5 is at TDC. This will also mean that the notches in the crank damper align with the plastic grooves PLUS the cam locking bar (T4011) also locates in the cam washers. Insert the crank locking dowel from underneath the engine.
- With the engine timing all set you cam remove the cambelt (put pin in hydraulic tensioner, loosen adjuster, remove belt).
- You now need to remove the backing plates behind the cambelt – do both sides. The fixed roller rockers (x2) and cam sensor on Bank A will also need to be removed.
Step 2 – Rocker cover B (easy one)
We now move into to taking the cams out which means removing the rocker covers. This is a well-known PITA but fear not because it definitely can be done without removing the engine! (as the Audi guides suggest).
- Bank B isn’t too difficult to remove: Unplug the 4 coils and unbolt them.
- Unclip the the SAI and Oil ventilation pipes. There is also a pipe which goes around the back of the engine which bolts down on the rocker cover, remove this bolt and the pipe can be moved out of the way.
- Undo the 12 bolts which hold the rocker cover down NB: It won’t be easy to actually pull the bolts out as they are almost held in by the rocker cover gasket. Just be careful none fall out and you drop them.
- Pull the rocker cover upwards and wiggle it out of the way. Be gentle though – they are made of Magnesium and very light but its probably not hard to break off a corner etc..

Step 3 – Rocker cover A (harder one)
Onto the problematic side. This one is the reason why the audi guide recommends taking the engine out. The cover is held very close to a few parts and one of those is impossible to remove without removing the engine – the rigid coolant pipe.
- As per Bank B, unplug coils and unbolt (x8)
- Unclip the SAI and Oil ventilation pipes.
- Unbolt brackets holding the rigid metal pipes onto the rocker cover and move out of the way. You also need to undo the jubilee clip holding the thin pipe (coolant) from up by the injectors/inlet manifold.
- Now the fun starts. There’s 3 things which need moving to the get it out.
- Firstly there’s the fuel rail and the in/out pipes. There are 2 small bolts that hold the fuel rail down onto the inlet manfold. Unbolt them. Spray a little WD40 onto the base of the injectors to loosen the seals and leave it 10 minutes before trying to lift the rail up. It will come up eventually bit it needs a little help.
- Next up it’s the SAI valve at the back of the engine bay. Mine was catching very close to the rocker cover and as I was going to paint it before refitting I didn’t want to scuff it on the way back in. You might be able to get it out without removing the SAI valve but I wouldn’t chance it. There are 2 5mm allen bolts to remove to get the pipework off the SAI valve, the 2 more that hold the valve on. I needed to cut down an old allen key to fit in the space as I couldn’t get a normal socket set in there.
- Lastly it’s the coolant rail. As mentioned earlier you can’t actually remove it without removing the engine, so we need to bend it slightly out of the way. It doesn’t need to move much. Unbolt the 12 bolts holding the rocker cover on. Remove the single bolt the hold the pipe onto the block and gently pull outwards towards the wing. The rocker cover will come off eventually.
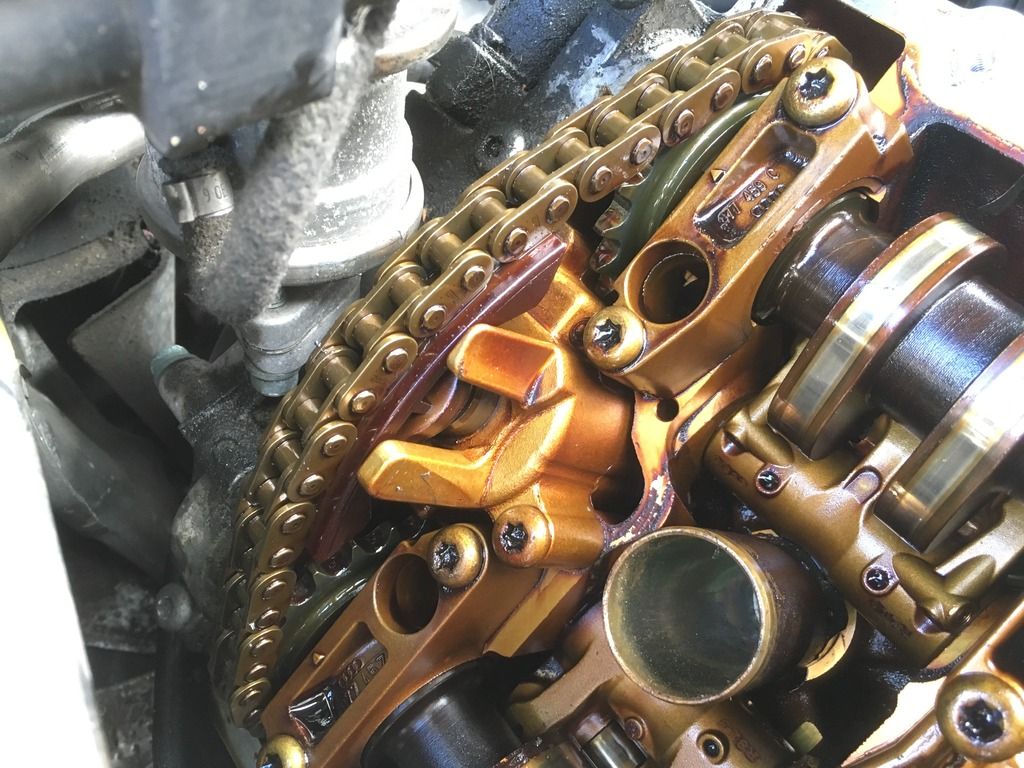
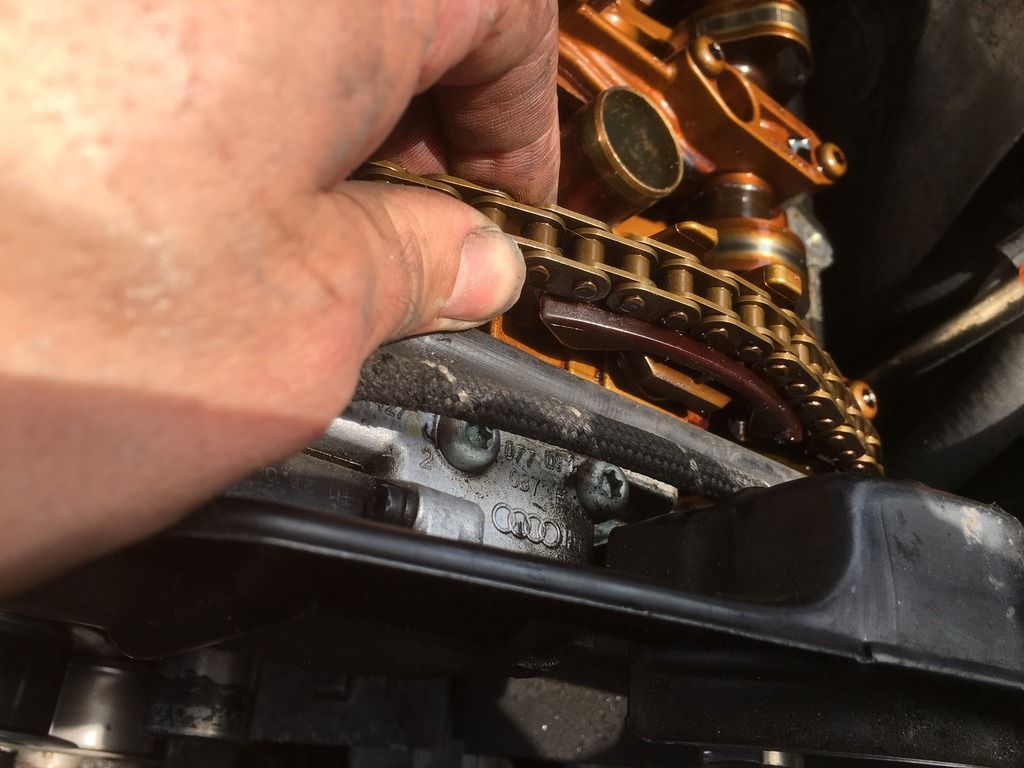
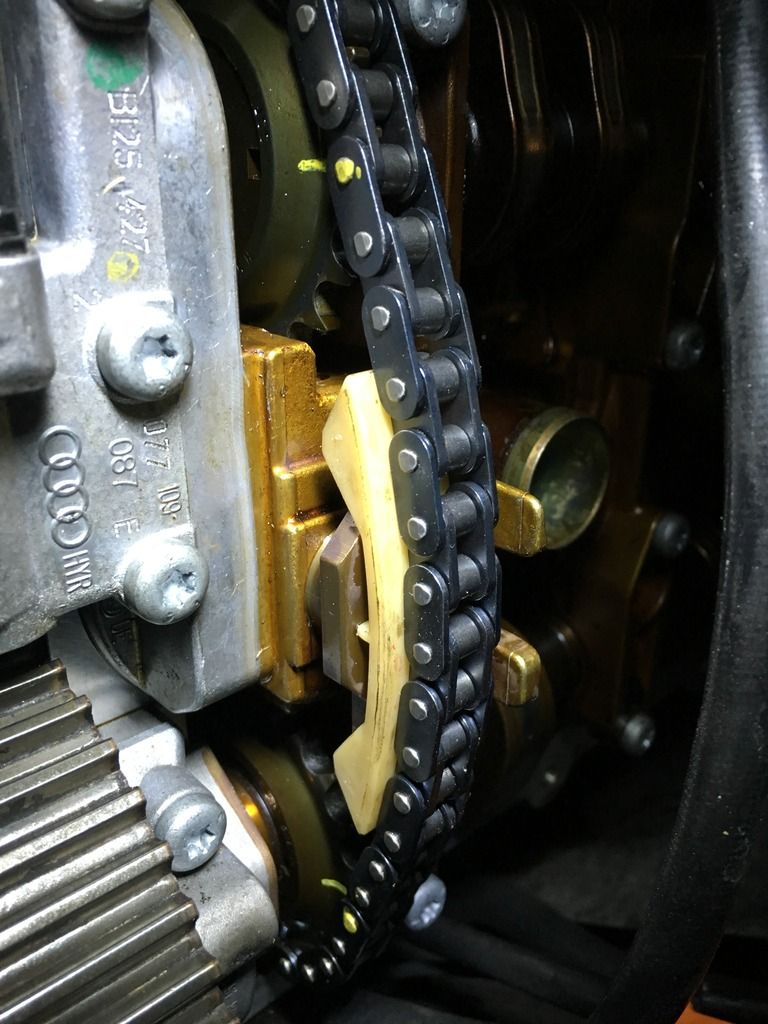
There was a tiny bit of slack in the cam chains (more than I’d suggest normal) plus it was clear to see that the Bank B tensioner pads had ridges on them. At this stage I made an effort to tie all the cables up neatly so they were over the inlet manifold in the middle of the engine as they kept falling over the cams etc..
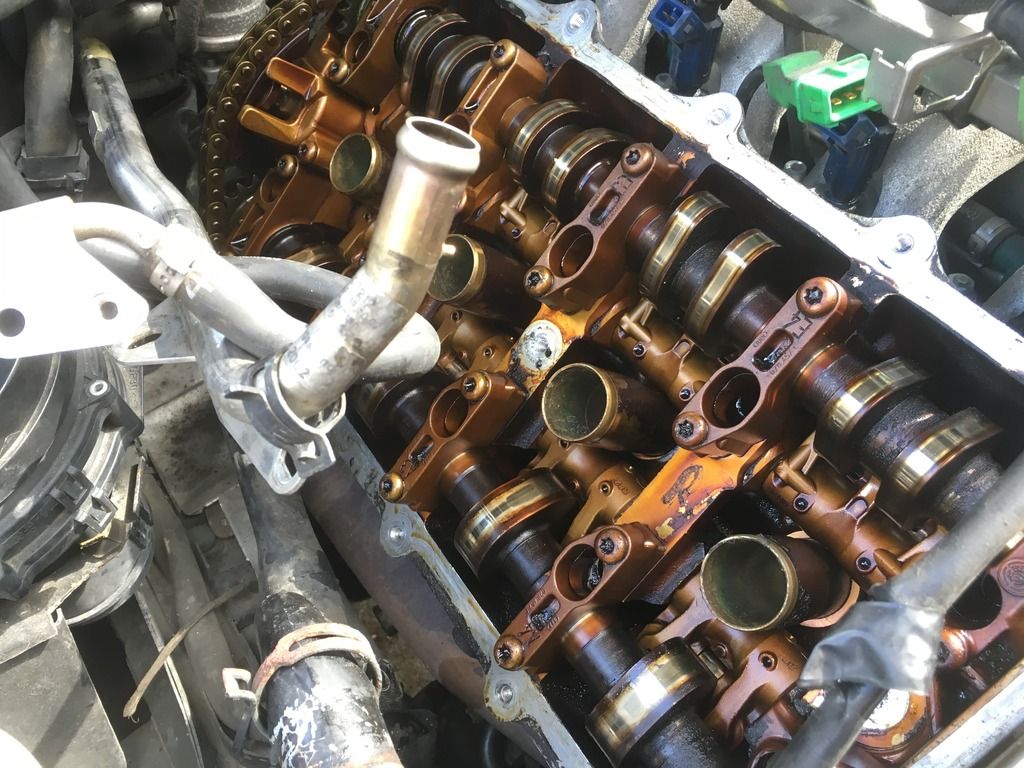
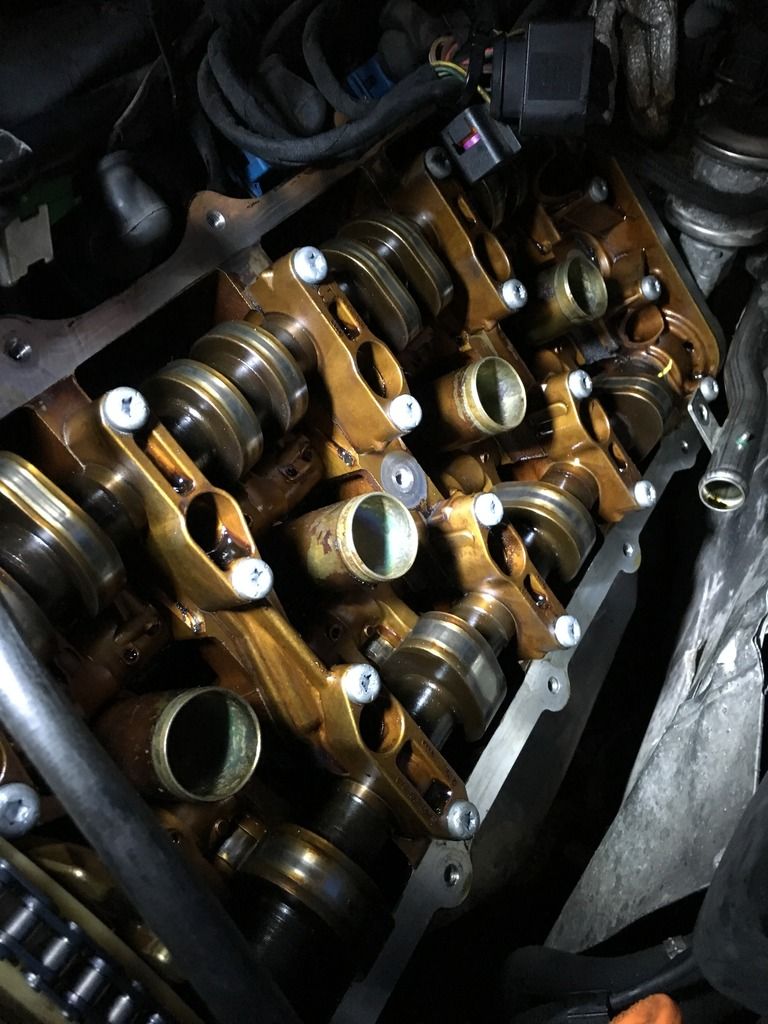
Step 4 – Removing the cams: Bank A
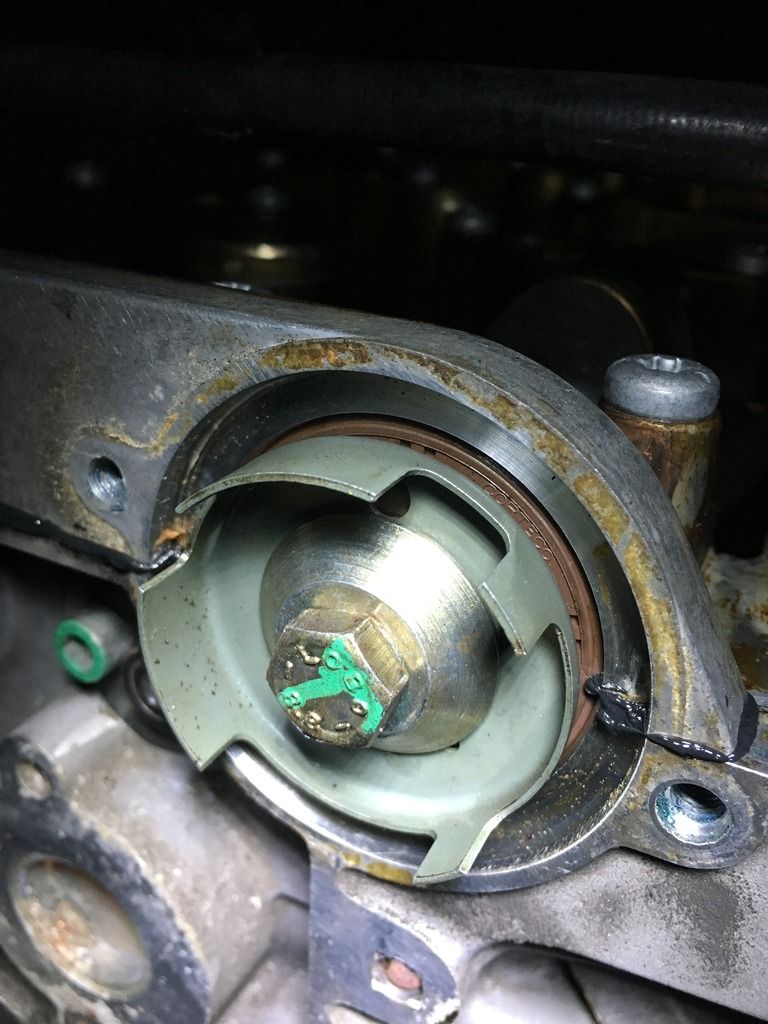
At this stage everything should still be all lined up. Double check that the chain timing is correct by making sure the little triangles on the back set of cam caps line up with the notches in the cams. They should both be pointing upwards. You can also check the number of chain links between those markings (should be 16 on Bank A and 15 on Bank B) as per Audi guide.
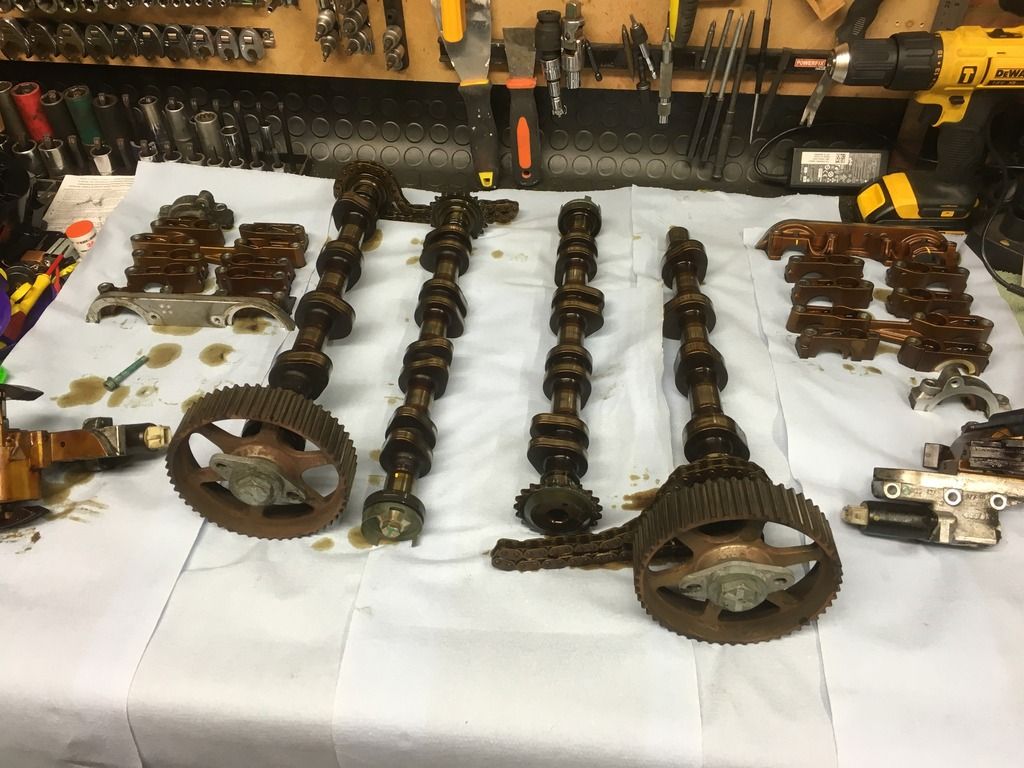
I made 2 extra markings on the cam caps so they lined up with the line on each of the caps at the other end – using a small paint pen marker. Put the tensioner compressor tool over the cam tensioner (T3366) and screw it in. My tool was made by LASER (not the best quality) and it was starting to bend when getting really tight. You now need to remove all the cam caps – but do them in a certain order so you don’t stress any part of the valvetrain or bend the cams. Lift up both cams, chain AND tensioner out all in one go and put them somewhere safe. Pick up the black/rubber cam seal from the back of the block (for exhaust cam).
Step 5 – Removing the cams: Bank B
Pretty much the same as Step 4, however the cam sensor is at the back of the cylinder head on Bank B and this needs removing first. Access to the bolts is very tight so its advisable to remove the SAI valve inlet pipe (2x 5mm allen bolts) to give you more space to get at the bolts for the cam sensor.
Step 6 – Fixing new tensioner pads
With the tensioners on the workbench it’d rude not to give them a clean-up. Be careful you don’t get any degreaser/brake cleaner on the seals of the pistons though as that will likely perish/make them swell up. You can see from the photo that my old pads were worn from the cam chains running over them for 100k miles. From research on the net I’ve seen them to be worn before and sometimes break off in chunks – maybe when they get very worn?. My pads simply popped off with the help of a screwdriver and didn’t break. There was still a little bend in them, so not that brittle yet. The new ones simply click onto the brackets. I made sure they were really clean before attempting to put the new ones on.

Step 7 – Putting it all back together: New seals etc..
With the cams out you should really replace the seals. There are 4x Orange/Brown seals, 2 for each side. There are also 2x black end caps (1 for each bank). Bank A configuration is as follows – Exhaust cam has 1 orange seal at cam pulley end and 1 black cap at the other end (back of the engine). The inlet cam has 1 orange seal at the front of the engine and nothing at the back (as that’s where the chain attaches to the sprocket. Bank B configuration is as follows – Exhaust cam 1 orange seal at the front (cam pulley end) and black end cap at the other. Inlet cam has no seal at the front sprocket end but has an orange seal at the back of the engine (where it fits into the cam sensor). The new seals are fairly easy to put on, the only difficult ones are the orange ones by the cam sensor as the thin ‘teeth’ at the end needs removing in order to get the old sensor off and new one on. I used a small impact gun to undo the bolts and held the cam by hand. There doesn’t seem to be any flats on the cams to hold the cams with spanners etc.. and I suggest you don’t risk scratching or bending it by putting it in a vice. Put a little oil around the seals before fitting to make sure they spin nicely and clean up the cams if needed. I also cleaned the nose of the exhaust cams (the conical section where the pulley sits) as mine has a small amount of corrosion – nothing some scotch pads couldn’t remove.
Step 8 – Putting them back in the engine:
When it came to refitting I decided to put some new chains on too. My old ones were probably ok, and comparing the two (old vs new) they didn’t seem to be any differences in sizes although I didn’t accurately measure them, only visually checked length etc. With the cams and tensioner on the workbench thread the chain around both sprockets so you have the required amount of chain links (see Audi guide). Compress one of the tensioners with the 3366 tool and this will now fit in the gap between the two sprockets. Before putting back int engine you will need to fit a new tensioner gasket AND a small moon gasket which fits underneath the tensioner.
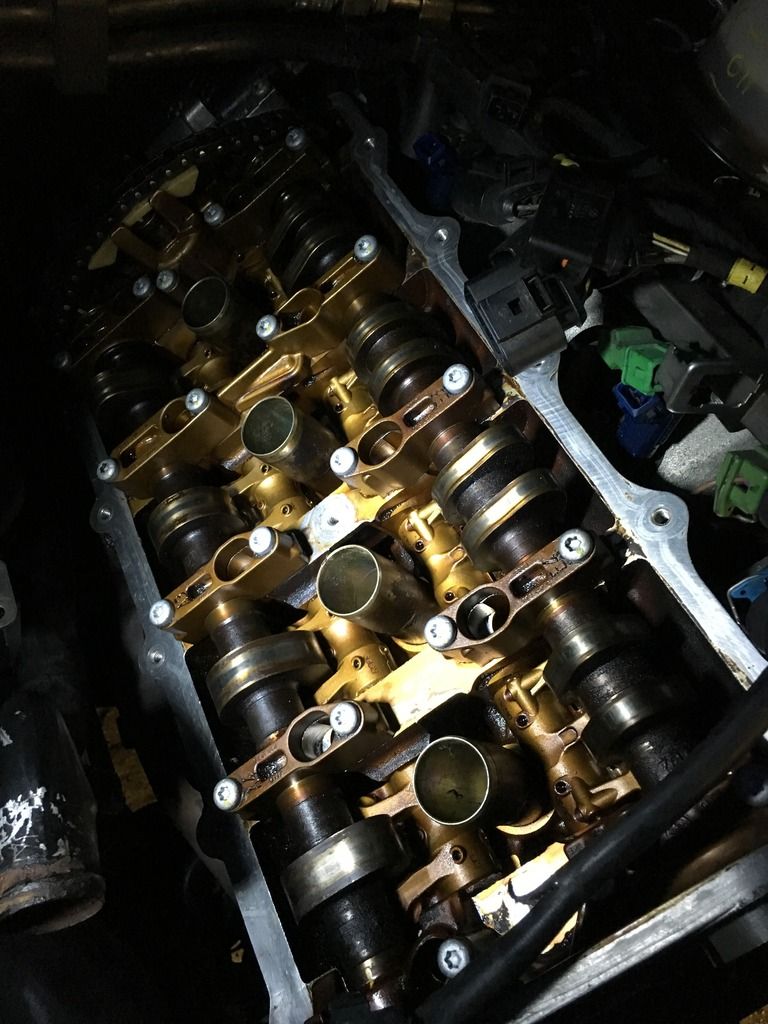
The Audi guide also recommends adding a dab of silicone sealant in the corners too. An extra pair of hands would be useful when moving the assembled valvetrain back to the engine – its easy to drop something plus there are a few things in the way when you get round to dropping them in. Give the cam bearings a wipe with a lint free cloth and reoil the surfaces with clean engine oil. Make sure the cams are lined up correctly before refitting the cam caps (in correct order). You should also replace the all of the cam cap bolts too (there are 52 in total!). Tighten them to 6Nm + 90deg as per the guide. The other side is much the same, however the chain is at the front of the engine so it makes it slightly easier to manhandle. It was, however, slightly harder to line up. When the cambelt is removed this bank is at an odd stage in the cycle and you may find the that cams turn when you take off the locking tool. This essentially means that the cams will be hard to put in place as some of the valves need to be pushed open (by the cams) when tightening. This isn’t so bad for the exhaust cam (as it can be held in place by the locking tool), but the inlet cam is connected by the chain and as such the chain is slack so won’t hold it in place yet.
In order to keep the cams in the correct place I loosely fitted the cam pulley, old washers and bolt to that could be lined up and then loosened the 3366 tool just enough so there was tension in the chain to stop the inlet camshaft from moving. When refitting the cam caps the centre cap (which bolts across both cams) is put on first but due to the position of the cams the inlet end wouldn’t push down enough to fit the bolts. I fitted the furthest bolt first and as it was tightening I could then get the next bolt in and so on until all 4 bolts were in. They can then be tightened down evenly to avoid stressing the cams or bolts etc. Fit all the cam caps and torque down. The cams should all be lined up still. Also remember to remove the 3366 tool.

Step 9 – Put the rocker covers back on:
Before doing this I took it as a last chance to double check everything looked ok. Cams lined up, cams were all lubricated with fresh oil and there weren’t any remnants of the old gasket around the rockers etc..
As previously mentioned you really should put on new gaskets at this stage. Rocker cover gaskets are about £38 from Audi and they are pretty good quality. The hardest bit is probably removing the ring gaskets that fit around the spark plugs/coilpack tubes. They have a rubber outer section and rigid metal ring inside. Prise the old ones out with a screwdriver. Clean out the surfaces with some fine scotch cloth and oil the outer edges of the new gasket. Use a large socket (think around 32mm should do), press in the gasket and then give it a couple of hits with the socket/hammer. The main gasket presses into the outer edge of the rocker cover, but there are also 2 small rings which fit up into the underside of the cover for the central 2 bolts. On my car they kept falling out when the cover was turned upside down so I ‘glued’ them in slightly with a dab of silicone sealant. When these have dried a little you also need to place a small amount of sealant onto the cylinder head around the areas where the cam caps screw down (as per Audi guide). Simply manoeuvre the rockers covers over the head and bolt down – think they are all 10Nm.
Step 10 – Do everything else:
Basically you know need to refit everything back on and put a new timing belt on. My tensioners weren’t changed that long ago so I simply put a new belt on. You will also need to refit the backing plates, cam sensors, oil/SAI pipes and valves, coil packs and wiring.
Before starting up I removed the MAFs from the airbox and mounted them as they would normally be fitted to the inlet pipes. This meant that I could start the car without the airboxes fitted meaning I could see if there were any leaks – I was mainly worried about fuel leaks as I’d earlier removed the fuel rail. I removed Fuse 29 and turned the car over for 10 seconds to make sure all the cams had been lubed up nicely before refitting the fuse and finally starting.
All done. Shame you can't see much of the work when the air box is on.