DIY to replace both exhaust downpipe flexi’s

4.2 V8 40v biturbo - 450 bhp
4.2 V8 40v biturbo - 480 bhp (plus)
User avatar
skyegtb
3rd Gear
Posts: 319
Joined: Thu Sep 04, 2008 6:37 am

DIY to replace both exhaust downpipe flexi’s

Post by skyegtb » Fri Feb 10, 2017 6:32 pm

DIY to replace both exhaust downpipe flexi’s
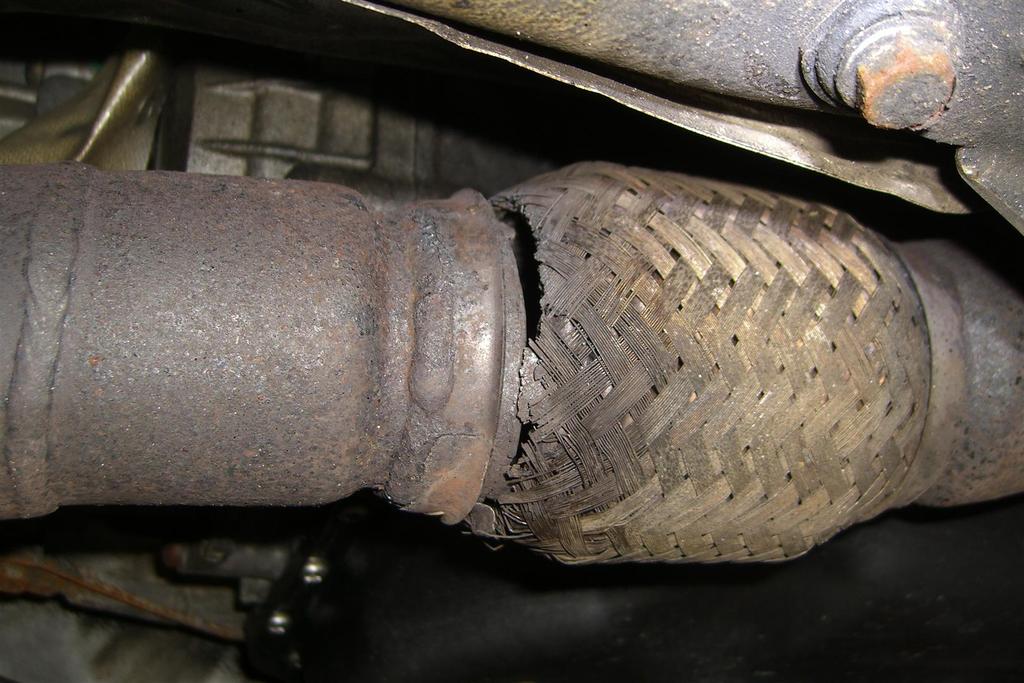
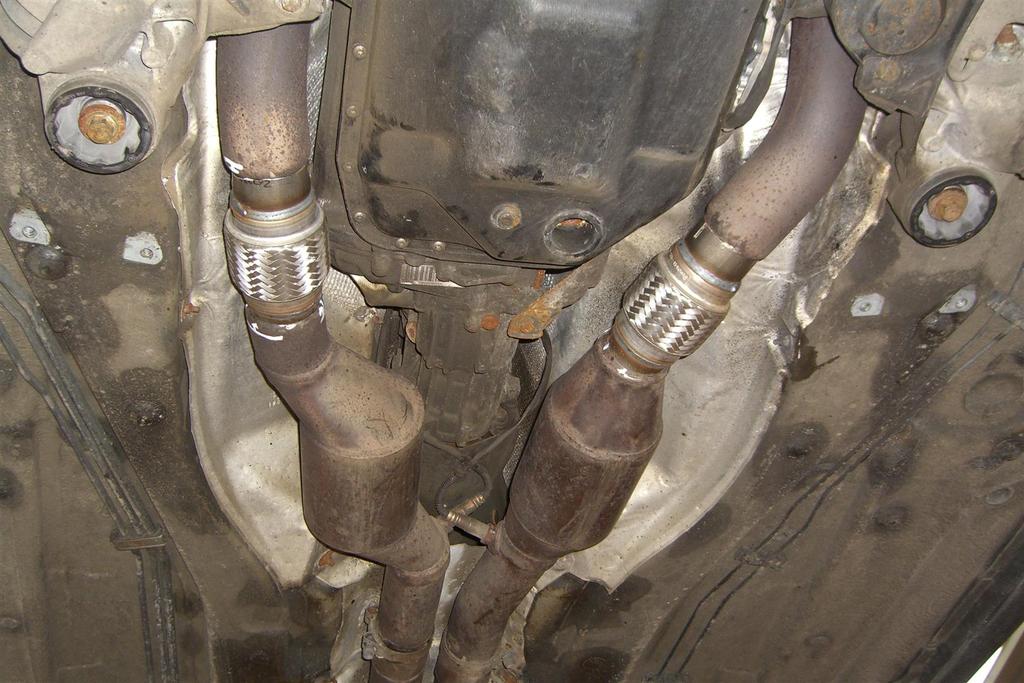
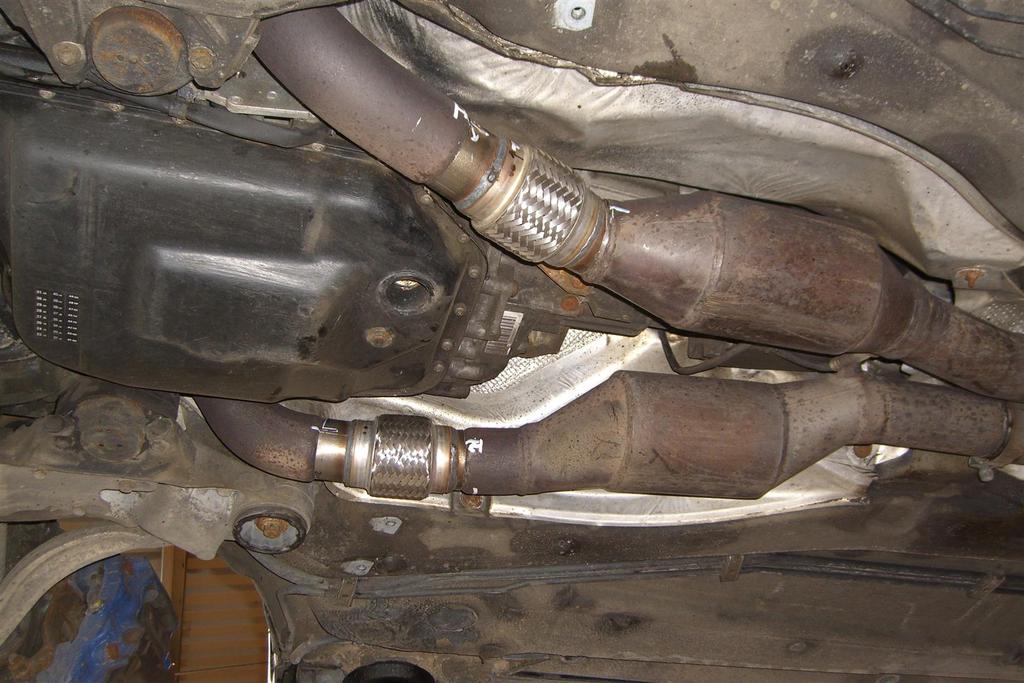
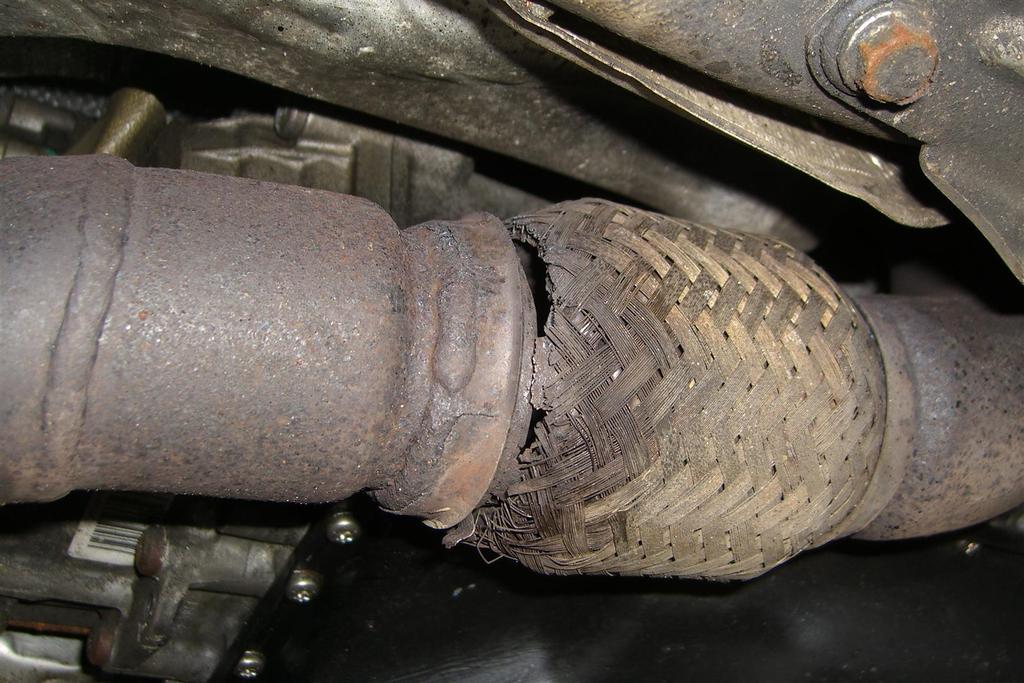
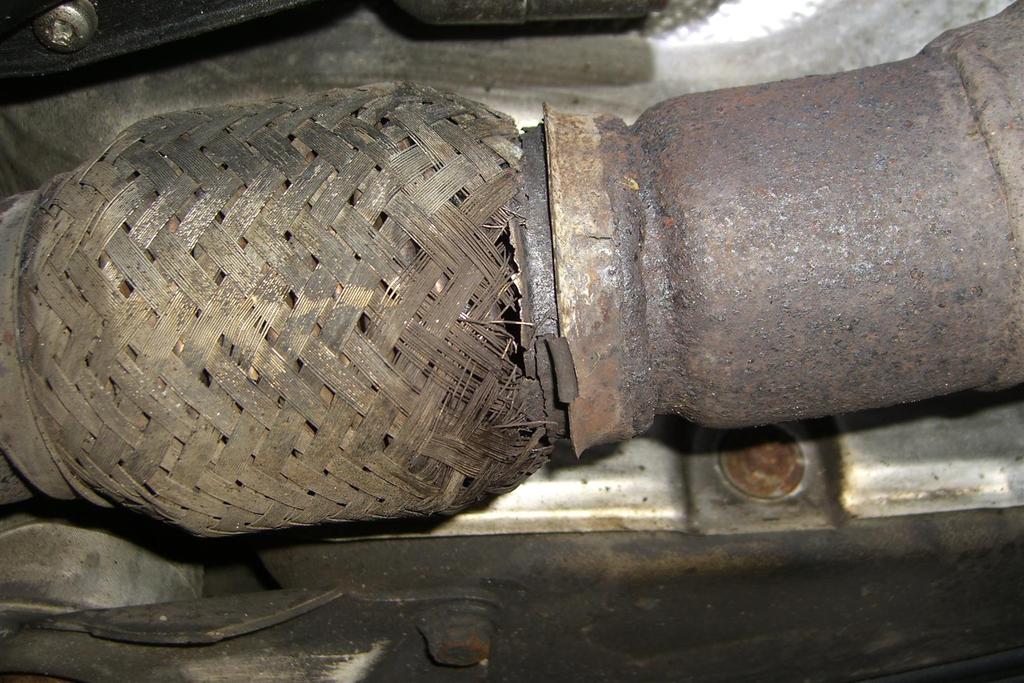
Hello all. Just did this job to my car after suffering both front flexi’s failing simultaneously. My car has Milltek downpipes, but the replacement of the flexi’s would be very similar with the standard downpipes too. Also, not sure if this is really a DIY for everyone as it definitely requires a ramp, a transmission jack and a welder; but it is a pretty straightforward job. The only issues were the difficulty of cutting and grinding off the old flexi pipes, and then doing a neat job of welding the new ones on. Anyway, here goes:

Lift car off the ground.
Take both front wheels off.
Take the engine under tray off.
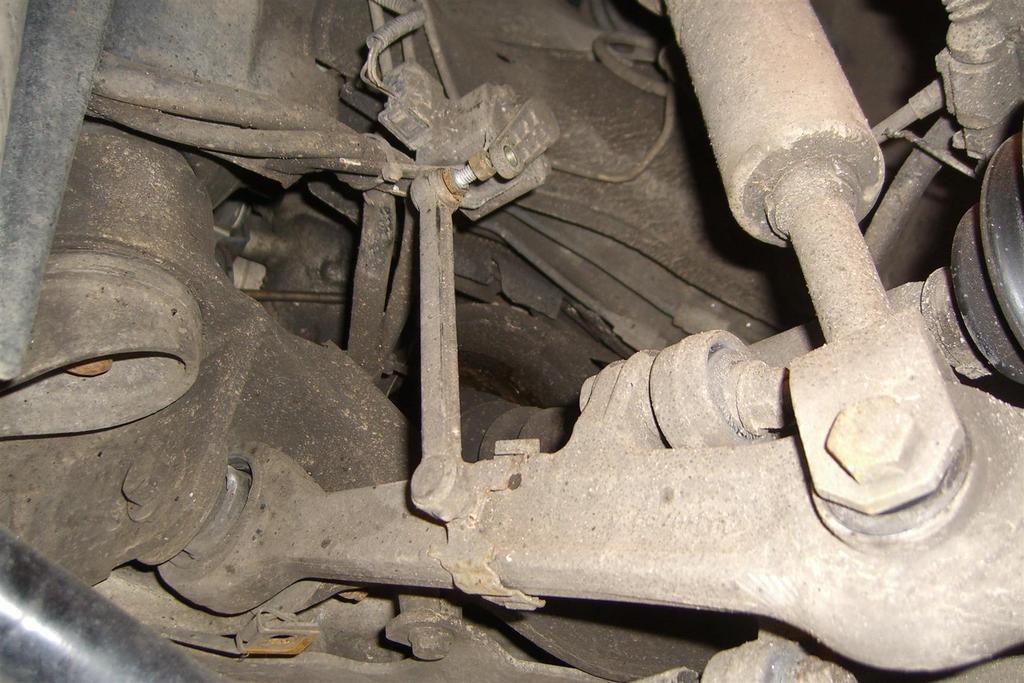
Disconnect the suspension height sensor on the passenger side.
Lower the car.
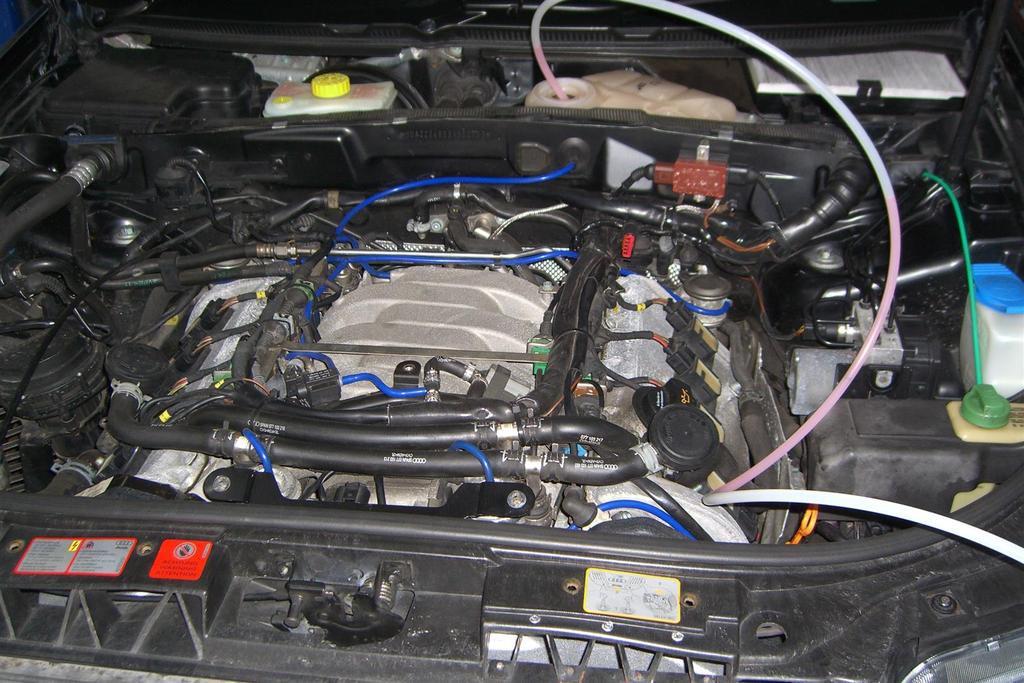
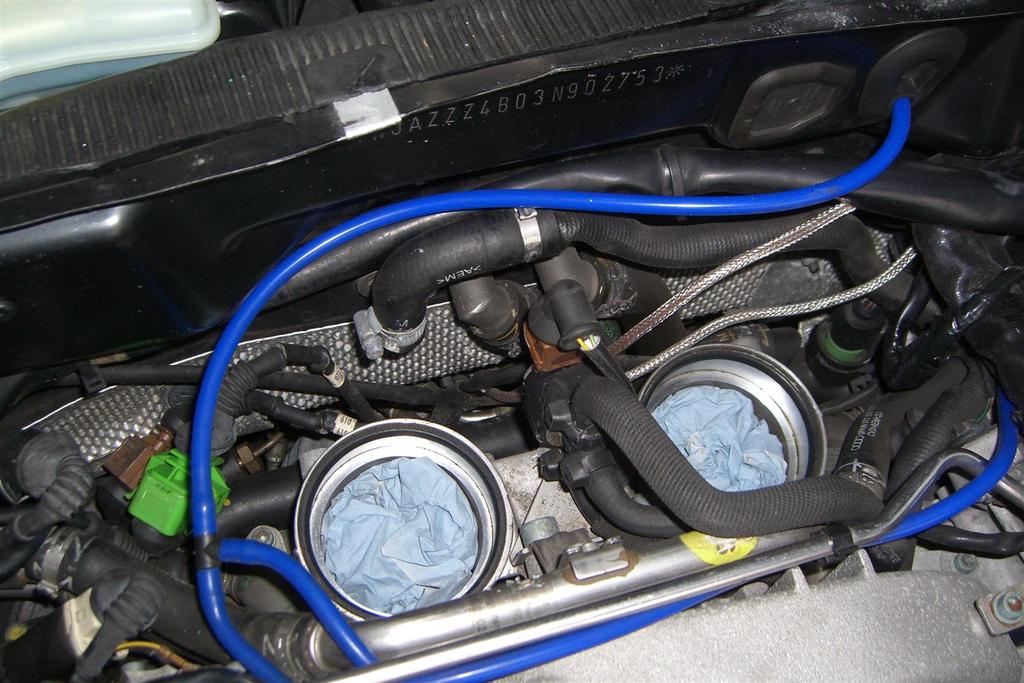
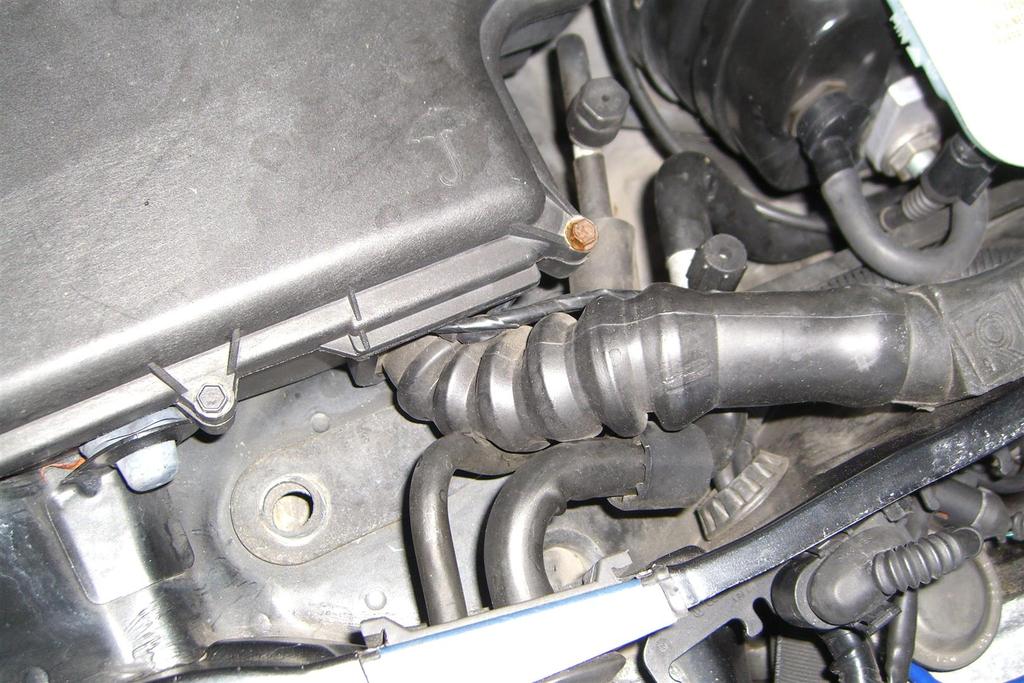
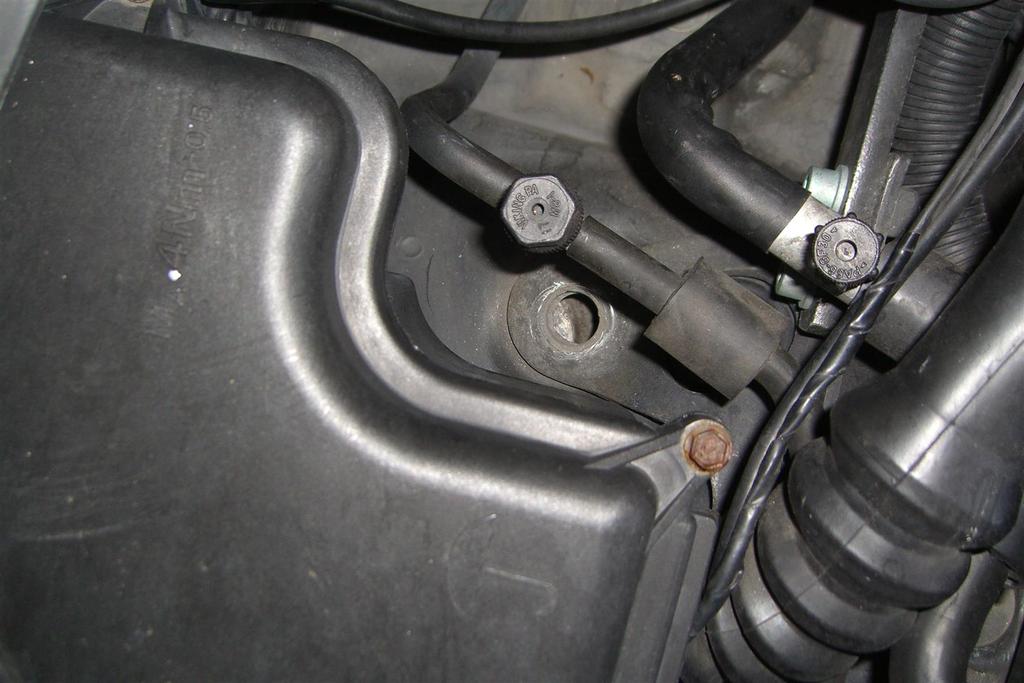
Take the air filter housing off and plug the intake holes with rags.
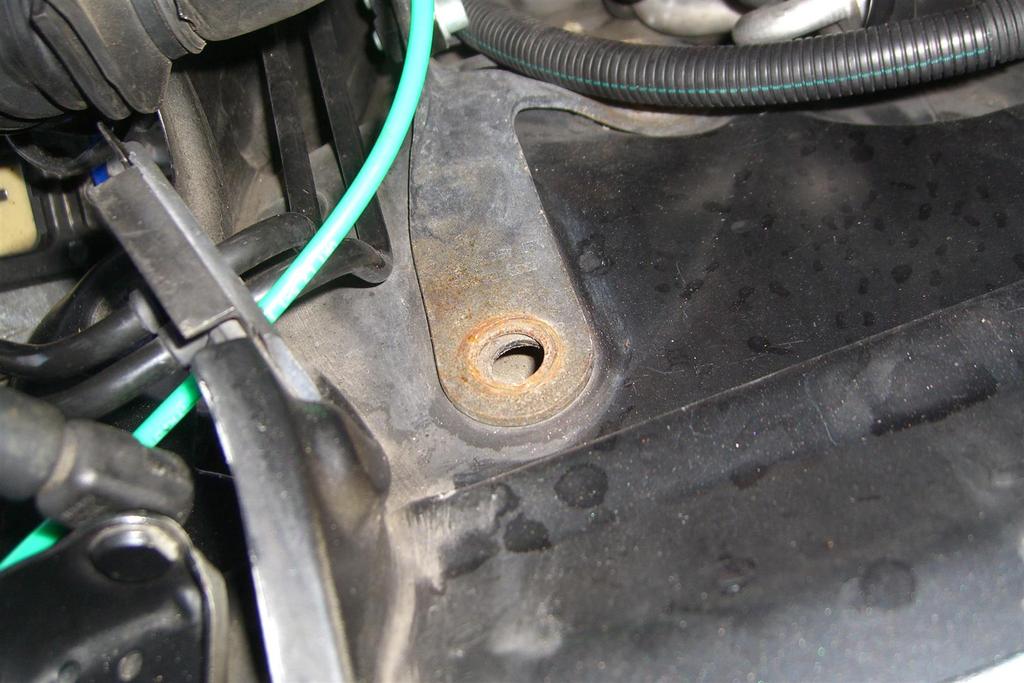
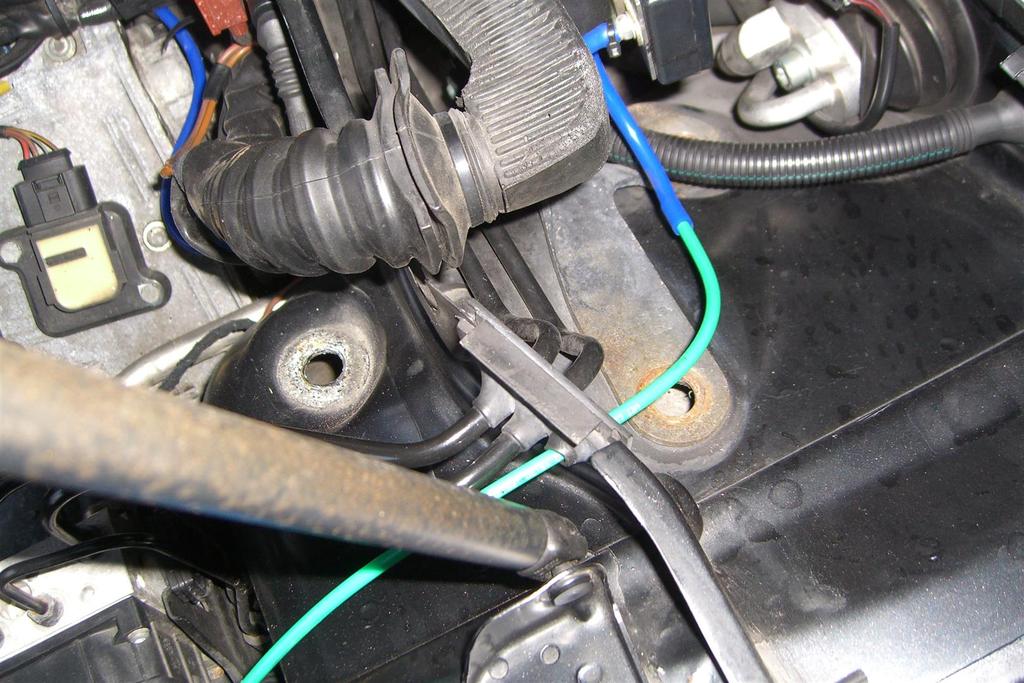
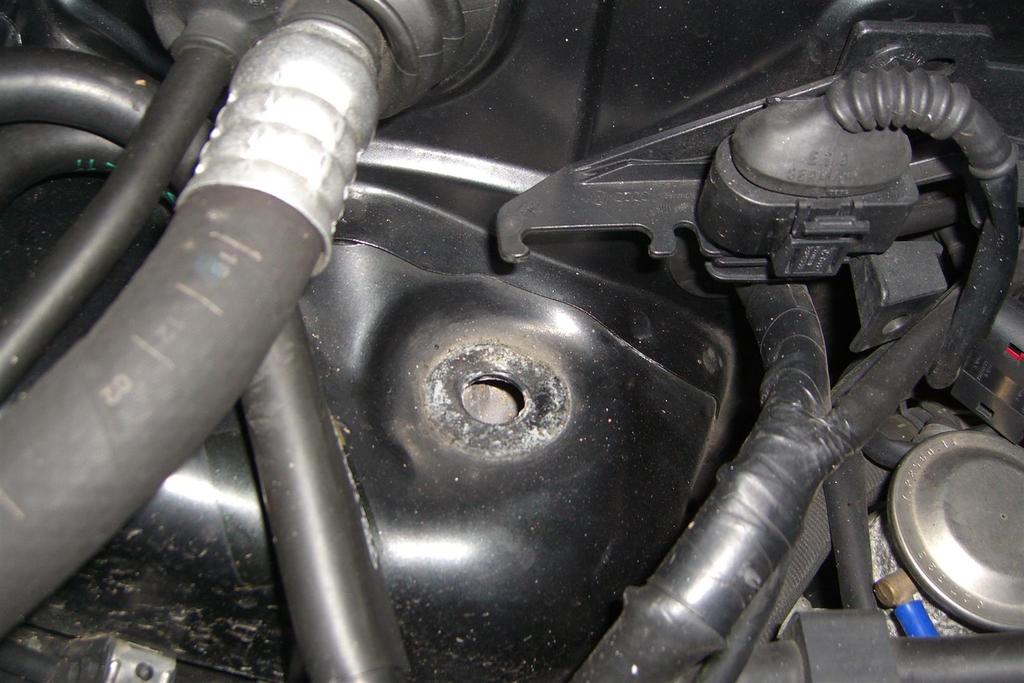
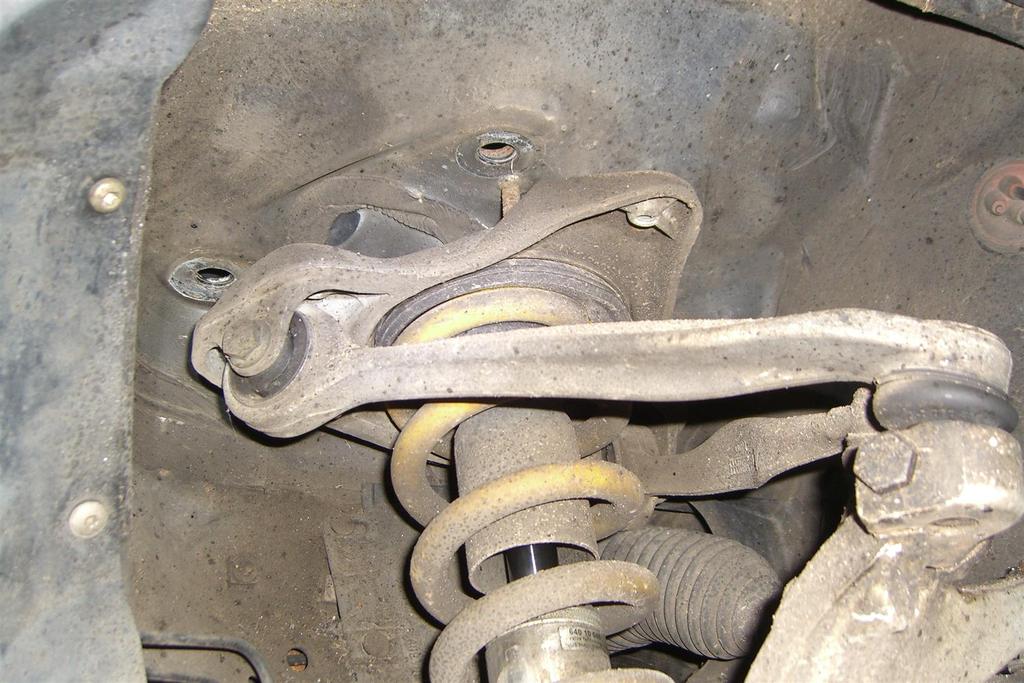
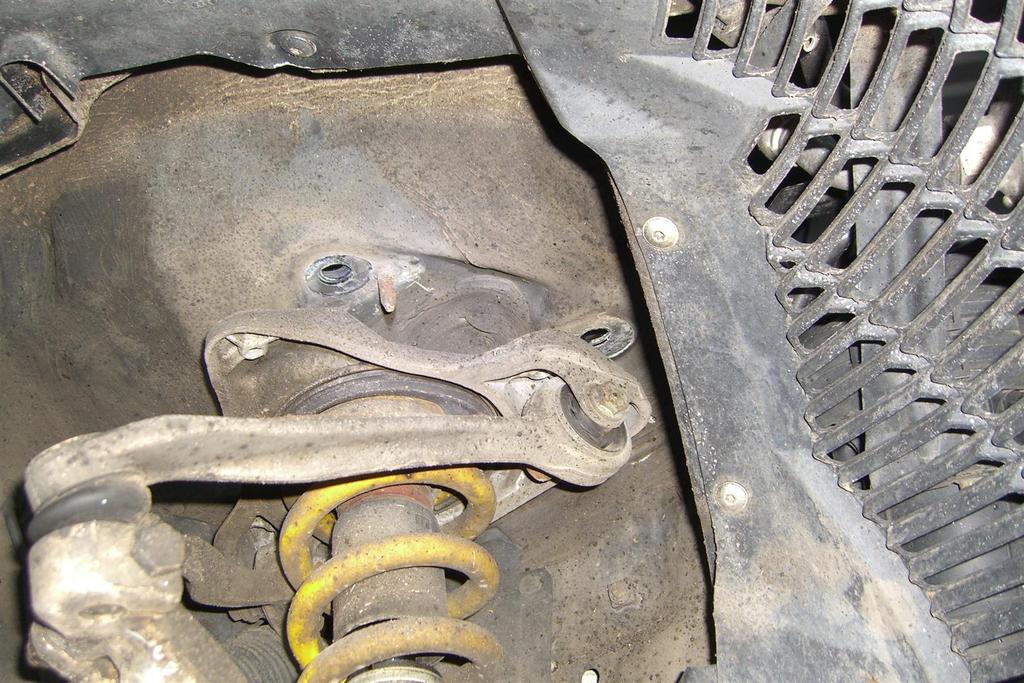
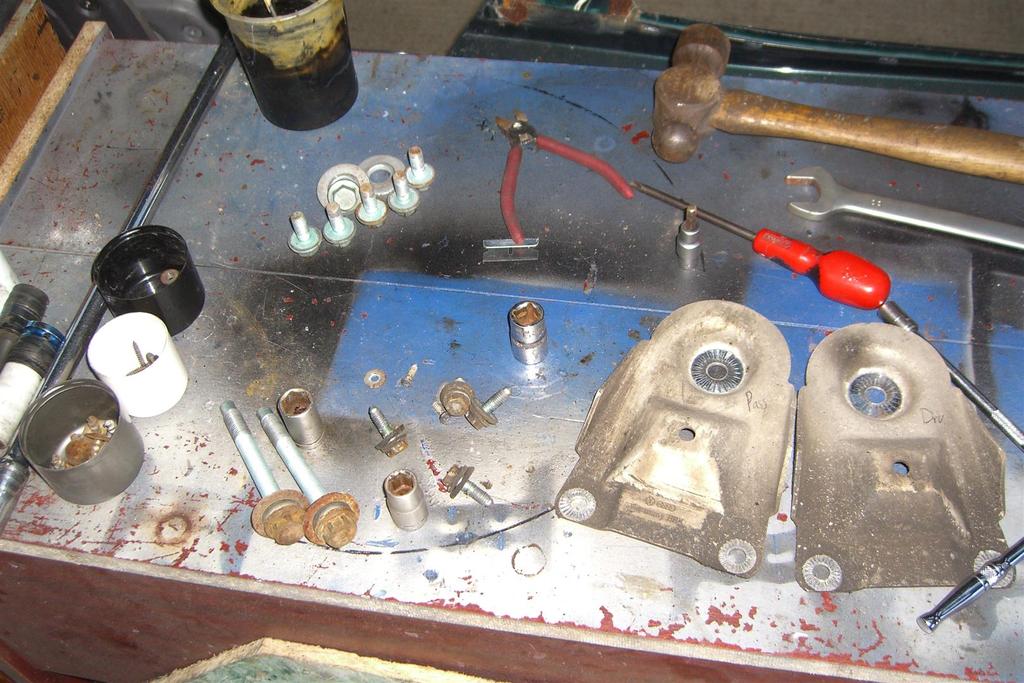
Unbolt the 3 bolts that hold the suspension strut to the car on each side.
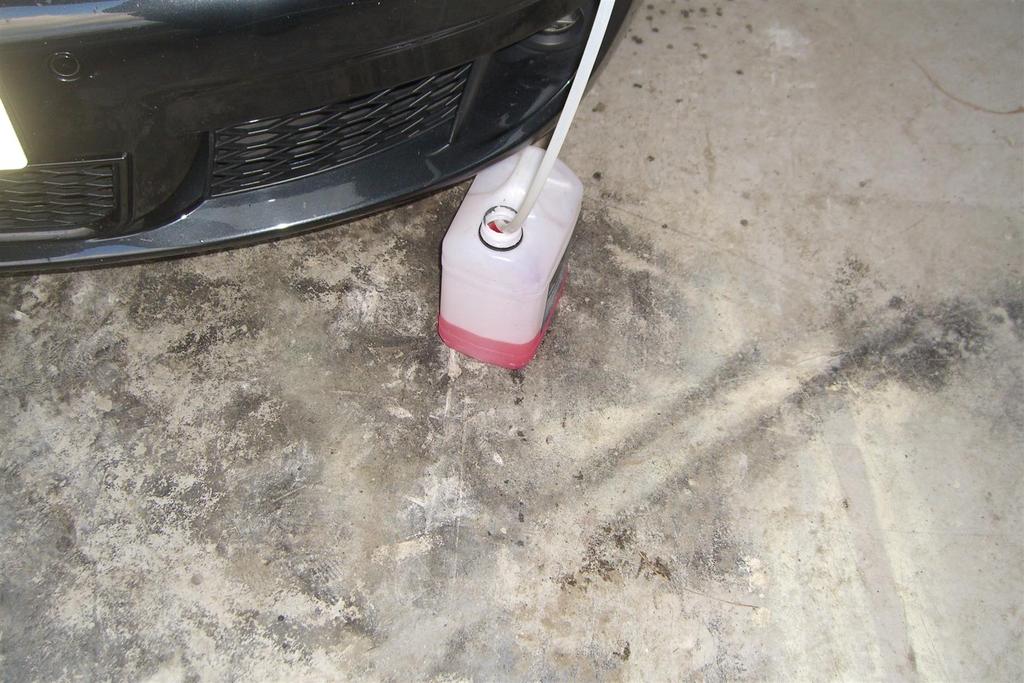
Siphon the coolant from the header tank.
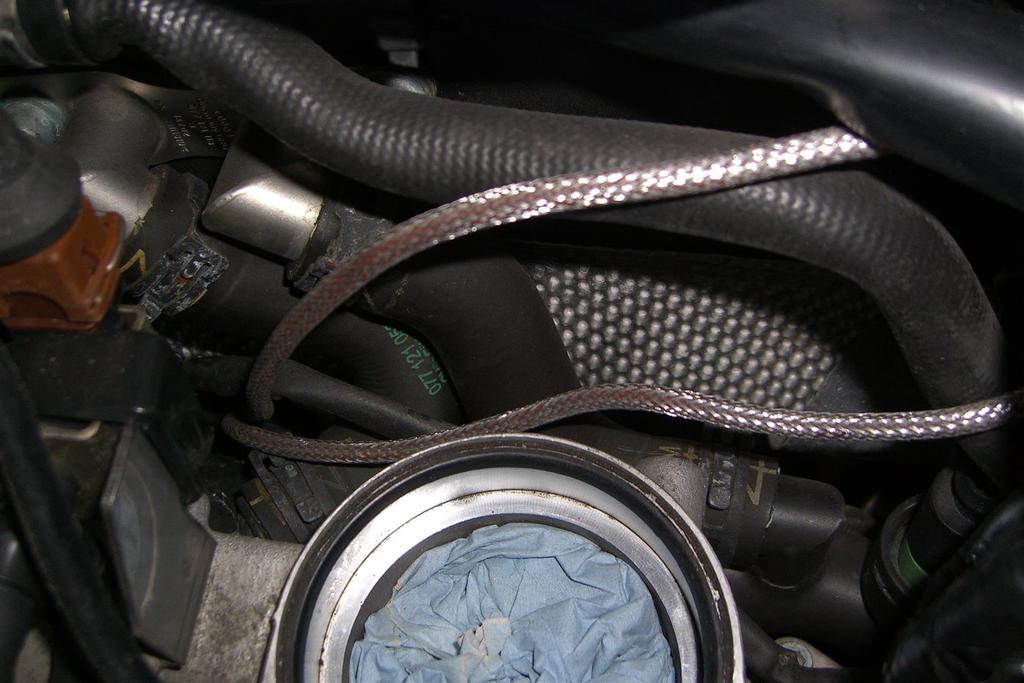
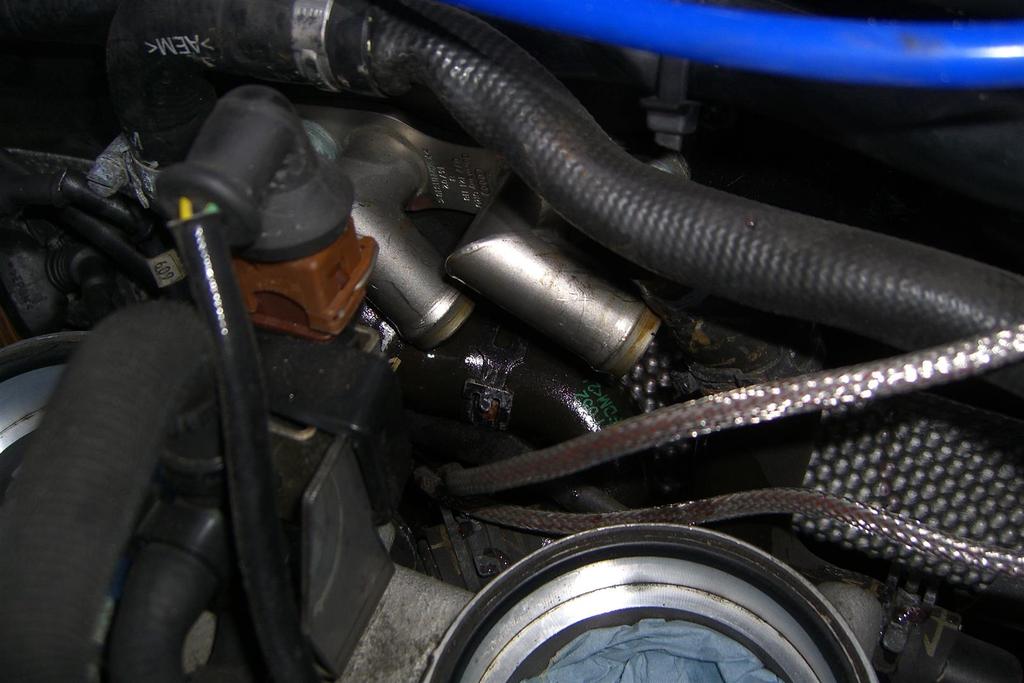
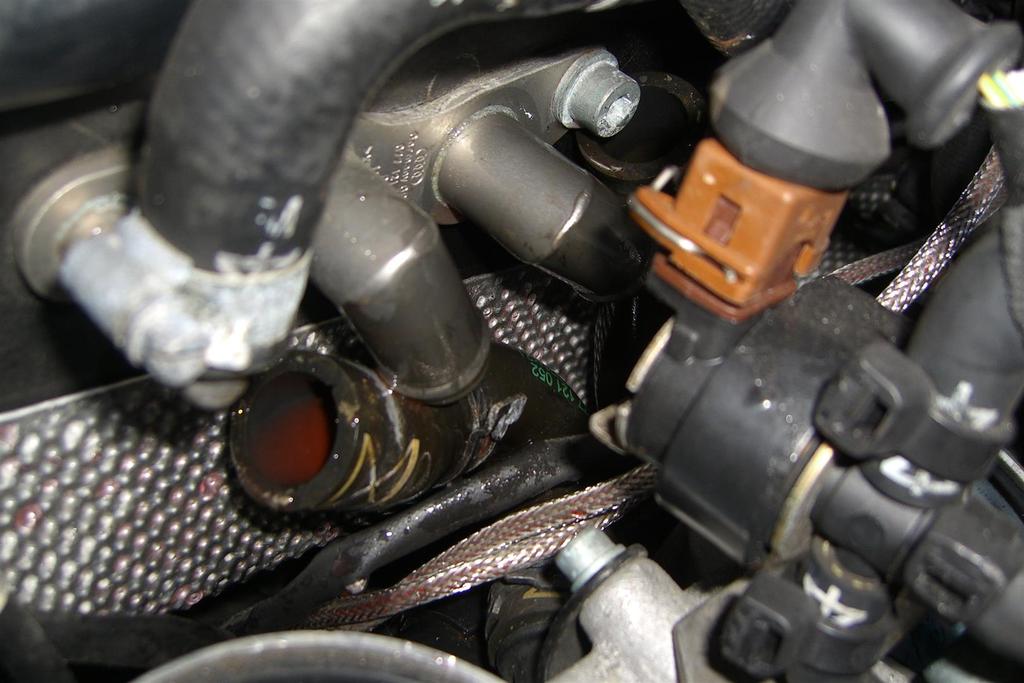
At the back of the engine the 2 coolant pipes that go to the heater matrix need to be disconnected as the engine will be dropped 2-3 inches. About ½ a litre of coolant will be lost when opening these pipes.
With all of the above done, raise the car again.
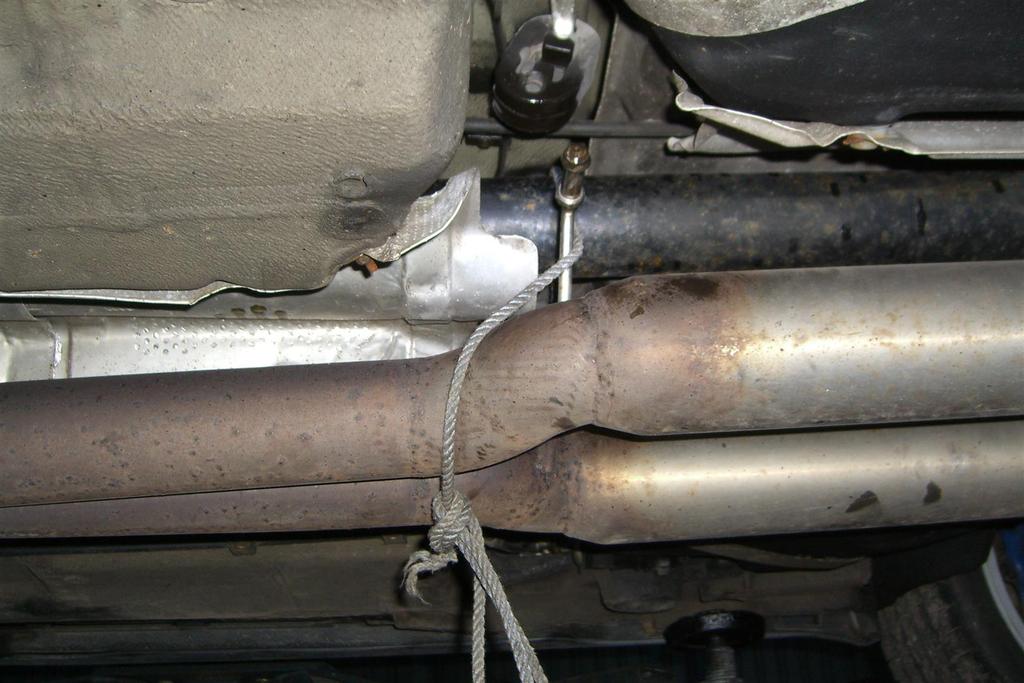
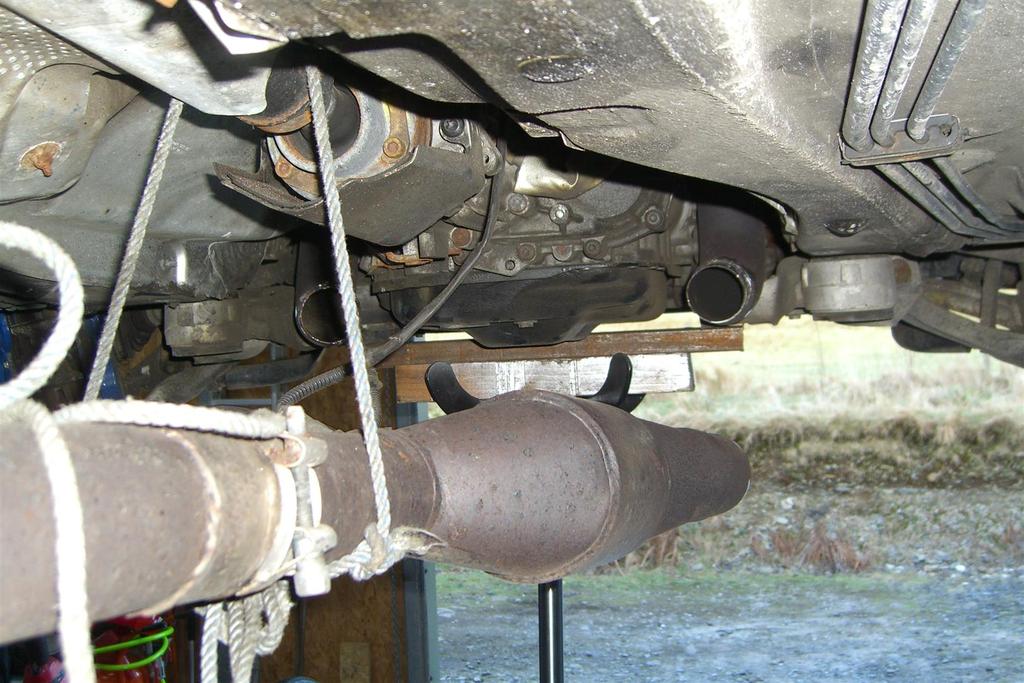
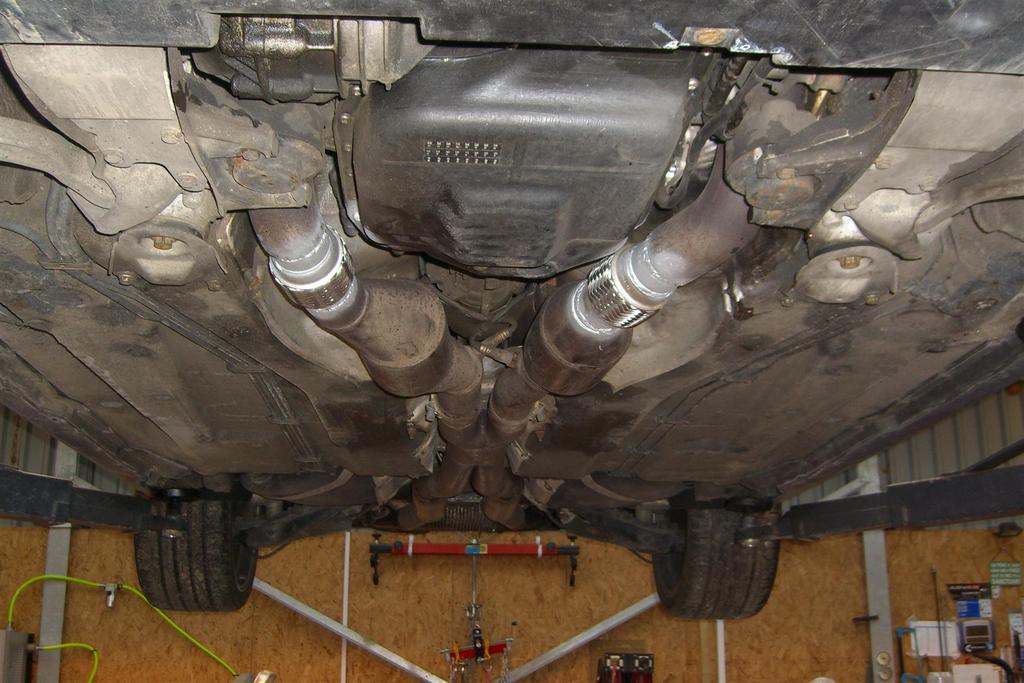
Optionally (and preferably) at this stage the entire rear cat back section of the exhaust can be removed (personally I left it on) but this required a lot of faffing about with ropes to secure the exhaust after I had dropped it from its rubber mounts.
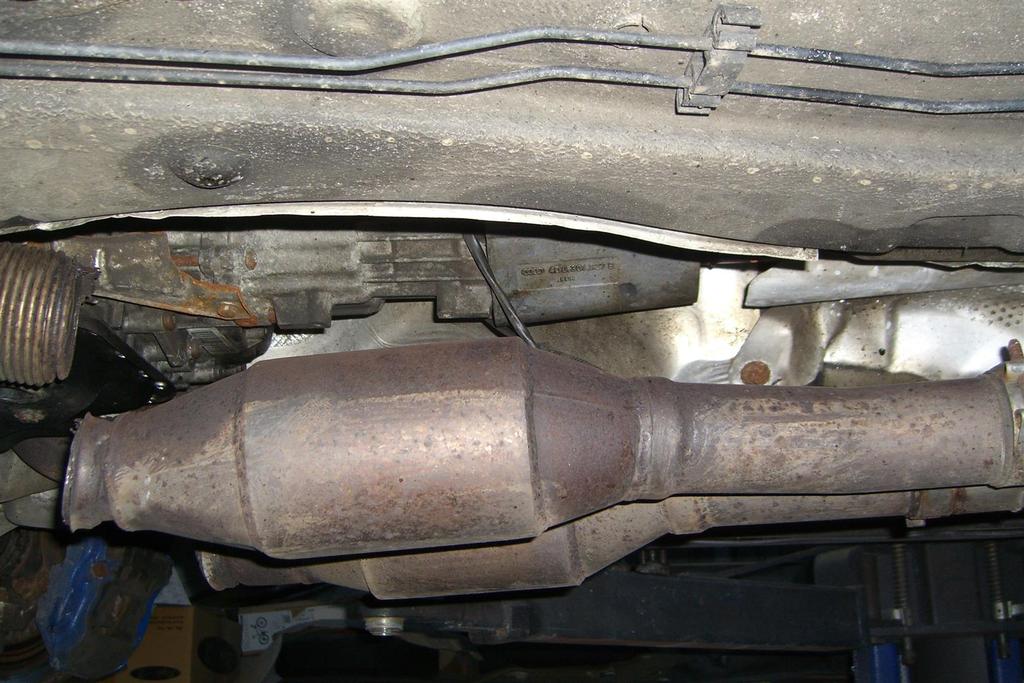
Also of note, at this point, I had considered removing the downpipes from the car completely, but I was unable to free the rear oxygen sensors from after the main cats, so decided to do all work in situ.
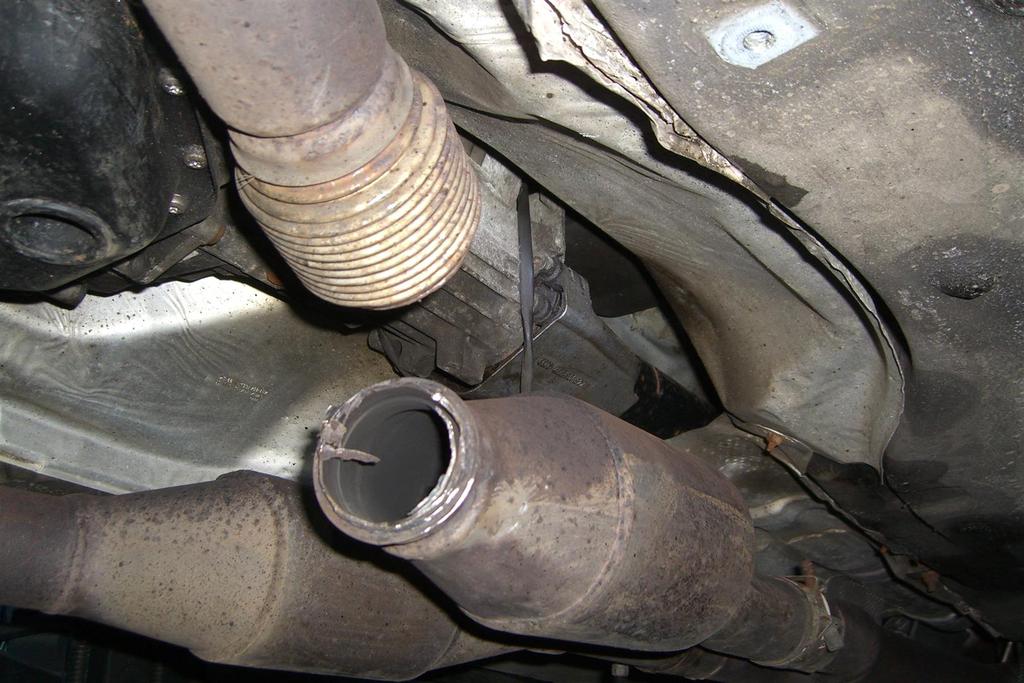
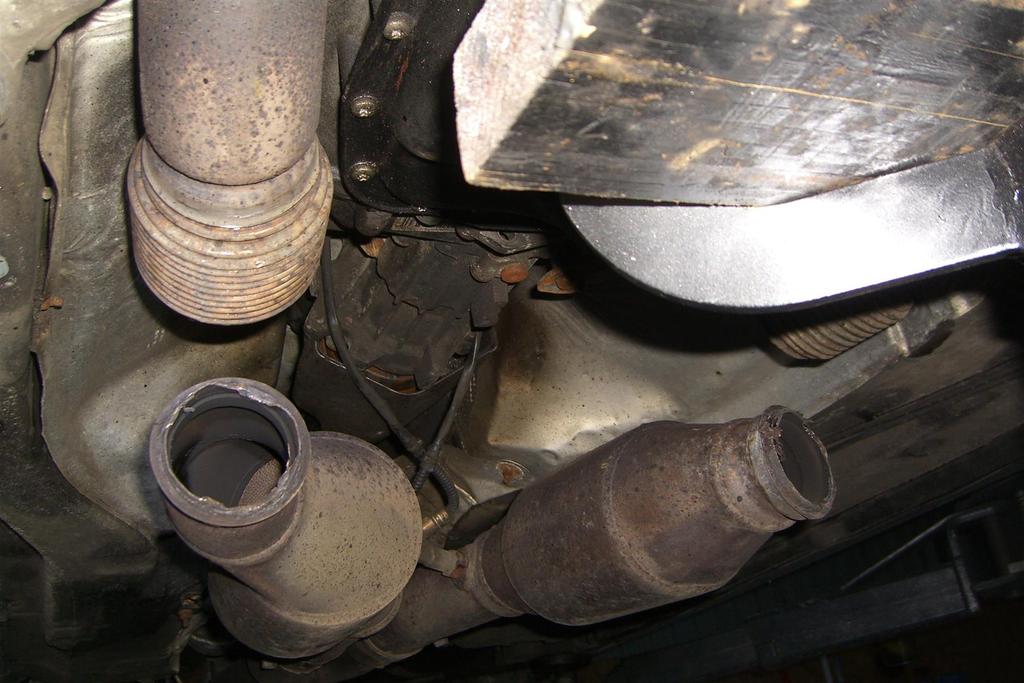
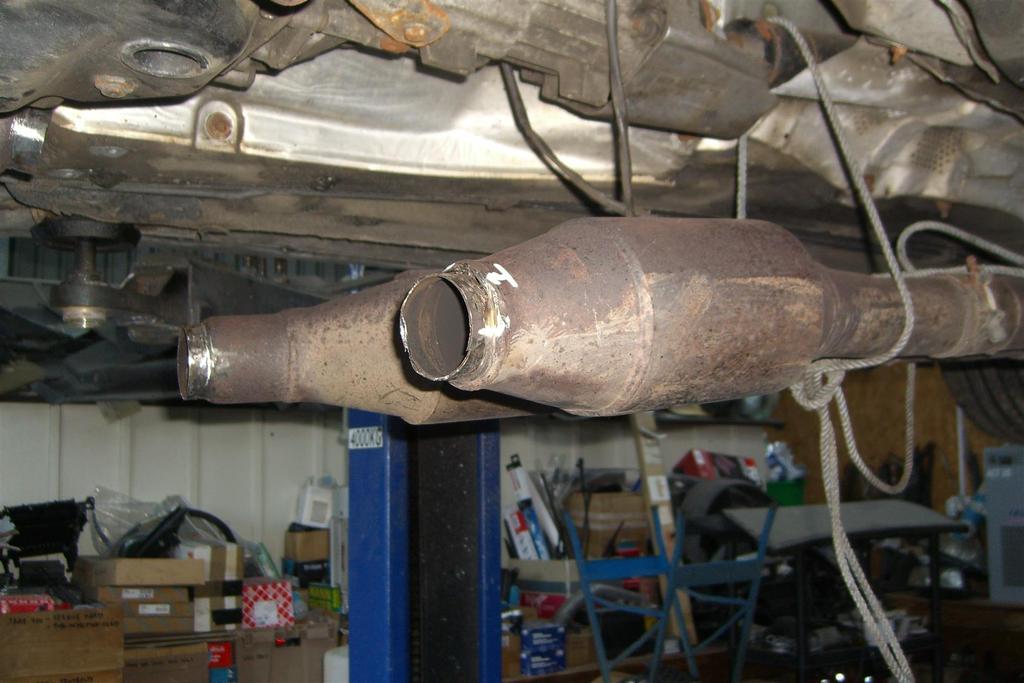
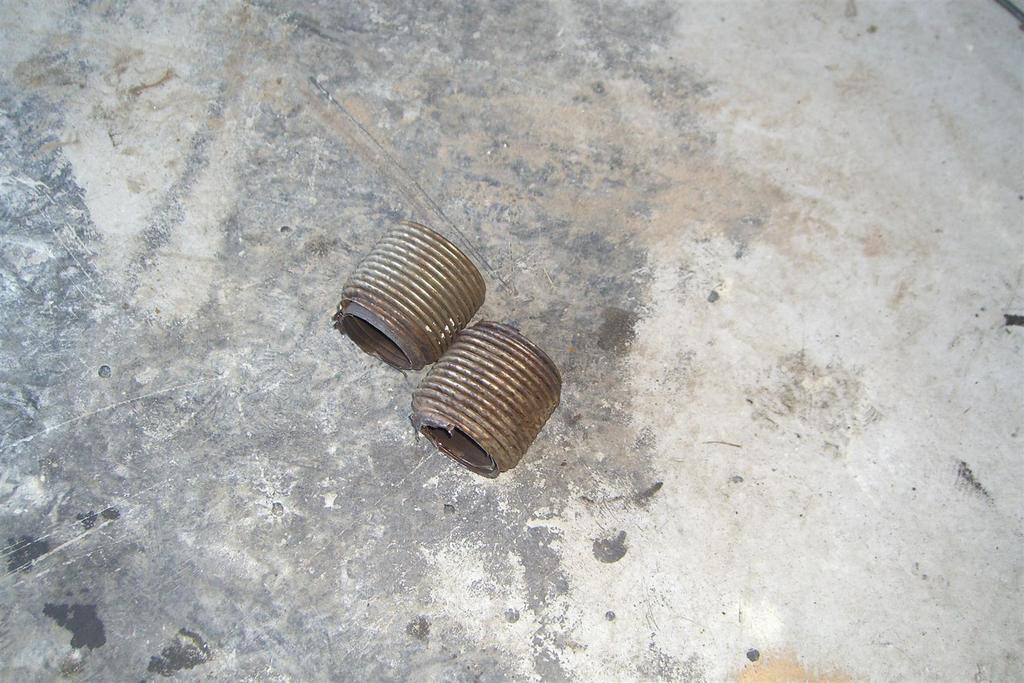
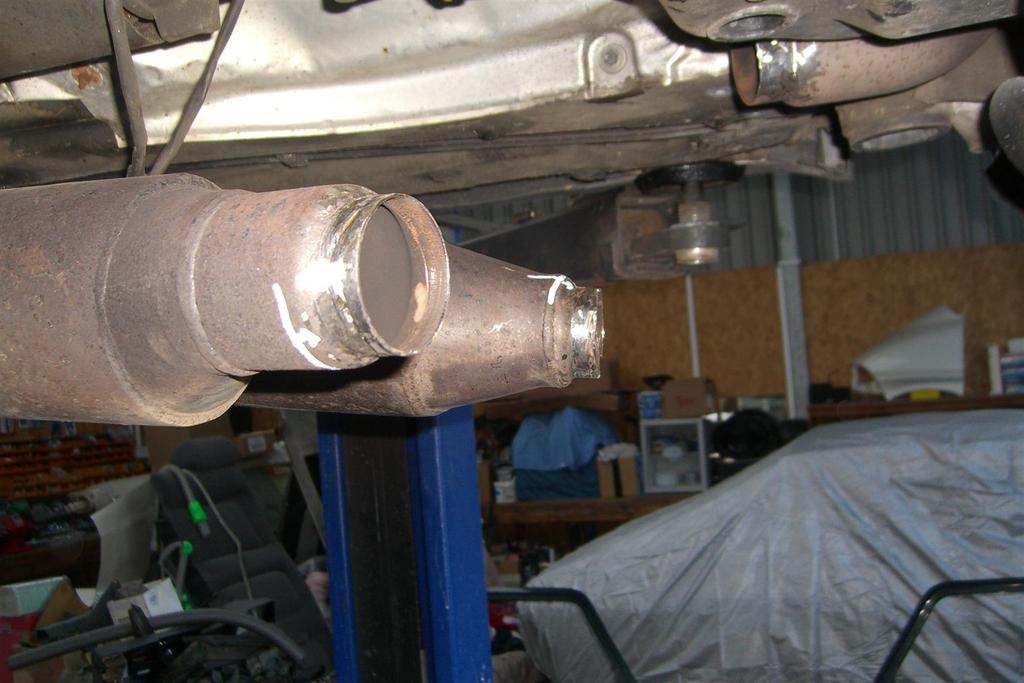
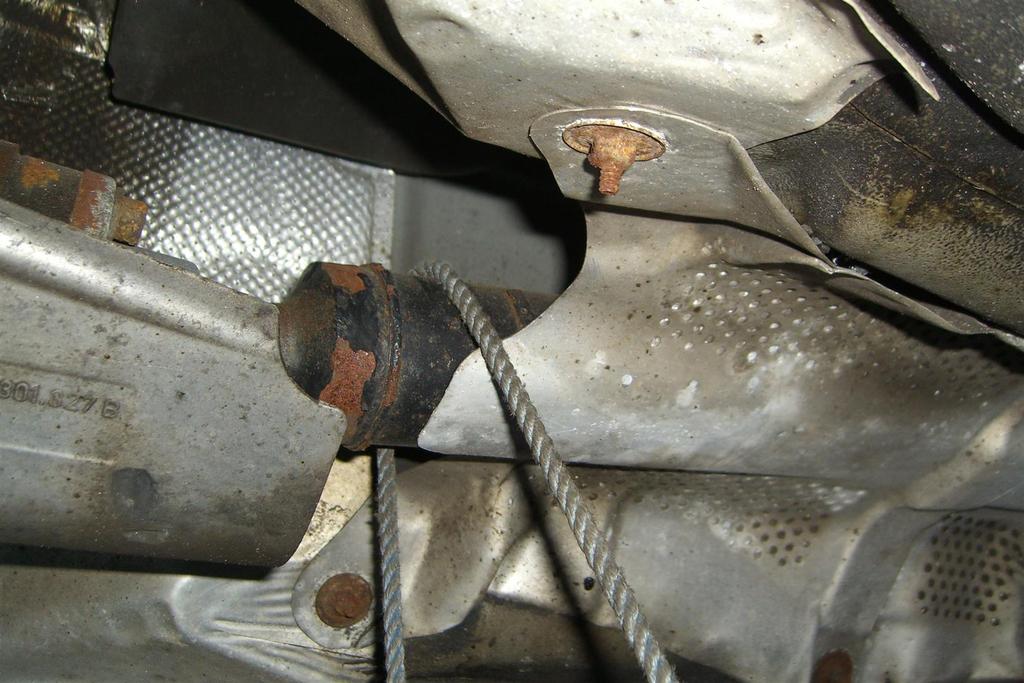
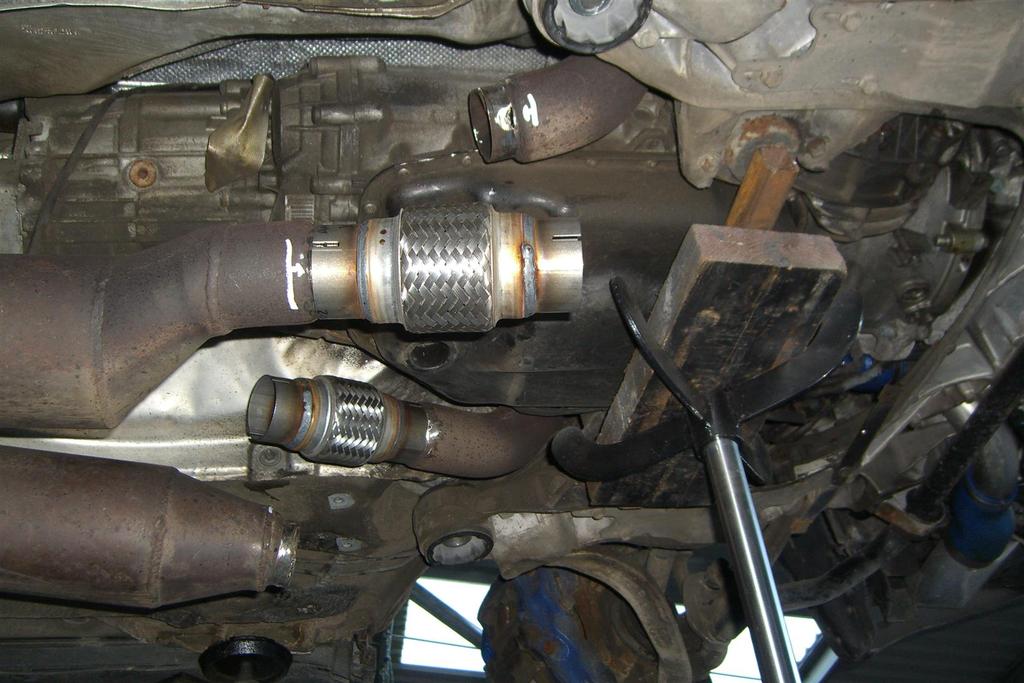
As both of my flexi’s were virtually severed I cut through the remaining metal which separated the exhaust from front to rear.
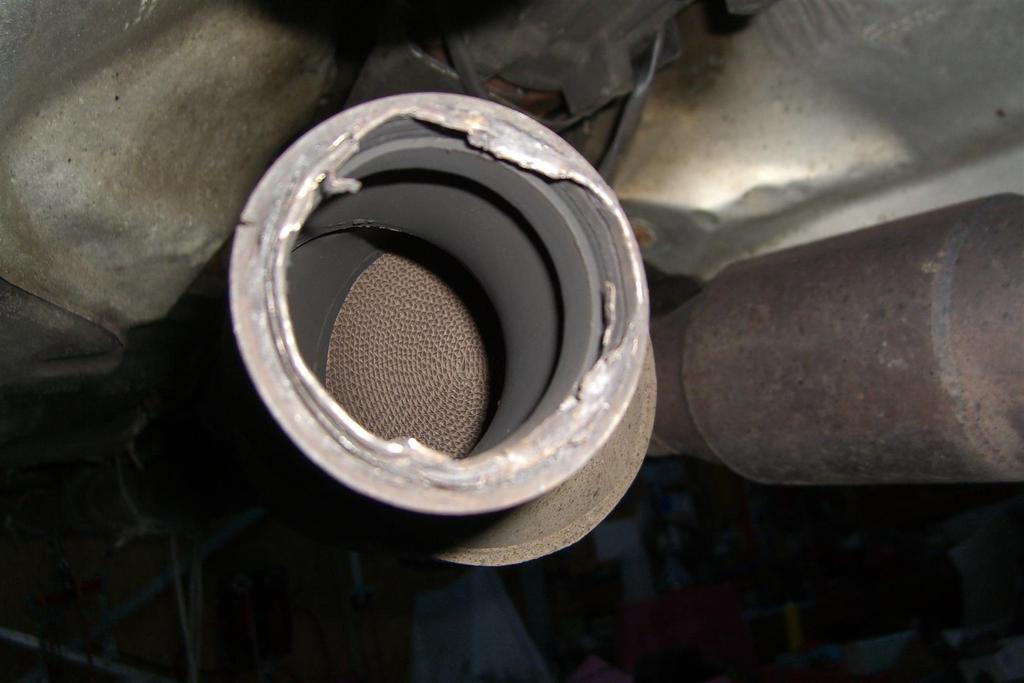
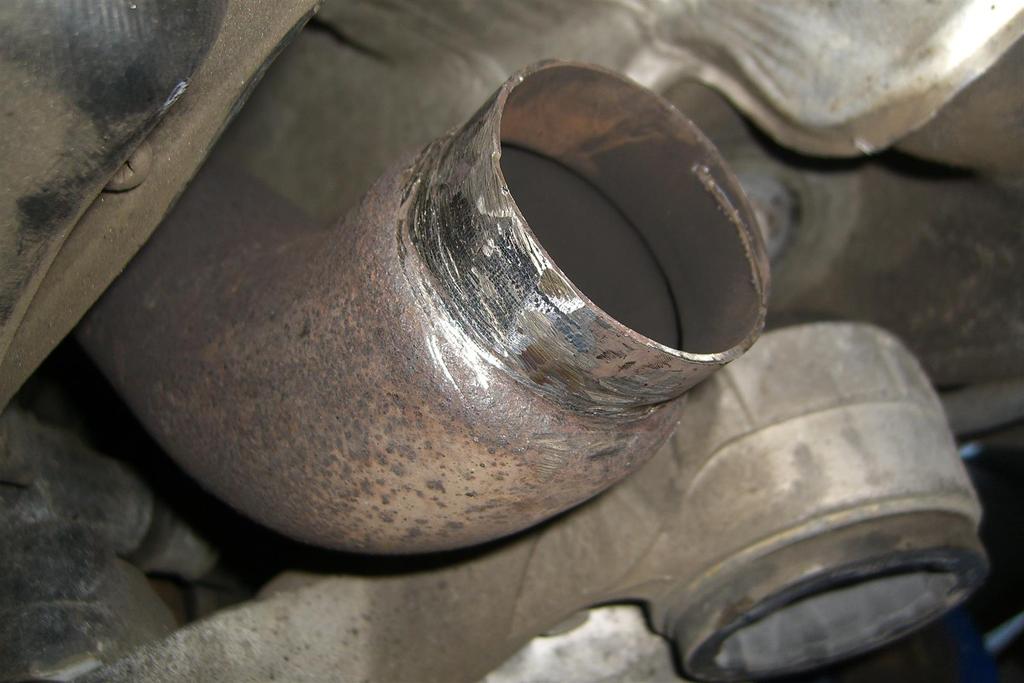
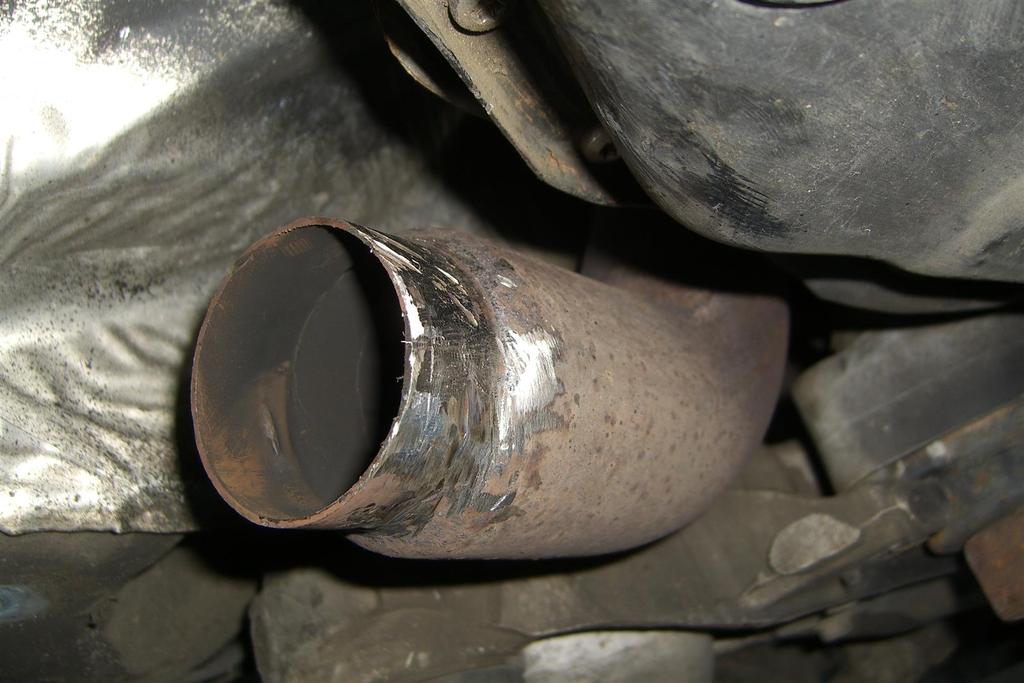
With the pipes cut the (not) fun part of the job of cutting and grinding the old flexi’s from the exhaust began. I used 2 x 4” grinders, one with a cutting disc and one with a grinding I disc. I also used a die grinder connected to my compressor to do the final cleaning. This is a horrible job and needs full PPE including a face mask. I reckon I had all 4 pipe ends cleaned in about 1 hour, but it was a long hour!!
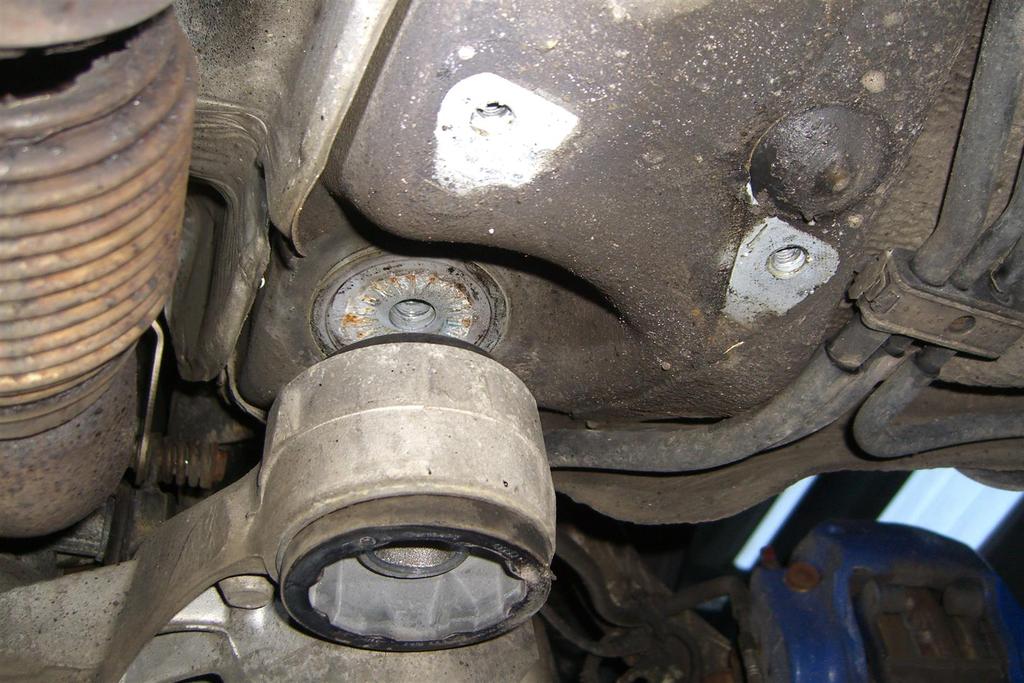
During the above ‘cleaning’ you need to lower the subframe at the rear to give adequate access to the top of the front part of the downpipes.
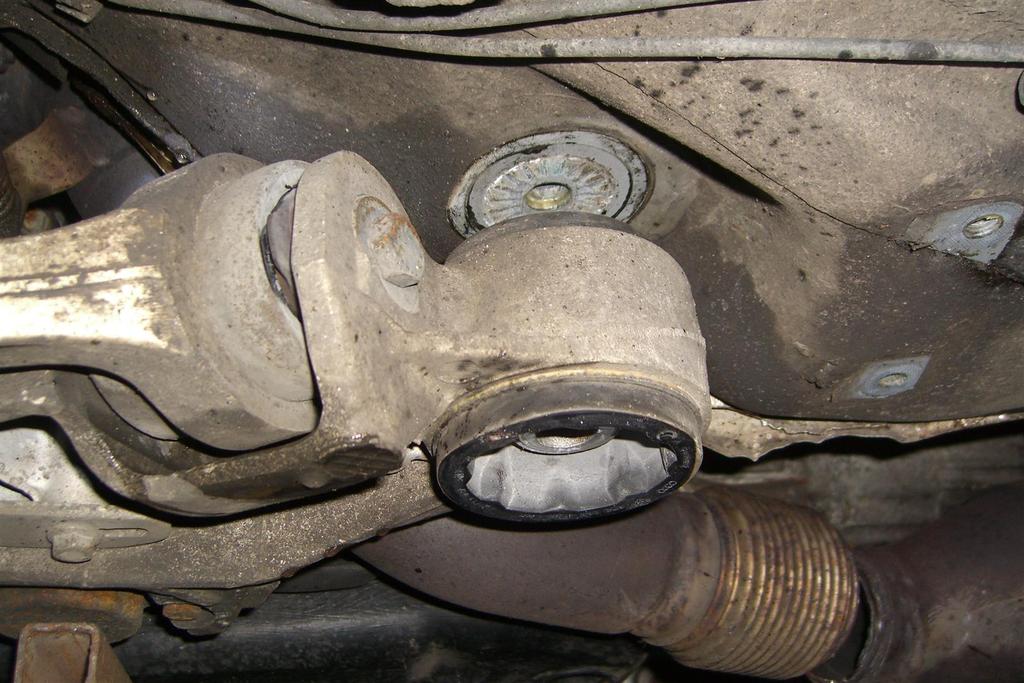
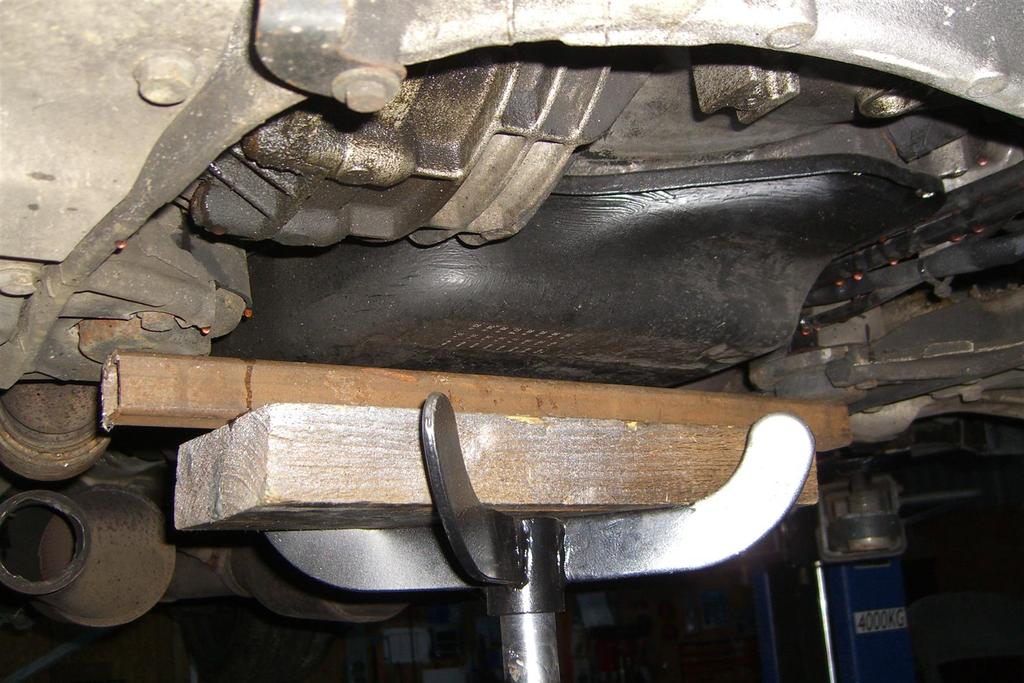
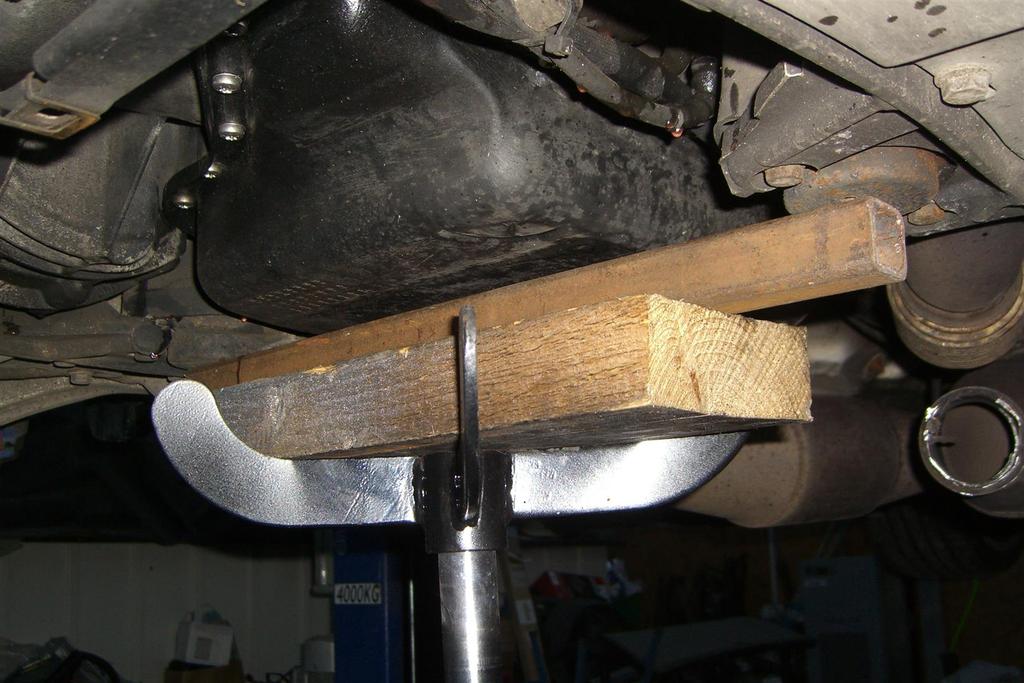
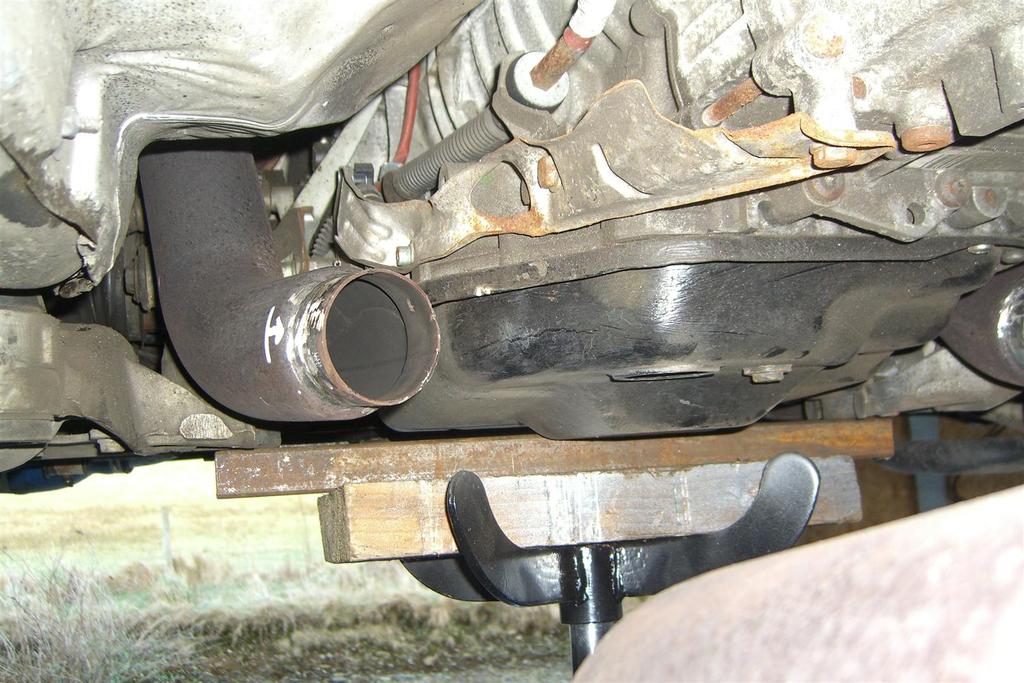
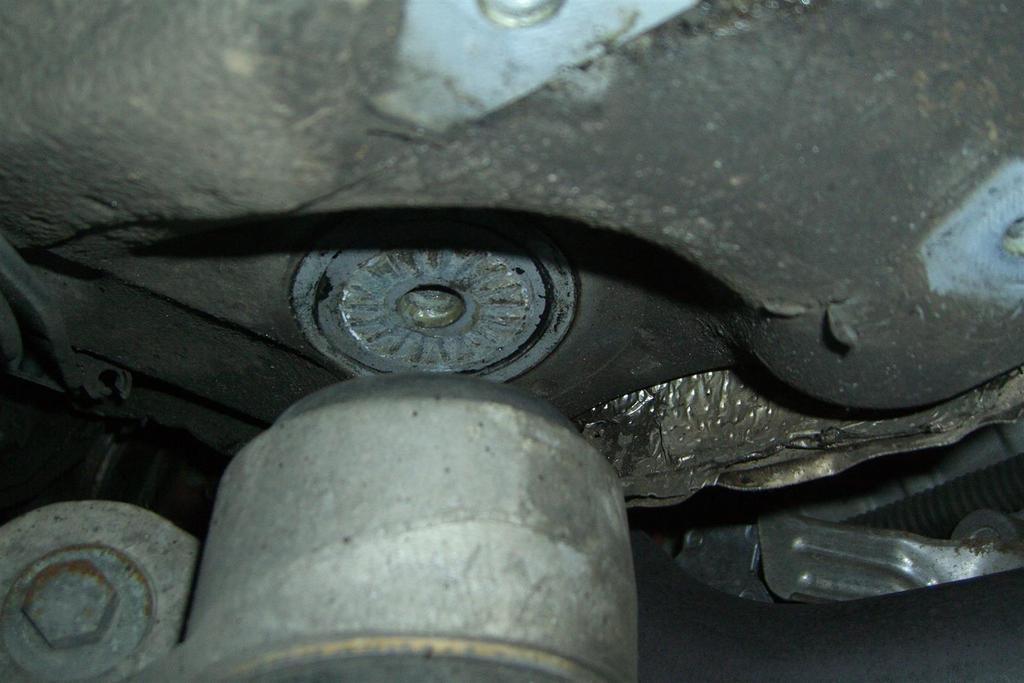
To lower the subframe, you need to firstly take the weight of the engine and box on your transmission jack (my one has about a 6ft height on it, so easy to adjust to a comfortable position) – I positioned the load bearing points at the bottom of the gearbox mounts and this worked well. Next loosen the 2 forward subframe bolts (18mm socket). I loosened these about 5mm each. Finally remove the 2 small bolts (13mm socket) from the rear subframe mounts and then remove the large rear subframe bolts entirely. Great care must be taken during this stage as the load will shift from the subframe bolts on the transmission jack.
The subframe will need to be lowered and raised a few times during this job to give the required clearance for each task.
Without disconnecting the driveshaft you can lower the subframe about 2 inches, this gives enough room to do this job. If the downpipes were to be removed I imagine the driveshaft would need separated at the aft of the box and this would allow 2 or 3 more inches of drop.
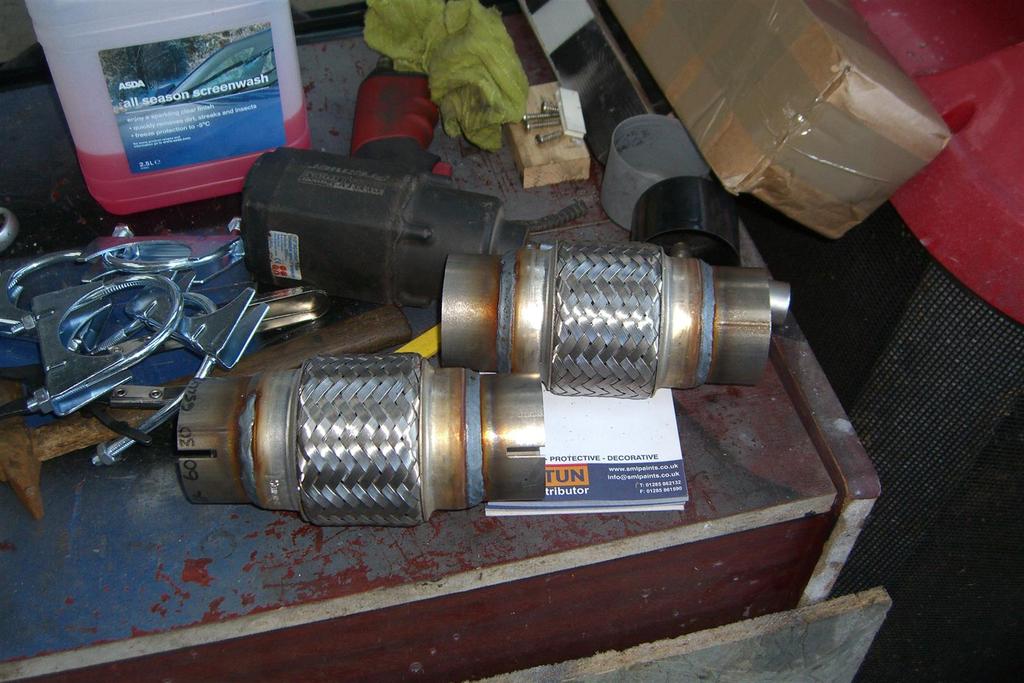
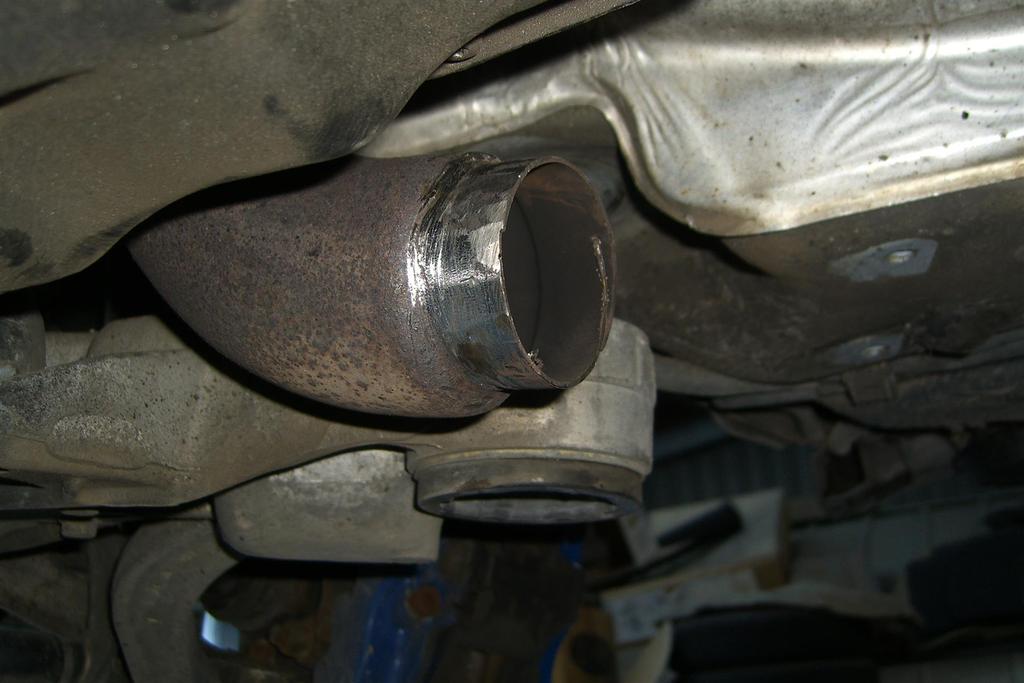
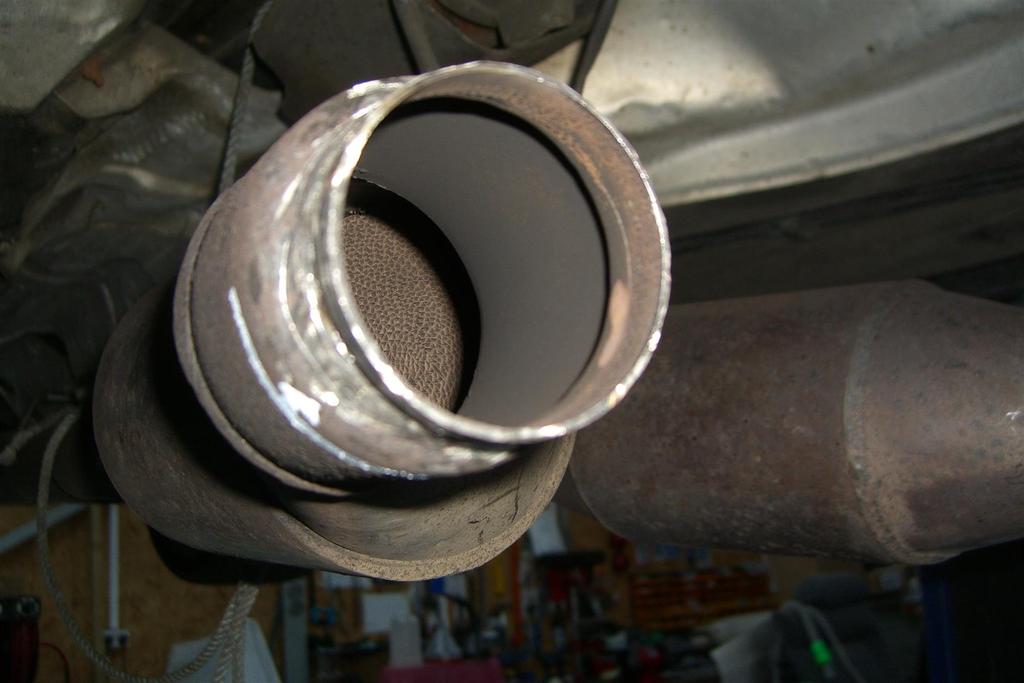
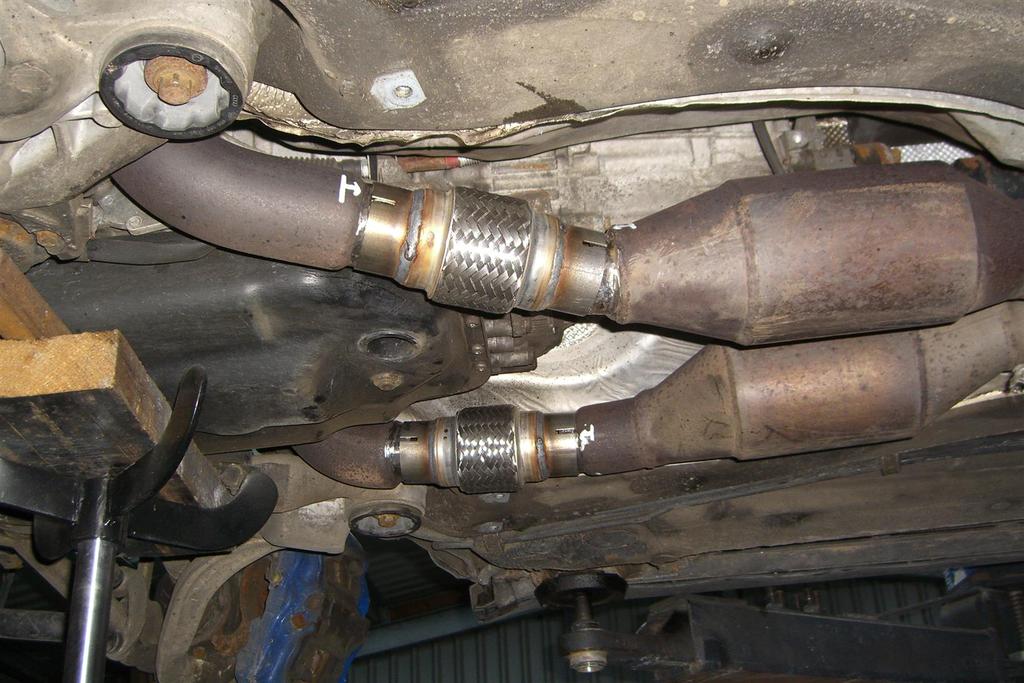
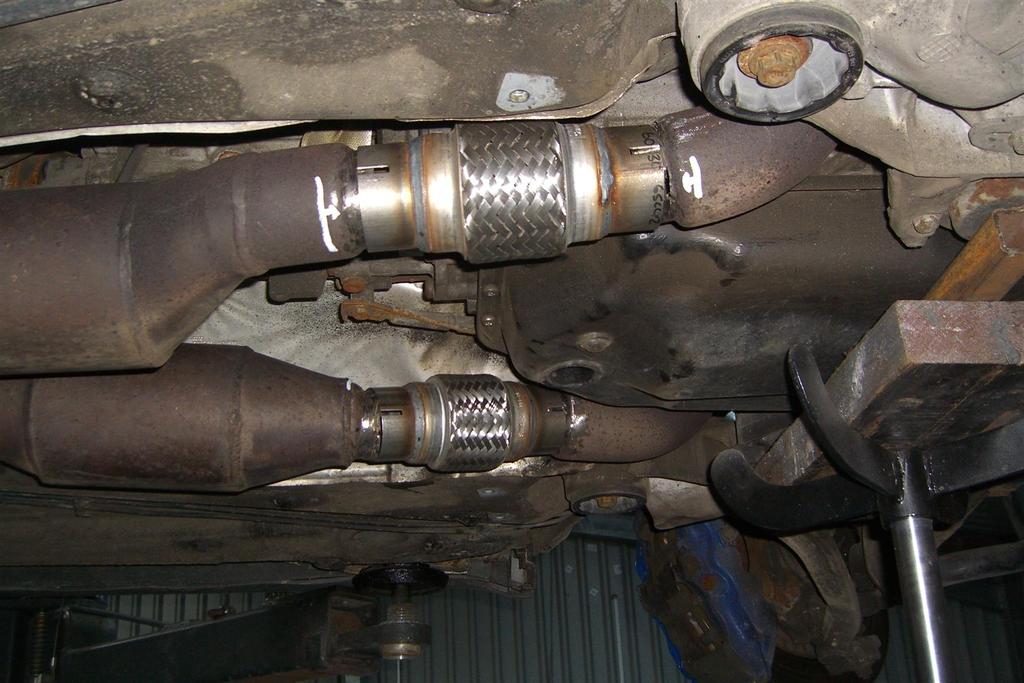
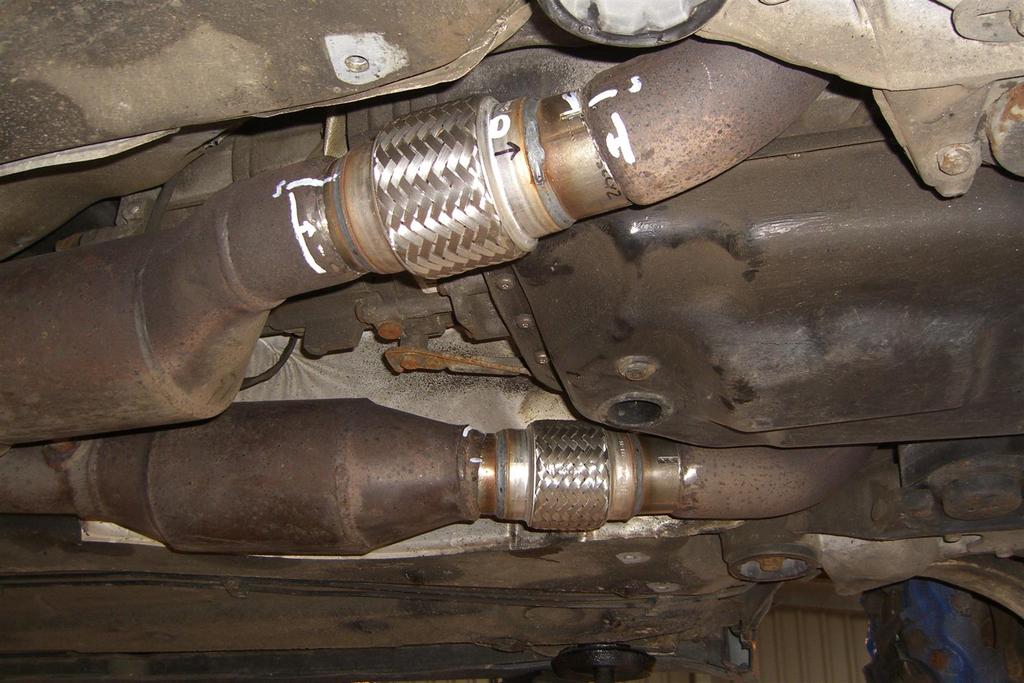
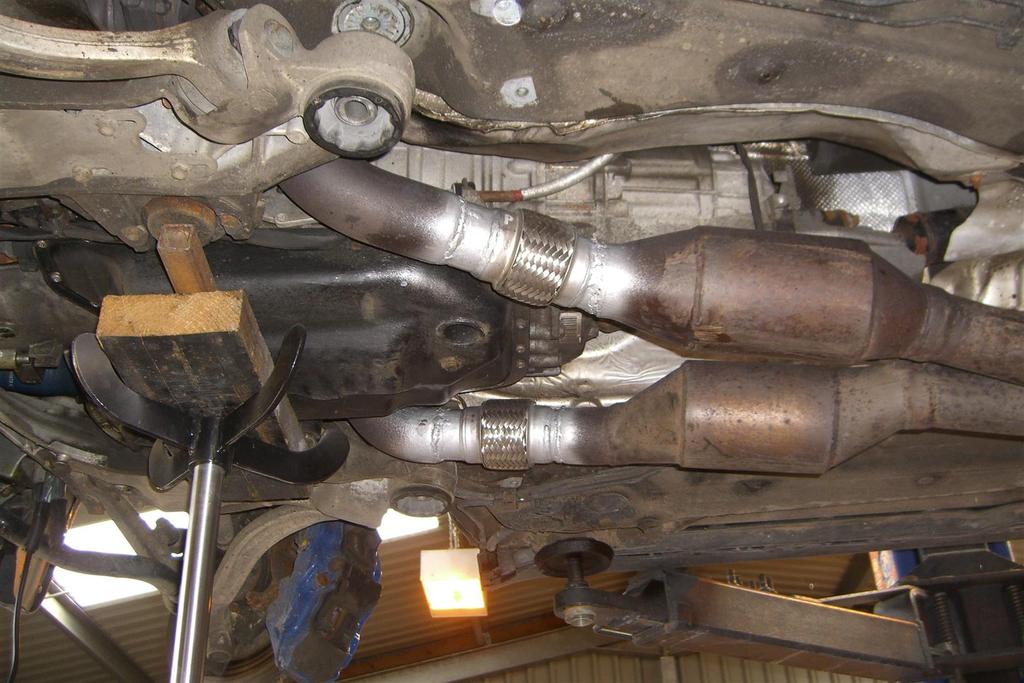
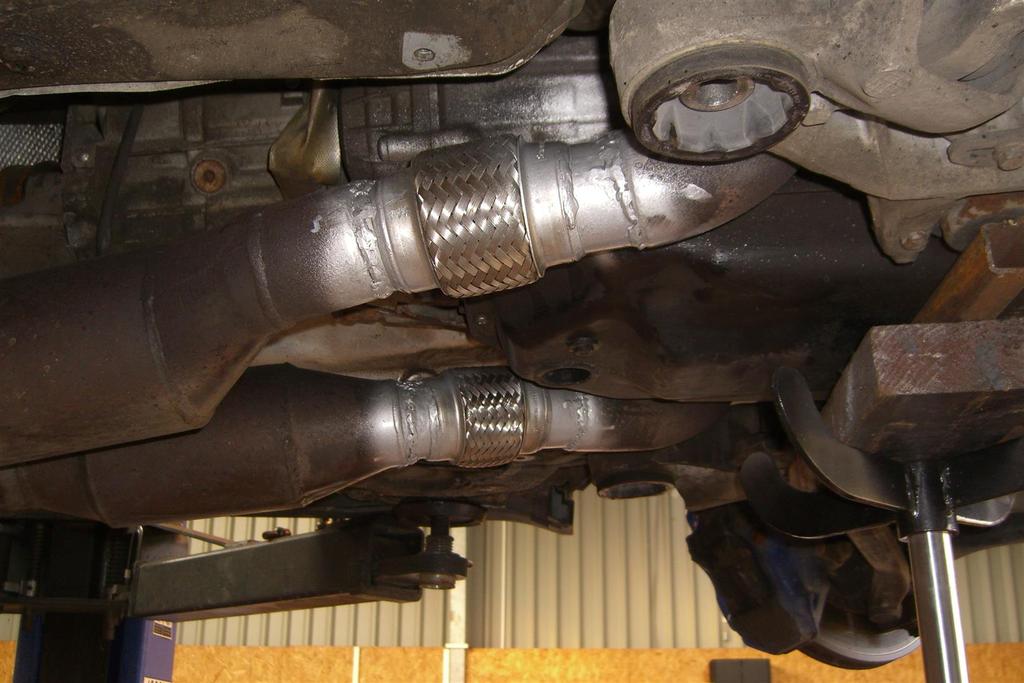
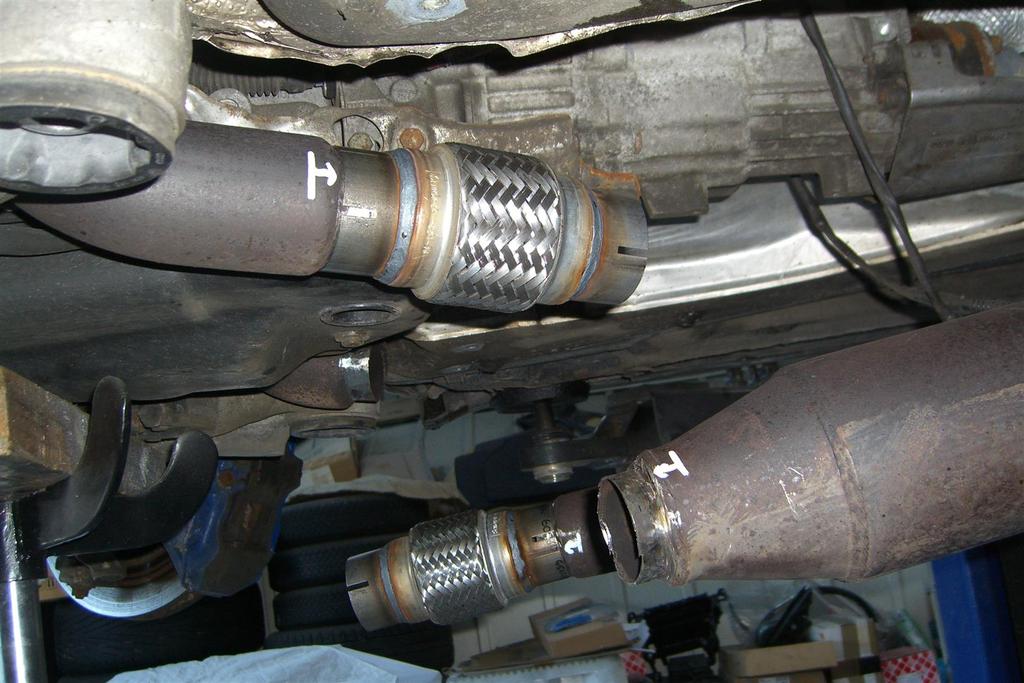
The fitting of the new flexi pipes will be a matter of personal choice. Personally I went for 2 x 150mm long flexi’s that were designed to sleeve over the 60mm pipe ends on the downpipes. It should be noted that the Milltek downpipes are 70mm diameter, but at the connection points for the flexi’s it reduces down to 60mm where the flexi’s are welded on.
I’m not going to go through the process of cutting and shaping up the new flexi’s, or the welding, but the pictures are self explanatory, however, even with the subframe lowered access to the top of the downpipe for welding is extremely limited and I had to use a mirror to see a few of the spots that needed welded.
When the new flexi’s are welded in place you pretty much put everything back in the reverse order of the dismantling.
When you top up the coolant you need to remember to bleed the coolant system through the pipe in the plenum chamber.
I spent about 6 hours doing this job and it was not really a fun job due to the amount of grinding and the constant awkward access, but the actual dropping of the subframe is very simple. The welding I did was less than perfect, but probably as good as I expected – the welds are air tight but not the prettiest!
Couple of points of note: The subframe should not be shifted from its original position or this will knock the alignment out – it certainly did not move for me, but I had marked everything just in case it did. The silver paint on the downpipes is just heat resistant paint to make the repair look a little neater for the photos!

I hope this was of some interest, for me it showed how relatively easy it is to drop the subframe to get access to the downpipes.
Pics below:
Image

Image

Image

Image

Image

Image

Image

Image

Image

Image

Image

Image

Image

Image

Image

Image

Image

Image

Image

Image

Image

Image

Image

Image

Image

Image

Image

Image

Image

Image

Image

Image

Image

Image

Image

Image

Image

Image

Image

Image

Image

Image

Image

Image

Image

Image

Image

Image

Image
Last edited by skyegtb on Tue Jul 31, 2018 6:03 pm, edited 2 times in total.
2003 RS6 MTM 568

User avatar
Shoppinit
Cruising
Posts: 20282
Joined: Wed Dec 31, 2008 6:24 pm

Re: DIY to replace both exhaust downpipe flexi’s

Post by Shoppinit » Sat Feb 11, 2017 10:00 am

Thanks for posting this. Very tidy job. :thumbs:

I am going to have to replace mine at some point since they snagged on something and ripped a bit of the weave. I knew it would be a barsteward job and you've confirmed it. Think I'll put it off for a long as possible.

I suspect this is pretty much impossible to do without a proper lift.
Daytona RS6 C5 Avant. Viper'd, Billies, Waggers, MTM box brain, C6 stoppers, xcarlink, R8 coolant cap (woohoo)
///M3 E46 | XC90 (V8, natch) | Passat GTE | RR Classic V8 flapper
"The major difference between a thing that might go wrong and a thing that cannot possibly go wrong is that when a thing that cannot possibly go wrong goes wrong it usually turns out to be impossible to get at and repair."

User avatar
skyegtb
3rd Gear
Posts: 319
Joined: Thu Sep 04, 2008 6:37 am

Re: DIY to replace both exhaust downpipe flexi’s

Post by skyegtb » Sat Feb 11, 2017 10:48 am

Yeah, it's not the nicest job. I suppose it could be done on axle stands but that would make the grinding and welding even more difficult and unpleasant.
2003 RS6 MTM 568

User avatar
mavada
Cruising
Posts: 3270
Joined: Thu Nov 11, 2010 1:19 pm
Location: The Neanderthal land

Re: DIY to replace both exhaust downpipe flexi’s

Post by mavada » Sat Feb 11, 2017 12:17 pm

...now we have seen your car from underneath, do you have some piccies from above?
Nice Job by the way :D
If you can't go to the track, bring the track to you.
Mugello Blue C5 RS6 Avant
Viper Tuning ECU/TCU
MTM Bimoto wheels 9,5 x 19 ET 30 LK 5x112 with 275/30/19 tyres
MTM exhaust system cat back 4-pipe with throttle valves in 2 pipes, control
Yellow Koni's
Porsche 959, gone but not forgotten.
Fight ALS disease https://www.youtube.com/watch?v=wGFDWTC8B8g

User avatar
skyegtb
3rd Gear
Posts: 319
Joined: Thu Sep 04, 2008 6:37 am

Re: DIY to replace both exhaust downpipe flexi’s

Post by skyegtb » Sat Feb 11, 2017 1:36 pm

Hi Mavada. If you search for my posts there are a few other DIY's and stuff with pics of my car in it.
2003 RS6 MTM 568

Mɐʇʇ
Cruising
Posts: 2718
Joined: Tue Oct 07, 2014 8:30 pm

Re: DIY to replace both exhaust downpipe flexi’s

Post by Mɐʇʇ » Sat Feb 11, 2017 6:47 pm

Nice job!

I also replaced both my flexi joints last time my motor was out.
Only point of caution was that I bought flexi joints that were for the correct size of the exhaust - and found that in this size the flex joints were smaller, creating a restriction.

In the end I bought flexijoints that were (I think) 2 sizes larger - these had the same inner dia on the flexi as the stock joints - so it took a little extra fabrication & welding to make up some sleeves to get them to fit the exhaust pipework.

The original downpipes, IIRC, are 63mm. But you need to buy 76mm flexis to get the correct ID on the flexi - and make sure they are "ILOK" flexi's, and also as short as possible.
These are the closest to OEM I could find:
http://www.ebay.co.uk/itm/262580409861? ... EBIDX%3AIT
The flexi section, diameter wise, was near as dammit identical size to stock, I think. (I was a bit obsessed about not creating any more exhaust restriction)

And obviously a bit of extra swearing cutting the ends off and welding in sleaves to get them to fit the exhaust.
"not a professional engineer, mechanic and mechanist"

User avatar
skyegtb
3rd Gear
Posts: 319
Joined: Thu Sep 04, 2008 6:37 am

Re: DIY to replace both exhaust downpipe flexi’s

Post by skyegtb » Sat Feb 11, 2017 10:09 pm

I guess I was lucky because the replacements I ordered were near enough identical to the Milltek originals. There is definitely a restriction there from 70mm to 63mm approx, but I was happy enough replacing like for like.
Last edited by skyegtb on Sat Feb 11, 2017 11:11 pm, edited 1 time in total.
2003 RS6 MTM 568

Mɐʇʇ
Cruising
Posts: 2718
Joined: Tue Oct 07, 2014 8:30 pm

Re: DIY to replace both exhaust downpipe flexi’s

Post by Mɐʇʇ » Sat Feb 11, 2017 10:14 pm

Yeh, I got a bit carried away! :biggrin3:
"not a professional engineer, mechanic and mechanist"

User avatar
EireRS6
1st Gear
Posts: 74
Joined: Wed Dec 27, 2017 1:58 pm

Re: DIY to replace both exhaust downpipe flexi’s

Post by EireRS6 » Sun Jul 22, 2018 11:20 pm

Is the link above correct as I think I need one of these?

Sent from my SM-A520F using Tapatalk


Mɐʇʇ
Cruising
Posts: 2718
Joined: Tue Oct 07, 2014 8:30 pm

Re: DIY to replace both exhaust downpipe flexi’s

Post by Mɐʇʇ » Mon Jul 23, 2018 10:24 am

Yes - but be mindful the pipe size on these is bigger than stock as per my note, so they need welding on the sleeves to fit. The reason for that is to ensure you get the right size iloc joint to ensure no restriction.
"not a professional engineer, mechanic and mechanist"

User avatar
EireRS6
1st Gear
Posts: 74
Joined: Wed Dec 27, 2017 1:58 pm

Re: DIY to replace both exhaust downpipe flexi’s

Post by EireRS6 » Mon Jul 23, 2018 10:32 am

Cool. Cheers Matt

Sent from my SM-A520F using Tapatalk


User avatar
EireRS6
1st Gear
Posts: 74
Joined: Wed Dec 27, 2017 1:58 pm

Re: DIY to replace both exhaust downpipe flexi’s

Post by EireRS6 » Tue Jul 24, 2018 12:52 pm

Does anyone have access to the pictures that were in the original post by skyegtb?

User avatar
skyegtb
3rd Gear
Posts: 319
Joined: Thu Sep 04, 2008 6:37 am

Re: DIY to replace both exhaust downpipe flexi’s

Post by skyegtb » Tue Jul 24, 2018 4:33 pm

https://postimg.cc/gallery/17h8t2hme/

Try that link, that's where the pictures are meant to be!
2003 RS6 MTM 568

User avatar
EireRS6
1st Gear
Posts: 74
Joined: Wed Dec 27, 2017 1:58 pm

Re: DIY to replace both exhaust downpipe flexi’s

Post by EireRS6 » Tue Jul 24, 2018 4:50 pm

Much appreciated!

User avatar
EireRS6
1st Gear
Posts: 74
Joined: Wed Dec 27, 2017 1:58 pm

Re: DIY to replace both exhaust downpipe flexi’s

Post by EireRS6 » Tue Jul 24, 2018 11:24 pm

Is the O.D. of the pipe either side of the flexi 63mm?

Sent from my SM-A520F using Tapatalk


Post Reply

Return to “RS6 / RS6 plus (C5 Typ 4B) 2002-2004”

Who is online

Users browsing this forum: ALE-RS6, asgor, Majestic-12 [Bot] and 140 guests