
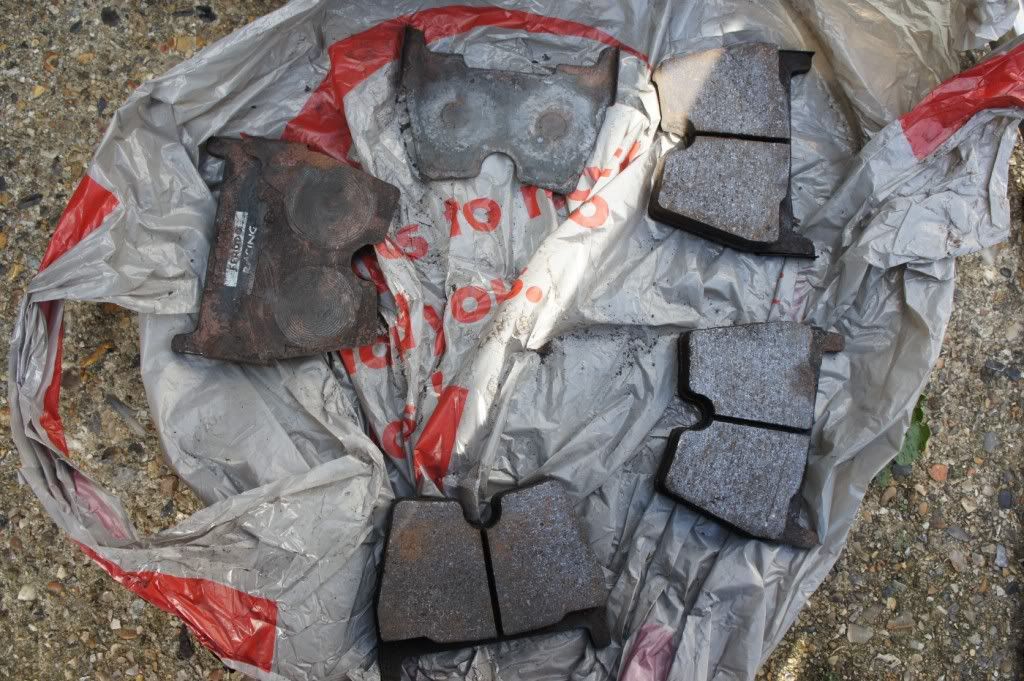
I actually put part used Phaeton discs and DS2500 pads on, bare in mind that these pads do not have wear sensors, mine have been looped to create an open circuit as to trick the car in thinking that the wear pads are ok.
So lets start.
Tools needed,
10mm spanner
21mm heavy duty socket (ideally a breaker bar)
Flat headed screwdriver
Long nose pliers
Hole punch or long nail or screw
Hammer
Star socket (size tbc)
Wheel brace and locking nut
WD40 & Grease
Scotchbright
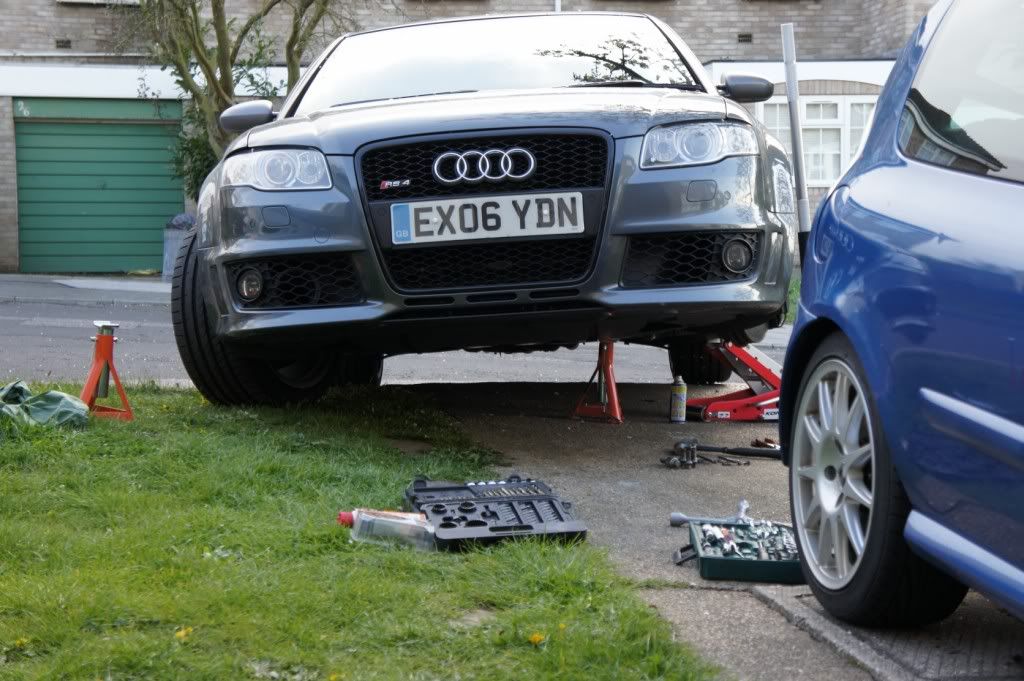
Jack and axle stands
Arm strength

Jack the car up and put car on front axle stands, this is not necessary for just changing the pads but is safer. Position axle stand under subframe
If changing the discs, put steering on full lock, if changing right hand side discs you need to use left full lock (so you can get to rear of calliper) and vice versa.
No need to undo break fluid reservoir cap, however, if you have had a fluid change when the pads are low you will need to undo cap, put rag around reservoir area to stop spillage. Due to the new pads being thicker, this will push the pistons in forcing the brake fluid up into the reservoir.
Now remove the two brake pad retaining pins. I used a thin screw (if you don't have a hole punch) and hammer the pin towards the engine, push down on the pin as to compress the anti rattle springs, this will make it easier to remove.

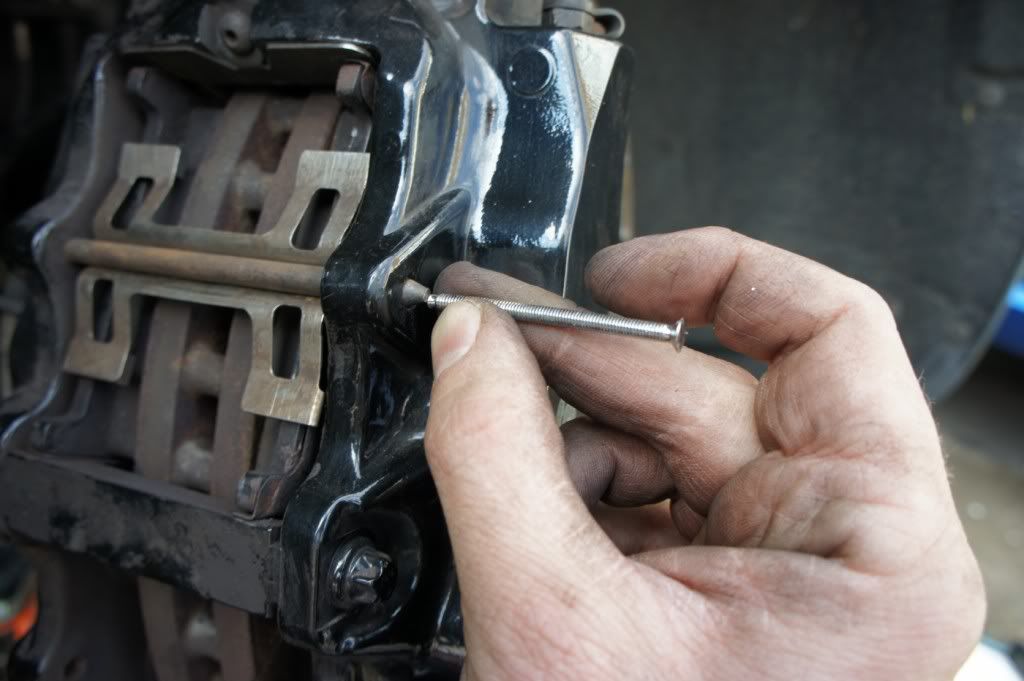
Once the brake pad retaining pics have been removed I would recommend cleaning them with some Scotchbrite as it makes it easier to remove in the future. If seized use a tiny bit of WD40 (don't go mental with it).
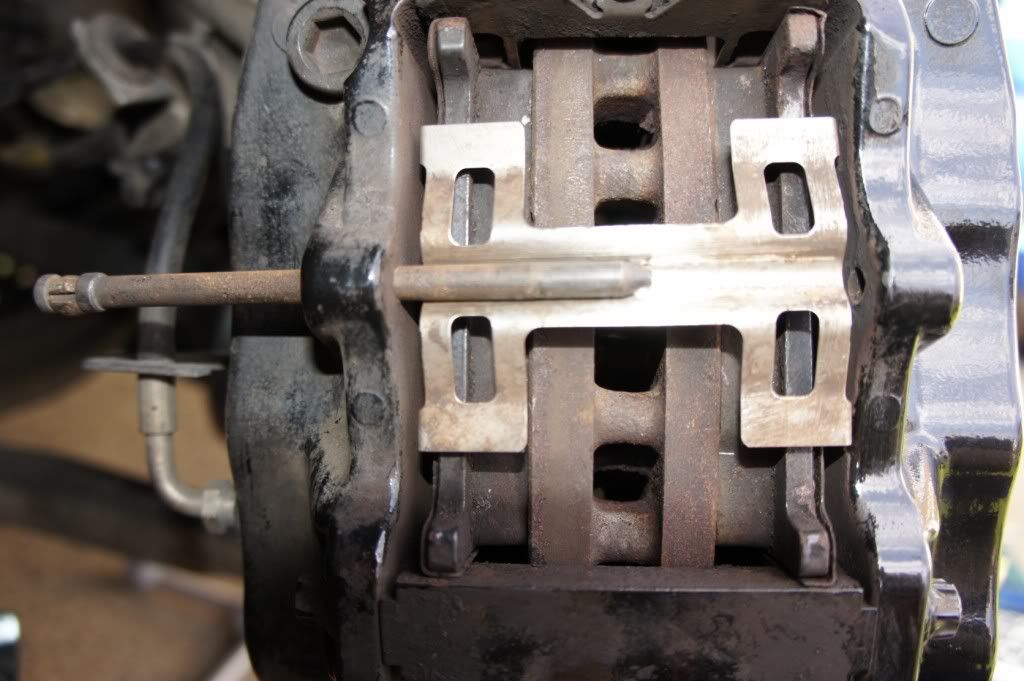
Once pins and springs have been removed, use a flat headed screw driver (or a calliper rewind tool) and carefully wedge between discs and pad, slowing pushing the pad and piston pot back into the calliper (once pads are out you can easily move the pistons with fingers). As they are 8 pot callipers there are two pistons per pad. Once the pistons are pushed back the pads will slide out, you can use a long nose pliers to extract the pad is its jammed in.
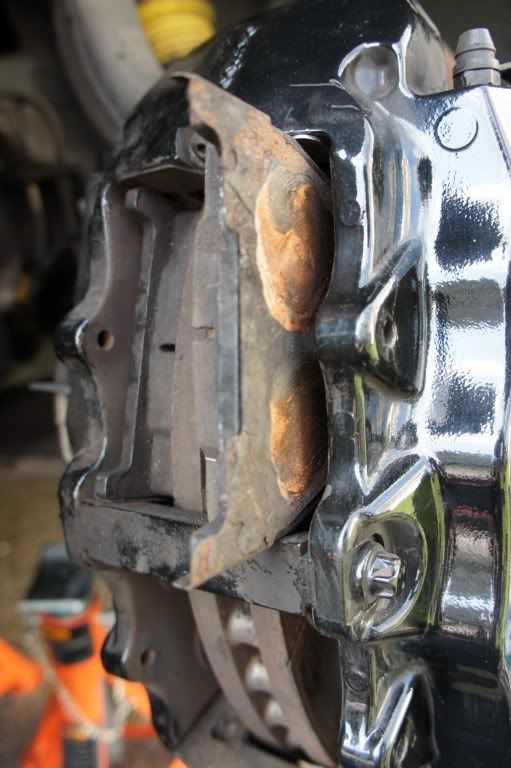
Once removed, prepare the new brake pads by putting some copper grease between the pack of the pad and the shim, then a tiny amount between shim and piston. Slide new pads back into place. All pads are the same and all fit in one way.
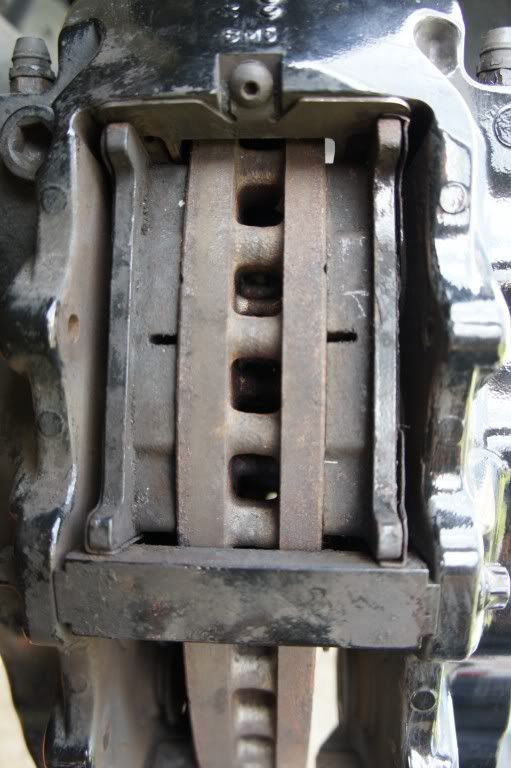
Put anti rattle springs and brake pad retaining pins back in, you may need to tap them back in place with a hammer.
When complete, put wheel back on and lower car, and road test, Ideally when engine off pump foot brake, turn engine on pump foot brake.
Fitting brake discs.
As before for changing pads, the pads need to be removed in order for the calliper to come off.
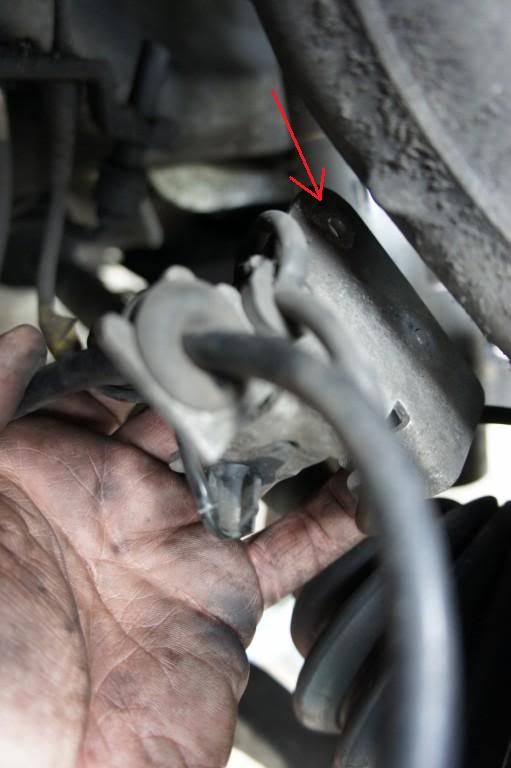
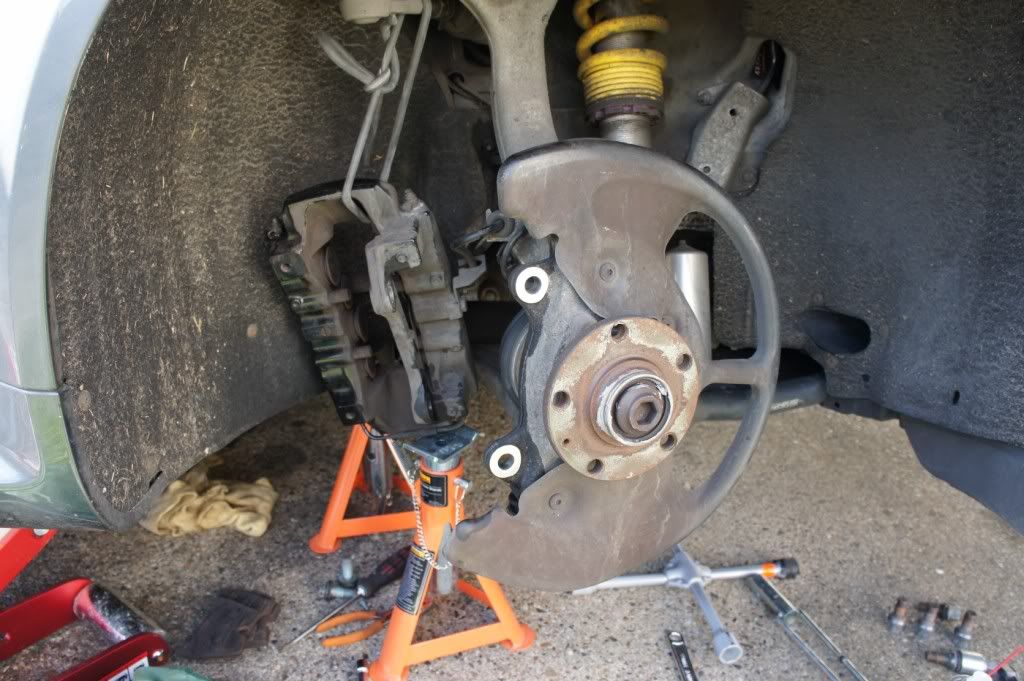
You need to remove the brake sensor housing bracket, this is held onto the wishbone by 1 x 10mm bolt, a spanner is best used (its removed so you can access the top bolt with a socket wrench).
Next, now this is the hard part, you need to undo the 2 x 21mm calliper retaining bolts that are located at the back of the calliper. These bolts have locking collar shims. They are done up tight, and it is recommended that you use a very sturdy socket set, a breaker bar is ideal as they have a rotating end so it wont fowl on the wheel arch. Use a small amount of WD40 to loosen it up. Tap with hammer and then try with all your might. Axle stands are a must.
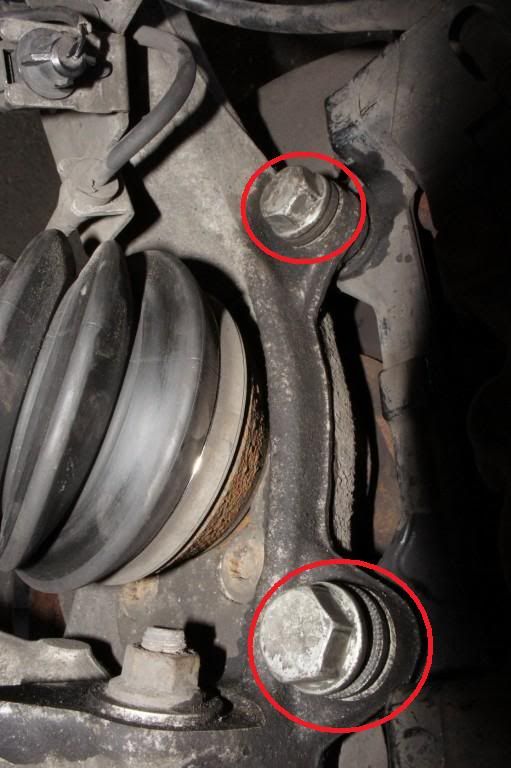
Once the 2 x 21mm calliper retaining bolts are removed the calliper will just slide off, tie the calliper to the top of the suspension frame and/or rest it on another axle stand, this will not put strain on the brake hoses.

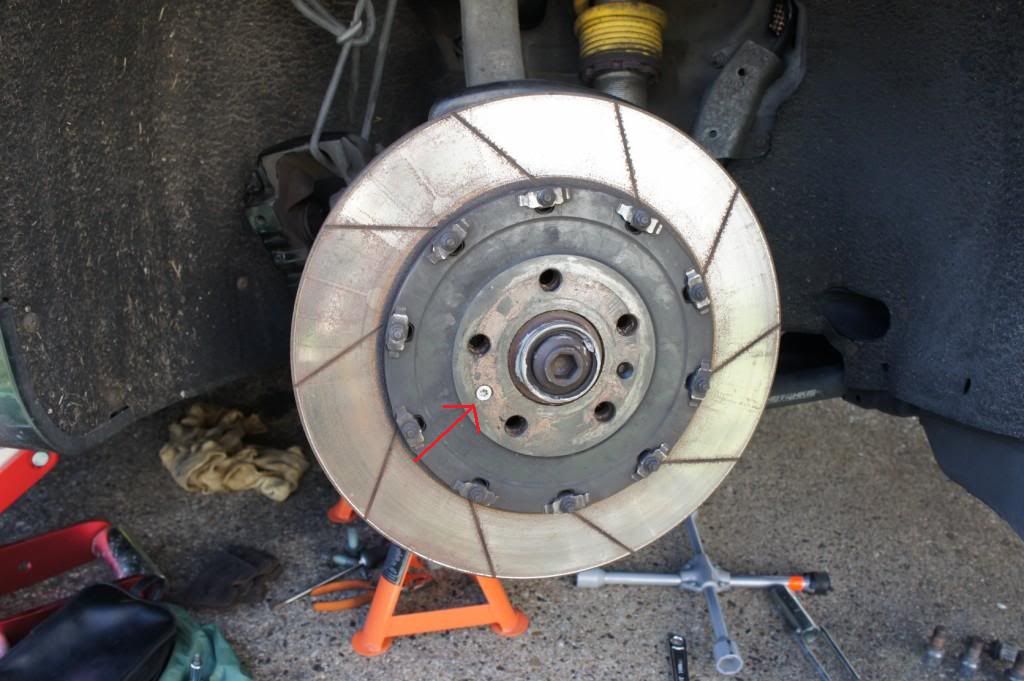
Next step, use a star head and remove the single bolt that is holding the disc to the hub, and then remove disc.
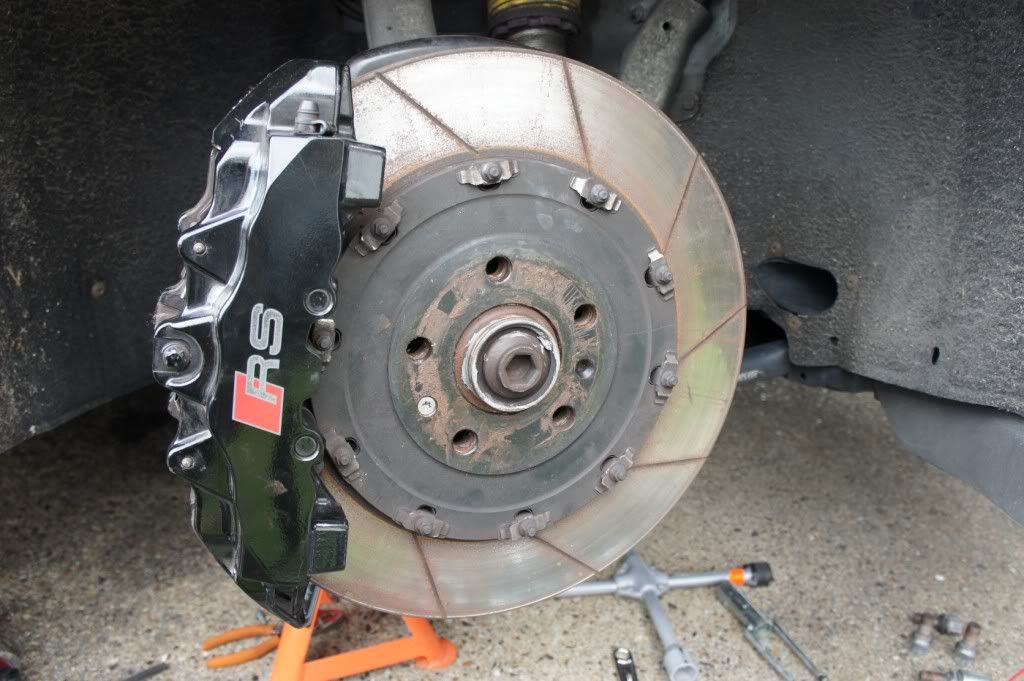
Put new disc on using smearing copper grease on the hub that the discs sits onto.
Next is to put calliper back on using the 2 calliper retaining bolts, make sure you do them up very tight (200nm). Put break pads back in as mentioned above. Fit the break line housing bracket to wishbone with the single bolt.
Replace wheel and road test.
Job done.


